

Best STEM Robotics Kits for Kids: What to Compare Before You Buy
A robot that turns the wrong way teaches more than one that never makes a mistake. That is the value of a good STEM robotics kit: code becomes something a child can build, run, watch fail, and fix.
The best kit is not the one with the longest feature list. It fits what your child can do today and has a next step waiting. Eight things decide the fit: age and skill, build effort, coding method, sensors, device needs, learning support, expansion, and total cost.
Start with the kit type. Everything else narrows from there.
Quick pick: which kind of robotics kit fits your child?
|
Kit type |
Best for |
How kids code |
Build effort |
Typical price tier |
|
Screen free coding robot |
Ages 5 to 8 and first time coders |
Buttons, cards, or floor tiles |
None |
Under $75 to $150 |
|
Prebuilt coding robot |
Kids who want to program on day one |
App blocks, then text on some models |
None |
$75 to $250 |
|
Build and code kit |
Ages 8 to 12 who like machines |
Block coding, some add Python |
Moderate: snap fit or screws |
$75 to $150 |
|
Design, print, and code kit |
Makers who want their own robot parts |
App coding plus 3D printed parts |
Moderate, plus print time |
About $140, printer separate |
|
Arduino or microcontroller kit |
Ages 12 and up with some coding |
C/C++ or MicroPython text |
High: wiring and screws |
$50 to $150 |
|
Competition system |
Clubs, classrooms, committed teens |
Blocks through Python |
High: large part counts |
Over $250 |
What Are STEM Robotics Kits for Kids?

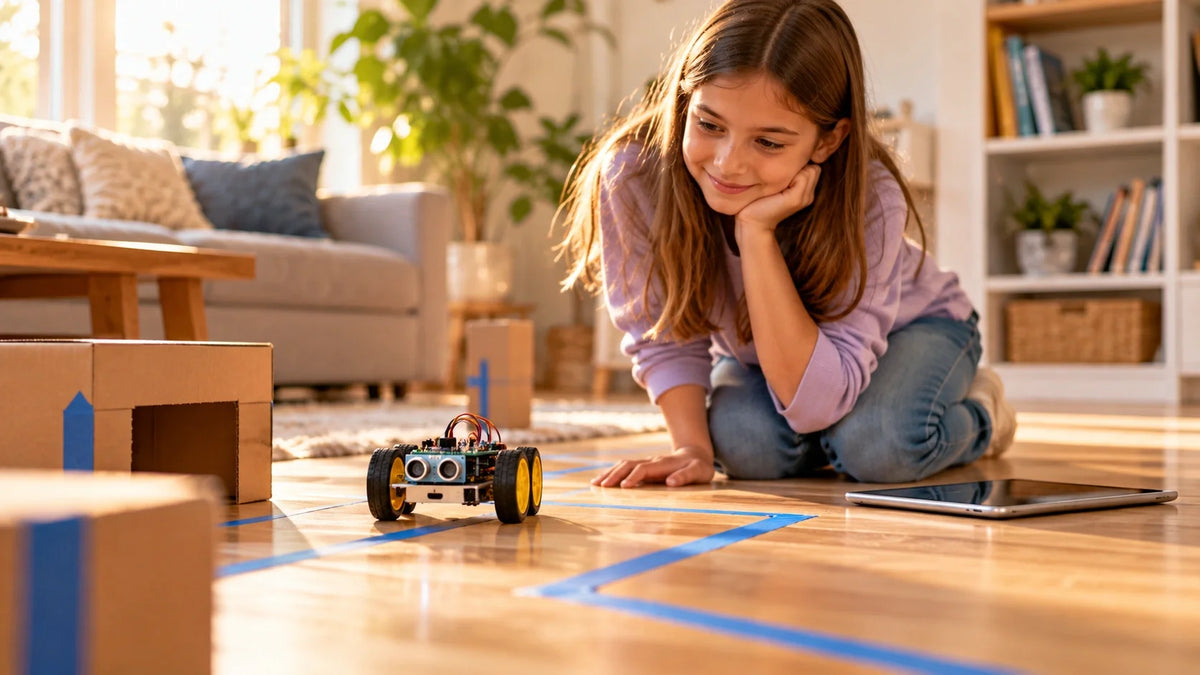
Motors, sensors, a small controller, and a way to program them. That is the core of every STEM robotics kit. Depending on the kit, a child may assemble the robot, write commands, read sensor data, and change the design when it misbehaves.
Some kits are mostly coding. Others add real mechanical building and electronics. Know which one you are buying.
What Makes a Robot Kit a STEM Kit?
Control is the test. A STEM robot lets the child decide how the machine behaves, through cards, code blocks, typed programs, or wired sensors and motors.
The learning is a loop: plan, run, watch, change. A robot that only repeats fixed moves from a remote leaves little room for that.
STEM Robotics Kits vs. Robot Toys vs. Coding Robots
|
Product type |
What the child does |
Learning depth |
Watch for |
|
Robot toy |
Presses buttons and watches it dance, talk, or drive |
Low. Actions are preset |
Coding modes that are only a menu of tricks |
|
Coding robot |
Programs movement, lights, and sounds on a robot that arrives built |
Medium to high on software |
Little mechanical learning |
|
Build and code kit |
Assembles the frame, motors, and sensors, then programs them |
High on hardware and code |
Build time and small parts |
In practice the lines blur. Sphero BOLT+ arrives fully built and runs drawing, block, JavaScript, and Python programs. Makeblock mBot is assembled first, then programmed with blocks.
Build and Code Kits vs. Prebuilt Robots
Neither format wins by default.
Build and code kits show how motors, wheels, sensors, and a controller work as one system. Prebuilt robots skip that stage, so coding starts soon after charging. Kids who love machines often enjoy the build. Kids who mainly want to program may prefer a robot that works out of the box.
What Skills Can Kids Learn From Robotics Kits?
Sequencing, debugging, iteration, mechanical design, and logical problem solving. The Scratch Foundation's creative learning philosophy describes block coding as identifying problems, breaking them into smaller parts, debugging, and iterating on solutions.
Robotics makes bugs visible. If the robot turns too early, the problem is on the floor in front of the child. Advanced kits add electronics, sensor data, variables, conditionals, and typed code.
What to Compare Before You Buy a STEM Robotics Kit
Ask one question first: what will your child actually do after opening the box? A kit that fits age, skill, and interest beats one packed with features the child cannot reach yet.
Then check what is missing. Apps, a compatible device, batteries, spare parts, and expansion packs all change the real cost.
Eight factors at a glance
|
Factor |
What to check |
Red flag |
|
Age and skill |
Reading level, dexterity, patience, earlier coding |
Only the number on the box was checked |
|
Assembly |
Piece count, tools needed, clarity of diagrams |
Tiny screws for a first time builder |
|
Coding method |
The day one mode and the hardest mode |
Vague claims such as "advanced coding" |
|
Sensors and motors |
What the code can read and control |
Sensors that only work in preset modes |
|
Devices |
Operating system, Bluetooth or Wi-Fi, computer needs |
App not supported on your tablet |
|
Learning support |
Lessons, starter programs, troubleshooting |
A parts list with no project path |
|
Expansion |
Ports, parts availability, software lifespan |
Proprietary parts already being phased out |
|
Total cost |
Batteries, mats, add-on packs, replacements |
Advertised projects that need extra kits |
Recommended Age and Actual Skill Level
Treat the age on the box as a first filter. Two 10 year olds can differ a lot in reading, coding history, patience, and fine motor control.
Check the tasks behind the label: following diagrams, handling small screws, fixing a Bluetooth pairing, typing code. Those matter more than the printed number.
Assembly Difficulty
Assembly ranges from none to dozens of mechanical and electronic parts. Check the piece count, the tools needed, and how clearly the manual separates similar parts.
Small screws can turn a good kit into a parent project. Snap fit systems suit new builders. Harder assembly does not mean better learning.
Coding Method and Difficulty
Find the mode your child will use on day one, then the hardest one. Early systems use buttons or cards, intermediate ones use blocks, and advanced ones move to Python, MicroPython, JavaScript, or Arduino code.
A clear ladder on one platform means you may not need a new robot as skills grow.
Sensors, Motors, and Electronics
Motors decide what a robot can do. Sensors let the program react to its surroundings. Distance, line, light, color, touch, and motion sensing each open different experiments.
Do not just count sensors. Ask whether your child can read them in code and act on the data. Arduino based robot car kits, for example, often combine obstacle avoidance with line tracking.
Screen and Device Requirements
Some early robots need no screen at all. Most others need an app or desktop software. Check supported operating systems, Bluetooth or Wi-Fi needs, and whether it runs on a device you own.
If the programming lives in an app, you are partly buying software, and device support can change over time.
Lessons and Learning Support
Good instructions get a child to a first working project. After that, lessons should lead toward harder ideas.
Look for building guides, starter programs, and troubleshooting help. A big project library only helps if difficulty climbs.
Expansion Options and Software Lifespan
Extra sensors, parts, motors, and harder coding modes add new problems without a new system. Check whether the platform accepts generic components or only its own parts.
Software lifespan matters too. LEGO Education ended SPIKE sales on June 30, 2026, and says the SPIKE App will stay supported until June 30, 2031. Check dates like these before paying premium money for a platform that depends on an app.
How to Choose a STEM Robotics Kit by Age

Age narrows the list. Readiness makes the final call.
Younger children need fast feedback and simple controls. Older, experienced kids can handle longer builds, debugging, and typed syntax. Interest matters as much as age.
|
Age band |
Good starting format |
Coding level |
Parent role |
Natural next step |
|
5 to 8 |
Robot coded with buttons, cards, or tiles |
Sequencing, simple repeats |
Setup and building courses |
Block coding on a tablet |
|
8 to 12 |
Build and code kit or prebuilt coding robot |
Blocks, variables, sensor conditions |
Help on tricky build steps |
Python mode or more sensors |
|
12 and up |
Microcontroller, modular, or competition kit |
Python, MicroPython, C/C++ |
Mostly hands off |
Custom projects, clubs, competitions |
Ages 5 to 8: Tactile Coding Without a Screen
Look for large controls, clear cause and effect, and short challenges. Buttons, coding cards, and path tiles teach sequencing without typing. Botley 2.0 from Learning Resources, sold for ages 5 and up, uses a handheld remote programmer instead of an app.
Syntax can wait. A child should be able to predict what the robot will do, test it, spot the mistake, and try again.
Ages 8 to 12: Building and Block Coding
Many kids in this range are ready for loops, variables, conditionals, and sensor challenges, plus more detailed builds.
Blocks keep attention on program structure instead of punctuation. Pick a kit that later opens text coding or more sensors, so it stays useful for years.
Ages 12 and Up: Text Coding and Real Engineering
Teens with some experience may be ready for Python, MicroPython, JavaScript, or Arduino code, plus builds where wiring and sensor placement are part of the project.
Age alone does not make these platforms beginner friendly. A first time teen coder often learns faster with a few weeks of blocks first.
How to Read Manufacturer Age Labels
Use the printed age as a screening tool, not a difficulty score. Keep safety labels and learning readiness separate.
|
SAFETY LABELS ARE NOT SKILL LABELS A small parts warning answers a different question than "Can my child follow the app?" Under the U.S. Consumer Product Safety Commission's small parts rules, children's products with small parts are banned for kids under 3, and certain toys with small parts must carry choking hazard warnings. Read both labels. Where you can, open a sample manual or starter lesson online before buying. Five minutes with the real instructions tells you more than a broad "8+" sticker. |
Is the Kit Too Hard, or Is Your Child Ready for More?
|
Signs the kit is too hard |
Signs your child is ready for more |
|
An adult ends up doing most of the building |
They change example programs without being asked |
|
The child copies code without knowing what it changes |
They invent their own challenges and courses |
|
Tiny parts cause repeated stalls |
They ask for more sensors, motors, or "real" code |
|
Several barriers hit at once: hard build, new code, weak manual, tricky setup |
They debug alone: find the problem, change one thing, test again |
Some difficulty is healthy. A manageable problem followed by a working fix is the heart of robotics. The next step may be expansion parts or a switch to text, not a new system.
How to Match a Robotics Kit to Your Child's Coding Level

Coding interfaces form a rough ladder: physical commands, visual blocks, then typed text. Kids can skip rungs, but the ladder makes products easier to compare.
Pick a rung where your child understands why the robot behaves as it does, and check that the next rung exists.
|
Stage |
What the child does |
Concepts practiced |
Ready to move up when |
|
Physical commands |
Presses buttons or lays out cards and tiles |
Order, direction, prediction |
They plan long sequences without trial and error |
|
Block coding |
Drags and snaps blocks on a screen |
Loops, events, conditions, variables |
They can read a program and predict the result |
|
Python or MicroPython |
Types commands with real syntax |
Same logic, plus syntax and functions |
They fix typos and indentation errors alone |
|
Arduino C/C++ |
Writes code that reads pins and drives hardware |
Digital and analog input and output |
They wire and debug new modules on their own |
Screen Free Commands and Coding Cards
Code you can hold. Children press arrows, arrange cards, or lay tiles to build a sequence, which keeps the focus on order, direction, and correction.
Block Coding and Scratch Style Programming
Blocks snap together, which prevents most typing errors and makes structure visible. They still teach loops, events, conditions, variables, and sensor values.
Many robot apps call themselves Scratch based. That usually means Scratch's look plus blocks for motors and sensors, not that projects move between the robot app and Scratch. Ask what "Scratch compatible" means for the exact product.
Python and MicroPython
Text coding removes the blocks. Spelling, indentation, and structure become part of debugging.
MicroPython is a lean implementation of Python 3, optimized to run on microcontrollers and other constrained hardware. A robot that supports both blocks and Python lets a child learn the logic visually first, then write it in text.
Arduino and C/C++
Arduino kits go deeper into hardware. The official Arduino language reference documents functions such as digitalRead(), digitalWrite(), analogRead(), and analogWrite(), along with control structures like if, else, while, and for.
This level suits learners comfortable troubleshooting code and wiring. Beginners need guided examples and clear wiring diagrams.
Moving From Blocks to Text
The switch goes best when the ideas stay familiar and only the interface changes. Platforms with both modes on one robot shrink that jump.
Do not rush it. Comfort with planning, testing, and debugging comes first.
|
TRY THIS BEFORE SWITCHING TO TEXT Ask your child to explain a block program out loud, line by line, before running it. If the prediction matches what the robot does, they are ready to write the same program in Python. |
Which Robotics Hardware Features Matter Most?

Hardware sets what the code can affect and sense. For every component, ask: what new experiment does this let my child run?
|
Component |
Experiment it unlocks |
Check before buying |
|
Drive motors |
Speed, turning radius, timing |
Can motor values be set in code? |
|
Servo motors |
Arms, grippers, steering |
How many ports can drive them? |
|
Distance sensor |
Stop, turn, or reroute near objects |
Can the trigger distance be changed in code? |
|
Line sensor |
Following a path on its own |
Does it cope with curves and lost lines? |
|
Lights, sound, display |
Status signals, games, live sensor readouts |
Programmable, or fixed patterns only? |
|
Controller and ports |
Adding new modules later |
Standard connectors or proprietary ones? |
Motors and Movement
Drive motors move wheels or tracks. Servo motors position arms, grippers, and steering. More controllable motors mean more variables to test. A motor that only answers a remote adds little.
Distance and Line Sensors
Distance sensors introduce conditional logic: "drive until something is close, then turn." Changing the trigger distance and comparing results is a real experiment.
Line sensors read the contrast between a path and the floor, the classic first step into autonomous navigation.
Lights, Displays, and Sound
Lights and sounds can flag sensor events or become part of a game. A display adds live data; Sphero BOLT+ uses an LCD for animations and readings. Fixed decorative lights add little.
Controllers, Ports, and Repairability
The controller runs the program and connects by USB, Bluetooth, Wi-Fi, or a proprietary link. Check whether firmware updates need a cable. Clear pairing steps matter for young users.
Expansion ports can turn one robot into years of projects. Check that common parts are sold separately, since generic parts are easier to replace than proprietary pieces.
How Much Building Should a Robotics Kit Require?
Building adds mechanical learning and time before the first program runs. Match it to how much construction excites your child.
|
Build style |
Time to first run |
What kids learn |
Trade off |
|
Prebuilt robot |
Shortest: charge and set up the app |
Coding, sensors, experiments |
Little chance to redesign the body |
|
Snap fit kit |
Short, with few or no tools |
Structure, quick rebuilds, iteration |
Loose joints can make movement inconsistent |
|
Screw and component kit |
Longest: often several sessions |
Motors, boards, brackets, wiring |
Dexterity demands and frequent adult help |
|
Design, print, and code kit |
Build time plus print time |
Custom parts, design thinking, code |
Needs access to a 3D printer |
Fine Motor Skills, Small Parts, and Build Time
Tiny screws, wires, and connectors can stall a child even when the coding level fits. Check the manual, not just the box. A parts tray helps.
Estimate time to the first working result. Long builds work better in clear stages, and slow rebuilds cut replay value.
When Adult Help Is Needed
Useful help removes one barrier, like a stubborn screw or an error message. Help that finishes the project takes the learning with it.
If every session needs an adult who knows electronics, count that in. Real independence can matter more than the stated age.
Custom Robot Parts: Where 3D Printing Fits
Most kits limit a child to the parts in the box. A 3D printer lifts that limit: design a new gripper or sensor mount, print it, and test it the next day.
That is the idea behind the AOSEED X-KIT, a robot kit kids can design, 3D print, and code themselves. It includes 650+ modular components and beginner friendly coding, and printed parts can come from any 3D printer. It is currently $139.00. Check the product page for the latest coding details.
|
WHY SOME FAMILIES PAIR A ROBOTICS KIT WITH A 3D PRINTER When a robot part breaks or a design idea outgrows the box, a printer lets kids make the part instead of waiting for a replacement pack. AOSEED's kid-friendly 3D printers are fully enclosed and app guided, with a large library of ready to print models for first projects. X-MAKER JOY is listed for ages 4 to 12 and suits younger first time makers. X-MAKER is listed for ages 9 to 16 and has the larger 150 x 150 x 150 mm build area for bigger robot parts. The child designs and prints. The parent steps in at setup. |
How to Compare Learning Value and Replay Value
Feature counts do not measure learning. Ten sensors teach little if the software never shows kids how to use them.
Look for a path from following instructions to making decisions to changing the problem itself.
From Guided Lessons to Independence
Lessons should add one concept at a time and climb in difficulty. The goal is a child who invents a new challenge without a worksheet.
Debugging and Engineering Design
Robots rarely work on the first run. Wheels slip. Thresholds are off. Turns overshoot.
Those failures are the lesson if the system shows enough to investigate. The Next Generation Science Standards ask middle schoolers to develop a model to generate data for iterative testing and modification of a design. A robot makes that loop physical. Avoid platforms where errors end in an unexplained connection failure.
Rebuildable Designs and Multiple Coding Levels
Rebuildable systems let children change the physical design as well as the code. Check that alternative builds are genuinely different.
Several coding modes extend a robot's life without new hardware, especially when only the language changes.
Add-Ons, Third Party Parts, and Community Projects
Add-ons create fresh problems for a familiar robot. Price them first. A cheap base kit gets expensive if every project needs another proprietary pack.
Open hardware gives older learners more choice and cheaper parts, but may need wiring knowledge. Either way, current tutorials and sample code for the exact version sold keep a robot in use.
How Much Should You Spend on a STEM Robotics Kit?
Compare price with what your child will actually use. Treat these tiers as shopping categories, not promises.
|
Price tier |
What you usually get |
Best for |
Watch for |
|
Under $75 |
One focus: sequencing, a simple build, or intro coding |
Testing interest |
Some are closer to science projects than coding platforms |
|
$75 to $150 |
Capable coding robots and beginner build and code kits |
Most families starting out |
Batteries, mats, and add-ons sold separately |
|
$150 to $250 |
More sensors, several coding levels, structured lessons |
Kids already hooked on robotics |
How the maker supports older models in its app |
|
Over $250 |
Large construction sets, precision motors, competition hardware |
Clubs, classrooms, committed teens |
Competition rules that change between seasons |
When Paying More Adds Learning Value
Paying more makes sense when it removes a learning ceiling: more programmable sensors, rebuildable structures, text coding, spare parts, or a deep project library. A brand name alone is not a learning feature.
Team buyers need one more check. FIRST describes the 2026 to 2027 season as the final season of FIRST LEGO League, offered as a Founders Edition and a Future Edition. Confirm rules and hardware before buying.
Extra Costs: Batteries, Apps, and Add-Ons
Start with power. Some robots include rechargeable batteries; others need disposable ones not in the box.
Then add the extras: tablet, mat, expansion packs, storage, and spare parts. Estimate year two, not just checkout day.
When to Choose a Simple Kit vs. an Advanced Kit

Choose a simpler kit when:
• Your child is 5 to 8, or new to coding at any age.
• You want a first working program within one sitting.
• Nobody at home is comfortable with wiring or error messages.
• You are still finding out whether robotics will stick.
Choose an advanced kit when:
• They already modify block programs without being prompted.
• Requests for more sensors, motors, or "real" code keep coming.
• A club, class, or competition sets the hardware.
• Long builds are fun for them, and designing their own parts sounds even better.
STEM Robotics Kit Comparison Checklist
Same questions, every kit. Marketing highlights differ from box to box. These questions do not.
|
Check |
Question to answer |
Pass if |
|
Age and skill fit |
Can the child do the core activity, not just meet the age number? |
Independent play after the first guided project |
|
Building |
Assembled, snap fit, or screws and wiring? |
Build matches the child's interest and dexterity |
|
Coding ladder |
What are the easiest and hardest modes? |
At least one clear next level |
|
Hardware |
What can be controlled and what can be sensed? |
Every sensor is readable in code |
|
Devices |
Which phone, tablet, Chromebook, Mac, or PC does it need? |
Runs on a device you own; offline use is clear |
|
Learning resources |
Lessons, examples, troubleshooting guides? |
Matches the child's reading level |
|
Durability |
What happens after a drop, a lost piece, or a failed cable? |
Replacement parts sold separately |
|
Lifecycle |
Is the software actively supported? |
Actively sold, or support dates published |
A strong purchase gives a clear first success, real problems to solve next, and room to keep building after the instructions end.
Conclusion
The right STEM robotics kit fits what your child can do now and has a next challenge ready. Compare age with real skill, then weigh build effort, coding method, sensors, device needs, learning support, and adult help.
Value over time matters as much as the first project. Rebuildable designs, programmable sensors, harder coding modes, and supported software keep a kit in use.
For kids who want to design their own robot parts, AOSEED's toy-creation ecosystem connects designing, printing, building, and coding. The X-KIT creative robot kit is $139.00 (list price $179.00) and works with parts printed on any 3D printer.
FAQs
What Are the Best STEM Robot Kits for Kids?
It depends on the child. Younger beginners do best with robots coded through buttons, cards, or simple blocks. Experienced kids can handle sensors, mechanical builds, Python, MicroPython, or Arduino code.
Strong kits let children change programs and invent their own challenges instead of replaying preset tricks.
Practical tip: pick the kit that matches current ability and has one clear level to grow into.
What Are Some Good Robotic STEM Kits for Kids?
Five categories cover most good options: robots coded without a screen, block coding robots, build and code kits, sensor platforms, and text coding kits.
Beginners need easy setup and guided projects more than a long sensor list. Advanced students can move to Python or microcontroller projects.
Practical tip: compare what a child can make alone after the tutorials, not the feature count on the box.
Which Robot Is Best for Kids?
No single robot suits every child. Fit depends on age, experience, reading ability, dexterity, device access, and whether the child prefers building or coding.
Young beginners get more from physical commands and instant movement. Older kids who know blocks need sensors and a route toward text coding.
Practical tip: name your child's next learning goal first, then choose hardware that supports it.
What Is the Best Robotics Kit for Kids?
The one that balances challenge with independence. Your child should finish an early project, understand what each command changes, then experiment beyond it.
Look for programmable movement, real sensor input, and projects that climb in difficulty. Check lifecycle too: LEGO Education stopped selling SPIKE on June 30, 2026, and supports the SPIKE App until June 30, 2031.
Practical tip: read the maker's current support page as well as the specs.
What Are the Top 10 Robots for Kids?
A fixed top 10 list helps less than sorting robots by age and purpose. A robot for a five year old solves a different problem from an Arduino kit for a teen.
Shortlist by category: robots coded without a screen, prebuilt coding robots, build and code vehicles, modular systems, and microcontroller platforms. Then compare coding level, assembly, sensors, and software support.
Practical tip: compare two or three kits that suit your child, not ten made for different learners.
What Are the Best Robot Learning Toys for Kids in 2026?
The ones still actively supported. Check that a robot's software, lessons, and replacement parts are maintained, since hardware often outlasts app compatibility.
LEGO Education retired SPIKE in 2026 but says the SPIKE App stays supported until June 30, 2031. Existing sets still work, but the comparison with actively sold platforms changes.
Practical tip: confirm product status and software support with the maker before ordering.
What Is a Good Robotics Starter Kit for Beginners?
One that makes the first success easy and leaves room to experiment. Look for clear instructions, simple controls, and projects that add one idea at a time.
Young kids can start with physical commands. Older beginners can start with blocks, which remove syntax errors and keep the focus on logic and debugging.
Practical tip: choose a kit your child can start with limited adult help, not the one with the highest ceiling.
What Are the Big 4 of Robotics?
There is no official Big 4 of robotics. For comparing kits, four areas are useful: mechanical construction, electronics, programming, and sensing and control.
The frame moves, electronics connect the parts, code gives instructions, and sensors let the program react. Advanced platforms tie all four together.
Practical tip: count how many of the four your child can actively experiment with.




Further reading

Thanksgiving STEM Activities for Kids: Table Projects and Simple Engineering Challenges

Halloween STEM Activities for Kids: Spooky Builds That Teach Real Science

STEM Crafts for Kids: Build, Decorate and Test



