

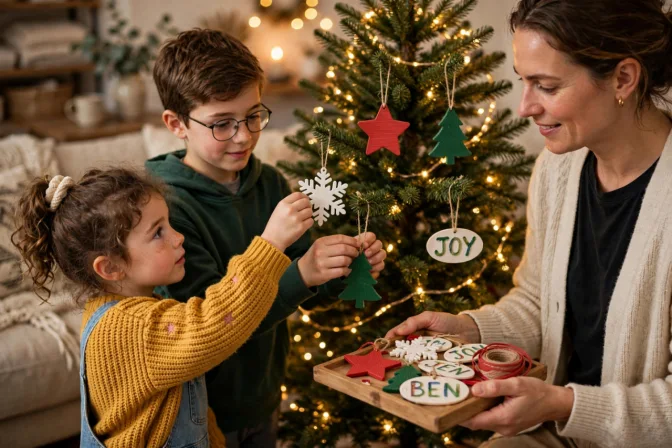
3D Printed Christmas Ornaments Kids Can Design and Print: 10 Easy Ideas
3D printed Christmas ornaments are one of the best first projects for kids. A flat snowflake uses about 5 grams of PLA, prints in well under an hour on a kids 3D printer, and is on the tree the same afternoon with the child’s own colors and initials.
Below are 10 Christmas ornament 3D printing ideas, from a quick name tag to a two piece ornament ball. Each one lists the estimated print time on a kids printer, grams of filament, how much adult help it takes and how your child makes it their own.
If you’ve never tried to 3D print Christmas ornaments before, start with the first three. They print flat, need no supports and almost never fail.
The 10 Ornaments at a Glance
Print times are estimates. We worked them out from AOSEED’s own figure of roughly 8 grams of PLA per hour on default settings, so a 6 gram ornament comes out around 45 minutes. The app shows the real time and weight for each model before you press print.
|
Ornament |
Estimated print time |
Filament |
Adult help |
How your child personalizes it |
|
1. Snowflake |
30 to 45 min |
4 to 6 g |
Low |
Picks the pattern and color, adds a ribbon |
|
2. Name tag |
30 to 55 min |
4 to 7 g |
Low |
Their name or initial, plus the year |
|
3. Star |
45 min to 1 hr 10 min |
6 to 9 g |
Low |
Solid or outline, paints the points |
|
4. Mini Christmas tree |
55 min to 1 hr 15 min |
7 to 10 g |
Low |
Stickers or paint dots as lights |
|
5. Candy cane |
40 min to 1 hr |
5 to 8 g |
Low |
Paints the stripes in any colors |
|
6. Gingerbread man |
1 hr to 1 hr 25 min |
8 to 11 g |
Medium |
Face, buttons and icing with paint pens |
|
7. Reindeer |
55 min to 1 hr 15 min |
7 to 10 g |
Medium |
Nose color and a name on the back |
|
8. Santa face |
1 hr 15 min to 1 hr 45 min |
10 to 14 g |
Medium |
Paints the hat, beard and cheeks |
|
9. Mini wreath |
1 hr 30 min to 2 hr |
12 to 16 g |
Medium |
Bow color and painted berries |
|
10. Two piece ornament ball |
2 hr 30 min to 3 hr 45 min |
20 to 30 g |
High |
Pattern, color and a note hidden inside |
What You Need to 3D Print Christmas Ornaments at Home
You need a kids 3D printer, PLA filament in a few holiday colors, ribbon or ornament hooks and some paint. Everything else is optional.
A Kids 3D Printer Your Child Can Run
We used the AOSEED X-MAKER JOY 3D printer for kids for every time in this guide. It runs from an app on a phone or tablet, prints PLA inside a fully enclosed case, and has a 120 x 120 x 120 mm build area, enough for the ornament ball.

Kids pick a model, change the color and tap print. A parent loads the filament, keeps an eye on the first layer and takes the finished ornament off the magnetic plate.
PLA in Christmas Colors
PLA is the plastic most kids’ printers use, and the only one the JOY prints. White, red, green and silver cover most ornaments. The AOSEED PLA filament in 1 kg rolls comes in all four, and one roll covers dozens of ornaments, over a hundred of the small flat ones.
Ribbon, Paint and a Clear Table
Thin satin ribbon or metal ornament hooks work for hanging. For painting, acrylic paint pens are less messy than brushes, and a sheet of newspaper on the kitchen table saves an argument later.
10 Christmas Ornaments 3D Printing Ideas for Kids
The list starts with flat, quick prints and ends with the ornament ball, which takes the longest and needs the most help.
|
HOW WE RATE ADULT HELP Low means a parent loads filament and removes the print, and the child does the rest. Medium adds help with thin parts or detailed painting. High means an adult handles assembly or a print longer than two hours. If you’re choosing a printer for a younger or older child, see the full range of kid friendly 3D printers from AOSEED. |
1. Snowflake Ornament: The Easiest First Print
A flat snowflake about 70 mm across, roughly 3 mm thick, with a hole at the top for ribbon. It uses 4 to 6 grams of PLA and takes 30 to 45 minutes.
Every snowflake in the model library looks a little different, so kids usually want to print three or four and compare them. White and silver look the most like real snow on a green tree.
Adult help is low. Let it cool for a minute before lifting it off the plate, because the thin arms can bend while still warm.
2. Name Tag Ornament: A Keepsake With the Year on It
This is a small flat plate, oval or round, with a raised name. It takes 4 to 7 grams and about half an hour to just under an hour, depending on how long the name is.
Short names print cleanest at this size. A model with a text option lets kids type their name and “2026” right in the app. Without one, they can print a blank tag and write the name on with a paint pen.

Kids often want one for every person in the house. Plan on a whole evening of printing if that happens.
3. Star Ornament: Bold Points for the Front of the Tree
A five point star printed flat, 6 to 9 grams, around 45 minutes to 1 hour 10 minutes. Thick points hold up much better than skinny ones when a toddler grabs the tree.
The solid star prints faster. The outline version, just the edge, looks more delicate and uses less plastic. Gold or yellow paint on the tips makes either one look finished, and a 6 year old can manage the whole thing with you only loading filament.
4. Mini Christmas Tree Ornament: A Tree for the Tree
A small flat tree shape, about 70 mm tall, printed in green. Plan on 7 to 10 grams and roughly an hour.
Here’s where the DIY stickers that come in the JOY box get used. Kids stick on dots as lights or paint tiny ornaments on the branches. Some kids print a second one in white and color it in completely.
There’s nothing thin or fragile on it, so it’s a good one to hand to a younger sibling.
5. Candy Cane Ornament: Stripes Kids Paint Themselves
Print a plain white candy cane, 5 to 8 grams, about 40 minutes to an hour. The hook shape at the top hangs straight on a branch, so no ribbon is needed.
The stripes are the fun part. Red and white is the classic, but kids tend to go for green and gold, or their favorite team colors. Masking tape wrapped at an angle gives cleaner stripes than freehand.

Check the paint is dry before it goes on the tree. Acrylic is usually dry to the touch within an hour.
6. Gingerbread Man Ornament: A Face Kids Draw Themselves
A flat gingerbread figure in tan or brown PLA, 8 to 11 grams, 1 hour to about 1 hour 25 minutes.
Printing it plain leaves all the personality to the child. White paint pens make good icing lines, and the face can be happy, grumpy or sleepy. Some families make one for each person and paint them to match.

You’ll probably end up steadying small hands on the buttons and eyes, which is why we call it medium.
7. Reindeer Ornament: Antlers Need a Gentle Touch
A reindeer head or full body printed flat in brown, 7 to 10 grams, around an hour.
Kids choose the nose. Red is the obvious pick, but it’s their reindeer. A name painted on the back makes it easy to tell whose is whose on the tree.
We rate this medium because the antlers are the thinnest part of any ornament here. An adult should flex the plate to pop it off rather than pulling on the antlers.
8. Santa Face Ornament: Raised Details to Paint
A round Santa face with a raised beard and hat, 10 to 14 grams, about 1 hour 15 minutes to 1 hour 45 minutes. Printing it in white means the beard is already done.
Kids paint the hat red, add pink cheeks and dot in the eyes. The raised edges act like the lines in a coloring book, so the paint stays where it should.
The eyes are tiny. A small brush, or a toothpick dipped in paint, works better than a pen there, and most kids want a grown up nearby for that part.
9. Mini Wreath Ornament: More Detail, Still Flat
A small circle wreath with leaves and a bow, 12 to 16 grams, 1 hour 30 minutes to 2 hours. Print in green and keep the bow part of the same piece so nothing has to be glued.
Kids paint the bow, dot red berries between the leaves and add their initial in the middle. It’s the most detailed flat ornament on the list, so it suits kids who already have a few prints done.
Painting the berries takes patience, so sit with younger kids for that step.
10. Two Piece Ornament Ball: The Weekend Project
A hollow ball printed as two halves that snap or glue together, 20 to 30 grams in total, roughly 2 hours 30 minutes to 3 hours 45 minutes. Keep it around 60 mm across so both halves fit on the plate at once.
Kids choose a cutout pattern, stars, snowflakes or plain, and the color. Before it’s closed, they can tuck a tiny folded note or a photo inside, which makes it the ornament that gets opened again every December.

Adult help is high. A parent checks the two halves line up and handles any glue. Try this one after the flat ornaments have gone well.
How Kids Can Personalize Their Ornaments
Kids personalize ornaments in three places: in the app before printing, by picking the filament color, and with paint and ribbon after.
Use the App’s Design Tools
The JOY comes with multiple guided design apps and AI creation tools that turn drawings and photos into printable shapes. A child’s drawing of a star or a cat can become an ornament. The AOSEED app for kids’ 3D design has a model library that gets new models every week.
Pick a Color That Means Something
Colors are the easiest choice for younger kids. A favorite color, a school color or one color per family member all work. Printing the same snowflake in four colors makes a set that looks planned.
Paint, Stickers and Ribbon
Most of the personal touches happen after printing. Acrylic paint and paint pens stick well to PLA, the DIY stickers in the JOY box work on the flat ornaments, and a ribbon in a favorite color finishes it off.
Print Settings and Safety Tips for Christmas Ornaments
Flat, thick and small is the rule for ornaments that print well and survive a season on the tree. Default settings in the app work for every project here.

Keep Ornaments Flat and About 3 mm Thick
Flat ornaments print without supports, which means less cleanup and fewer failed prints. Around 3 mm thick is sturdy enough to survive a fall onto a wood floor. Thin points under 2 mm tend to snap.
Hang Them Away From Heat
PLA softens in heat, so keep ornaments off hot bulbs and well away from candles. The NFPA’s holiday fire safety tips say to keep the tree at least three feet from heat sources, and LED lights stay much cooler.
Watch for Small Parts if You Have a Toddler
A small ornament can be a choking hazard. Children’s Health suggests a simple check: anything that fits through a toilet paper roll is too small for little ones. Hang the smallest prints high on the tree.
Use Paint Made for Kids
Look for the AP seal on acrylic paint and paint pens. The ACMI’s art material seals explain that AP products have been reviewed by a medical expert and are safe for children when used as intended.
Give the Printer Some Fresh Air
Run the printer in a room with some airflow, not a closed closet. NIOSH’s guide to safe 3D printing recommends ventilation, and an enclosed printer like the JOY keeps small hands away from the hot nozzle.
Make Ornament Printing a Family Tradition
Print one new ornament each December and write the year on the back. After a few years you’ll have a box of ornaments that shows how your child’s ideas changed. For more ideas once the tree is done, browse our 3D printed holiday projects.

Ornaments Have Always Been Handmade
For centuries, glass ornaments came from Lauscha, a German village where whole families made them by hand. The Corning Museum of Glass tells how American factories started making them in the late 1930s. A kid printing a snowflake is part of a long line of homemade decorations.
Final Thoughts on 3D Printed Christmas Ornaments
Start with a snowflake or a name tag, then work up to the ornament ball over Christmas break. Let your child make every choice they can, from the color to the face on the gingerbread man.
If this is your first holiday with a printer, AOSEED’s design and print tools for kids have the app, the models and the printers in one place.
FAQs
What are the easiest Christmas ornaments to 3D print?
Flat ones. Snowflakes, name tags, stars and candy canes print in under an hour, need no supports and rarely fail. Save hollow shapes like ornament balls for later.
What is the best filament for 3D printed Christmas ornaments?
PLA. It prints easily at low temperatures, comes in every holiday color and takes acrylic paint well. Check what your printer supports first; the X-MAKER JOY prints PLA only.
How long does it take to 3D print a Christmas ornament?
Most small flat ornaments take 30 minutes to 1.5 hours. A hollow ball can take 3 hours or more. Our guide to how long a 3D print takes explains what changes the time.
Are 3D printed ornaments safe for homes with small children?
They’re safer than glass, since PLA doesn’t shatter. Still, the CPSC’s holiday decorating advice is to keep trimmings with small parts out of children’s reach and avoid sharp ones, so sand any rough edges.
Can kids design their own Christmas ornaments?
Yes. With a kids printer and app, children can pick models, change colors, add text where the model allows and turn drawings into shapes. An adult still helps with filament and print removal.
Can you 3D print Christmas ornaments without supports?
Yes, if they’re flat. Every ornament on this list except the ball prints without supports. Shapes with overhangs, like hanging bells, may need them.
Where can I find Christmas ornament designs?
The AOSEED app has a model library with holiday designs, and the AOSEED Creative Hub has project ideas. Free model sites also share ornament files; check the size fits a 120 mm build area.
What else can kids 3D print for Christmas?
Ornaments are a good start, and gifts are a natural next step. Our DIY Christmas gifts kids can make guide covers presents beyond the tree, from paper crafts to 3D prints.



Further reading

3D Printed Puzzles for Kids by Age: 9 Projects From Shape Boards to Puzzle Boxes

15 Easy STEM Activities for Kids Using Things You Already Have

Is a 3D Printer a Good Gift for a Kid? A 10 Point Christmas Checklist for Age, Cost, and Space


