

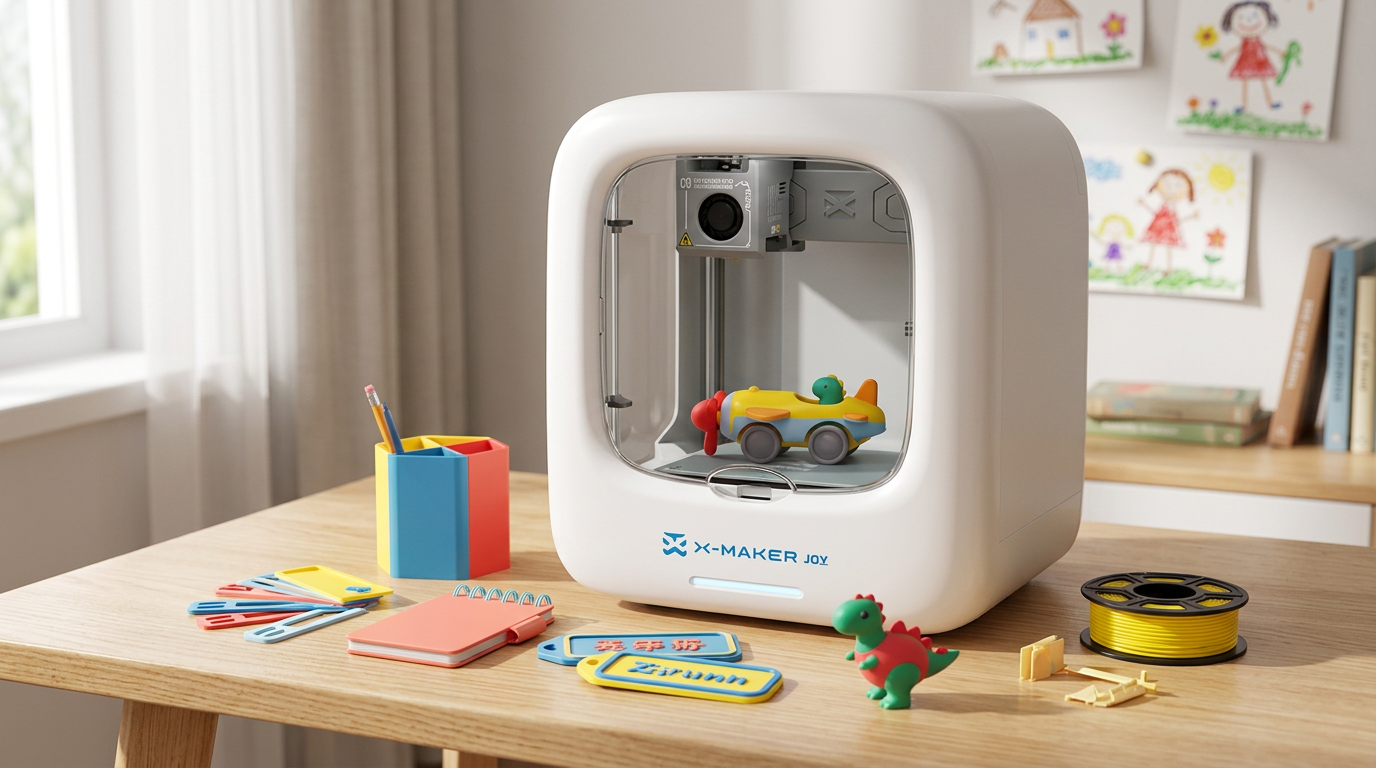
12 Back-to-School Supplies Kids Can Design and 3D Print
Back-to-school shopping usually means choosing from the same pencil cases, bookmarks, and desk organizers every store carries. With a 3D printer, kids can design and print 12 practical school supplies, including pencil holders, organizer trays, bookmarks, zipper pulls, pencil grips, name tags, cord wraps, and other useful desk and backpack accessories.
None of the twelve projects below require engineering skill. Most start as boxes, cylinders, holes, and raised text, which is exactly what beginner design tools are built to handle. The modeling is rarely the hard part. Measuring is. So is leaving the right gap for a fit, and accepting that version one usually needs a repair.
That repair is the lesson. A hole prints too tight. A wall bends. The base tips the moment four pens go in. The child measures again, changes one number, prints a small test piece, and tries once more. By the end of a term they own supplies they use daily. They also understand how design actually goes. Trial, error, revision.
Quick-Pick Project Table
Start with one row. Not the whole list. Difficulty below means design complexity, not print quality.
|
# |
Project |
Difficulty |
Rough Print Time |
Skill It Teaches |
|
1 |
Personalized pencil holder |
Easy |
2 to 4 hrs |
Wall thickness, base stability |
|
2 |
Stackable organizer tray |
Easy |
2 to 3 hrs |
Rim and groove fit |
|
3 |
Mini desktop trash can |
Easy |
2 to 3 hrs |
Tapered walls, removable lid |
|
4 |
Custom tape holder |
Medium |
3 to 5 hrs |
Axle clearance, rotation |
|
5 |
Clip-on bookworm bookmark |
Easy |
20 to 40 min |
Thin-gap tolerance |
|
6 |
Ergonomic pencil grip |
Easy |
15 to 30 min |
Inner diameter matching |
|
7 |
Pencil extender |
Medium |
30 to 50 min |
Friction fit, split flex |
|
8 |
Spirograph drawing set |
Hard |
3 to 5 hrs |
Gear meshing, tooth spacing |
|
9 |
Backpack zipper pull |
Easy |
15 to 25 min |
Stress points, loop strength |
|
10 |
Name tag or badge clip |
Easy |
25 to 45 min |
Raised text legibility |
|
11 |
Earbud cord wrap |
Easy |
30 to 45 min |
Slot sizing, smooth curves |
|
12 |
Hinged pencil case |
Hard |
5 to 8 hrs |
Print-in-place hinge clearance |
Print-time ranges are rough estimates based on PLA, a 0.4 mm nozzle, 0.2 mm layer height, two walls, about 15% infill, and standard print speeds on a compact home 3D printer. Supports are assumed only where the design requires them. Actual times will vary with model size, slicer settings, material, and printer speed.
Why Let Kids Design Their Own School Supplies
Hands-On STEM Practice They Can Hold

A child designing a pencil holder is doing several things at once. They measure pencil length, compare diameters, work out spacing, and decide how thick a wall needs to be before it stops feeling flimsy. All of that happens before a single layer prints. No plastic yet.
Then the model fails. The base is too narrow, so it tips. The opening is 2 mm short, so the ruler will not slide in. Nothing on screen warned them.
That gap between the digital model and the physical object is the whole point. A design is a loop, not one act. Build it. Print it. Look at what broke. Change one variable. Run it again.
Everyday Problems Turned Into Design Briefs
Useful projects almost always start as a complaint. The zipper is too small to grab with gloves on. The pencil is too short to hold. Earbuds knot themselves inside the bag every single time.
That is a brief. A bigger zipper pull needs a wide opening and a thick loop. A pencil extender needs a snug inner channel. Loose will not do. The child has to settle what the object must do before deciding what it looks like.
This habit carries. They start asking who uses the thing, which measurement matters most, and how it is likely to break.
Supplies That Are Easy to Spot in a Classroom
A pencil case with a raised name does not get mixed up at a shared table. Neither does a zipper pull shaped like a specific animal. The personalization is practical.
School colors. Initials. A class number, or a small symbol. Each changes the object without making it meaningfully harder to print. Kids also tend to look after something they built themselves, which counts for more than it sounds in a class of thirty.
What Kids Need Before They Start Designing
Beginner-Friendly 3D Design Software
Beginner tools build objects out of cubes, cylinders, cones, and letters. Autodesk’s free browser-based design app Tinkercad is the usual first stop, because a child can drag shapes onto a work plane, resize them, group them, and cut holes without learning a single command. No install. It is ad-free and kidSAFE certified.
Older students sometimes move to tools with tighter dimensional control, such as Fusion, Onshape, or FreeCAD. Those take longer. The menus alone can stall a beginner for weeks.
The best software is whichever one the child can finish a design in. Nothing else matters much. A plain object that prints beats a detailed one still sitting on screen.
Measuring the Items They Already Own

A ruler covers height, width, and length. Calipers matter once a child needs the true diameter of a pencil, an earbud cable, a badge reel post, or a small opening. Guessing at those numbers is where most first prints die. Measure instead.
Write the measurements down before modeling starts. Three columns work. Measured size, planned clearance, final model dimension.
|
CLEARANCE RULE OF THUMB Any printed part that slides over or around another object needs extra room. Start with 0.3 to 0.6 mm and adjust after a test print. A hole modeled at the exact measured size comes out too tight almost every time, because printers and materials both carry small dimensional variance. |
Choosing Filament for Everyday Use
PLA handles most school projects. It prints easily, comes in every color a child could want, and holds up fine for holders, bookmarks, trays, and desk pieces kept at normal indoor temperatures. Start there.
PETG suits parts that flex or sit somewhere warm. Zipper pulls, cord wraps, clips, anything that might spend an afternoon in a hot car. It strings more, though. It also grips some build plates hard, so an adult should prepare the machine.
|
Factor |
PLA |
PETG |
|
Ease of printing |
Easiest option for beginners |
Needs slower speeds and more tuning |
|
Detail quality |
Crisp text and fine edges |
Slightly softer detail, more stringing |
|
Flexibility |
Rigid, can snap under repeated bending |
Bends before it breaks |
|
Heat tolerance |
Softens in a hot car or sunny window |
Handles warmth better |
|
Best for here |
Holders, trays, bookmarks, spirograph gears |
Zipper pulls, cord wraps, clips, latches |
|
Start with it? |
Yes, learn on PLA first |
Only after PLA feels routine |
Flexible filament works for soft grips and bendable straps. It is harder to feed on some machines. Leave it for later.
Planning for Safety, Size, and Durability
The design should be big enough to use and small enough to print without eating a whole evening. A project that fills the entire build plate can run eight hours and then fail in the last twenty minutes over one bad overhang.
Skip sharp points. Skip very thin walls and tiny loose parts. Rounded corners and slightly chunkier features survive a school bag better. Backpacks are brutal.
|
ADULT REVIEW BEFORE PRINTING An adult should look at the model before it reaches the printer. This one check catches unsafe shapes, weak joints, blocked holes, and sizes that drifted away from the original plan. Two minutes. It saves hours. |
Desk and Organization Supplies Kids Can Design

1. Personalized Pencil Holder
Desk supplies make good first projects, because they lean on simple geometric forms and give fast feedback. A pencil holder starts as a cylinder, a cube, or a six-sided container. Three decisions come first: how many pencils it holds, how tall the sides run, and how wide the base must be so it does not tip when loaded.
For standard pencils, 90 to 110 mm of height works. Markers change that number. Scissors and paintbrushes too. Measure the tallest thing the child actually plans to store.
Raised names, cutout initials, and repeating patterns all work around the outside. Leave solid material between large cutouts. Walls crack where openings crowd each other.
2. Stackable Desk Organizer Tray
A stackable tray holds erasers, flash cards, sticky notes, or small craft supplies. The first one needs a flat base, low walls, and a shallow rim matching a groove on the underside of the next tray.
Measurements matter most here. Too wide and the trays will not seat. Too loose and the top one slides off the desk.
Print one corner first. That corner test checks the rim and groove connection in under twenty minutes instead of three hours.
3. Mini Desktop Trash Can
This one solves a real problem. Pencil shavings, torn paper corners, and broken eraser bits have nowhere to go, and they end up on the floor. The body can be a tapered box or cylinder with a wide opening.
A removable lid adds a second challenge. Kids can try a drop-in lid, a sliding top, or a small swinging flap printed as its own piece.
Keep the inside smooth. Deep grooves and sharp interior corners trap shavings, and a bin that cannot be emptied cleanly stops getting used.
4. Custom Tape Holder
A tape holder needs more planning than a container. It requires a central support for the roll, enough room for the roll to spin freely, and a front edge that grips the tape while it is pulled.
|
DO NOT PRINT THE CUTTING BLADE A printed serrated edge is either too blunt to work or sharp enough to catch a finger. Keep the project as a holder with no cutter, or have an adult transfer the metal cutter from an empty commercial dispenser. |
Measure the inner diameter and width of the roll before modeling. Plan the axle first. A removable axle beats a printed-in-place post, because swapping an empty roll then takes seconds.
Reading and Writing Supplies Kids Can Design
5. Clip-On Bookworm Bookmark
These projects are small, so they burn little filament and finish fast. Good for testing text size, clips, gears, and tight openings. A clip-on bookmark slides over a single page without sticking far past the edge of the book. A worm shape suits it, since the body forms the clip and the head stays visible above the page.
The gap between the clip layers has to fit paper and still hold. Print a test piece. Two millimetres decides it. Grip, or fall out.
Round the edges. Keep the bottom surface flat, because thick raised details leave impressions in the pages of a closed book.
6. Ergonomic Pencil or Pen Grip
A grip makes a narrow pencil easier to hold. The design might use a soft triangular profile, shallow finger grooves, or a thicker round sleeve.
The inner hole has to match the writing tool. Pencils and pens do not share a diameter. Measure the exact item.
PLA stays rigid. Flexible filament gives a softer one, at the cost of slower printing and settings an adult should configure.
|
A comfort aid, not a treatment. A custom grip should feel comfortable and should never force fingers into a position that hurts. If a student has ongoing hand pain or real difficulty writing, that is a conversation for a parent, teacher, or qualified health professional. A printed grip should not be asked to solve it. |
7. Pencil Extender
An extender keeps a short pencil useful once it gets awkward to hold. It is a tube. Narrow opening at one end, wider handle at the other.
The fit has to be tight enough to hold during writing. A split down one side adds a little flex, which lets the same extender work across pencils that vary slightly in diameter.
Print a short ring before the full extender. Shifting the inner diameter by 0.2 mm changes the grip completely. Small numbers, large effect.
8. Spirograph Drawing Set

A spirograph set combines art, geometry, and mechanical design. It needs a large ring with internal teeth plus smaller gears carrying pen holes at different distances from the centre.
Teeth have to be evenly spaced and correctly sized to mesh without binding. Drawing each tooth by hand is slow and error-prone. Start from a template.
Print the parts flat for cleaner edges. If the gears stick, light sanding on the tooth faces normally fixes it. Then let the child change gear sizes and pen-hole positions, because every change produces a different pattern.
|
A PRINTER THAT MAKES THE FIRST PROJECT FINISHABLE MOST OF THESE PROJECTS FAIL FOR ONE REASON. THE CHILD LOSES MOMENTUM BEFORE THE FIRST PRINT EVER STARTS. AOSEED BUILDS KID-FRIENDLY 3D PRINTERS SIZED FOR BEGINNERS AROUND THAT PROBLEM. FULLY ENCLOSED BUILD AREA. ONE-TAP PRINTING FROM AN APP. AUTO LEVELLING, SO NOBODY ADJUSTS A BED BEFORE A BOOKMARK. A REVIEWED MODEL LIBRARY WITH WEEKLY ADDITIONS, SO THERE IS ALWAYS A NEXT THING TO MAKE. |
Backpack and Tech Accessories Kids Can Design
9. Personalized Backpack Zipper Pull

Backpack accessories get pulled, twisted, dropped, and crushed under textbooks. They need thick connection points and edges smooth enough not to snag fabric. A zipper pull can be a letter, an animal, a sports symbol, or a plain name tag. Whatever the shape, it needs a hole or loop that attaches securely to the slider.
Thicken that area. A narrow ring looks tidy on screen and tears after two weeks of real use.
Rounded outlines catch less on clothing and locker doors. Long thin shapes snap when a bag hits the floor. Bags hit floors constantly.
10. Name Tag or ID Badge Clip
A name tag can carry a first name, initials, a class number, or a club. It might slide onto a strap, connect to a badge reel, or hang from a key ring.
|
KEEP PERSONAL DETAILS OFF ANYTHING VISIBLE A tag strangers can read should never carry a full name, home address, phone number, or school schedule. First name or initials only. |
Raised text prints more reliably than deeply recessed lettering. Keep letters large enough to survive slicing. Check the preview first.
11. Earbud Cord Wrap
A cord wrap stops wired earbuds knotting in a backpack pocket. The basic version is a flat shape with two cable slots and wider ends that keep the wrapped cord from sliding off.
Slots need to hold the cable. No pinching. Smooth curves beat sharp corners, since the wire bends in the same spot every time.
Rockets, bones, clouds, game controllers, school mascots. Any of those work as a shape, provided the object stays flat enough to fit in a pencil case.
12. Hinged Pencil Case
Hardest project here. It can use a separate metal pin, a printed pin, snap-fit hinges, or a print-in-place joint that comes off the bed already moving.
Beginners should try a two-part case with a sliding lid first. Once that works, print a small hinge sample before committing five hours to the full case.
Size the case around the longest item it must hold. Measure pencils, pens, scissors, and markers, then add room so nothing has to be forced in. A latch keeps it shut inside a bag. It should flex only slightly, because repeated overbending weakens printed plastic fast.
How Kids Can Customize Each Design
Names, Initials, and Class Numbers
Customization means more than swapping filament color. Kids can alter dimensions, labels, outlines, textures, storage layouts, and how the object attaches to something else. Raised text is easiest. A name on the side of a holder, initials on a bookmark, a class number on a tray.
Use a clear font with thick letterforms. Thin script breaks up or vanishes when the model is sliced. Recessed letters work too, as long as they are not cut so deep they hollow out a thin wall.
School Colors and Favorite Shapes
Color ties the object to a school, a team, or a personal interest. Printing the base in one color and a separate nameplate in another is an easy two-part upgrade.
Shape can drive the outline. A cord wrap shaped like a rocket. A bookmark shaped like a dinosaur. The object still has to work as a supply, though, and large spikes and narrow tails break in a bag.
Dimensions Matched to Specific Supplies
Custom sizing is the strongest argument for designing instead of downloading. A tray that fits one specific desk drawer. A holder sized for one specific set of markers.
Build a sizing test with several holes at different diameters, label each one, and let the print decide the final number. That beats guessing.
Patterns, Textures, and Simple Icons
Dots, stripes, waves, stars, and simple geometric cutouts make flat surfaces more interesting without adding parts. A light texture on a latch or cord wrap also improves grip.
Icons need bold outlines and large features. Bigger than feels right. Tiny facial details and hairline strokes disappear with a standard 0.4 mm nozzle.
One Design, Several Versions
A single model can become a family of supplies. The same tray at three heights. One zipper-pull template holding different letters.
Save a clean base model before adding personal details, and name versions by what changed. Files called wide-marker-holder and three-slot-tray stay usable. Files called final, final2, and newfinal do not.
Print Settings That Survive a School Year
|
Setting |
Starting Point |
When to Change It |
|
Layer height |
0.2 mm with a 0.4 mm nozzle |
Drop to 0.16 mm for small letters, curves, and gear teeth |
|
Wall lines |
3 walls |
Add walls for parts that carry weight or get pulled |
|
Infill |
15 to 25 percent |
Raise it for latches, hinges, and zipper-pull loops |
|
Orientation |
Flattest stable face on the bed |
Rotate so stress runs across layers, not along them |
|
Supports |
Off by default |
On for steep overhangs, handles, and hinge barrels |
|
Minimum wall |
1.2 mm on small parts |
Thicker on anything larger than a pencil case |
Layer Height
Settings decide how long a project takes, how much filament it burns, and whether it lasts past October. The numbers above are starting points. Not rules. Where the printer manufacturer’s instructions differ, follow the manufacturer.
A 0.2 mm layer height suits most school supplies printed with a 0.4 mm nozzle. It balances finish against time without much thought.
Fine details do better at 0.16 mm. The trade is time, since there are more layers to lay down. Thicker layers of 0.24 or 0.28 mm speed up big organizers and plain containers, at the cost of rougher detail.
Walls and Infill
For containers, clips, and small tools, walls matter more than infill. Three wall lines. That is the default for anything handled daily.
Fifteen to twenty-five percent infill covers most holders, trays, bookmarks, and cases. Small solid features often come out nearly full anyway, because there is no room for a pattern.
A weak zipper-pull hole is a design problem, not an infill problem. Add material there. Pushing infill to 100 percent will not save it.
Print Orientation
Put the flattest stable surface on the bed. That cuts supports. The first layers get something to grip.
Layer direction changes strength. A zipper-pull loop printed flat resists pulling far better than the same loop printed upright, where force pries the layers apart. Raised text prints cleanest facing up.
When Supports Are Needed
Supports hold up anything that would otherwise print into open air. Steep overhangs, handles, hinge barrels, some decorative shapes.
They cost time and leave marks. Rotating the model, splitting it into parts, or replacing a flat ceiling with an angled one often removes the need entirely. The slicer preview shows where they will appear, so check it first.
An adult should handle support removal whenever tools, force, or sharp edges are involved.
Where Kids Can Find Designs to Remix
School and Education Model Libraries
Nobody needs to build every model from an empty workspace. Existing files teach how parts are shaped, how hinges fit, and how experienced designers solve problems that stump beginners. Large platforms carry education, school, desk, and organization categories full of bookmarks, pencil cases, geometry tools, science models, and storage projects.
Search by function. Not appearance. Terms like remixable pencil holder, school desk organizer, or print-in-place pencil case return far more usable results than dinosaur bookmark.
An adult should scan the model page before downloading. Comments, user print photos, and the description often reveal problems the preview render hides.
How to Read a File License
The license sits on the model page. It sets out whether a user may print the design, change it, share a modified version, or sell anything made from it. Creative Commons publishes six standard license types, and the differences matter. CC BY and CC BY-SA permit commercial use when their terms are met. Any license containing NC limits the work to noncommercial use only.
Have the child save four things per file: designer name, model title, source page, license. That record takes seconds. Crediting later becomes trivial.
When a Design Can Be Remixed
A design can be remixed when its license allows modification. The child can resize it, add text, change the outline, thicken a weak section, or combine permitted elements from more than one file. The modified version still follows the original license. The U.S. Copyright Office notes that pictorial, graphic, and sculptural works include three-dimensional works of fine, graphic, and applied art, so adding a name to somebody else’s model does not make it a new work.
When a license is unclear, ask the designer or pick a different file. Ask, or move on. Most libraries offer filters for exactly this.
Giving Credit to the Original Designer
Credit should name the designer and the original model title. A school project can also list the platform and describe what the student changed.
One line does it. Remixed from a named model by a named creator, with added text, revised dimensions, and thicker walls. It teaches that files have owners even when they cost nothing.
Safety Rules for Kids Using a 3D Printer

Keep Hands Away From Hot Parts
A 3D printer is a machine with hot parts, moving components, electrical connections, and tools that can be sharp. Kids should use one with adult supervision and follow the instructions for that exact model. Set the rules before the first print, not after the first burn.
Many desktop nozzles run above 190°C, and heated beds reach temperatures that burn. Nobody touches the nozzle, heater block, or bed while the machine is heating, printing, or cooling. NIOSH guidance for schools, libraries, and makerspaces recommends controlling who can access a running printer, limiting time spent beside it, choosing lower-emission materials, and using enclosures or ventilation.
Position the machine where hands, sleeves, hair, and loose paper cannot reach the moving parts. Younger children watch from a distance. An adult handles setup.
One rule prevents confusion. Touch the finished print only after an adult confirms the machine is cool.
Let an Adult Remove Difficult Prints
Some prints lift off cleanly once the plate cools. Others stick hard and need the plate flexed, a scraper worked under an edge, or steady force applied in the right direction.
Anything involving a blade is an adult job, and the tool always moves away from the body. Kids can help by waiting for the bed to cool and clearing stray filament from the area. They should never yank a stuck print. The sudden release injures hands and damages printers in the same motion.
Run the Printer in a Ventilated Space
Run the machine in a room with moving fresh air rather than a sealed closet. An enclosure with suitable filtration also helps control heat, noise, and particles when it is built for that printer. EPA researchers studying 3D printer emissions report that the process releases gases and particulates, including volatile organic compounds, which is why ventilation and enclosure both appear in the standard advice.
Nobody should sit beside the machine for an entire print. Check in periodically. Keep it on a stable, heat-resistant surface, away from bedding, curtains, paper piles, and blocked vents. Any unusual smell, smoke, electrical noise, or overheating alert means stopping the print safely and calling an adult.
Skip Restricted and Unsafe Objects
School projects belong in a narrow lane. Learning tools, desk supplies, toys, models, harmless accessories. No weapons, no realistic weapon parts, no dangerous tools, nothing designed to defeat a school safety rule.
Copyrighted characters, logos, and commercial product copies are off limits for sale without permission, even when a design is fine for personal use. Parents and teachers should review projects before printing or sharing, because school policy, local law, platform rules, and file licenses each set different limits.
When to Start Simple and When to Level Up

Twelve projects is plenty. Starting in the wrong place is the fastest way to lose a child’s interest, so use the two lists below to pick an entry point.
Start with the simple end when:
- The child has never designed anything in 3D before
- Attention span for one project is under an hour
- You want a finished object on day one, not day three
- Best fits: the zipper pull, bookmark, name tag, and pencil grip
Move up to the harder projects when:
- They can already measure, model, and print without help at every step
- At least one test print has been run, and its result actually changed the model
- Clearance makes sense to them well enough to explain it back to you
- Best fits: the tape holder, spirograph set, and hinged pencil case
Hardware matters more at the beginner end than the advanced one. A younger designer working through the easy list benefits from an enclosed starter printer built for younger designers, because auto levelling, one-click app printing, and a fully enclosed PLA-only build area strip out most of the friction that kills a first project. The X-MAKER JOY runs a 120 × 120 × 120 mm build area at 120 to 300 mm/s. That covers every project on this list except an oversized pencil case.
An older student designing gear teeth and print-in-place hinges will eventually want a bigger build volume, a touchscreen, and more material options. That is a second-printer conversation. Not a first one.
Conclusion
Designing back-to-school supplies gives kids more than a drawer of custom holders and bookmarks. Every project asks them to measure something real, build a digital model, print it, test it against the object it was made for, and fix whatever failed.
The best first project is small, useful, and easy to change. A zipper pull or bookmark teaches sizing and text tools in under an hour. A hinged pencil case gives an experienced student something genuinely difficult.
Adults stay involved wherever the machine is hot, moving, or being cleaned. That boundary holds. It is also easier to hold when the printer itself is enclosed and app-controlled.
Families deciding where to begin can compare age fit, setup effort, and project range acrossAOSEED’s family-friendly 3D printing platform. As checked on August 13, 2026, AOSEED lists the X-MAKER JOY for ages 4–12 at $229 in its U.S. store, reduced from $339. It arrives mostly ready to use and includes a 1-year warranty; direct AOSEED purchases are subject to its 30-day return policy. Adult supervision is recommended, especially during early sessions.
No child designs every project correctly first time. A bad fit. A weak wall. A hinge that will not turn. Each one is information for the next version, and learning to treat failure as data is the most durable thing 3D printing teaches.
FAQs
Can a 12-Year-Old Use a 3D Printer?
Yes, with supervision. A 12-year-old can run a filament 3D printer given adult oversight and clear rules about which parts are off limits. The child handles what matters creatively: building the model, choosing colors, preparing a simple print, watching progress. An adult manages hot components, maintenance, stuck prints, and anything involving a cutting tool.
The reason for that split is straightforward. Desktop filament printers heat plastic inside a nozzle that commonly exceeds 190°C, so the machine should not be treated like an ordinary computer peripheral. NIOSH also reports that filament printing releases ultrafine particles and chemicals, which is why it belongs in a ventilated space or a suitable enclosure rather than a closed bedroom.
A practical rule works well at this age. Let the child design, prepare, and monitor. Require an adult to load filament, remove difficult prints, clear jams, and service the machine. Start with short prints.
Is 3D Printing Hard for Kids?
Not the basics. Most kids manage them, though it takes time to understand how design choices show up in the finished object. A child can usually produce a name tag, bookmark, pencil holder, or cord wrap once they can move, resize, align, group, and subtract basic shapes.
The software is the easy part. Tinkercad is free, runs in a browser, and was built specifically as an introduction to 3D design, electronics, and coding, so a beginner can drag a cylinder onto a work plane and cut a hole through it within minutes of signing in.
Troubleshooting is where it gets genuinely difficult. Prints fail from poor bed adhesion, wrong measurements, thin walls, or steep overhangs, and each cause looks much the same from across the room. Kids learn faster through small tests than long expensive prints.
A useful routine. Pick one simple project, print a small test piece, write down what went wrong, and change a single setting or measurement at a time.
What Is the Best 3D Printer for a 12-Year-Old?
An easy filament machine. For a 12-year-old who wants to design original school supplies, look for automatic levelling, a removable build plate, simple software, and adult-controlled safety features. An enclosed machine matters most in a classroom or shared family space, since the enclosure puts a physical barrier between curious hands and hot moving parts.
Build volume is the specification most people over-weight. Every project on this list fits inside a 120 mm cube of build space. A printer that finishes a bookmark reliably beats one that prints twice as large and jams twice as often.
The AOSEED X-MAKER JOY fits this profile for younger and mid-range designers: enclosed, PLA-only, Wi-Fi controlled, auto levelling, quick-swap nozzle. Older students wanting ABS, a touchscreen, and a 150 mm build area are better served by the step-up X-MAKER.
One question settles it. Does the child mainly want to design objects from scratch, or print ready-made models? That matters more than print speed.
How Much Does a 3D Printer Cost for Kids?
Roughly $200 to $500. Child-friendly 3D printers sit in that band, depending on whether the machine is enclosed, how much filament is bundled, and whether the app and model library are included at no extra cost. Prices move during sale periods, so a figure checked in August may not hold in November.
As a live reference point, the AOSEED X-MAKER JOY was listed at $259 for the US single AI+ set at the time of writing, reduced from $339. Bundles adding filament and toy creation kits were listed higher, at $285 and $299 for the deal and creation packs.
The printer is only part of the budget. Families should also plan for spare PLA, filament storage, replacement nozzles, basic cleaning tools, a stable heat-resistant surface, and ventilation if the room is small.
Compare the full starter package. Not the headline price. A cheaper machine needing upgrades, extra setup time, and constant adult troubleshooting is rarely cheaper by the end of the first term.
How Much Does It Cost to Run a 3D Printer for One Hour?
A few cents. The exact figure depends on the printer, the material, bed and room temperature, and the local rate. On small prints the filament costs more than the power.
AOSEED’s X-MAKER JOY has a rated power of 60 watts. Using that rating as an illustrative estimate, one hour of printing at 60 watts would use 0.06 kWh. TheU.S. Energy Information Administration reported an average U.S. residential electricity price of 18.44 cents per kWh for May 2026, putting that example at about 1.1 cents per hour. Actual electricity use varies with heating cycles, print settings, and how the printer operates during a job.
So a five-hour pencil case is under ten cents of electricity. Pennies, effectively. The filament for it costs considerably more, though still far less than an equivalent case bought from a shop.
To estimate at home, multiply the printer’s average kilowatts by the number of printing hours, then multiply that by the price shown on the household electricity bill.
What Can Kids 3D Print and Sell?
Original designs, mostly. Personalized bookmarks, name tags, zipper pulls, pencil holders, cord wraps, desk trays, plant labels, game-piece organizers, simple classroom rewards. The safest products are small, durable, easy to inspect, and clearly designed by the student rather than downloaded.
A downloadable model is not automatically sellable. Creative Commons licenses differ on this point. CC BY and CC BY-SA can permit commercial use when their terms are followed, while any license containing NC restricts the work to noncommercial use. Read the license. Thirty seconds, and it prevents a real problem.
Copyright also protects original sculptures, graphics, and other visual artwork, so copying a famous character or another designer’s model creates legal exposure even when the file downloads freely.
A practical approach. Sell only designs the child built from basic shapes, and keep the files, sketches, license records, and source links for every item offered.
Is It Illegal to Sell 3D Prints at School?
Depends on the school. Selling 3D prints on campus is not a simple yes or no, and permission comes first, because schools commonly limit selling, fundraising, advertising, pricing, delivery, and the categories of product students may bring in at all.
The product itself must also be legal to sell. A downloaded file may allow personal printing while blocking commercial use, and a Creative Commons license containing NC rules out commercial sale entirely. Copyright can protect original visual and sculptural works regardless of how the file was obtained.
Local tax, business, and youth-employment rules can apply once sales become regular or the amounts grow. Rules vary by location. A parent or guardian should check them rather than relying on a general answer found online.
The safest route is written approval from a teacher or administrator, original or properly licensed designs only, and an adult managing payments and records.
What Are You Not Allowed to 3D Print?
No single list covers every country, state, school, platform, and product. The workable rule is that nobody should print objects that are illegal where they live, break school rules, copy protected designs without permission, or create a serious safety risk.
Copyright protects original artistic and sculptural works, and Creative Commons licenses can limit commercial use, modification, or redistribution. A file being freely available online removes none of those restrictions.
Weapons and regulated firearm parts sit in a separate category needing real caution, since federal, state, and local firearm law continues to apply to items produced by 3D printing. That is not a grey area for a school project.
Kids should stay with school supplies, learning models, toys, organizers, and decorations. Ask an adult, check the license, review school policy, and stop whenever the legal or safety position is unclear.
Sources
- NIOSH, “Approaches to Safe 3D Printing: A Guide for Makerspace Users, Schools, Libraries, and Small Businesses”
- U.S. Environmental Protection Agency, “3D Printing Research at EPA”
- Autodesk, “Tinkercad: Free 3D Design, Electronics, and Coding App”
- Creative Commons, “About CC Licenses”
- U.S. Copyright Office, “Visual Arts: Registration”
- U.S. Energy Information Administration, “Electricity Monthly Update: End Use, May 2026”



Further reading

Thanksgiving STEM Activities for Kids: Table Projects and Simple Engineering Challenges

Halloween STEM Activities for Kids: Spooky Builds That Teach Real Science

STEM Crafts for Kids: Build, Decorate and Test



