

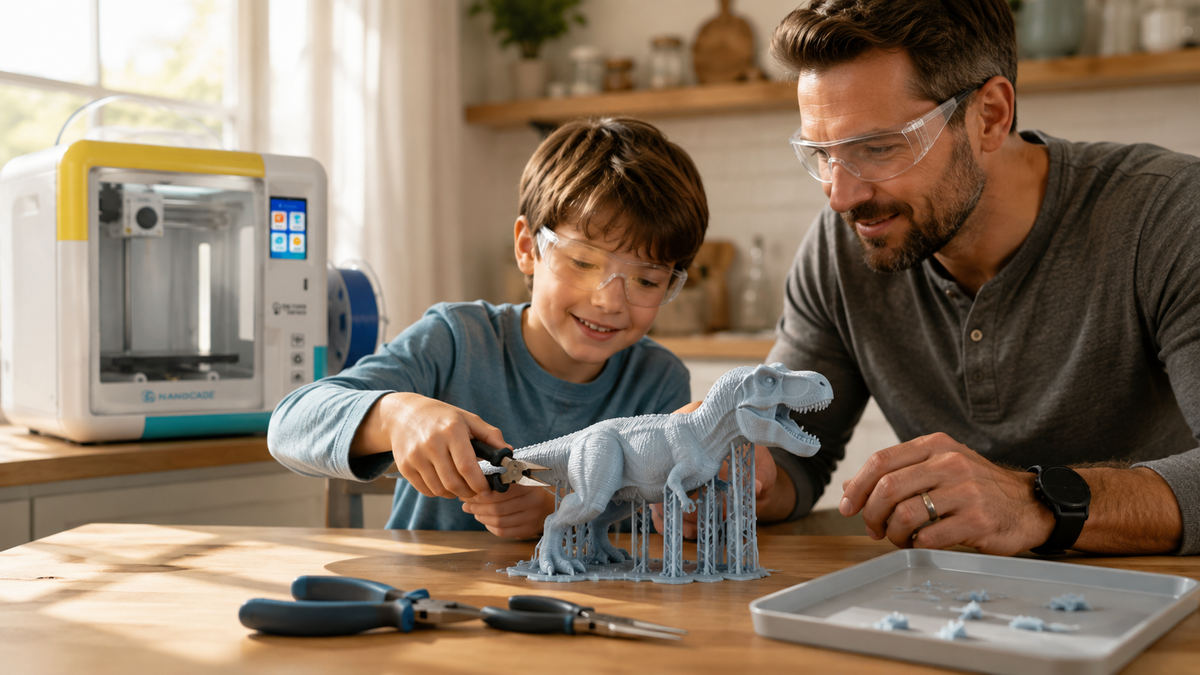
How to Remove 3D Print Supports Safely: A Parent-and-Kid Guide
The print finished. Your child wants to hold it right now. Wait. Under the model sits a scaffold of thin plastic that has to come off first, and that is the moment most family prints get broken.
Support removal can involve sharp edges, flying fragments, and tools that slip under pressure. Adults should handle cutting tools, blades, heat, solvents, resin, and supports that require force to remove. Children can help only with low-risk tasks approved and supervised by an adult, such as holding a light, collecting loose fragments, or handling supports that separate safely by hand.
Here is the routine we use with families. Who handles what. Which tool comes first. When to stop pulling. And how to make the next print easier to clean than the last one.
Quick-Pick: Match the Support to the Method
|
If the support is... |
Start with |
Who handles it |
Watch for |
|
Loose and already separated |
Fingers, then tweezers |
Child, supervised |
Sharp points on snapped ends |
|
A thick wall or block |
Flush cutters, cut into sections |
Adult only |
The cut end flying off the model |
|
A tree branch |
Cut the trunk at the base first |
Adult only |
Tips still gripping thin features |
|
Inside a hole or channel |
Narrow pliers plus a flashlight |
Adult cuts, child lights |
Fragments left inside a joint |
|
Water-soluble (PVA) |
Warm water soak |
Adult sets up the bath |
Water hot enough to soften the model |
|
A raised nub after cleanup |
Fine sandpaper or a small file |
Child, supervised |
Sanding a sharp edge round |
Why 3D Prints Need Supports in the First Place

An FDM printer builds each layer on the one below it, so steep overhangs may need temporary support when there is not enough material underneath the new line. The exact limit varies with nozzle size, layer height, cooling, speed, material, and model geometry. Bridges work differently because they span between supported endpoints, so check the slicer preview or a small test before adding support
The trade is simple. More overhangs mean more support material, and the University of Florida’s Marston Makerspace notes that heavy support can damage a design as it comes off. Thin arcs and delicate arms are the usual casualties. Design choices made before slicing decide how ugly cleanup will be.
What supports actually touch
Supports meet the model at small contact points. Those joints are meant to break. Direction matters. They can still lift a layer or tear a surface when the force runs the wrong way.
Resin prints work differently. Thin posts hold the part in place while each layer forms, and they leave a scatter of tiny tips instead of a wall.
Why careful removal matters more on a kid’s print
Toys have the exact features that snap: fingers, antennae, wings, tails, spoilers. Speed is the enemy. A model that survives printing can still lose a limb in ten seconds of impatience.
There is a second reason to slow down. Snapped fragments are small, hard, and easy to lose in carpet. The U.S. Consumer Product Safety Commission’s small parts rule exists for that reason. Pieces small enough to fit inside a cylinder roughly the size of a young child’s throat present a choking hazard to children under three. Toddler in the house? Pet? Then the waste tray matters as much as the tools.
Set the Parent-and-Kid Rules Before You Start

Decide the split at the table, not mid-cut. Say it out loud. Kids follow a rule they heard before the tools came out. They argue with a rule invented after they reached for the cutters.
A child can own real work here. That part matters. Inspection, lighting, sorting, collecting, brushing, and the final quality check are all genuine jobs. They also build the observation habit that makes the next print better.
|
Task |
Child, with supervision |
Adult only |
|
Finding every support contact point |
Yes, this is the best starting job |
Confirms the plan |
|
Holding the flashlight |
Yes |
No |
|
Testing a support that is already loose |
Yes, gentle pressure only |
Steps in if it resists |
|
Flush cutters, hobby knife, scrapers |
No |
Yes |
|
Heat gun, hair dryer, warm water |
No |
Yes |
|
Solvents and uncured resin |
No |
Yes, with ventilation and gloves |
|
Collecting fragments into a tray |
Yes |
Seals the waste |
|
Fine sanding a leftover nub |
Yes, if the adult approves the spot |
Handles files and rotary tools |
|
PARENT TIP Give your child the job title before the job. "You are the inspector" lands better than "watch me." An inspector who finds a support you missed is doing the most useful work at the table. |
Gear Up: Eye Protection, Gloves, and a Clear Table
Eye protection is not optional. Support plastic under tension releases fast and unpredictably. Stanford University’s environmental health and safety guidance tells users to wear safety glasses or goggles during post-processing. It also calls for cut-resistant gloves whenever tools or razors are used to remove supports. Everyday glasses fall short.
The reasoning is the same one behind OSHA’s eye and face protection standard, which requires side protection wherever flying objects are a hazard. A clipped support branch is a flying object. Both people at the table need glasses, not just the one cutting.
Gloves, sleeves, and the surface underneath
Close-fitting gloves help with rough edges. Bulky gloves do the opposite, because they cost you grip and control. Fit beats thickness. Skip them if they make the tool harder to hold.
Roll sleeves. Tie back long hair. Remove dangling jewelry before any rotary tool or heat source comes out.
Clear the table first. Work on a stable surface with a cutting mat or a light-colored tray. Light colors make small dark fragments findable. Keep food, drinks, and unrelated tools off the table. Set the waste container within reach so nobody stretches across a blade.
|
IF A FRAGMENT HITS AN EYE Do not rub. MedlinePlus advises against rubbing the eye and against trying to remove anything embedded in it. Flush gently with clean water and get medical help if pain, redness, or vision changes continue. Full guidance is on the MedlinePlus page for a foreign object in the eye. |
Know Your Print and Support Type

Two answers decide the method. How was it printed? What are the supports made of? Guessing is how models get ruined.
Check the spool label, the saved slicer profile, or the resin bottle. Color tells you nothing.
|
Support type |
How it comes off |
Difficulty |
Best for |
|
Standard (linear, grid, zigzag) |
Cut into sections, then twist away |
Moderate to hard on wide contact areas |
Flat overhangs and long bridges |
|
Tree / organic |
Break the trunk, work up the branches |
Usually easier, harder inside tight pockets |
Curved and angled overhangs |
|
Breakaway |
Peel or snap by hand or with pliers |
Easy on open surfaces |
Simple shapes with room to grip |
|
Soluble (PVA) |
Soak in warm water until it releases |
Easiest, but slowest |
Enclosed channels and moving parts |
|
Resin posts |
Clip branches, then the tips, after washing |
Fiddly, adult-only workflow |
Detailed miniatures and figures |
Material choice sets the ceiling on how hard this gets. Stanford’s guidance recommends PLA wherever it is workable, because it emits fewer volatile compounds and particles than ABS or nylon. NIOSH’s work on 3D printing hazards flags inhalation, dermal contact, and mechanical injury as the categories to control. For families, a starter printer that only runs PLA removes most of the hard cases before they start. No ABS to soften. No resin bath. No solvent step in the kitchen.
When to Start Removing Supports
Timing changes how much force the job needs. Rushing is the most common reason a first print gets bent. Wait it out.
Let an FDM print cool completely
Leave the model on the bed until both the print and the plate feel cool. Warm plastic bends near thin walls. It also grips the plate harder.
There is no universal number of minutes. A small PLA keychain cools in a few minutes. A tall PETG model on a hot bed takes considerably longer. Touch the plate edge first. Then the thickest part of the model. Start only when neither feels warm and nothing flexes under light pressure.
Never drop a hot plate into cold water to speed this up.
Soluble and resin timing
Confirm the exact support filament and model material before soaking. Follow the manufacturers’ instructions for water temperature, soak time, agitation, rinsing, drying, and wastewater disposal, since these conditions vary by material. Keep the entire liquid-handling process adult-only, and do not pour used support-removal water down the drain unless the manufacturer or local guidance says it is permitted.
Keep the bath in a workshop container, out of reach of children and pets, and check it at intervals rather than leaving it alone for hours.
Resin follows the resin maker’s workflow, not a general rule. Many recommend washing, then curing, then removing supports, because cured supports hold the shape better while you clip. Some delicate models do better trimmed after the wash and before the final cure. Read the label. Keep uncured prints and contaminated tools away from children entirely.
The Eight-Step Method

Work outside in. Break the structure down before you touch the model surface. One habit. Most of the damage prevented.
- Inspect and plan. Turn the model under bright light. Find every contact point. Every one. Note which thin features sit next to a support, then pick a path from open areas toward enclosed ones.
- Secure the print without bending it. Hold the thickest solid part. Never a wing. Never an arm. Rest the model on a padded mat with the support facing up.
- Clear the loose exterior first. Remove anything already separated. Free plastic first. Every piece you take away buys tool room for the next one.
- Divide before you pull. Cut large walls and trunks into smaller pieces with flush cutters. Place the flat side of the cutter toward the finished surface. Aim the cut end at the tray.
- Twist, do not yank. Grip the support with needle-nose pliers a short distance from the model, then make a small side-to-side motion. Twist the support. Never the model.
- Slow down at thin features. Brace the delicate part from behind, with a finger placed away from the cutting path. Slow hands. Leave a short nub wherever a tool cannot reach the contact point safely.
- Trim the remaining nubs. Cut slightly above the surface rather than dead flush. A flush cut is how you get a dent. Then level the rest with a fine file or sandpaper.
- Inspect before handing it over. Check every supported face under light. Cracks, lifted layers, sharp points, missed supports. Work hinges and moving parts through a small range. Then clean the table and the floor.
|
THE ONE RULE THAT SAVES MODELS Resistance is a signal to change method, not to add force. If a support does not move under gentle pressure, stop and cut it smaller. Every broken print we have seen came from one more pull. |
Material by Material
|
Material |
Cooling |
Method |
Watch for |
|
PLA |
Cool until firm |
Loose outer supports, then cut walls, then twist |
Usually needs no heat when settings are right |
|
PETG |
Cool fully |
Cut into small sections, work edges inward |
Strong contact points, surface going glossy |
|
ABS / ASA |
Cool fully |
Reduce large structures first, then twist gently |
Thin features cracking under sudden force |
|
Resin |
Wash first, follow the resin workflow |
Clip branches, then tips, brace thin parts |
Uncured resin on tools and hands |
|
PVA support |
Not applicable |
Warm water soak, then lift what is loose |
Water temperature softening the model |
The material name matters less than people expect. Settings decide more. Support density, contact distance, and access account for most of the difficulty. An ASA print with a generous gap peels off easily. A PLA print with a dense interface fights back.
When Supports Will Not Budge
Three causes, usually. Too much connected plastic, too small a gap, or no room for a tool. More force fixes none of them.
Density, gap, and fused interfaces
High density turns a support into a stiff block. Work inward. Cut the open cells out first and the rest weakens fast.
Support Z-distance is the gap between the support and the model. A small gap gives a cleaner overhang underside and a much stronger bond. When it is too small the support looks fused to the surface, and the honest answer is to trim carefully and accept a little sanding.
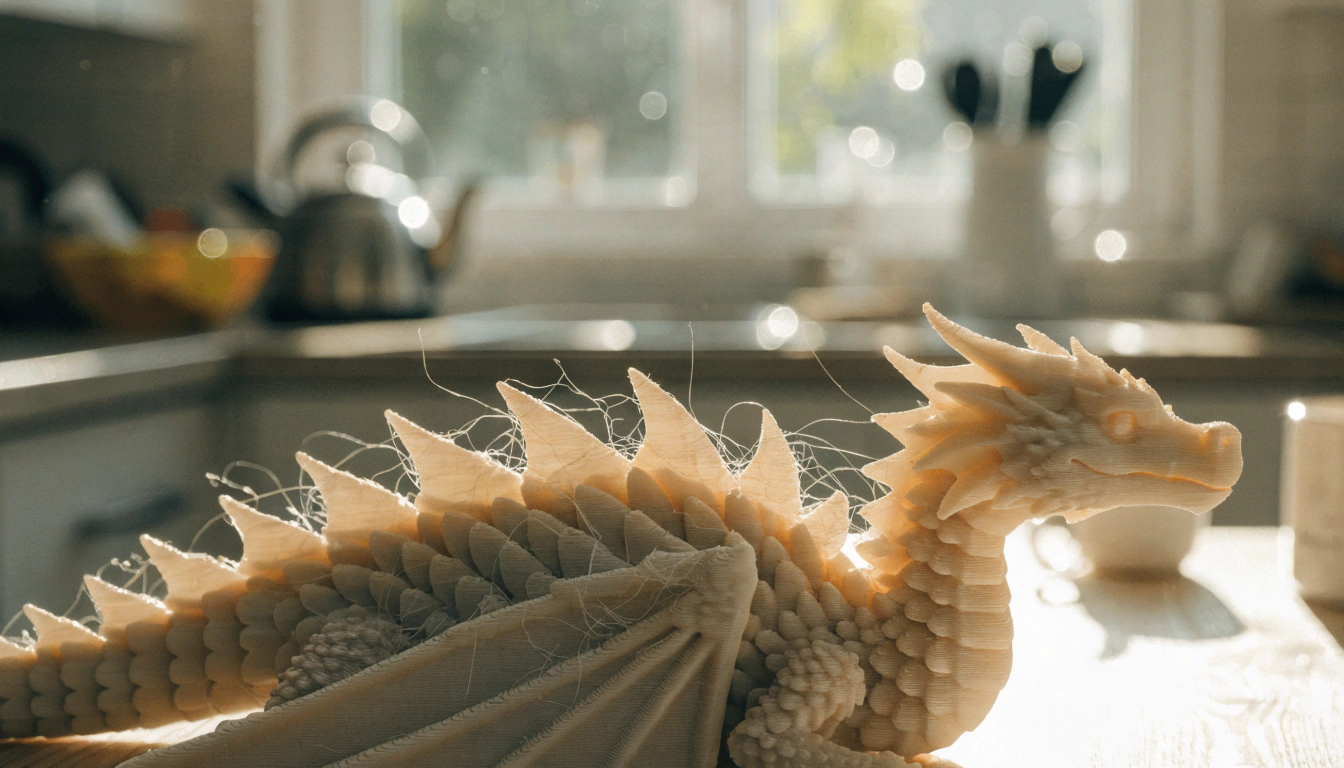
A fused interface reads like an extra skin on the model. Start at an exposed edge. Lift a small section, and work parallel to the surface rather than cutting down into it.
Trapped supports and the stop signal
Never force a large support through a small opening. Cut it into pieces that fit the gap. Track every piece, so nothing stays behind in a hinge or gear.
Stop when the model bends, whitens at a stress point, makes a cracking sound, or starts separating between layers. Set it down. Change the angle. A leftover stub can be sanded or primed later. A snapped arm cannot.
|
ADULT-ONLY BACKUP METHODS Mild heat and solvents are last resorts, not shortcuts. Warm the model gradually, keep the heat source moving, and stop before the surface softens. Never heat an unknown plastic, and never let a child hold the print while heat is applied. Solvent finishing changes the surface, can affect dimensions, and needs the ventilation and disposal steps on the product label. |
Cleaning Up Marks and Checking the Model

Cleanup should reduce marks without changing the shape. Gentlest tool first.
Feel the surface with a fingertip once you have confirmed no sharp fragments remain. Side lighting makes raised nubs obvious. Clip the tall ones first. Then take light sanding passes and check often. Support a thin wall from behind while you sand it.
Do not dig into a low spot to match a nearby dent. Keep the original shape. Fill the defect later if it bothers you.
Finish with a soft brush over grooves and textures, held above the waste tray. Then check holes, hinges, and gear teeth under bright light. One chip can block movement even when the outside looks clean.
KID-FRIENDLY 3D PRINTERS CHANGE HOW MUCH CLEANUP YOU DO AT ALL. ENCLOSED, PLA-ONLY MACHINES WITH APP-GUIDED PRESETS SKIP THE HARDEST SUPPORT CASES: NO SOLVENT BATHS, NO RESIN WASH STEP, NO GUESSWORK ABOUT MATERIAL. SEE THE FULL RANGE OF
kid-friendly 3D printers built for supervised family use and compare how each one handles a first print.
Make the Next Print Easier to Clean Up
Cleanup difficulty is decided before the printer starts. Orientation, pattern, density, contact distance, and material all move the dial. All of them.
Change one setting at a time. Write down what happened. Small test models cost pennies compared with reprinting a large failure.
- Lower support density in small steps, and confirm the overhang still prints cleanly.
- Increase Z-distance slightly, matched to your layer height. Too large and the supported underside sags.
- Try lines, zigzags, or tree supports instead of a dense grid on curved models.
- Reduce interface density or interface layers, then check whether the underside is still acceptable.
- Rotate the model to move support marks onto a hidden face, and preview the slice from every side.
- Use support blockers in holes and textures where supports were never needed.
- Thicken thin overhangs, or split the model into pieces that print flat and glue together after.
When to handle it yourself, and when to hand it over
Two lists, one decision. Read them before the next print finishes, not after.
Keep the model in adult hands when:
- The supports are dense, fused, or wrapped around thin features.
- The print is resin, or the support material is unconfirmed.
- Cutters, knives, heat, or any liquid is involved.
- The model is a gift or a school project with one chance to get it right.
Hand it to your child when:
- The remaining supports are loose or already separated.
- The work is inspection, lighting, collecting, brushing, or light sanding on an approved spot.
- The model is chunky, with no thin arms or antennae left to protect.
- You want them to rate the print for the log: easy, medium, or difficult.
Conclusion
Support removal is a finishing skill. Not a chore. Split the tasks, wear the glasses, cool the print, cut before you pull, and stop the moment the model resists. Then log what worked, so the next print starts ahead.
That routine is what turns one print into a habit. Still choosing a machine forfamily 3D printing at home? The X-MAKER JOY is the low-friction option. Enclosed, quiet, PLA only, app-controlled with one-click printing, built for ages 4 to 12, and listed at $229 at the time of writing, down from $339. Auto leveling and a quick-swap nozzle keep the first print simple. PLA-only printing avoids uncured-resin and resin-solvent workflows, but breakaway supports may still require adult use of cutters or pliers, controlled sanding with dust cleanup, fragment collection, or a reprint if the support interface is fused or inaccessible.
FAQs
What Is the Best Tool to Remove Supports From a 3D Print?
Flush cutters first. Then needle-nose pliers. Cutters divide a large support structure into pieces so less force reaches the model, and pliers give you a controlled twist on the sections that remain. Tweezers handle loose fragments in small openings. A hobby knife trims tiny leftover nubs, and it stays in adult hands because the blade can slip the instant plastic breaks. No single tool covers every contact point, which is why the order matters more than the brand. Practical tip: start with the biggest tool the space allows and switch to something smaller only after the main structure is gone.
How Long Should a 3D Print Cool Before Removing Supports?
There is no fixed number. Wait until the model and the build surface have both reached room temperature, and until the plastic feels firm rather than warm or flexible. Cooling time shifts with material, model size, bed temperature, and whether the printer is enclosed. A small PLA figure may be ready in a few minutes. A tall PETG or ASA part printed on a hot bed can need much longer. Warm plastic bends near thin walls, and a hot plate holds the base more tightly. Practical tip: touch the plate edge first, then press a thin feature lightly. If either feels warm or flexes, give it more time.
What Type of 3D Print Support Is Easiest to Remove?
Water-soluble supports win. They release instead of being cut or pulled. Among breakaway options, tree supports are often easier since they touch the model at fewer, narrower points. Real difficulty depends on more than the name: contact distance, interface layers, density, model shape, and whether a tool can physically reach the joint all matter. A tree branch trapped inside a narrow channel is harder than a simple line support on an open face. Practical tip: choose soluble supports for enclosed details and moving assemblies, and test tree, line, or zigzag patterns on a small model before committing to a long print.
Do You Remove Supports Before or After Curing?
Follow the resin maker. There is no universal rule for every resin. Many recommend washing and post-curing before support removal, because cured supports help the model hold its shape while you clip. Removing supports after the wash but before the final cure can make contact points easier to cut, since the resin is not fully hardened, but it raises the risk of bending or warping thin parts. Specialty resins sometimes specify their own order for washing, curing, and removal. Practical tip: check the instructions for the exact resin you used, and keep uncured prints, wash liquid, and contaminated tools away from children.
How Do You Safely Remove Supports From 3D Prints?
Let the print cool. Put safety glasses on both people. Inspect every contact point before cutting anything. Hold the model by its strongest section and clear the accessible outer supports before going near thin details. Use flush cutters to divide large structures instead of tearing them off as one piece, then grip smaller sections with pliers and twist in short movements while watching for bending, whitening, or cracking. Point sharp tools away from bodies and direct clipped ends toward a tray, because they can fly off without warning. Practical tip: when a support resists gentle movement, cut it smaller instead of pulling harder.
Why Are My 3D Print Supports So Hard to Remove?
Usually the contact gap is too small, the interface is too dense, or the pattern holds too much connected material. Heat and cramped access make it worse. Support Z-distance controls the gap between the support and the model: a smaller gap improves the underside of an overhang but creates a stronger bond that needs more force to break. Wider pattern spacing or a slightly larger gap makes removal easier, though too large a gap reduces the quality of the supported surface. Practical tip: change one slicer setting at a time and print a small overhang test so you can compare removal effort without wasting a full model.
How Do I Remove Supports From PLA?
Let the PLA model cool fully. Take the loose exterior supports off first. Use flush cutters to divide thick support walls into sections and needle-nose pliers to twist the smaller pieces away from the surface. Do not pull a large support block straight outward, because that force travels into thin features and can tear the supported face. Leave short nubs wherever cutters cannot reach the model safely, then level them with a fine file or sandpaper. PLA supports usually come away mechanically when gap, interface, and density are set sensibly. Practical tip: hold the strongest part of the model and work from open areas toward tight spaces.
Are ASA Supports Hard to Remove?
Not always. They can feel tough when the interface is dense or the contact gap is too small. Model shape and slicer settings usually matter more than the material name. Let the print and the build surface cool before you start, cut large structures into smaller pieces, and use controlled twisting rather than pulling the whole structure away at once. Thin ASA features can crack under sudden force, so grip the model by a thick section. Bed adhesion and support adhesion are separate problems that need separate setting changes. Practical tip: if ASA supports keep fusing, test a slightly larger Z-distance while checking that overhangs still print cleanly.
Sources
- U.S. Consumer Product Safety Commission, “Small Parts Ban and Choking Hazard Labeling”
- Occupational Safety and Health Administration, “1910.133: Eye and Face Protection”
- National Institute for Occupational Safety and Health, “3D Printing (Additive Manufacturing)”
- Stanford University Environmental Health & Safety, “3D Printing Safety and Health Guidance”
- MedlinePlus, U.S. National Library of Medicine, “Eye: Foreign Object In”
- University of Florida Marston Makerspace, “3D Printing for Architecture Students”






Further reading

Thanksgiving STEM Activities for Kids: Table Projects and Simple Engineering Challenges

Halloween STEM Activities for Kids: Spooky Builds That Teach Real Science

STEM Crafts for Kids: Build, Decorate and Test



