

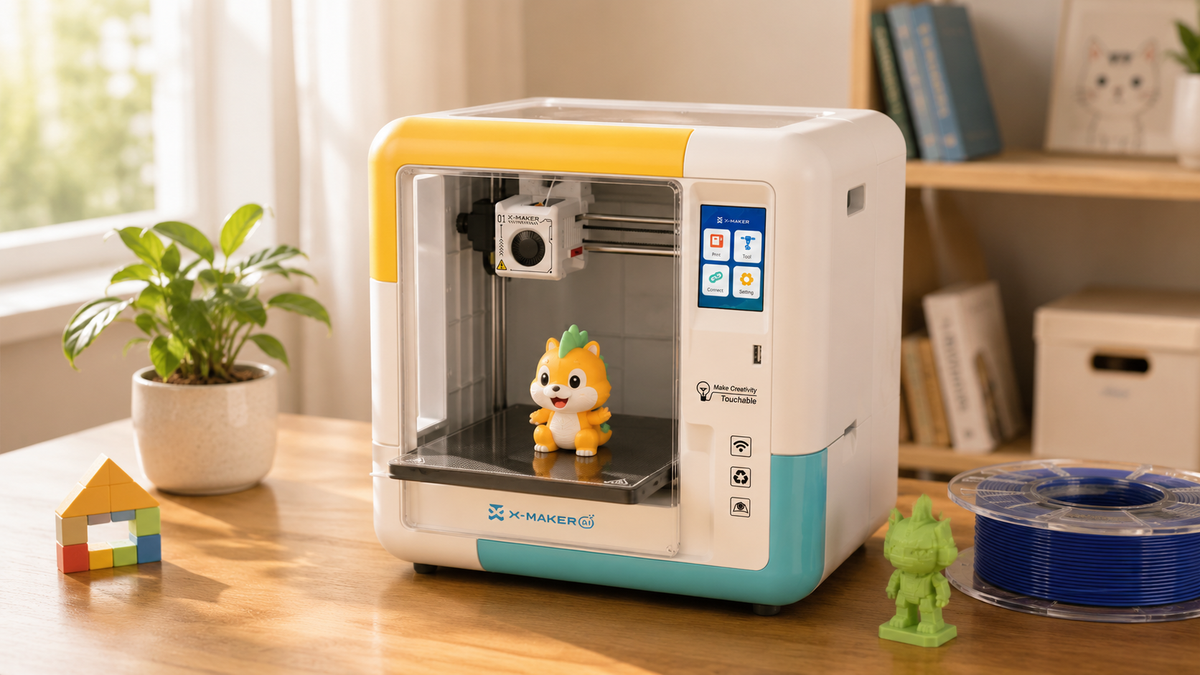
Auto-Leveling vs Manual-Leveling 3D Printers for Kids: 9 Buying Differences
First-layer consistency is one important buying factor because a poor start can spoil the job. Compare it alongside safe access, verified age and supervision guidance, software fit, project time, maintenance requirements, and replacement-parts support.
The label can sound as if the printer handles the entire setup, but implementations differ. Some systems probe a mesh and also determine nozzle height; others compensate for surface variation while leaving Z-offset or mechanical tramming to the user.
Nine differences matter. Setup time, ease for a child, first-layer reliability, repeatability, purchase cost, upkeep, learning value, hardware dependence, and long-term convenience. Here is how each one plays out at home.
Review Method and Bottom-Line Verdict
This comparison reviews the complete first-layer workflow rather than the badge on the box. The useful questions are whether the machine measures a real surface mesh, sets or verifies nozzle height, remembers the result correctly, detects a changed plate, and gives a parent a clear recovery path when the first layer is wrong.
Best overall for a first family printer: a well-integrated automatic system that documents what it measures and what still needs adult attention. The advantage is not that calibration disappears. It is that the same measurement routine can be repeated by different users without asking each person to judge paper friction at four corners.
Best for a mechanically curious learner or a tightly controlled budget: a small, rigid manual-leveling machine with accessible adjustment points and an adult willing to own setup. Manual leveling is not inherently low quality. It simply moves more of the result into the operator's hands.
The buying trap is partial automation. A printer may probe the bed but still require a manual Z-offset, manual screw adjustment, or a fresh routine after the removable plate is reseated. Treat those remaining steps as part of the product review, because they determine who can start a print without help.
Quick Pick by Family Situation
|
Situation |
Potentially better fit |
What to verify |
|
First printer with an adult supervising setup |
Auto-leveling |
Whether probing also handles nozzle height or still requires Z-offset calibration |
|
Shared by siblings or a classroom |
Auto-leveling |
Whether the routine is repeatable across users and after plate removal |
|
Used frequently |
Auto-leveling |
Probe time, saved-mesh behavior, and replacement-part availability |
|
Stable secondary machine with a tight budget |
Manual leveling |
How often the bed drifts and how clearly the manual explains adjustment |
|
Learner specifically studying mechanical calibration |
Manual leveling with adult guidance |
Readiness to judge the nozzle gap and make controlled adjustments |
|
Removable build sheets used often |
Auto-leveling may help |
Whether reseating or sheet thickness requires fresh probing or offset checks |
What Bed Leveling Actually Does on a Kids’ 3D Printer

Leveling keeps the nozzle a workable distance from the plate as it travels. Not level with the floor. Level with the printer’s own motion, which is a different idea and the reason the word trips people up. When that distance drifts across the surface, filament gets crushed in one area and floats in another.
Why the Nozzle-to-Bed Gap Matters
A mesh system can compensate for small measured height variations so more of the build surface stays within the profile’s acceptable first-layer gap. It does not change that acceptable gap or correct unrelated adhesion and mechanical faults.
Marlin bed leveling can use measurements from multiple points to build a compensation mesh for the bed surface. Additional reliable samples and appropriate interpolation can represent surface variation more closely, but only within probe repeatability and mechanical limits; more points do not compensate for an unstable sensor or frame.
Leveling Is Not the Same as Tramming
Tramming is physical. Screws, knobs, brackets, the plate itself sitting square to the motion system. Most auto-leveling measures whatever height difference is left after the plate is already close. That makes the feature automatic surface compensation more than automatic mechanical alignment.
|
Two printers can both advertise auto leveling and behave nothing alike. One probes the bed and also works out nozzle height. The other builds a mesh and still expects a person to dial in Z-offset by hand. Same badge. Different Saturday morning. |
How Auto-Leveling Works
A sensor, a probe, or the nozzle itself touches down at a series of points and records what it finds. Those readings become a map. The printer then makes small Z corrections during the first layers so the gap stays closer to constant across the plate.
What a Bed Mesh Really Is
A height map. Nothing more. The plate does not get flatter. The nozzle just follows the shape that was measured, which is why a shallow dip in the middle of a bed can be handled while four corner screws cannot reach it.
Klipper’s bed mesh documentation is blunt about the limits. Software correction approximates the shape of the bed and will not deliver perfect results, and it cannot compensate for mechanical or electrical problems. A skewed axis or an inaccurate probe feeds bad numbers into the process, and bad numbers produce a bad mesh.
Why Z-Offset Still Matters
A mesh says how the surface changes from point to point. It does not always say how far the nozzle tip sits from that surface at the start. That second number is Z-offset, and the same Klipper documentation tells users to calibrate it before running a mesh at all.
Some printers set it for you. Some do not. A flawless mesh built around a wrong absolute height still gives a bad first layer, and this is the question most product pages avoid answering.
How Manual Leveling Works
The user moves the head near an adjustment point, checks the gap, and turns a screw or wheel until it feels right. Then the next point. Then usually the first one again.
The Paper Test, Step by Step

The classic method puts a sheet of paper between nozzle and plate. Klipper’s manual leveling guide describes commanding the nozzle to each screw position at zero height, then adjusting that screw until pushing the paper back and forth produces a small amount of friction. A feeler gauge gives a more consistent thickness than paper. Both still lean on a person’s judgment. No sensor, no shortcut.
Why Manual Leveling Usually Takes More Than One Pass
Adjusting one corner tilts the others slightly. The same guide handles this by scheduling another full cycle whenever a screw needed a real turn, and it finishes only when every screw checks out without significant adjustment. There is a detail worth knowing here too. Changing bed tilt invalidates a probe calibration done on the old tilt, so mixed systems need the probe recalibrated after screws move.
Manual leveling requires repeated observation and controlled adjustment. Some learners may enjoy that mechanical feedback, while others will need an adult to complete the routine.
9 Buying Differences Parents Should Compare
Judge the whole first-layer workflow, not the label. A strong auto-leveling system removes a recurring chore and adds a sensor, wiring, firmware, and a calibration step. Manual leveling drops all of that electronic dependence and hands the recurring chore back to the family.
|
Decision Point |
Auto-Leveling |
Manual Leveling |
|
Daily start |
Measures the surface, applies or loads a mesh |
Knobs, screws, paper or gauge, and a person’s eye |
|
Small surface variation |
Compensates within a reasonable range |
Corner screws cannot remove a dip or a crown |
|
Plate swaps |
Absorbs them when probing and offset handling repeat |
A fresh gap check when sheet thickness changes |
|
Failure visibility |
Can mask mild tilt until it exceeds the range |
Forces the owner to understand the physical bed |
|
Ownership burden |
Sensor, cable, firmware, calibration path |
More recurring setup and more user judgment |
|
Who it suits |
May suit beginners or shared use when the complete routine is documented and repeatable |
May suit stable machines or supervised mechanical learning |
1. Setup Time
Automated probing time varies by machine and mesh routine; manual tramming time varies by bed design and user experience. Compare the exact manuals and, if setup time is a deciding factor, time the complete cold-start-to-validated-first-layer workflow on named models.
2. Ease of Use for a Child
Auto-leveling can reduce the bed-adjustment steps in a guided workflow. A responsible adult must still follow the exact manual for setup, material loading, supervision, ventilation, print monitoring, troubleshooting, and part removal.
3. First-Layer Reliability
A repeatable mesh can compensate for limited surface variation, while careful manual tramming can work well on a flat, stable bed. Neither method corrects every mechanical, calibration, material, or cleanliness problem.
4. Repeatability Across Users
Automation may improve consistency across several users when the probe, plate seating, Z-offset, firmware, and stored mesh behave repeatably. Manual results depend more directly on each user's judgment and technique.
5. Purchase Cost
Aftermarket probe cost and installation requirements vary widely by machine. Before treating a retrofit as the cheaper option, verify official compatibility, required electronics and firmware, installation skill, calibration procedure, warranty impact, and replacement support. Compare those costs with the total price and support terms of a printer that includes auto-leveling from the manufacturer.
6. Maintenance and Troubleshooting
Manual systems fail in visible ways. A screw drifted, a spring softened, the plate shifted. Automated systems fail in quieter ways: a stressed cable on a moving toolhead, a probe that triggers half a hair lower than it used to, a stored mesh that no longer matches the sheet on the bed. Both are fixable. Different instincts, though.
7. Learning Value
Turning a screw and observing the first layer can make mechanical cause and effect visible. Auto-leveling teaches a different lesson: a measurement and compensation system works only within its calibrated mechanical limits.
8. Sensor and Hardware Dependence
A manual printer keeps working with no probe on board. An automated one leans on accurate measurement, so a loose sensor or a damaged cable produces confident nonsense instead of an obvious fault. Check parts first. Replacement probes should exist for the exact model before you buy into a proprietary system.
9. Long-Term Convenience
Frequency is one factor in long-term convenience. Compare the complete start routine, how often the bed changes, saved-mesh behavior, probe maintenance, replacement parts, and who will diagnose an inconsistent first layer.
A Practical Review Test Before You Choose
If two printers look similar on a specification sheet, compare them with the same five-part test. Manuals and setup videos can answer most of it before purchase; a store demo or return-period evaluation can answer the rest.
1. Cold-Start-to-First-Layer Test
Start with the printer powered off and the plate installed. Count every required action until a first-layer test begins: homing, heating, probing, screw adjustment, Z-offset confirmation, plate cleaning, profile selection, and any prompt that requires an adult judgment. The better family workflow is the one that makes each step visible and recoverable, not merely the one with the shortest animation.
Also record unattended waiting time separately from hands-on work. A two-minute probe routine may be easier than one minute of careful knob adjustment because the child can wait for the machine while an adult does something else.
2. Plate-Reseat Repeatability Test
Remove the flexible plate, clean it as directed, reinstall it, and repeat the same first-layer pattern. A good system should produce a similar result when the plate is seated correctly. If one corner changes, inspect for trapped debris, a sheet that is not fully registered, or a mesh that was reused after the surface moved.
This test matters for families because removable plates are handled frequently. A leveling method that works only until the first part is removed creates more adult intervention than the feature list suggests.
3. Deliberate Error-Recovery Test
Read the documented recovery process for a plate installed incorrectly, a failed probe, and a first layer that is visibly too high or too low. The printer should explain whether to stop, reseat, recalibrate, adjust offset, or contact support. A simple error message with a model-specific help page is more useful than a sophisticated sensor that leaves the family guessing.
4. Shared-User Test
Ask whether a second child, parent, or teacher can repeat the startup routine without inheriting hidden knowledge from the first operator. Automatic probing usually scores better here, but only when the profile, stored mesh, plate choice, and offset state are clearly identified. Manual systems can also be shareable when one trained adult performs setup and students begin only after a signed-off first layer.
5. Parts-and-Support Test
Check the current parts list for the probe, cable, bed mounts, plate, and nozzle assembly. Confirm whether replacement requires calibration, firmware changes, or authorized service. Automation saves time only while the measuring system remains available and supportable.
Which Is Easier for a Child to Use?
Auto-leveling may be easier when it removes repeatable calibration steps and the remaining workflow is clearly documented. Ease still depends on nozzle-height handling, plate preparation, model preparation, material loading, error recovery, and required adult supervision.
A child using a manual machine must recognize an incorrect nozzle gap, connect it to the relevant adjustment, and make a controlled change. Some learners can do this with coaching; others will need an adult to handle the calibration. Base the decision on the child's readiness and the manufacturer's supervision guidance.
This is the case for a beginner printer that handles most leveling steps automatically. Verify what the term means on that machine: whether it probes a mesh, whether Z-offset remains manual, when it reuses saved data, and what an adult must do after a nozzle or plate change.
|
Teach the first layer anyway. Have your child watch the opening pass and describe what a good one looks like: even lines, touching neighbors, no gaps and no squashed ridges. Automation should remove the chore, not the feedback. A kid who can read a first layer can tell you when something is actually wrong. |
What Auto-Leveling Cannot Fix

Auto-leveling measures or guides compensation; it does not repair the machine. The six issues below can remain after a mesh and should be checked separately.
- A dirty plate. Oil, dust, and old adhesive kill adhesion no matter how accurately they were measured.
- Sheets that shift. If a removable plate moves after probing, the stored map describes a surface that is no longer there.
- Trapped debris. One fragment under the sheet creates a local high spot the probe reads as real bed.
- Mechanical play. Loose wheels, bearings, bed mounts, or Z components move between measuring and printing.
- Severe tilt. Software should not be asked to hide a large alignment error, and doing so burns usable correction range.
- Wrong settings. Nozzle temperature, first-layer speed, flow, and cooling still decide how the material lands.
|
Safety sits outside the leveling question. NIOSH guidance for makerspaces, schools, and libraries recommends a fully enclosed printer and attention to filament choice, and a study of printers used in educational settings found that nozzle temperature and filament type both change what a machine releases. Run PLA at the temperature the maker specifies, keep the enclosure shut, ventilate the room, and supervise early sessions. |
How to Test an "Auto Leveling" Claim Before You Buy

The phrase is not standardized. Read the manual, the setup video, and the spare-parts list rather than the feature badge, and answer these seven questions:
- What does the measuring? Nozzle contact reads at the printing point. A side-mounted probe needs a known X, Y, and Z relationship to the nozzle.
- Is nozzle height automatic, or is Z-offset a separate job for you?
- Does it build a real mesh, or just walk the nozzle to a few spots so a person can turn knobs?
- Probe before every print, or reuse a saved map? Fresh probing is slower and catches plate changes.
- Can you see the mesh? Visualization exposes a badly seated sheet or a tilt that software should not be smoothing over.
- What is the documented procedure after a nozzle change or a plate change?
- Are replacement probes and cables available for the exact printer, and would a sensor failure stop printing until the part is repaired?
|
Stronger Signal |
Weaker Signal |
|
Consistent first layers after cold starts and plate removal |
A badge reading 16-point or 49-point leveling |
|
A manual that covers tramming, mesh, Z calibration, and when to redo each |
"Fully automatic" with no sequence shown anywhere |
|
Probes and sensing parts listed for that model |
A proprietary sensor with no documentation |
|
A warning when the plate is unseated or out of range |
Silent compensation for a large mechanical error |
|
Mesh visible to the user |
No way to see what was measured |
Point count is a specification, not a standalone quality score. A smaller set of repeatable readings can be more useful than a denser but unstable mesh; assess probe repeatability, placement, calibration, firmware, and first-layer results together.
COMPARE KIDS' 3D PRINTERS BY AGE LABEL, SETUP EFFORT, PROBE OR MESH BEHAVIOR, Z-OFFSET WORKFLOW, AND HOW MUCH OF THE FIRST-LAYER CHECK A CHILD CAN DO WITH SUPERVISION.
When to Choose Each

Two short lists. Read the one that sounds like your house.
Choose auto-leveling when:
- This is the child’s first printer and you want fewer adult steps in the way.
- The machine will run weekly or more, or several people will use it.
- Build sheets come off after every print.
- You would rather spend the time on projects than on bed screws.
- You want a start routine that is documented and repeatable for users with different experience levels, with adult supervision matched to the manufacturer's guidance.
Manual leveling is still enough when:
- Budget is the deciding factor and the bed is small and rigid.
- The printer is a second machine that rarely changes.
- An adult is willing to handle setup while the child handles design.
- Mechanical learning is part of the point.
- Printing happens a few times a month, not a few times a week.
Plenty of printers use both approaches at once. You tram the plate, the probe handles what is left. That is a sensible split. It does not mean physical alignment stopped mattering.
The 30-Day Ownership Review
Week 1: Measure the Learning Curve
During the first week, record how many adult decisions happen before printing and how often the first layer must be stopped. Do not count a guided on-screen action as a problem; count moments when the manual or interface does not make the next safe action clear. This separates a genuinely beginner-friendly workflow from one that is merely automated on paper.
Weeks 2–3: Measure Drift and Recovery
Repeat the same small first-layer pattern after several normal removals and after moving the printer only if the manual permits it. The goal is not a perfect visual match. Look for a stable process: similar adhesion, no scraping, no loose lines, and a recovery routine that restores the result without random setting changes.
If a manual printer stays stable for weeks, its recurring adjustment burden may be small. If an automatic printer needs frequent offset correction, the sensor label is not delivering the expected convenience. Ownership data matters more than the word automatic.
Week 4: Review Who Can Operate What
By the end of the month, divide the workflow into child tasks and adult tasks. A child may be ready to select a file, confirm the plate is clear, watch the first layer, and report an error while an adult still handles cleaning chemicals, nozzle work, offset changes, and troubleshooting. The better purchase is the one whose remaining adult tasks fit the household's time and the manufacturer's supervision guidance.
Final review rule: choose the printer with the most repeatable documented workflow, not the greatest number of probe points. Mechanical stability, plate seating, offset handling, software behavior, spare parts, and clear support together determine whether leveling feels automatic in daily use.
Conclusion
For a first printer used by a child, a well-documented auto-leveling system may reduce a recurring setup task, especially when several people share the machine. Manual leveling remains reasonable when an adult handles setup, the bed is stable, the budget is constrained, or mechanical calibration is part of the learning goal.
Judge the feature by what it actually automates. Ask first. Whether a real mesh gets built, whether nozzle height is handled or handed to you, what happens after a plate or nozzle change, and whether a replacement probe can be bought at all. Software cannot fix a loose gantry or a dirty sheet, so a stable printer with a well-integrated system beats a high probe count on a wobbly frame.
If you want a machine with a simplified setup, verify the exact model and region on the manufacturer’s current product page and manual. Check the documented leveling workflow, enclosure and plate handling, supported materials, verified age and adult-supervision guidance, current price, warranty, return terms, and any setup steps that still require an adult.
FAQs
What does auto-leveling actually do on a 3D printer?
Auto-leveling measures the build surface at one or more points and uses the result to compensate for height variation during the first layers. The exact method differs by printer: some create a mesh, while others guide or automate only part of the setup.
Does auto-leveling mean there is no setup?
No. It reduces one calibration task but does not remove the rest of first-layer preparation.
- The plate still needs to be clean and seated correctly.
- Z-offset or nozzle height may still require calibration.
- Loose hardware, debris, temperature, flow, and cooling remain separate issues.
Is manual leveling more accurate than auto-leveling?
Either method can work well when the machine is mechanically sound and the procedure is followed. Manual leveling depends more on the user's feel and repetition; automatic systems depend on probe repeatability, mounting, firmware, and a valid calibration.
Should I run auto bed leveling before every print?
Follow the printer maker's workflow. Re-probing is useful after the build plate, nozzle, toolhead, or bed setup changes; a stable machine may be designed to reuse a stored mesh between prints.
What are signs that the bed is not level or the offset is wrong?
Look for differences across the first layer rather than a single imperfect spot.
- Lines are round and loose on one side but heavily flattened on the other.
- The nozzle scrapes in one area or prints too high in another.
- Corners detach even though the plate is clean and the material profile is appropriate.
- A fresh mesh changes sharply after reseating the removable plate.
Which leveling method is better for families or schools?
Auto-leveling is usually the more repeatable choice when several people share a printer or sessions need to start quickly. Manual leveling can still suit a stable, low-cost machine when an adult handles setup or when mechanical calibration is part of the learning goal.
Sources
- Marlin Firmware, “G29: Bed Leveling”
- Klipper, “Bed Mesh”
- Klipper, “Manual Leveling”
- NIOSH / CDC, “Approaches to Safe 3D Printing: A Guide for Makerspace Users, Schools, Libraries, and Small Businesses”
- National Library of Medicine (PMC), “Use of 3-Dimensional Printers in Educational Settings: The Need for Awareness of the Effects of Printer Temperature and Filament Type on Contaminant Releases”



Further reading

Art Gifts for Kids: Supplies, Kits and Ways to Turn Drawings Into Objects
Gift Ideas for Boys Who Love to Build, Invent and Take Things Apart

Experience Gifts for Kids: Activities, Classes and Maker Projects to Do Together


