

3D-Printed Board Game Pieces: STL Files, Inserts & Ideas
You can 3D print a missing pawn, a custom score marker, a card tray, a dice tower, a fitted box insert or an entire traditional game. The best first project is usually one flat replacement piece or one small accessory, because you can measure it, test it and finish it before committing a full spool.
This guide is intentionally about board game pieces, accessories, organizer files and STL selection. If your main goal is game rules and family play, use AOSEED's separate guide to interactive 3D-printed games for kids. Keeping the two topics separate helps readers land on the page that answers their actual question.
The times below are planning ranges, not promises. Your slicer is the source of truth because nozzle size, layer height, speed, infill, part orientation and printer profile can change the result substantially.

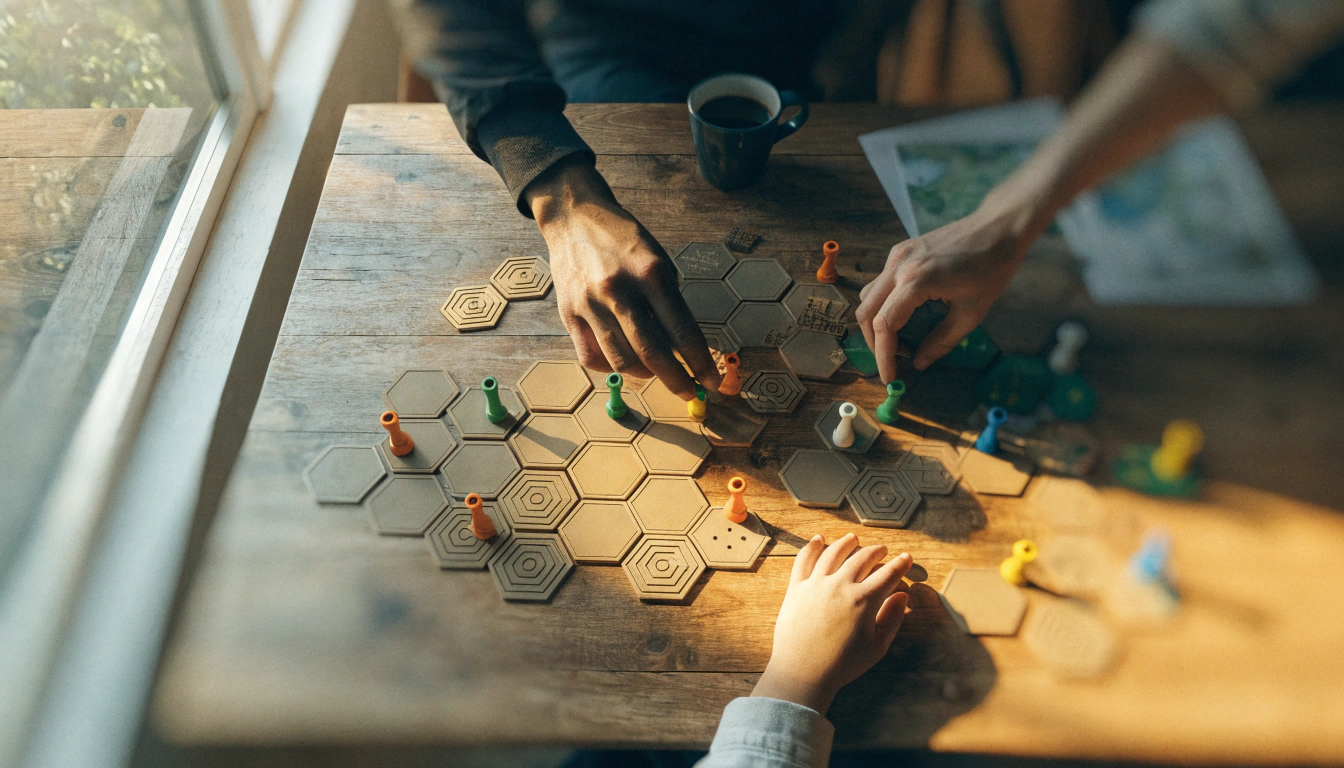
Editorial project-scale illustration. It compares generic part counts and complexity; it is not a photograph of a downloadable STL file.
Quick choice: what should you print?
|
Goal |
Best first print |
Measure first? |
Main risk |
Next action |
|
Replace a lost part |
One pawn, token or marker |
Yes |
Wrong footprint or height |
Make a one-piece size test |
|
Improve table play |
Card stand, token tray or turn marker |
Usually |
Slots too tight |
Test one slot at final settings |
|
Speed up setup |
Small organizer tray |
Yes |
Box lid lift |
Record internal box and card dimensions |
|
Build a full game |
Tic-tac-toe, checkers or peg solitaire |
Check build area |
Long batch or warped board |
Print one piece and one board section |
20 board-game parts and projects worth printing
Choose by function before searching by game name. Generic projects are easier to license, resize and reuse. The part counts and time ranges describe common FDM designs at ordinary draft or standard settings; check the actual file and slicer before starting.
|
Project |
What to print |
Parts |
Typical time |
Supports |
Level |
|
Replacement pawn |
One stable pawn with matching base |
1 |
15–45 min |
No |
Easy |
|
Blank meeple |
Wide one-piece player figure |
1–6 |
20–90 min |
No |
Easy |
|
Turn marker |
Large disc, arrow or badge |
1 |
20–60 min |
No |
Easy |
|
Resource tokens |
Simple raised icons in color groups |
10–40 |
1–4 hr |
No |
Easy |
|
Score markers |
Numbered pegs or cubes |
4–20 |
45 min–3 hr |
Usually no |
Easy |
|
Custom dice |
Large die with recessed symbols |
1–4 |
45 min–2 hr |
Usually no |
Easy |
|
Card stand |
One slotted rail or curved holder |
1–4 |
1–4 hr |
No |
Easy |
|
Card tray |
Draw and discard wells |
1–2 |
2–6 hr |
Usually no |
Easy |
|
Token tray |
Open compartments with finger scoops |
1–4 |
2–8 hr |
No |
Easy |
|
Dice tray |
Shallow tray with removable liner |
1–2 |
2–6 hr |
No |
Easy |
|
Project |
What to print |
Parts |
Typical time |
Supports |
Level |
|
Dice tower |
Tower and catch tray |
1–4 |
4–12 hr |
Design-dependent |
Medium |
|
Player dashboard |
Card and token zones |
1–4 |
3–12 hr |
Usually no |
Medium |
|
Box insert |
Trays for cards, tokens and boards |
3–12 |
8–30 hr |
Usually no |
Medium |
|
Tile rack |
Angled rail sized to tile thickness |
1–4 |
1–5 hr |
No |
Easy |
|
Modular board tile |
Repeatable squares or hexagons |
9–40 |
6–30 hr |
No |
Medium |
|
Travel tic-tac-toe |
Board, lid and 10 markers |
12 |
2–6 hr |
No |
Easy |
|
Checkers set |
24 pieces plus board or mat |
25+ |
8–24 hr |
No |
Medium |
|
Chess set |
32 pieces; optional board |
32+ |
12–40 hr |
Often |
Advanced |
|
Nine Men's Morris |
Board and 18 counters |
19 |
5–15 hr |
Usually no |
Medium |
|
Peg solitaire |
Board and 32 pegs |
33 |
5–15 hr |
Usually no |
Medium |

Editorial close-up of generic board tiles. No commercial game, official accessory or downloadable file is implied.
Six third-party STL examples with license details
|
LICENSE CHECK, AUGUST 9, 2026: File pages, prices and licenses can change. Open the creator's current page before downloading, record the access date, and save a copy of the license with the STL. AOSEED does not own or endorse these third-party files. |
|||||
|
File |
Creator |
Source |
License |
Commercial use |
Check before print |
|
crap_and_stuff |
Thingiverse |
CC BY-SA |
Yes, with attribution and ShareAlike |
1 file; creator reports no supports |
|
|
BlakeCortez |
Thingiverse |
CC BY-SA |
Yes, with attribution and ShareAlike |
2 files; test detail before batching |
|
|
Michael_O |
3D GO mirror of Thingiverse |
CC BY |
Yes, with attribution |
Support-free design; board needs a larger bed |
|
|
MrStump |
3D GO mirror of Thingiverse |
CC BY |
Yes, with attribution |
Customizer/OpenSCAD; size to your dice |
|
|
DanaDamian |
3D GO mirror of Thingiverse |
CC BY |
Yes, with attribution |
55 mm compartments; PLA, no supports |
|
|
BSDGuyShawn |
Cults |
Custom creator license |
Physical sales allowed; no digital redistribution |
165 mm board; current Cults page is paid |
A Creative Commons license describes permission for the file and licensed work. It does not automatically grant rights to a third party's logo, character, artwork or trademark that may appear in the model. If a model page does not state a license clearly, treat it as personal-use-only until the creator confirms otherwise.
Commercial game names: what you can and cannot assume
Community libraries contain inserts and replacement parts described as compatible with commercial titles. Compatibility language may help users identify the intended box or component, but it does not make the file official, licensed by the publisher or safe to sell. Do not describe a third-party file as an official free STL unless the rights holder says so.
- For personal replacement: Measure the part you own and use a generic shape when possible. Keep the file page and license with your project notes.
- For a compatibility accessory: Use factual wording such as “sized to fit” and avoid logos, copied artwork, rulebook scans and packaging graphics.
- For commercial sale: Confirm the STL license permits physical sales, meet its attribution or ShareAlike terms, and evaluate copyright and trademark rights separately.
- For an original AOSEED project: Use original names, symbols, geometry and rules documentation, then publish a clear license beside the download.
How to measure a replacement board-game piece
Do not model from memory. A piece can look correct and still jam a recessed slot, block the box lid or reveal hidden information because it is taller than the rest.
- Identify the functional surfaces. Mark the base, slot, peg, hole, stacking face and maximum height that actually affect play or storage.
- Measure twice. Use calipers if available. Take two readings on worn parts and record millimeters, not a rounded inch conversion.
- Match function before decoration. Build the base and fit surfaces first. Add a raised icon only after the plain test piece works.
- Allow for printer variation. There is no universal clearance number. Start from the designer's guidance or your printer's tolerance test, then adjust one variable.
- Print a coupon or one piece. For a slot, print only the lower 10 to 20 mm. For a peg, print one peg and one receiving hole at final settings.
- Test play and storage. Check pickup, stacking, visibility, box closure and stability on the board. Keep the successful dimensions with the file.

Editorial fit-test illustration. Print one connector, peg or short wall section before committing to a full batch.
How to choose a board-game STL file
A useful model page should answer more than “does it look good?” Use this checklist before slicing.
- License: Is the license named on the current creator page, and does it cover your personal, classroom or commercial use?
- Creator evidence: Are there real makes, print photos, comments or a version history, not only polished renders?
- Dimensions: Does the page state the assembled size and smallest critical gap, or provide an editable source file?
- Build area: Can every part fit your machine without scaling a functional joint? Scaling a whole insert can ruin card and token clearances.
- Dependencies: Are magnets, screws, elastic, cards, bearings or adhesives required? Confirm size and child access before ordering hardware.
- Orientation and supports: Does the creator show the intended print direction? Reorienting a hinge or thin peg can change strength.
- Revision fit: For an organizer, does the file match your exact game edition, expansion set and sleeved-card thickness?
Filament and settings by part type
PLA is the practical starting material for rigid tokens, trays and boards. Use PETG only when your printer supports it and the part needs repeated flex, such as a clip or latch. Always use the filament maker's profile as the starting point.
|
Part |
Layer height |
Walls |
Infill |
Support |
First test |
|
Pawn or token |
0.16–0.20 mm |
3 |
10–20% |
Avoid if possible |
One piece at final size |
|
Raised text/icon |
0.12–0.20 mm |
3 |
10–20% |
Usually no |
One label at table distance |
|
Card or tile holder |
0.20 mm |
3–4 |
15–25% |
Usually no |
One slot with real card/tile |
|
Organizer tray |
0.20–0.28 mm |
3–4 |
10–20% |
Usually no |
One corner and one divider |
|
Snap lid or clip |
0.16–0.24 mm |
4+ |
20–35% |
Design-dependent |
One latch cycle test |
|
Large board tile |
0.20–0.28 mm |
3–4 |
10–15% |
No |
One tile plus connector |
For repeated parts, keep the same filament, orientation and print profile. A mid-batch material or temperature change can alter color, surface texture and fit enough to mark pieces or prevent tiles from joining.

Editorial material comparison with generic tokens and filament. Actual finish depends on the material, printer and profile.
How to size a board game insert without lifting the lid
An insert fails when it fits the empty box but not the complete stored game. Measure the contents in the condition you actually store them, including sleeves, expansions, bagged tokens and folded boards.
- Measure the box interior. Record length, width and usable depth at several points because some boxes taper.
- Measure the tallest stored stack. Include the folded board, rulebooks, player aids and any sleeved cards.
- Leave removal space. Finger scoops and shallow ramps usually work better than tight vertical wells.
- Print one corner. Test a short wall section with the real cards or tokens before printing every tray.
- Run the lid test. Load the game, close the lid without pressure, turn the box upright and check whether parts escape their wells.
|
Measurement |
Record in mm |
Why it matters |
|
Internal box length × width × depth |
____ × ____ × ____ |
Defines the outer envelope |
|
Folded board + rulebooks |
____ high |
Often determines lid closure |
|
Sleeved card stack |
____ × ____ × ____ |
Sleeves add width and height |
|
Largest token or miniature |
____ × ____ × ____ |
Sets well depth and pickup space |
|
Allowed lid lift |
0 mm preferred |
Visible lift can damage the box in storage |
Common failures and the fastest diagnostic test
|
Problem |
Likely cause |
First check |
Fix |
|
Pieces detach mid-print |
Dirty plate or poor first layer |
Print one token and watch layer one |
Clean the approved surface; rerun leveling or first-layer setup |
|
Board corners lift |
Large cooling stress or draft |
Print one tile or corner |
Use a brim, reduce drafts or split the board |
|
Peg will not enter hole |
Clearance too small or over-extrusion |
Print one peg-hole pair |
Increase modeled gap or tune flow |
|
Insert lifts the lid |
Missing stored-height allowance |
Load all components |
Reduce tray wall height or redesign stack order |
|
Raised text is unreadable |
Features too thin for nozzle/profile |
Slice one label at final size |
Use thicker strokes, larger text or recessed symbols |
|
Thin arm or peg snaps |
Weak layer direction |
Bend one test part gently |
Reorient, thicken or choose a one-piece shape |
If a print fails before the first few layers are stable, start with Prusa's first-layer troubleshooting guide as a diagnostic framework, then use your own printer manufacturer's surface and calibration instructions. Do not change temperature, speed and bed preparation at the same time.
A realistic family workflow
For a child-led project, let the child choose the problem, compare shapes and colors, and test the finished part. An adult should select the file, confirm the license, slice it, operate the printer, follow the room ventilation plan, remove the print and inspect the result.
The AOSEED X-MAKER JOY is a fully enclosed, PLA-only FDM model with a 120 × 120 × 120 mm build volume, according to AOSEED's current product page. That size suits tokens, small trays and board tiles; large boards or organizers still need to be split. An enclosure reduces casual access to moving and hot components, but it does not replace adult supervision or suitable room ventilation.
A strong first session has one visible finish line: replace one lost pawn, make four turn markers or test one card slot. Save the 30-piece organizer for a later session after the child has seen a small print succeed.

AOSEED X-MAKER JOY product illustration with generic game pieces. The adult controls file selection, printing, removal and inspection.
Cost and when to use a service
Use the slicer's grams and time estimate instead of a generic price range. Material cost equals estimated grams multiplied by your actual cost per gram. Add supports, purge material, hardware and a failure allowance. The same file can cost very different amounts on different settings.
- Print at home when you already own a machine, need several iterations, and the parts fit the build area.
- Use a library or makerspace when you need one simple part and can meet the facility's file, material and supervision rules.
- Use a print service when the project needs a larger build area, a material your machine does not support, or a finish you do not want to tune yourself.
Public access varies by location. The American Library Association's makerspace overview explains the role of library maker programs, but you should contact the local facility for current equipment, fees and age rules.
Safety check before a printed piece reaches the table
A home-printed part is not automatically a certified commercial toy. Inspect it for the intended player and setting every time it returns to play.
- Keep loose small parts away from children under three and from anyone who mouths objects. Use larger one-piece shapes when practical.
- Reject cracks, sharp support scars and loose decorations. A thin peg that bends after one session should be redesigned, not glued back for a young child.
- Avoid accessible magnets and button batteries. Do not add them to a child-accessible game piece unless the hardware is permanently secured in a design evaluated for the use case.
- Wash hands after sanding or post-processing. Keep blades, rotary tools, adhesives and filament scraps under adult control.
- Store by count. Write the piece total on the container and count everything back after play.
Choose the next step by your actual goal
A replacement piece needs accurate measurements. A family game needs a short, finishable build. An organizer needs storage measurements. Treat those as three different search intents and three different projects.
- Lost piece: Use the six-step measurement method and print one size test before adding decoration.
- Family game: Choose an original or clearly licensed file with few parts, no loose hardware and a finish line inside one session.
- Kid-friendly printer workflow: compare build volume, supported material, enclosure, software and adult-control steps across AOSEED 3D printers for kids.

AOSEED family-printer comparison image. Confirm current build volume, supported material and software on each product page before choosing a model.
FAQs
Can you 3D print a replacement board game piece?
Yes. Measure the original piece and every slot or box area it must fit, then print one plain test piece before adding detail or batching copies.
For a personal replacement, use generic geometry when possible. If you download someone else's model, keep the creator, current license and access date with the file.
How much clearance should a replacement piece have?
There is no universal clearance that works on every printer, material and orientation. Use the model creator's tested guidance or print a tolerance coupon on your own machine.
- For a sliding fit, test several small gaps and choose the smallest one that moves freely after cooling.
- For a peg and hole, print one mating pair at final orientation and settings.
- For a box insert, test the real sleeved cards, tokens and lid before printing the remaining trays.
Where can you find board-game STL files safely?
Use the original creator page on a recognized model library or marketplace, then verify the license, dimensions, comments, real makes and required hardware. A search result or mirror alone is not enough for a final license decision.
Save the page URL and access date with the download. If no license is visible, do not assume the word “free” includes permission to remix, redistribute or sell prints.
Can you sell 3D-printed board game accessories?
Only when the file license permits commercial physical prints and the accessory does not infringe other rights. A paid STL does not automatically include commercial permission.
Check attribution, ShareAlike and NonCommercial terms, then evaluate brand names, logos, characters and copied artwork separately under applicable copyright and trademark law. Ask the rights holder when the answer is unclear.
What filament is best for board game pieces?
PLA is the easiest starting choice for rigid pawns, tokens, trays and board tiles. It holds detail well and is supported by many beginner FDM printers.
Use PETG only when the printer supports it and the part needs flex or heat resistance, such as a clip or latch. PETG can string more, so test one functional part before a batch.
How do you stop a board game insert from lifting the lid?
Measure the complete stored stack, not only the empty box. Include the folded board, rulebooks, sleeved cards, player aids and every expansion that will remain inside.
- If the lid already lifts, identify the tallest tray or component stack before changing the whole design.
- Reduce wall height or reorder layers, then print one short corner or divider section as a fit test.
- Run a loaded tilt test only after the lid closes without pressure, so pieces do not migrate between wells.
Sources
- AOSEED, “X-MAKER JOY 3D Printer”
- Prusa Research, “First Layer Issues”
- Prusa Research, “Regular Printer Maintenance”
- Creative Commons, “Frequently Asked Questions”
- U.S. Copyright Office, “Copyright in General”
- United States Patent and Trademark Office, “Trademark Basics”
- U.S. Consumer Product Safety Commission, “Small Parts and Choking Hazard Labeling FAQs”
- U.S. Consumer Product Safety Commission, “Button Cell and Coin Battery Safety”
- American Library Association, “Makerspaces”
- Thingiverse, “Tic-tac-toe set” by crap_and_stuff, accessed August 9, 2026
- 3D GO/Thingiverse, “Parametric Dice Tower & Tablet Stand” by MrStump, accessed August 9, 2026
- Cults, “Nine Men's Morris” by BSDGuyShawn, accessed August 9, 2026



Further reading

Thanksgiving STEM Activities for Kids: Table Projects and Simple Engineering Challenges

Halloween STEM Activities for Kids: Spooky Builds That Teach Real Science

STEM Crafts for Kids: Build, Decorate and Test



