

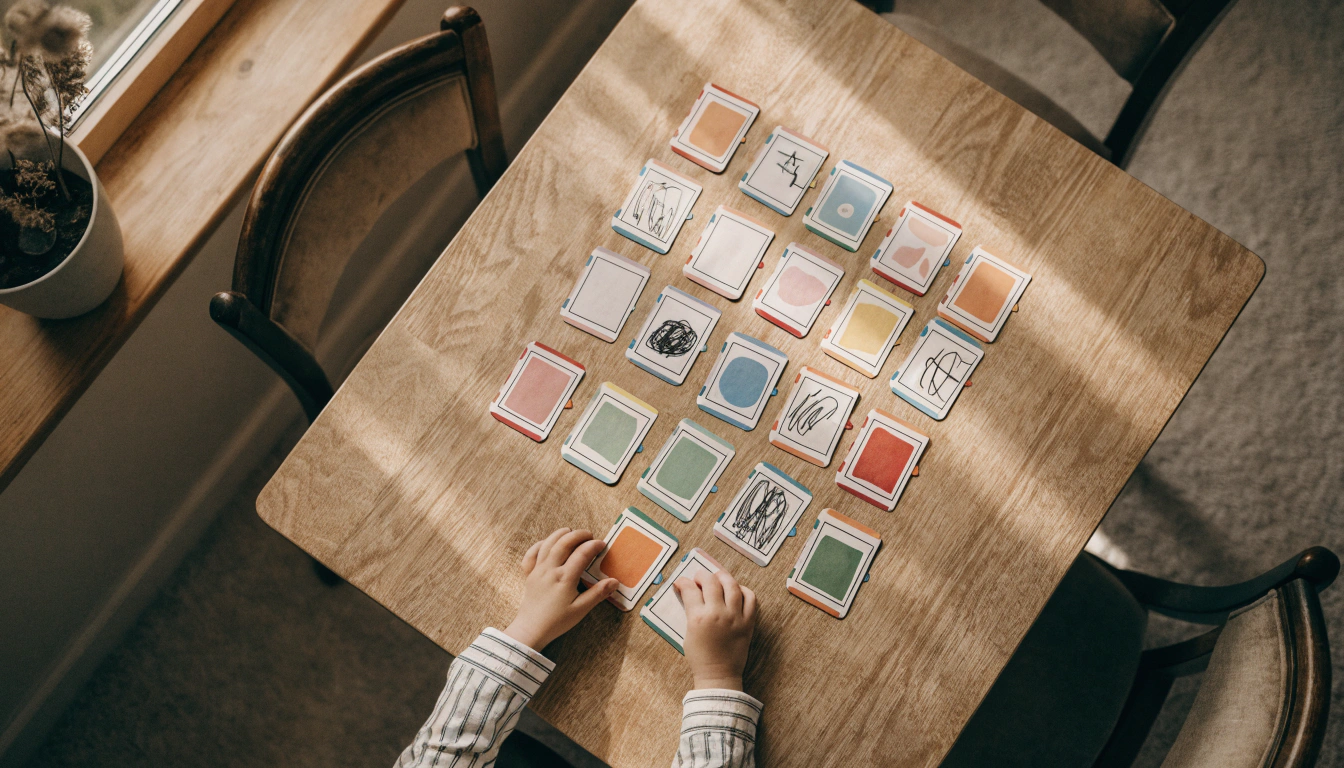
How to Make a Memory Matching Game: 6-Step Printable Guide
To make a memory matching game, print two identical copies of each image at 100% scale, mount them on opaque backing, cut every card to one template, and shuffle the finished pairs face down. A six-pair cardstock set usually takes 35 to 60 minutes after the artwork is ready.
This guide works with any free printable you have permission to use. Check that the file contains two copies of every image, prints without watermarks across the cards, and allows the personal or classroom use you intend. If one page contains only one copy of each design, print that page twice in the same batch.
Start with six clearly different pairs, run one test page for size and show-through, then complete the six-step build. The tables below help you choose card size, pair count and durability without making the first round unnecessarily hard.
Quick pick: choose your card build
Choose the build for how often the cards will be handled. Time estimates begin after the printable file is downloaded and checked.
|
Build Level |
Materials |
Time |
Best For |
|
Fast paper set |
Printer paper + opaque cardstock backing |
25–35 min |
One supervised afternoon or a travel test |
|
Durable family set |
Matte cardstock + backing + corner punch |
45–75 min |
Repeat family play and gifts |
|
Reusable group set |
Cardstock + thin chipboard + lamination |
90–120 min |
Classrooms, libraries and shared family sets |
Memory matching game rules at a glance
What counts as a matching pair?
A memory matching game uses pairs of identical pictures placed face down. Players remember where images appeared and try to uncover the two copies in one turn.
It is also called Memory, Concentration, Pairs or Pelmanism. For a first set, use identical images; related pairs such as an uppercase letter and its lowercase form add difficulty later.
How do you play?
Shuffle the cards and arrange them face down in an even grid. On each turn, a player flips two cards without changing their positions.
If the cards match, the player keeps the pair. If they do not, everyone looks briefly and the cards return face down in the same locations. Continue until the board is clear; either compare pair totals or play cooperatively without scoring.
Who can play?
Use this homemade card set for children age 3+ under adult supervision. For a first game, choose large paper or cardstock cards, three or four pairs and familiar images. Keep every loose card and all 3D tokens away from children under three and from anyone who mouths objects.
Older children and mixed-age families can use more pairs or related-image matches. For older adults, choose large, high-contrast cards and treat the game as social recreation, not a memory treatment or diagnostic test.
Choose a free printable that will make a fair game

Check licensing, pair completeness, box size and visual contrast before printing the full set.
Check four things before downloading
A usable printable needs clear permission, complete pairs, consistent card boxes and artwork that remains distinct at the final printed size. Avoid files that place a different border, number or crop on one card in a pair, because that creates a tell.
For children age 3–5, prefer bold animals, foods, vehicles or shapes on uncluttered backgrounds. For older players, space, geography, vocabulary or related-image pairs can add challenge. Print only the pairs that fit the player's current comfort level.
Choose a theme with clear visual differences
Photos work well for family members, pets, foods and real-world objects. Illustrations usually offer cleaner silhouettes and less background clutter.
Use one visual style across the set. A single photograph among cartoons or one image with a darker border becomes identifiable before the card is turned over.
Use one card size and one identical back
Cards about 2.5 to 3 inches (64 to 76 mm) wide are easy for many children to flip and still fit a dining-table grid. Use the larger end for younger players or anyone who benefits from easier handling. A travel set can be smaller only if every player can grip and identify it safely.
|
FAIR-PLAY CHECKEvery card needs the same height, width, backing, thickness and corner treatment. Inspect the backs under bright light before the first game; one marked card can reveal its pair. |
How many pairs should a memory game have?

Begin with a small, orderly grid and add two pairs only after play remains comfortable.
Start with the smallest grid that still requires remembering a few locations. Pair count should follow experience, attention and table space, not age alone.
|
Player |
Starting Pairs |
Grid |
Notes |
|
First game, age 3–4 |
3–4 pairs |
2 × 3 or 2 × 4 |
Large 3-inch cards, familiar images, active adult supervision |
|
Early elementary, 5–7 |
6–8 pairs |
3 × 4 or 4 × 4 |
Distinct images; offer cooperative play first |
|
Elementary, 8–10 |
8–12 pairs |
4 × 4 or 4 × 6 |
Add two pairs only after several comfortable rounds |
|
Older kids and teens |
12–18 pairs |
4 × 6 to 6 × 6 |
Try related pairs or a timed round |
|
Mixed ages |
6–10 pairs |
3 × 4 to 4 × 5 |
Use the easier grid |
|
Adults and older adults |
6–12 pairs |
3 × 4 to 4 × 6 |
Large, high-contrast cards; social recreation, not treatment |
Add two pairs after the player completes several rounds without frustration. Increasing from six to eight pairs is easier to evaluate than doubling the board.
Other ways to adjust difficulty
- Use related images only after identical pairs feel easy
- Add a gentle turn timer for experienced players
- Change the layout from rows to a wider grid or circle
- Try related pairs, such as state and capital or equation and answer
- Rotate turns after every match so younger players get predictable turns
Change one variable per round and notice the result. If you change pair count, artwork similarity and turn rules together, you will not know which adjustment made the game harder.
Materials and tools

Use one paper, one backing and one finishing method across the entire set.
Use the lightest build that will survive the setting. Gather the complete list before printing so every page receives the same backing and finish.
- A properly licensed printable PDF with two identical copies of each image
- A color or black-and-white printer with enough ink or toner for one batch
- Matte paper or printer-compatible cardstock
- Opaque cardstock or thin chipboard for backing if the artwork shows through
- A glue stick or photo-safe adhesive that dries flat
- Scissors or a paper trimmer for adult use
- Optional laminating pouches, laminator and corner punch for a reusable set
Paper and opaque backing
Regular printer paper bends and often reveals dark shapes from the front. Mount the full sheet on one consistent piece of colored cardstock or thin cereal-box board, then test it face down under the brightest light used during play.
Matte cardstock between roughly 176 and 216 gsm is a practical starting range if the printer supports it. Check the printer manual before loading heavy stock. Glossy photo paper can reflect overhead light and show fingerprints, so test it before building the full set.
Cutting, adhesive and lamination
Scissors work for a small set. A guarded paper trimmer gives straighter edges and more consistent card dimensions, but an adult should operate and store it.
A glue stick or thin, even coat of paper-safe adhesive is less likely to wrinkle light paper than pooled liquid glue. For classroom or library use, laminate the full sheet before cutting for speed, or laminate individual cards with a sealed border for better moisture protection.
|
ADULT JOBS AND SMALL-PARTS SAFETYAn adult operates cutting tools, laminators and 3D printers; removes scraps; and checks every card or token before play. Keep all loose cards and 3D tokens away from children under three and from anyone who mouths objects. Stop using pieces that crack, peel, develop sharp edges or lose attached parts. |
Print settings that keep every pair fair

A face-down light test reveals image ghosting before time is spent cutting every card.
A scaling mismatch creates marked pairs. If one page prints at 100% and another at 95%, the card boxes and artwork will not align, even after trimming.
Select Actual Size or 100%
Choose Actual Size or 100% in the print dialog. Use Fit to Page only if the printable creator specifically requires it, and then use the same setting for every copy.
Print all copies in one batch with the same printer, paper tray, quality setting and orientation. Avoid duplex printing unless the back grid has been tested for front-to-back alignment; many home printers shift the reverse pass.
Run one test page before the full set
Print one sheet on the actual paper. Hold it face down under normal and bright room light. If any outline or color shows through, add one opaque backing layer before cutting.
Cut one test card and compare it with the printable's stated dimensions. Check that a player can grip it, flip it without sliding nearby cards and distinguish the image at arm's length.
How to make matching cards in six steps
- Confirm that every image has one identical partner.
- Mount the full printed sheet on opaque backing.
- Laminate only if the set needs repeated or shared use.
- Cut every card to one measured master size.
- Finish all corners in the same way.
- Inspect, count and test the complete set before play.

Adult-operated cutting produces consistent cards; the child can sort, pair, count and test the set.
Step 1: Confirm two copies of every image
Some printables include both cards in each pair; others provide one page that must be printed twice. Lay the sheets side by side and account for every image before applying backing or lamination.
Step 2: Back the full sheet
Mount the uncut sheet on one piece of opaque cardstock or thin chipboard. Backing before cutting keeps the layers square and makes every card easier to trim to the same template.
Apply adhesive in a thin, even layer to the edges and corners. Press the sheet flat under a clean board or heavy book until it is fully dry; wet adhesive can curl paper and create marked cards.
Step 3: Laminate only if the set needs it
For fast classroom production, laminate the full backed sheet before cutting. The exposed cut edge is less protected, but all cards can still match if you cut consistently.
For sealed edges, cut the backed cards first, space them inside the pouch and leave the same clear border around every card. Run a test card before sealing the whole set.
Step 4: Cut to one master size
Make long horizontal cuts first, then cut the strips into individual cards. Do not force a thick stack through the trimmer; shifting layers create different widths.
Keep the first accurate card as the master. Compare every card against it, including the four corners and the distance from artwork to edge.
Step 5: Finish every corner the same way
A corner punch removes sharp paper points and can reduce edge peeling. Use one punch setting and process every card in the same orientation.
If there is no corner punch, leave all corners square. Hand-cut curves vary enough to reveal individual cards from the back.
Step 6: Inspect, count and test the set
Lay all cards face up and arrange them into pairs. Check for missing partners, ink streaks, uneven crops, lifted laminate and sharp or delaminating edges.
Turn every card face down and inspect the backs under bright light. Repair or replace any card with a different stain, crease, edge, thickness or color. Count the cards, record the total on the container and run one practice round before giving the set to a child.
Set up and play
Shuffle and lay out the grid
Shuffle without bending the cards: slide them face down across the table, gather them, and repeat.
Lay the cards in straight rows with a finger-width gap. A 4 × 6 grid holds 12 pairs; smaller grids reduce visual and memory load. Organized positions make the location challenge fair.
Choose turn order and one rule set
Choose a first player and move clockwise, or play cooperatively and count how many turns the group needs to clear the board.
The active player turns one card, leaves it visible, then turns a second. Everyone sees both images. Do not move cards to new positions after they are revealed.
Handle matches, misses and scoring
A matching pair leaves the grid. Under the standard competitive rule, that player takes another turn; in an alternating version, play passes after every turn.
Choose the extra-turn rule before the first flip and keep it for the entire game. For a cooperative round, skip scores and try to clear the board in fewer turns next time.
|
COOPERATIVE OPTIONSkip scoring for a first game. Clear the board together, count the number of turns and try again with the same grid. This keeps the rules predictable while the player learns where cards stay. |
Build your own printable memory game
A ready-made printable is the fastest route. A custom set is useful when the player needs family photos, classroom vocabulary or an interest-specific theme.
Pick one theme and define the pairs
Choose one focused theme: family members, pets, local places, vocabulary, animals or vehicles. List the pair labels first so you do not accidentally duplicate one image and omit another.
Lay out a measured card grid
Open a US Letter page in Canva, Google Slides or another layout tool. Add equal 2.5- to 3-inch card boxes with visible cutting space, then center one image inside each box.
Duplicate each finished card without resizing, rotating or recropping the copy. Six unique images should produce 12 cards; ten images should produce 20. Count before export.
Use identical backs
Use one solid color or one simple repeated pattern on every back. Avoid directional patterns unless every card will be cut and placed in the same orientation.
Home-printer duplex alignment often drifts. For a first set, mount single-sided fronts on one sheet of colored backing instead of relying on a perfectly aligned printed back.
Export a PDF and test one copy
Export a print-quality PDF so the card boxes keep their dimensions. Check that no artwork crosses a cut line, print one copy at 100% and measure the master card before printing the duplicate sheet.
Turn printed cards into large 3D matching tokens

Large, one-piece tokens beside an enclosed AOSEED printer; the adult controls printing and inspection.
Paper cards are the simplest and safest starting point. Move to printed tokens only when the child can keep loose game pieces out of the mouth and an adult can control the printer and inspect every part.
For children ages 4–12, an adult can use the AOSEED X-MAKER JOY to make large, flat, one-piece matching tokens. Aim for tokens about 50 mm across, use raised symbols instead of tiny attachments, avoid magnets, and keep the entire set away from children under three. The adult handles setup, ventilation, removal and edge inspection.
Matching play gives children a chance to practice holding locations in mind, waiting for a turn and shifting attention. Harvard's Brain-Building Through Play resource describes games as opportunities to practice executive-function skills; it does not establish that one homemade game treats attention or memory problems. For more physical play ideas, see 8 print-and-play games for kids ages 4–12.
|
MAKE IT, PLAY IT, THEN MAKE THE NEXTStart with six pairs. Change one variable for version two: pair count, symbol, token size or theme. The adult manages printing and safety checks. |

AOSEED X-MAKER JOY, design tablet and large paired tokens. Preserve the real product geometry in publication artwork.
Common problems and quick fixes
Players can see through the cards
Thin paper can reveal dark outlines and saturated colors. Mount the full sheet on one opaque backing color and repeat the bright-light test before cutting.
Use the same paper, backing and finish for replacements. If one card changes thickness or shade, replace both cards in that pair.
Cards printed at different sizes
This usually comes from mixed print scaling, orientation or printer settings. Measure against the master card and reprint both cards in any visibly mismatched pair.
Cards curl or bend
Heavy ink coverage, wet adhesive and one-sided lamination can curl a sheet. Use a thin adhesive layer, press the sheet flat until dry and let laminated sheets cool on a level surface.
Laminated edges peel
A peeling edge usually means the cut entered the seal or the laminator was not ready. Remove the card from play, make a new pair with equal borders, and do not leave loose film where a child can pull it free.
A card goes missing
Count the cards after every game and write the total on the container. Put a small pair code on the image side only, such as A1 and A1, so a single orphan is easy to identify without marking the backs.
Keep the source PDF and one editable master in a named folder. Reprint both cards in the affected pair so their age, paper and finish remain matched.
Store the set so every pair stays usable
- Use a rigid envelope for paper or cardstock sets and write the theme and card count on the front
- Choose a resealable bag with enough room that corners do not fold
- Use a small lidded box for laminated cards or 3D tokens; separate themes with labeled dividers
- Record the theme, pair count, difficulty and any small-parts warning on the container
- Keep a four- to eight-pair travel set in a pouch sized for a restaurant table or airplane tray
Count the full set back into its container immediately after play. Store 3D tokens and any laminated scraps where children under three cannot reach them.
When to use a ready-made printable or create your own
Use a ready-made printable when
- You need a playable set today
- The player is learning the rules and benefits from tested, distinct artwork
- You want to test the pair count before investing in a custom design
- A classroom or library needs several clearly labeled themes
Create a custom set when
- You want family photos, pets or familiar places
- The set needs specific vocabulary, letter pairs or math relationships
- You are making a personal gift and have permission to use every image
- The player is ready to move from identical images to related pairs
Conclusion
For a reliable first set, choose six clearly different pairs, print two copies in one batch at 100%, add opaque backing, cut every card to a master size and inspect the backs under bright light. Record the final card count before play.
Increase difficulty by two pairs at a time and save the source PDF so a lost card does not end the game. If you move from cards to 3D tokens, use large one-piece designs and keep printer operation, ventilation, cleanup and inspection adult-controlled.
The goal is not the largest grid; it is a fair set that gets played, repaired and redesigned. Families who want to turn more drawings and game ideas into physical projects can compare AOSEED 3D printers for kids by age range and workflow.
FAQs
What age can children start playing a memory matching game?
Many children can try a very small, supervised matching game at about age three, but readiness matters more than a birthday. Begin with three or four pairs and stop if the child mouths, bends or throws the cards.
A child is more likely to be ready when they can:
- Turn over two cards and leave the rest in place.
- Wait through one short turn with adult support.
- Return a non-match face down instead of removing it.
- Handle the pieces without mouthing or tearing them.
How many pairs should a child's first memory game have?
Start with three to six pairs. After the player completes several rounds without losing the card positions or becoming frustrated, add two pairs at a time.
Adjust the grid for:
- Experience: a first-time player needs fewer pairs than a child who already knows the rules.
- Image similarity: related pairs are harder than two identical pictures.
- Table space: every card needs a fixed position with room for hands to turn it.
- Play style: cooperative play can support a slightly larger grid because players share clues.
Should you laminate memory cards before or after cutting?
Both methods can work, but they produce different edges. Choose one method for the whole set so no card can be identified by touch.
- Fast home set — mount an entire printed sheet on opaque backing, laminate the sheet and then cut the cards. This is quicker, but the cut edges are not sealed.
- High-use set — cut the backed cards first, space them evenly inside an intact pouch, laminate and trim each card with the same clear sealed border. This takes longer but better protects the edges.
- Any method — never cut an empty thermal pouch before it enters the laminator, and follow the machine and pouch instructions for temperature, carrier sheets and minimum border size.
Why can players see through printable memory cards?
Show-through happens when the printed artwork remains visible through thin or light-colored material. It can also appear only under a bright lamp or beside a window, so a normal desk check may miss it.
Common causes include:
- Thin printer paper or pale cardstock.
- Dark, saturated artwork on one card but not its partner.
- Different adhesive coverage, backing shades or paper grain.
- Strong light behind the face-down cards.
Fix the set in this order:
- Place one test card face down under the brightest light used during play.
- Mount the full printed sheet on one sheet of opaque backing before cutting.
- Use the same paper, adhesive coverage, lamination and corner treatment for every card.
- If one card still looks or feels different, replace both cards in that pair.
Is a homemade memory matching game safe for young children?
It can be suitable for an age-appropriate child under active adult supervision, but a homemade set is not a certified commercial toy. Keep every loose card, token and scrap away from children under three and from anyone who mouths objects.
Use the set only when:
- An adult handles cutting tools, laminators and printer setup.
- All cards are large enough for the intended player and have smooth, secure edges.
- Peeling laminate, cracked tokens, sharp corners and loose decorations are removed immediately.
- An adult counts the pieces before and after play and stores the complete set out of reach.
Can you 3D print memory-game tokens instead of paper cards?
Yes, for an age-appropriate child under active adult supervision. Paper cards remain the simpler first set, while 3D tokens are useful when a child benefits from larger pieces or a tactile format.
- Use large, flat, one-piece tokens about 50 mm across.
- Avoid magnets, snap-on decorations and other detachable parts.
- An adult operates the printer, follows ventilation guidance, removes the cooled print and inspects every edge before play.
- Stop using any token that cracks, warps, develops a sharp edge or loses a component.
For an enclosed, child-focused workflow, review the AOSEED X-MAKER JOY with an adult responsible for printer operation and final-part inspection.
Sources
- American Academy of Pediatrics — The Power of Play: How Fun and Games Help Children Thrive
- Center on the Developing Child at Harvard University — Brain-Building Through Play
- U.S. Consumer Product Safety Commission — Small Parts and Choking Hazard Labeling FAQs
- U.S. Consumer Product Safety Commission — Toys
- National Institute on Aging — Cognitive Health and Older Adults
- Pagat — Pelmanism Card Game Rules
- 3M Scotch — Laminating FAQs





Further reading

Thanksgiving STEM Activities for Kids: Table Projects and Simple Engineering Challenges

Halloween STEM Activities for Kids: Spooky Builds That Teach Real Science

STEM Crafts for Kids: Build, Decorate and Test



