

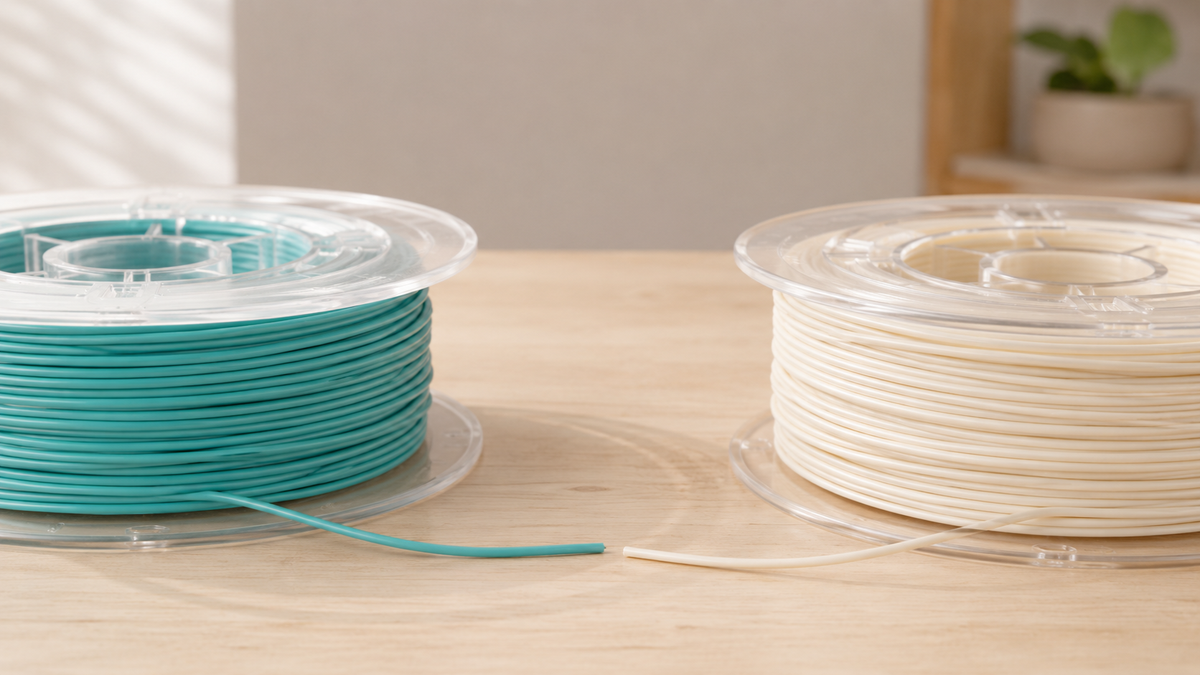
Can You Mix Filament Brands in One 3D Printer? 8 Compatibility Checks
Yes. Two brands of the same material will run in the same printer, and swapping between them from one print to the next is close to routine. The logo on the spool is not the check that decides it.
Diameter decides it. So does the base polymer, the temperature range each spool asks for, the additives hiding behind a familiar material name, what your printer is actually rated for, how wet the filament is, and whether the profile still matches. Combining two brands inside a single print is the harder version of the question, because the two materials have to bond at the layer where they meet.
Eight checks follow. Run them against the two physical spools in front of you rather than against the product page.
Review Method and Compatibility Verdict
This review treats each spool as a material profile, not just a brand name. Two boxes marked PLA can differ in additives, pigment, diameter consistency, moisture condition, recommended temperature, maximum volumetric flow, surface finish, and strength between layers. The printer can often use both, but the same settings may not give the same result.
Best low-risk use: switch brands between separate prints, select or create the correct profile, purge the previous color, and validate the first layer. Higher-risk use: place two brands inside one load-bearing part or an automatic multi-material job without testing their transition, flow behavior, and unloading characteristics.
Compatibility verdict: brands are usually interchangeable only at the system level, not automatically at the settings level. Match diameter and base polymer first; then verify printer limits, temperature overlap, abrasiveness, moisture, spool fit, flow, and interface strength.
Quick Answer By Scenario
|
What You Want To Do |
Verdict |
Check This First |
|
Brand A for one print, Brand B for the next, same material |
Usually fine |
Diameter, then the two temperature ranges |
|
Two PLA brands in one decorative print |
Usually fine |
Temperature overlap, then a small swatch |
|
Two PLA brands in one load-bearing part |
Test first |
Layer adhesion across the change layer |
|
Standard PLA together with PLA+ |
Test first |
The PLA+ maker’s own recommended range |
|
PLA with PETG in one structural part |
Avoid |
Bond strength at the interface |
|
1.75 mm spool in a 2.85 mm machine, or the reverse |
No |
Your printer’s required diameter |
|
Plain PLA with a carbon-fibre-filled PLA |
Check hardware |
Whether the nozzle is wear-resistant |
|
Any brand, on a spool that is wet or snapping |
Fix the spool first |
Dry or replace it before judging the brand |
Can You Mix Filament Brands in the Same 3D Printer?
Most open-material FDM printers will feed filament from several manufacturers, as long as the spool matches what the machine needs. A printer that takes 1.75 mm PLA does not require that PLA to carry the printer maker’s name. That is the normal case.
Trouble starts when two spools look identical on the label and behave differently in the melt zone. One carries extra modifiers. One wants more heat. One arrived damp.
Using Different Brands Between Separate Prints
The easy case. Nothing has to bond to anything. Load the new spool. Pick settings that suit it, purge the old colour out of the nozzle, and run a small test if the brand is unfamiliar to you.
Expect visible differences anyway. Gloss shifts. Stringing changes. A white from one maker reads warmer than a white from another, and dimensional accuracy can drift a few hundredths of a millimetre. None of that means the new brand is incompatible. It means it needs its own profile.
Using Different Brands Inside One Print
Two brands can share a single object through a manual filament change, an automatic material system, a second extruder, or a mixing hotend. That adds one requirement. The materials have to hold together where they touch, which the separate-prints case never asked of them.
Two standard PLAs are the gentlest pairing you can attempt. Even there, different additives and different preferred temperatures affect how firmly the new layer welds to the one below. For a decorative colour change, a small weakness rarely matters. For a bracket, a hook, or a hinge, it does.
Same Material Family vs Different Material Types
Mixing brands and mixing materials are two different jobs. Two brands of PLA share a polymer category. PLA and PETG are separate plastics with separate printing behaviour and no guarantee of a strong bond between them. Chemistry differs.
The same logic runs down the list. PETG with PETG is simpler than PETG with ABS. Two TPUs are easier to compare than a TPU next to a rigid PLA, though hardness still varies enough to matter.
Match the base material first. Brand comes second.
The 8 Compatibility Checks Before You Load A New Spool

Each check takes seconds and rules out one class of failure. Order matters. Work through them in order, because a diameter mismatch cannot be fixed by a temperature change and there is no point tuning flow on a spool that is soaking wet.
Check 1: Match The Filament Diameter
Two sizes dominate. 1.75 mm and 2.85 mm, and they are not interchangeable in a machine built for one of them. The extruder gears, the guide tube, the hotend path, and every flow calculation in the slicer assume a specific width.
Look in the printer manual, on the manufacturer specifications, on the spool already loaded, or in the filament settings of your slicer. It is printed plainly. A spool that is too wide will not enter the feed path correctly. One that is too narrow feeds unevenly and may not be gripped the way the drive expects. No workaround exists.
Before buying a spool, confirm the printer's required diameter in its manual or official specifications. A printer designed for 1.75 mm filament must use 1.75 mm filament.
|
WHERE PARENTS TRIP UP A child can load filament without help on most enclosed machines. Buying it is the adult’s job. Write the required diameter on a sticky note and put it on the printer, because a 2.85 mm bargain spool is a wasted order rather than a fixable setting. |
Check 2: Keep The Base Material The Same
Two brands of one polymer are far easier to pair than two polymers. Matching the material gives you a realistic chance of finding shared temperatures, shared cooling, and a bond that holds. It is a safer starting point, not a guarantee.
If a printer is specified for PLA only, keep compatibility tests within PLA. If it supports more than one material family, use the manufacturer and filament supplier guidance for temperature, ventilation, and hardware rather than treating those materials as interchangeable.
One polymer, one profile. For a first year of printing, staying inside a single material family is the least frustrating choice available.
Check 3: Compare Printing Temperature Ranges

Read both labels. The recommended nozzle range sits on each one. Not all PLA prints at a single temperature, and brand A often prefers the cool end of the normal window while brand B does its best work near the top of it.
If the two ranges overlap, start your test inside the shared band. A narrow overlap is worth knowing about before you commit to a two-hour print. Bed temperature matters too. It controls first-layer adhesion, warping, and how easily the finished part releases.
Do not simply split the difference when neither manufacturer recommends the midpoint. Pushing a filament above the temperature its maker specifies changes what comes off the nozzle: a study of 3D printers in educational settings measured different particle and chemical emissions from the same filaments when the nozzle ran hotter than recommended. That is a reason to stay inside a published range rather than invent one.
|
WHEN THE GAP IS TOO WIDE A large temperature gap is a stop sign, not a challenge. One filament will under-extrude at the setting the other needs, and the second will string or sag at the hotter setting. A multi-tool printer can assign each hotend its own temperature. A single nozzle cannot, so use each spool in its own print instead. |
Check 4: Read The Formula, Not Just The Material Name
A material name describes the polymer family. It does not list everything in the spool. Pigments, plasticizers, mineral fillers, fibres, and flow modifiers all change how the plastic moves through the nozzle and how the deposited line cools and welds.
Same name, different plastic. That is why two products labelled PLA can want different settings.
- PLA+ is a product label, not a standard recipe. One maker tunes it for toughness, another for speed.
- Silk PLA gets its shine from formulation changes, and it flows differently from ordinary PLA.
- Matte blends hide layer lines by a different mechanism and can behave differently again.
- High-speed formulas are built for higher flow rates. A standard spool from another brand may not keep up at the same speed.
- Filled materials carry carbon fibre, glass fibre, wood particles, metal powder, or glow compounds. Some are abrasive.
This is not a gap in your knowledge. It is a gap in the field. NIST is still developing measurement standards for polymer additive manufacturing, including the characterisation of raw feedstock, which is precisely why a shared name on two labels is not a promise of shared behaviour.
Treat an unfamiliar formula as a new material until a test says otherwise. Test, then trust.
Check 5: Confirm Your Printer Supports Both Spools
A filament can fit the extruder and still need hardware the machine does not have. Fit is not support. Check the maximum hotend temperature, the bed requirement, the nozzle material, the extruder type, and whether the material wants an enclosure.
Respect the rating. A hotend should never be pushed past its rated limit to accommodate a spool. Abrasive filled filament wears ordinary brass faster and may call for a hardened nozzle. Very flexible material prefers a short, supported feed path, which is why a direct drive extruder handles it more predictably than a long Bowden tube. Materials that shrink hard as they cool benefit from a stable enclosed chamber.
Ventilation belongs on this list too. NIOSH reports that filament printing can release ultrafine particles and volatile organic compounds, with the mix depending on the printer and filament combination, and that hot surfaces cause burns. Their pre-print hazard checklist starts with reading the safety data sheet for the material you are about to load, which is a reasonable habit before running any unfamiliar brand around children.
|
THE PARENT’S PART The child can choose the model, start the print, and pull the finished part off a magnetic plate. The adult buys the spool, confirms it matches the machine, and keeps the room ventilated. That split holds for every brand on the shelf. |
|
BEFORE YOU BUY A SPOOL, CHECK WHAT THE MACHINE IS RATED FOR. AOSEED PUBLISHES DIAMETER, MATERIAL SUPPORT AND BUILD VOLUME FOR EVERY MODEL IN ITS RANGE OF KID-FRIENDLY 3D PRINTERS BUILT AROUND ONE TESTED MATERIAL, SO A PARENT CAN MATCH A SPOOL TO A PRINTER IN ABOUT THIRTY SECONDS INSTEAD OF READING A FORUM THREAD. |
Check 6: Compare Flow, Then Recalibrate
Two spools can share a diameter and a polymer and still push different amounts of plastic. Flow is the variable. Pigment load, additives, manufacturing tolerance, and melt behaviour all move it.
A spool should hold close to its stated diameter along its whole length. Quality control varies between products and between batches, so measuring a few points with a caliper is worth doing when a spool behaves oddly. Walls that come out slightly overfilled or underfilled with settings tuned for another brand point at flow, not at the printer.
Retraction shifts too. A value that leaves clean travel moves with one brand can leave wisps with another, and temperature, moisture, viscosity, and additives all feed into that. One variable per test. Otherwise you will not know which change fixed it.
Print a temperature tower when the brand is new to you or the published range is wide. Then save the result under a name that identifies the spool rather than the colour.
Check 7: Check Moisture, Storage And Age

A bad print is not always a brand problem. Storage matters more. Humidity, heat, sunlight, and an open bag will change how filament behaves long before it reaches the nozzle.
The effect is measurable. Testing across several PLA grades found that the most moisture-sensitive grade lost about 20 percent of its tensile strength and gained about 50 percent in melt flow index after conditioning at raised humidity. A separate study across six common filament polymers ranked water uptake with nylon highest, then PETG, with PLA and ABS lower and TPU and PEEK lower still.
So a damp spool can make a perfectly compatible brand look unreliable. Popping sounds, rough extrusion, bubbles, extra stringing, and weak layers are the usual signs. Dry it first. Filament that snaps in the feed path is a separate failure and normally a replacement rather than a repair.
- Age alone proves nothing. A sealed five-year-old spool can beat an open six-month-old one.
- Dry to the material maker’s published procedure, not to a temperature you guessed.
- Seal open spools with desiccant, and write the date opened on the side.
- Dry both spools before you compare two brands, or the comparison means nothing.
Check 8: Test Layer Adhesion Before A Long Print

Extrusion is not adhesion. The transition layer is the part that matters, and a small test costs a few grams of filament instead of several hours.
Print a simple tower, bar, or block that switches from brand A to brand B partway up. Use the layer height, nozzle temperature, cooling, and speed you plan to use for the real object, because copying the real conditions is the point. Then look closely at the change layer for gaps, weak extrusion, colour contamination, or a surface shift.
A clean-looking transition still is not proof. Bend or pull the cooled sample so the force crosses the change line. If it separates exactly there, that pairing is not suitable for a part under load, however good each spool is on its own.
Test the seam. Two strong filaments can still make a weak interface.
The eight checks at a glance:
|
# |
Check |
Fails Look Like |
Fix Or Rule |
|
1 |
Diameter |
Will not feed, or wildly wrong extrusion volume |
Match the printer’s required size. No workaround exists. |
|
2 |
Base material |
Weak boundary between regions, conflicting settings |
Stay in one polymer family unless the design needs otherwise. |
|
3 |
Temperature range |
Under-extrusion or stringing at a compromise setting |
Test inside the shared band. Never invent a midpoint. |
|
4 |
Formula and additives |
Rough surface, poor bonding, changed dimensions |
Treat modified and filled formulas as new materials. |
|
5 |
Printer hardware |
Clogs, nozzle wear, warping, unreachable temperatures |
Build the setup around the more demanding spool. |
|
6 |
Flow and calibration |
Overfilled or underfilled walls, new stringing |
One profile per brand. Change one variable at a time. |
|
7 |
Moisture and age |
Popping, bubbles, weak layers, brittle strand |
Dry or replace before you blame the brand. |
|
8 |
Layer adhesion |
Sample splits at the change layer |
Test across the transition before any long or loaded print. |
The 30-Minute Compatibility Review
1. Record the Two Spool Profiles
Write down brand, exact product line, material family, color, diameter, recommended nozzle and bed ranges, drying guidance, and any filled, silk, matte, foaming, high-speed, or flexible formulation. A photograph of both labels prevents the test result from being separated from the products it describes.
2. Inspect the Feed Path Before Heating
Confirm that the spool turns freely, fits the holder or material system, and reaches the inlet without scraping a flange or bending sharply. Check whether the new material is approved for the nozzle, gears, tubing, temperature range, enclosure, and ventilation setup. Stop here if a filled or abrasive filament needs hardware the printer does not have.
3. Purge at a Compatible Transition Temperature
Unload and load by the printer maker's procedure. Use a temperature that is within the outgoing material's safe unloading guidance and the incoming material's loading guidance; if those ranges do not overlap, follow the model-specific transition instructions rather than improvising. Continue purging until color and extrusion are steady, then inspect for popping, bubbles, roughness, or excessive force.
4. Print a Small Profile Check
Begin with a first-layer patch and a simple thin-wall or small cube. Review adhesion, line width, corners, top surface, stringing, and any under-extruded gaps. If the slicer supports separate custom filament profiles, save the tested result under the exact brand, product, and color instead of overwriting a generic material preset.
5. Test the Transition if Both Brands Share One Part
Print a small coupon that changes from the first spool to the second in the same orientation and layer sequence planned for the real part. After cooling, bend or pull the coupon in the direction that stresses the transition. A decorative color change may only need a visual check; a functional part needs a realistic mechanical test and should not rely on an unverified interface.
6. Repeat Only the Calibration the Evidence Calls For
Change one variable at a time. If dimensions and surfaces are consistent but corners bulge during speed changes, review pressure or flow-dynamics calibration. If walls are uniformly over- or under-extruded, review flow rate. If the first layer alone is poor, inspect plate preparation, nozzle distance, bed temperature, and profile selection before recalibrating everything.
How To Switch Between Filament Brands Safely
Treat a brand change as loading a new material profile. Six steps. Most take under a minute.
- Check the new spool before you unload the working one. Material type, diameter, recommended temperatures, spool condition, and any special nozzle requirement.
- Heat the hotend to a temperature suited to removing the old filament. Never pull hard against cold plastic sitting in the melt zone.
- Follow the printer’s own unload routine if it publishes one.
- Purge until the strand runs clean and steady in the new colour. Dark to pale needs noticeably more flushing than a shade change.
- Select or create the right slicer profile. Generic material presets are a starting point, not a finished setting.
- Run a small calibration model at the layer height and speed you plan to use, then move to the full job.
A quick-swap nozzle system shortens step two considerably, which matters when the person doing the swap is nine.
Mixing Brands In Multi-Colour And Multi-Material Setups
Automatic material systems make it easy to keep several colours or brands loaded. They do not remove the checks above. They add two more.
Spool geometry comes first. A filament can be exactly the right diameter while its spool is too wide, too large, too small, oddly shaped, or too rough at the hub to run in a feeder designed around specific dimensions. A spool that drags or slips causes failed load and unload cycles rather than bad prints. An external holder or an adapter solves some of it.
Profiles are the second. Some systems recognise branded spools and offer generic profiles for everything else. A generic PLA preset will get you printing. It will not necessarily get you clean walls, so build a custom profile once the spool proves itself, and never pick a profile by colour.
One point worth being precise about: most of these systems switch filament rather than mix it. They unload one strand and feed the next through the same nozzle, which means old material has to clear before the new colour reads true. Any visible blending comes from how separate lines and layers are arranged, not from two pigments combining into a new plastic. Genuine melt-zone mixing needs different hardware, and even then the output can come out striped rather than uniform.
When To Mix Brands And When To Keep Them Separate
Mix them when:
- Both spools are the same base polymer and the same diameter.
- Their recommended nozzle ranges overlap by a usable margin.
- The part is decorative, a colour change, a label, a sign, or a toy that will not carry load.
- You have printed a transition sample and it survived being bent across the change layer.
- Both spools are dry and neither is brittle.
Keep them in separate parts when:
- The diameters differ. This one is absolute.
- The polymers are unrelated and the interface has not been tested.
- The shared temperature window is narrow or nonexistent on a single-nozzle machine.
- One spool is abrasive and your nozzle is not rated for it.
- Either spool is popping, stringing badly, or snapping in the feed path.
- The finished part carries weight, takes stress, or fails expensively.
Separate parts, one project. Screws, pins, and snap fits join them afterwards without asking one nozzle to weld two materials that would rather not.
Diagnosing a Bad Brand Switch
The New Filament Clicks, Pops, or Looks Foamy
Likely causes include moisture, contamination left in the hotend, or a temperature outside the product's range. Follow the filament maker's drying guidance and repeat a short purge. Do not raise temperature indefinitely to hide wet material.
The Extruder Skips or the Spool Jerks
Separate feed resistance from melt resistance. Turn the spool by hand, inspect holder alignment, check tubing and guides, and confirm the spool is not rubbing. If the path is free, verify nozzle temperature, clog symptoms, material diameter, and whether the formulation is compatible with the machine's hotend and speed.
The Same File Suddenly Strings
Different pigments and additives can change melt behavior even within one material family. Confirm dryness, then review the new product's temperature range, retraction guidance, travel behavior, and cooling. Save the result in a spool-specific profile rather than changing a trusted profile for every other brand.
The Color Change Is Weak at the Interface
A clean-looking transition can still have poor layer bonding. Increase purge only if contamination is visible; purge volume does not guarantee adhesion. Recheck base polymer, temperature overlap, cooling, and the coupon test. If the joint fails under realistic load, keep the brands in separate parts or redesign the connection mechanically.
The Automatic Material System Refuses or Misfeeds the Spool
Check physical spool dimensions, edge condition, hub or adapter requirements, material-system approval, and the filament's flexibility or brittleness. A spool that works from an external holder may still be unsuitable for an enclosed feeder with tighter bends and repeated loading cycles.
Review takeaway: troubleshoot from the spool toward the nozzle, change one variable at a time, and keep the original profile available. That turns brand switching into a controlled comparison instead of a series of guesses.
Conclusion

Mixing brands is usually workable when diameter, base polymer, temperature range, printer hardware, dryness, and transition-layer adhesion all agree.
For separate prints, switch profiles and purge the old filament. For two brands in one part, print and bend a small transition sample before relying on the result.
FAQs
Does It Matter What Brand of Filament I Use?
Yes, but brand is only one variable. Diameter, material family, temperature range, moisture, additives, and printer limits usually decide compatibility first. Brand can still change colour, gloss, flow, stringing, and dimensional accuracy, so save a separate slicer profile when a new spool behaves differently.
Can PLA and PLA+ Be Mixed Together?
Sometimes. PLA+ is not one standard recipe, so the label alone cannot confirm compatibility.
- If the recommended temperature ranges overlap, print a small transition sample before a long job.
- If the PLA+ is silk, matte, high-speed, or filled, treat it as a different formulation and retest flow and adhesion.
- If the finished part carries load, keep the materials separate unless the transition sample survives a realistic stress test.
Is It Okay to Mix PETG and PLA?
Usually not in one load-bearing part. PLA and PETG use different print settings and may bond poorly at their interface. They can still be used as separate pieces in one project, or in a decorative test print, if each material is printed with an appropriate profile and the connection is mechanical rather than dependent on layer bonding.
Can 3D Printers Use Any Brand of Filament?
No. Many open-material FDM printers accept several brands, but only when the spool and material meet the machine's requirements.
- The filament diameter matches the printer.
- The material is within the printer's stated temperature and hardware limits.
- The spool fits the holder or material system and feeds without excess drag.
- Abrasive or filled filament is used only with compatible nozzle hardware.
Is PLA+ Stronger Than PETG?
Not as a general rule. PLA+ formulations vary by manufacturer, while strength also depends on print orientation, temperature, layer bonding, part geometry, and the type of load. Compare published test data for the exact products, then test a printed sample in the direction the real part will be stressed.
Is Five-Year-Old PLA Filament Still Usable?
Possibly. If the spool was sealed, remains flexible, and extrudes without popping or bubbles, it may still print well. If it snaps easily, strings heavily, or produces a rough foamy strand, follow the filament maker's drying guidance or replace it before comparing brands.
Sources
- Centers for Disease Control and Prevention, National Institute for Occupational Safety and Health, “Safe 3D Printing is for Everyone, Everywhere”
- Centers for Disease Control and Prevention, National Institute for Occupational Safety and Health, “3D Printing with Filaments: Health and Safety Questions to Ask”
- National Institutes of Health, PubMed Central, “Use of 3-Dimensional Printers in Educational Settings: The Need for Awareness of the Effects of Printer Temperature and Filament Type on Contaminant Releases”
- National Institutes of Health, PubMed Central, “Characterizing the Effect of Filament Moisture on Tensile Properties and Morphology of Fused Deposition Modeled Polylactic Acid/Polybutylene Succinate Parts”
- National Institutes of Health, PubMed Central, “Experimental Study on the Effect of Humidity on the Mechanical Properties of 3D-Printed Mechanical Metamaterials”
- National Institute of Standards and Technology, “Additive Manufacturing of Polymers”



Further reading

Art Gifts for Kids: Supplies, Kits and Ways to Turn Drawings Into Objects
Gift Ideas for Boys Who Love to Build, Invent and Take Things Apart

Experience Gifts for Kids: Activities, Classes and Maker Projects to Do Together


