

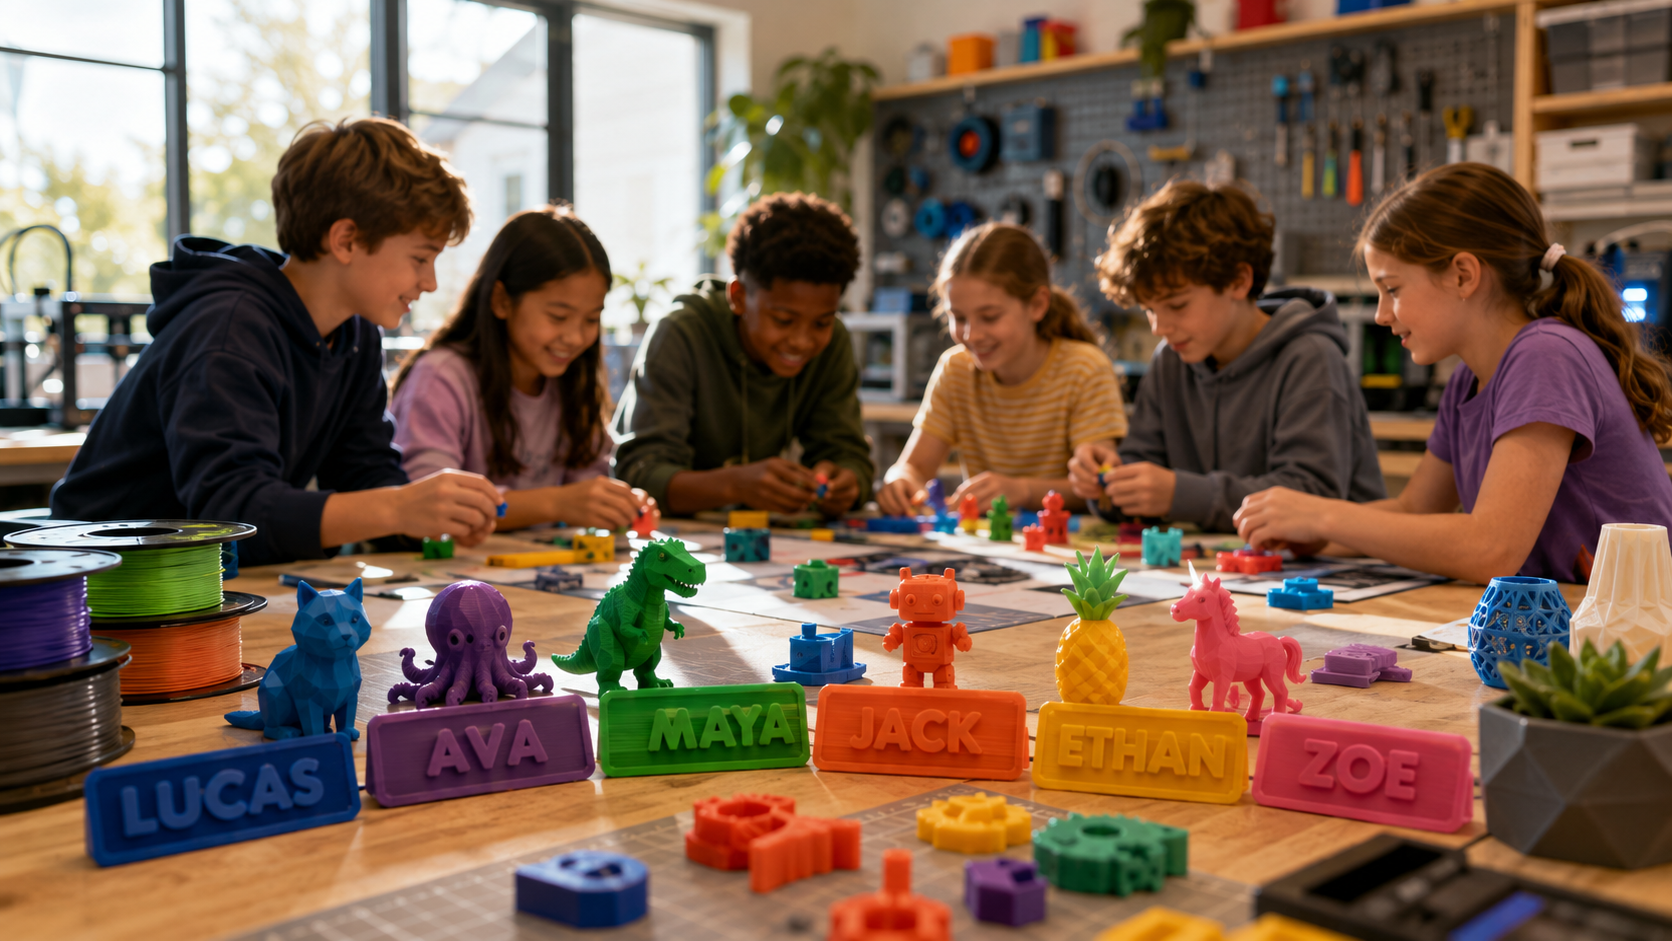
How to Start a Kids' 3D Printing Club: An 8-Week Plan
To start a kids' 3D printing club, choose one age band, meet for 60 to 90 minutes each week, keep projects small enough for your printer capacity, and make one adult responsible for every file that enters the print queue. The eight-week curriculum below moves from safety and basic controls to an original prototype, revision, printing, and a final showcase.
The printer is only one part of the system. You also need a supervised workspace, account and privacy decisions, file-naming rules, a reprint buffer, and a fallback activity for the weeks when a machine or model does not cooperate. This guide includes those operational details so the club can run with one dependable FDM printer rather than stall behind a growing queue.
|
FREE 8-WEEK CLUB PACK — PUBLISHING ACTION REQUIREDConvert the toolkit in this article into an editable PDF/Google Drive pack: weekly lesson plan, budget calculator, parent permission and safety sheet, file-naming template, print-queue sheet, revision rubric, and showcase invitation. Connect this first-screen callout to a working AOSEED email form before publication; do not publish a dead download button. |
Kids' 3D Printing Club Setup: Quick Decisions
|
Decision |
Ages 8–11 |
Ages 11–15 |
Why it matters |
|
Meeting length |
60 minutes |
75–90 minutes |
Younger beginners need shorter instructions; older students can use the extension |
|
Recommended group |
8–12 students with two adults |
10–15 students with two adults |
Cap enrollment by adult supervision and computers, not room capacity |
|
Printers |
1 for small queued projects |
1–2 depending on project time |
The slicer's total minutes determine capacity |
|
Design access |
Pairs or one device each |
One device each when possible |
A printer can run later; design access is the in-session bottleneck |
|
First project |
Name badge or desk token |
Measured organizer or useful classroom tool |
A small win teaches export and queue rules |
|
Print-time cap |
20–35 minutes per student |
30–60 minutes per student |
Short jobs leave room for failures and reprints |
|
Material |
One verified PLA workflow |
One verified PLA workflow first |
Reduce variables during the first eight weeks |

Editorial planning image for the eight-week sequence. Use the downloadable club calendar for exact dates and assignments; the pictured notebook is not a completed AOSEED curriculum record.
Before Enrollment: Define the Club You Can Actually Run
Choose one audience and one measurable finish line
Ages alone do not predict design skill, but a narrow age band makes instructions easier. Group true beginners together even if they span several grades. Pair students only when both have defined roles and switch the driver every 8 to 10 minutes.
By Week 8, every member should be able to name the hot and moving areas, navigate the design workspace, create or substantially modify a small model, export it using the club's naming rule, respond to one piece of feedback, and explain one change between the first and final version.
Use enrollment limits based on supervision and devices
For a first club, 8 to 12 students with a lead adult and a helper is easier to manage than a larger room with one adult. If only one adult is available, reduce enrollment or recruit a trained volunteer. The adult-to-student ratio should follow school, library, camp, insurance, and safeguarding policy; this guide is not a substitute for those requirements.
Decide what happens to files and student data
Test the exact design workflow before enrollment. Autodesk states that an educator can create a Tinkercad Classroom and let students join with a class code; students may also join with a teacher-provided nickname rather than registering a personal account. Its current Children's Privacy Statement explains Safe Mode, moderator responsibility, consent and school obligations. Your district or organization still decides whether the service is approved and what identifiers may be used.
- Use minimum data: Prefer class nicknames or assigned IDs when policy allows. Do not put full names in public galleries, filenames or image captions.
- Control sharing: Keep designs private by default. An adult approves any public post, photo or downloadable file.
- Plan deletion and access: Document who owns the class, when students lose access, and how work is exported at the end of the term.
Equipment, Budget, and a Safer Printing Area
Buy for supervision and maintenance, not just speed
A club printer should fit the room's safety plan, work with the approved computers or tablets, and have replacement parts and support that the organization can obtain. Useful features include an enclosed build area or guard, clear controls, repeatable bed setup, a removable build surface, and a documented workflow for the filament you will use.

AOSEED product-led image retained from the original design. Confirm the exact current model, specifications and classroom workflow on the linked product page before publication; this image is not a classroom test.
AOSEED's current X-MAKER page describes an enclosed printer aimed at older children and education workflows. Schools should still compare build volume, software approval, network rules, parts availability, material policy, print capacity and facility controls before purchase. To compare the current lineup without freezing a sale price into the article, use the AOSEED 3D printer collection.
Build a real first-term budget
|
Budget line |
Include |
Planning note |
|
Printer and delivery |
Machine, taxes, shipping, protection plan if approved |
Use a current quote, not an article price |
|
Consumables |
PLA, spare build surface, labels, storage bags |
Choose a few distinct colors rather than many partial spools |
|
Maintenance |
Approved nozzles, cleaning tools, replacement parts |
Confirm who may perform maintenance |
|
Student tools |
Rulers, calipers, paper, pencils, bins |
Sharp tools remain adult-controlled |
|
Safety and facilities |
Signage, floor boundary, ventilation or filtration review |
Follow facility and manufacturer requirements |
|
Failure allowance |
Extra filament and schedule time |
Reserve at least one queue slot per week for testing or reprints |
Treat PLA as a process that still needs controls
Do not write 'PLA is non-toxic, so ventilation is unnecessary.' The NIOSH safe 3D printing guide explains that emissions vary with printer, material, color, temperature and room conditions. It prioritizes substitution and engineering controls, including appropriate room ventilation, ventilated enclosures or local exhaust when needed. EPA also studies particles and gases from additive manufacturing in its 3D printing research.

Editorial workspace image showing a marked operator zone. It is a layout concept, not proof that the pictured room meets ventilation, fire, electrical or accessibility requirements.
- Ask facilities staff to review: Room ventilation, printer placement, electrical load, fire detection, clearance, after-hours operation and access control.
- Keep students outside the operating boundary: Only the trained adult starts jobs, pauses failures, opens the enclosure, removes parts and performs maintenance until local policy permits otherwise.
- Control post-processing: Adults manage scrapers, flush cutters, sanding, adhesives, paint and any solvent. Use the product safety data and local rules.
|
SAFETY BASELINEA closed door reduces access to hot and moving parts, but it does not replace ventilation review, adult supervision, maintenance controls or the manufacturer's operating instructions. |
Plan Capacity Before You Promise Every Student a Print
Use slicer minutes, not the number of printers on a purchasing sheet. Add the estimated minutes for every student job, then add a failure and reprint buffer. Compare that total with the supervised hours when the printer may legally and safely run between meetings.
|
Example |
Student jobs |
Estimated job time |
Base queue |
With 25% buffer |
|
Small club |
8 |
25 min |
200 min |
250 min |
|
Typical club |
12 |
30 min |
360 min |
450 min |
|
Larger beginner club |
15 |
40 min |
600 min |
750 min |
If the buffered queue is longer than your supervised print window, reduce model dimensions, lower the number of required prints, batch compatible objects on one plate only after testing, use cardboard or paper prototypes for early rounds, or add another supervised printer. Do not solve a capacity problem by running an unattended machine against local policy.
For a practical rotation model, see how to run one printer across small STEM groups. Adapt the group count to your room, equipment and safeguarding rules.
Create Club Rules and a Print-Queue System

Editorial example of a paper queue and labeled project bags. Recreate the queue with your actual student IDs, dates, slicer estimates and status fields; do not use the image as a live record.
Post rules students can repeat
- Boundary rule: Students observe from the marked line unless a trained adult invites them closer for a supervised demonstration.
- Design rule: No realistic weapons, copied keys, hateful or sexual content, unsafe objects, or files that violate school policy or another creator's rights.
- Size and time rule: Every file must fit the weekly dimensional cap and print-time cap before it can be submitted.
- Submission rule: One approved folder or form only. Never accept the same job through email, chat and a shared drive.
- Revision rule: A returned file goes back to the student with one reason and one next action; adults do not quietly redesign it.
Use one filename and seven queue fields
|
FILE-NAMING TEMPLATEClassID_StudentID_Project_Version.ext — example: CLUBA_014_BagTag_v03.stl. Avoid 'final-final2.stl' and avoid full student names in public or shared locations. |
||
|
Queue field |
What to record |
Why |
|
Student ID |
Class-safe identifier |
Returns the part without exposing a full name |
|
Filename/version |
Exact submitted file |
Stops an old version from printing |
|
Dimensions |
X × Y × Z in mm |
Makes size compliance visible |
|
Slicer estimate |
Minutes and material estimate |
Plans capacity |
|
Status |
Review / revise / queued / printing / done |
Shows the next action |
|
Due date |
Target meeting or showcase |
Lets the adult prioritize transparently |
|
Notes |
Return reason or observed failure |
Turns reprints into documented learning |
The adult queue owner checks that the model is on the build plate, within the size cap, structurally connected, suitable for the approved material, and reasonable in layer preview. Students should see the return reason, revise their own file, and submit a new version.
The Complete 8-Week 3D Printing Club Curriculum
Each week below has a 60-minute core. For a 90-minute club, use the extension and allow more peer feedback; do not simply make the final model larger. Printing usually happens between meetings so members spend club time designing, measuring, testing and explaining.
|
Week |
Focus |
Student evidence |
Queued output |
|
1 |
Safety, parts and workflow |
Safety check + labeled process map |
Teacher calibration or demo part |
|
2 |
Workspace controls |
Six-operation practice model |
No required print |
|
3 |
First small win |
Named badge/token v1 |
One capped beginner print |
|
4 |
Project brief and measurements |
Dimensioned sketch + success test |
Optional test coupon |
|
5 |
Build and submit |
Prototype v1 + file checklist |
Test piece or highest-risk feature |
|
6 |
Review and revise |
Before/after v2 + change log |
Approved final file |
|
7 |
Slice, print and diagnose |
Layer-preview check + result log |
Final or corrected print |
|
8 |
Showcase and reflect |
Model, sketch and one-minute explanation |
Only essential recovery prints |
Week 1: Safety, Printer Parts, and the Club Workflow
Learning goal: Students can identify the main FDM parts, state the boundary rule, and describe how a file moves from design to adult review, queue, printing and collection.
60-minute core agenda
- 0–10 min: Show the closed printer, spool, extruder path, nozzle area, build plate, screen and emergency/pause procedure without opening hot equipment.
- 10–25 min: Walk the boundary and sort scenario cards into student action or adult-only action.
- 25–45 min: Pass around fully cooled successful and failed prints; students name one visible clue and one question.
- 45–60 min: Draw the five-step club workflow and complete a verbal safety check. Extension: small groups create one rule poster using approved wording.
- 90-minute extension: Add 30 minutes for the extension described in the final agenda step, partner feedback, and clean file submission.
- Teacher preparation: Run one known-good calibration print before the session; mark the operator zone; prepare cooled sample parts, failure examples and rule cards; confirm emergency and pickup procedures.
- Student deliverable: A labeled workflow map plus a completed safety check. Keep the check as a club record if local policy allows.
- Safety checkpoint: No student touches the machine, filament path, build plate or tools. The adult demonstrates that parts may remain hot after a job ends.
- Between-session print queue: Only the teacher's calibration or demo file enters the queue. Record actual print time and result to establish a baseline.
- If the print fails: If the demo fails, use the failed part as evidence. Ask students to identify the first visible symptom and show the corrected setup at the next meeting.
Week 2: Tinkercad Camera and Six Essential Controls
Learning goal: Students can orbit, pan, zoom, move, resize, duplicate and combine basic shapes without the adult taking the mouse.
60-minute core agenda
- 0–10 min: Join the approved classroom and confirm nickname, privacy and saving rules.
- 10–25 min: Practice camera control before design: orbit, pan, zoom and return to home view.
- 25–45 min: Complete six micro-challenges using move, resize, rotate, duplicate, align, group and hole tools.
- 45–60 min: Exchange screens with a partner and reproduce one measurement exactly. Extension: add a simple constraint, such as fitting through a 30 mm square.
- 90-minute extension: Add 30 minutes for the extension described in the final agenda step, partner feedback, and clean file submission.
- Teacher preparation: Create the teacher-managed classroom; test every device and browser; prepare a one-page control card; open a backup offline slide or printed shape activity.
- Student deliverable: A saved practice model containing at least three aligned shapes and one hole, named with the club's version rule.
- Safety checkpoint: No printing is required. Reinforce that saving a design does not authorize it for the printer queue.
- Between-session print queue: No student job is required this week. The teacher may queue one anonymous example only if capacity permits.
- If the print fails: If the platform or internet fails, students use graph paper to draw front, side and top views and annotate the six digital operations they would use.

Editorial image of students sharing a design device. It illustrates driver/navigator roles and is not evidence of a specific AOSEED or Tinkercad session.
Week 3: First Printable Project — A Name Badge or Desk Token
Learning goal: Students create a small, legible object that sits flat, stays within the dimensional cap and survives basic handling.
60-minute core agenda
- 0–10 min: Compare one strong and one weak badge; identify thin loops, floating text and oversize dimensions.
- 10–20 min: Sketch the object with maximum width, height and thickness.
- 20–45 min: Build the base, add text or symbol, group the parts and inspect the underside.
- 45–60 min: Peer-check the file against the project rubric and export version 1. Extension: revise after a slicer-time estimate rather than adding decoration.
- 90-minute extension: Add 30 minutes for the extension described in the final agenda step, partner feedback, and clean file submission.
- Teacher preparation: Set a size and print-time cap based on the capacity calculation; prepare a strong example, a weak example and the submission form.
- Student deliverable: A dimensioned sketch, editable source and correctly named export that passes the student checklist.
- Safety checkpoint: The adult alone opens exported files in the slicer and decides whether they enter the queue.
- Between-session print queue: Queue only approved files. Record dimensions, estimated minutes and status; return noncompliant files with one specific revision request.
- If the print fails: If a badge fails, preserve the failure. The student circles the likely design or process issue, revises to v2 and waits for the next available reprint slot.
Week 4: Plan an Original Project With a User and a Success Test
Learning goal: Students define who the object is for, what it must do, its size limit and one test that can prove whether it works.
60-minute core agenda
- 0–10 min: Choose one bounded prompt: hold, organize, mark, connect or display something in the classroom.
- 10–25 min: Interview a partner as the user and write three needs without designing the solution for them.
- 25–45 min: Draw front, side and top views with at least three measurements.
- 45–60 min: Complete the project brief and capacity check. Extension: build a paper/cardboard volume model and revise the dimensions.
- 90-minute extension: Add 30 minutes for the extension described in the final agenda step, partner feedback, and clean file submission.
- Teacher preparation: Prepare prompt cards, rulers, calipers, graph paper and a completed sample brief. Define banned categories and material limits in advance.
- Student deliverable: A one-page brief with user, purpose, constraints, measured sketch and pass/fail success test.
- Safety checkpoint: Students measure cooled objects and classroom items only. Adult approval is required before any use of small loose parts, sharp edges or wearable items.
- Between-session print queue: Queue only a small clearance coupon or high-risk feature when it will change the design decision; do not queue full projects yet.
- If the print fails: If a test coupon fails, revise the risky feature or switch to a nonmoving design that still serves the same user and purpose.
Week 5: Build Prototype Version 1
Learning goal: Students translate the measured brief into a complete digital model and submit a deliberate first prototype rather than an oversized final object.
60-minute core agenda
- 0–10 min: Break the project into primary form, functional feature and optional detail.
- 10–40 min: Build from largest shape to smallest; check alignment and measurements after each major step.
- 40–50 min: Inspect from top, side and underside for floating or disconnected parts.
- 50–60 min: Save editable source and submit v1 with a checklist. Extension: make a duplicate and test one alternative dimension.
- 90-minute extension: Add 30 minutes for the extension described in the final agenda step, partner feedback, and clean file submission.
- Teacher preparation: Prepare one model decomposition example, project checklist and a rule for when a test piece is required before a full print.
- Student deliverable: Editable source, versioned export and completed preflight checklist tied to the Week 4 brief.
- Safety checkpoint: Students still do not start prints. Any measurement involving the printer or hot area is completed by the adult from manufacturer documentation.
- Between-session print queue: Review the highest-risk feature first. Queue a test piece or one approved v1 only when it fits the capacity plan.
- If the print fails: If the print fails, separate design evidence from machine evidence: compare the digital file, layer preview and physical symptom before changing anything.
Week 6: Peer Review, Slicer Check, and Revision
Learning goal: Students make one evidence-based change after feedback and can explain why version 2 should perform better.
60-minute core agenda
- 0–10 min: Review the feedback rule: describe the requirement, point to evidence, suggest one next test.
- 10–25 min: Run a two-person rubric check on size, connection, readability, orientation and success test.
- 25–45 min: Revise the largest functional risk first and save v2.
- 45–60 min: Adult projects the slicer preview for selected files; students record the first issue they see. Extension: create a before/after change card for the showcase.
- 90-minute extension: Add 30 minutes for the extension described in the final agenda step, partner feedback, and clean file submission.
- Teacher preparation: Print or display the rubric; pre-slice representative files; prepare screenshots of first layer, unsupported overhang and excessive print time.
- Student deliverable: Version 2, a one-sentence change log and an updated queue submission.
- Safety checkpoint: The adult controls slicer settings, printer profiles and machine files. Students view the layer preview but do not bypass the queue.
- Between-session print queue: Replace v1 with v2 only after confirming the filename and due date. Keep the rejected version linked to the change log.
- If the print fails: If the new version still fails preflight, reduce the feature count or print only the functional section. A small validated prototype is a successful Week 6 outcome.
Week 7: Print, Observe the First Layer, and Diagnose
Learning goal: Students connect the layer preview to a physical result and use observable evidence to choose a reprint, redesign or acceptance decision.
60-minute core agenda
- 0–15 min: Compare digital model, slicer preview and a finished or failed print from the queue.
- 15–30 min: From behind the boundary, observe an adult start one approved short job and inspect the first layer.
- 30–45 min: Use a symptom chart to classify adhesion, stringing, weak features, support or scale issues.
- 45–60 min: Record cause hypothesis and next action. Extension: revise the file or prepare a controlled reprint request.
- 90-minute extension: Add 30 minutes for the extension described in the final agenda step, partner feedback, and clean file submission.
- Teacher preparation: Choose one short approved demonstration job; have completed student parts, failures and slicer screenshots ready; confirm the room is authorized for live printing.
- Student deliverable: A result log that names the symptom, evidence, likely source and next action without claiming certainty where evidence is incomplete.
- Safety checkpoint: Students remain behind the boundary. The adult stops a failing print and handles part removal, tools and any maintenance.
- Between-session print queue: Prioritize showcase-critical jobs, then correction prints with a documented change. Do not reprint an unchanged file simply because the surface is imperfect.
- If the print fails: If a final print fails and no slot remains, show the sketch, digital model, failure and diagnostic note at the showcase. The iteration story is valid evidence of learning.
Week 8: Showcase, Explain, and Decide What Comes Next
Learning goal: Students present the user, problem, design decision, evidence and one revision in a one-minute explanation.
60-minute core agenda
- 0–15 min: Match every model with its sketch, version card and safety-checked display label.
- 15–30 min: Rehearse a one-minute explanation with a partner and remove unsupported claims.
- 30–50 min: Run the showcase or gallery walk; visitors leave one question or observation.
- 50–60 min: Complete a reflection and choose rerun, advanced track or subject-linked project. Extension: invite families or staff for a longer gallery period.
- 90-minute extension: Add 30 minutes for the extension described in the final agenda step, partner feedback, and clean file submission.
- Teacher preparation: Prepare consent-compliant display labels, showcase invitation, reflection sheet and a table for failed parts. Check sharp edges and loose pieces before display.
- Student deliverable: Final model or documented failure, original brief, before/after evidence and one-minute explanation.
- Safety checkpoint: Adults approve displays, photos, names and public sharing. Do not present printed parts as food-safe, load-bearing, medical or suitable for young children without appropriate evaluation.
- Between-session print queue: Use only essential recovery prints. Close the term with a queue export showing completed, revised and unprinted jobs so no student file disappears silently.
- If the print fails: If the object is incomplete, present the strongest evidence available: design, test piece, failure, diagnosis and next revision. Do not hide the learning behind a replacement object made by an adult.

Editorial showcase image retained from the original design. Replace it with consent-cleared AOSEED classroom evidence showing an original sketch, version history, failed part and final result; do not imply the pictured work was produced in this curriculum.
Assessment: Use a Small Rubric That Rewards Revision
|
Dimension |
Beginning |
Developing |
Ready to present |
|
Safety and workflow |
Needs repeated prompts |
Follows rules with one reminder |
Explains the boundary, queue and adult-only steps |
|
Design clarity |
Purpose or user is unclear |
Purpose is clear but constraints are incomplete |
User, purpose, dimensions and success test align |
|
Technical preparation |
File or version is missing |
File is named but needs preflight fixes |
Source, export, dimensions and checklist are complete |
|
Iteration |
No change after feedback |
Change is made but evidence is vague |
Before/after evidence and reason are specific |
|
Communication |
Describes only the object |
Names a feature and challenge |
Explains problem, choice, evidence and next step |
Copy/Paste Toolkit for the Club Pack
These fields can become a downloadable AOSEED resource after design and legal/privacy review. Until that asset exists, keep the templates visible in the article so the page still fulfills its promise.
Parent or guardian permission and safety sheet
- Program facts: Dates, location, age range, supervising adults, pickup policy and contact information.
- Activities: Browser-based design, supervised FDM printing, handling fully cooled parts, and optional photos or showcase sharing as separate choices.
- Safety limits: Students do not operate, open, maintain or remove parts from the printer unless the organization has an approved supervised procedure.
- Data and accounts: Name the approved platform, identifiers used, account type, retention period and who can view or share work.
- Accommodation field: Invite families to share accessibility, sensory, communication or scheduling needs without requesting unnecessary medical details.
Showcase invitation
Join our 3D Printing Club Showcase on [date/time] at [location]. Students will present the problem they chose, an early sketch, one revision, and a final or failed prototype. Photos and public sharing follow the consent choices already on file. Please ask students about the change they made, not only whether the print looks perfect.
How to Continue After Week 8
Rerun the same sequence when most members are new, the queue was tight, or volunteers need a predictable curriculum. Keep the safety and submission rules identical; rotate only the Week 4 prompt.
Create an advanced track when at least half the group is returning, students can manage measurement and versioning, and printer capacity allows test pieces. Good next themes include moving joints, classroom accessibility tools, geometry manipulatives, science models and cooperative game parts.
For the next term, choose projects from classroom-friendly 3D printing activities and map each one to a subject outcome, a size cap and a queue budget before enrollment opens.
Choosing a Printer for a School, Library, or Club

AOSEED product-led comparison image retained from the original layout. Verify the current models and specifications; the image does not prove capacity, safety approval or performance in your facility.
The strongest club printer is the one your staff can place, approve, maintain and keep in a documented workflow. Compare enclosure or guarding, material policy, build volume, repeatable setup, supported software, network requirements, replacement parts, noise, queue capacity and adult training.
|
PLANNING A SCHOOL OR LIBRARY CLUB?Compare current AOSEED models first, then contact AOSEED with student count, age range, meeting length, device type, network limits, supervised print hours and target project size. Ask for current education support and a written quote rather than relying on an article price. Compare models |
For availability, support or organization-specific questions, use the AOSEED contact page. The article should not claim an educator kit, curriculum download, volume discount or classroom quote form until AOSEED has a live page or confirmed process for it.
FAQs
How many students should be in a kids' 3D printing club?
A first club is usually manageable with 8 to 12 beginners, one lead adult and one trained helper. The correct cap is the lowest limit created by your safeguarding policy, adult supervision, approved devices and weekly print capacity.
For a larger group, use pairs with timed driver/navigator roles and fewer required prints. Do not increase enrollment just because the room can hold more chairs.
How many 3D printers does a school club need?
One reliable printer can support a small beginner club when projects are short and an adult runs the queue between meetings. Add a second printer only after calculating the buffered slicer minutes and confirming that the room, power, ventilation, supervision and maintenance plan can support it.
- Calculate: Number of required jobs × estimated minutes, then add a reprint buffer.
- Compare: Buffered minutes versus the supervised hours available between meetings.
- If capacity is short: Reduce size, print test pieces, make some outputs digital, or reduce required jobs before buying hardware.
How long should a 3D printing club meeting be?
Use 60 minutes for younger beginners and 75 to 90 minutes for older or returning students. A 90-minute meeting should add testing, peer review and revision, not simply allow larger models.
Most printing should happen in approved supervised windows between meetings. Students use club time for decisions that require thinking and feedback.
What ages can join a kids' 3D printing club?
This plan is designed for roughly ages 8 to 15 and should be grouped by experience as well as age. Ages 8 to 11 benefit from shorter sessions and more bounded projects; ages 11 to 15 can handle longer design briefs, measurements and version comparisons.
Younger children may still participate in a different adult-led activity, but the software, small parts, hot equipment, supervision and session design require a separate age-appropriate risk review.
Can students use Tinkercad without personal accounts?
Autodesk currently says students may join an educator's Tinkercad Classroom with a teacher-provided nickname rather than registering a personal account. The educator acts as moderator, and Safe Mode is on by default for a Classroom unless the educator changes it.
That feature does not replace school approval or consent duties. Review Autodesk's current children's privacy terms, use minimum identifiers, document who controls the class, and follow district or organization policy.
How do you manage a classroom 3D print queue?
Use one submission path and one adult queue owner. Every row should identify the student, exact file version, dimensions, slicer minutes, status, due date and return note.
- Review the model and filename. Return it if the version, size or purpose is unclear.
- Slice with the approved profile. Record the real estimate rather than the student's guess.
- Approve, return or queue. Give one visible reason for every returned file.
- Label the physical result immediately. Link failures and reprints to the correct version.
- Export the queue at term end. Close or explain every remaining job.
What should a 3D printing club do after eight weeks?
Rerun the sequence for new students, or create an advanced track for returning members. Keep the same safety, privacy, filename and queue system so students build on a stable process.
A strong second term connects 3D printing to a real subject or user: geometry manipulatives, science models, game parts, classroom organization or accessibility prototypes. Require a measured brief, test piece and before/after evidence just as in the first term.
Conclusion
A successful kids' 3D printing club is a supervised design system, not eight weeks of watching a machine. Start with a narrow age band, small projects and one adult-owned queue. Teach safety and controls first, require measured sketches and versioned files, and treat every failed print as evidence for the next decision.
The eight-week sequence works because every meeting produces visible evidence: a safety check, practice model, first print, project brief, prototype, revision, diagnosis and explanation. That structure protects the queue, gives families a clear learning story and makes it easier to continue the club after the showcase.
Sources
- National Institute for Occupational Safety and Health, “Approaches to Safe 3D Printing”
- U.S. Environmental Protection Agency, “3D Printing Research at EPA”
- Autodesk, “Children's Privacy Statement”
- AOSEED, “5 Classroom-Friendly 3D Printing Activities”
- AOSEED, “How One 3D Printer Can Support Small-Group STEM Learning”
- AOSEED, “3D Printers for Kids” collection
- AOSEED, “Contact AOSEED”






Further reading

Thanksgiving STEM Activities for Kids: Table Projects and Simple Engineering Challenges

Halloween STEM Activities for Kids: Spooky Builds That Teach Real Science

STEM Crafts for Kids: Build, Decorate and Test



