


5 Classroom-Friendly 3D Printing Activities for Grades 3–5
A student who makes something to learn a concept understands it differently from a student who reads about it. The earth layer diagram in the textbook is a representation. The painted 3D cross-section model the student printed and assembled is real knowledge they can hold.
3D printer classroom activities for Grades 3–5 work because they move the learning from passive (looking, listening, reading) to active (designing, printing, testing, presenting). And they are genuinely cross-curricular: the same printer that runs an earth science session on Wednesday can run a history artefact session on Friday.
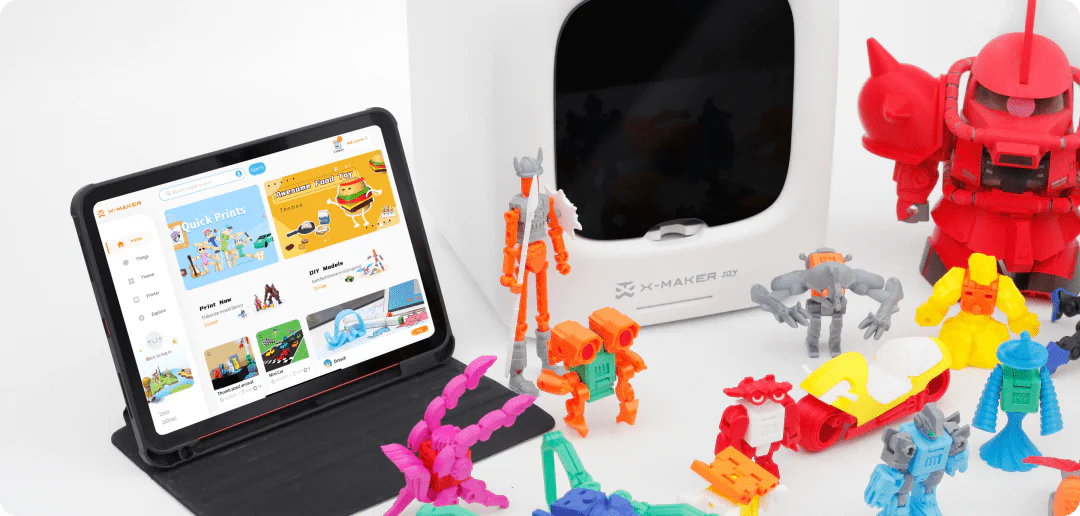
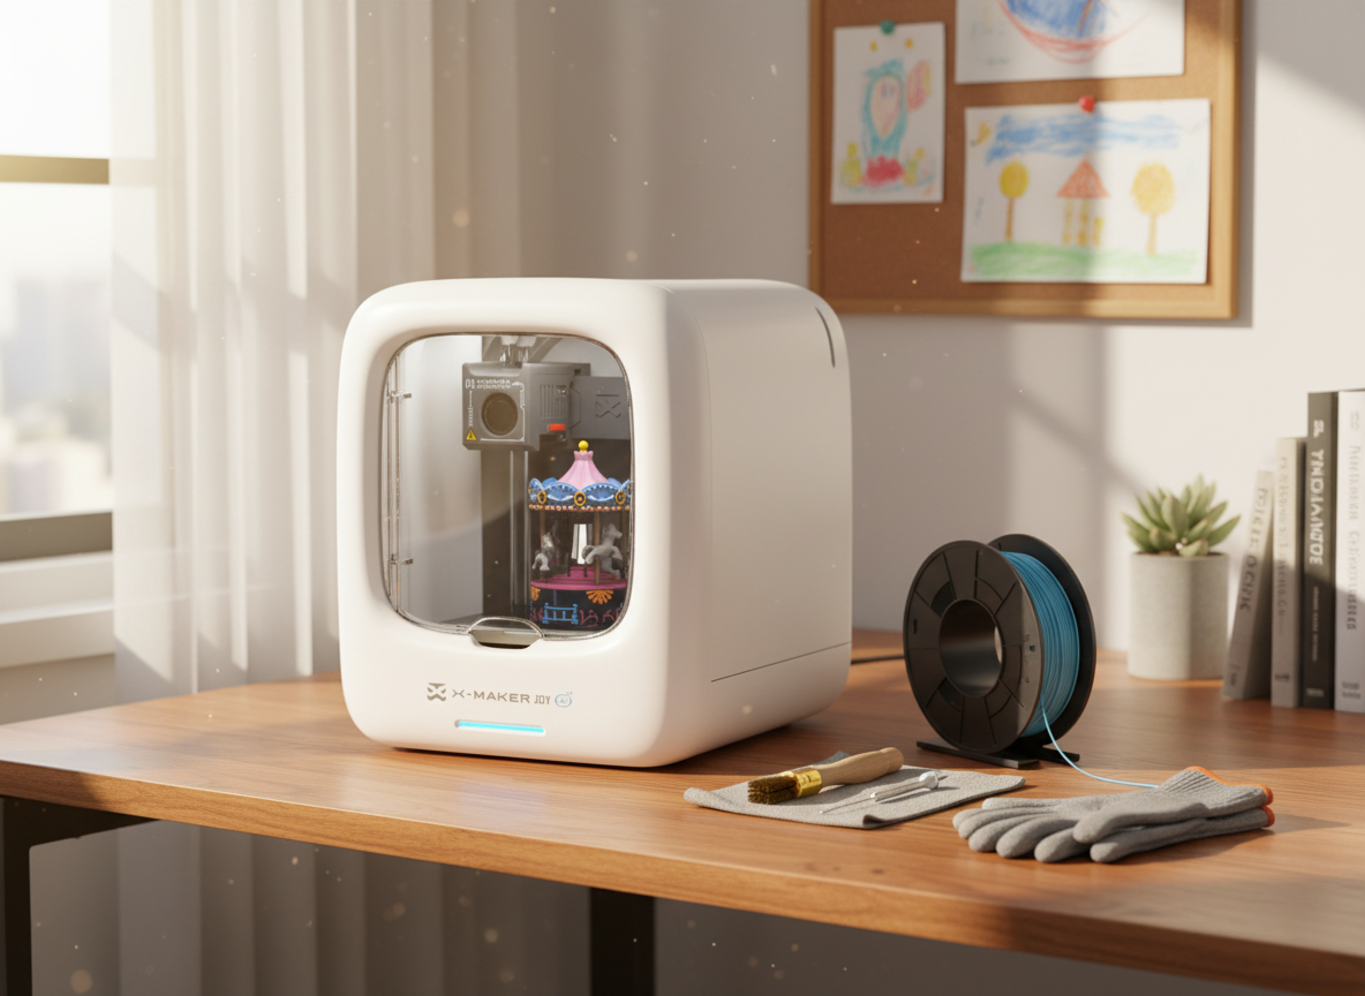
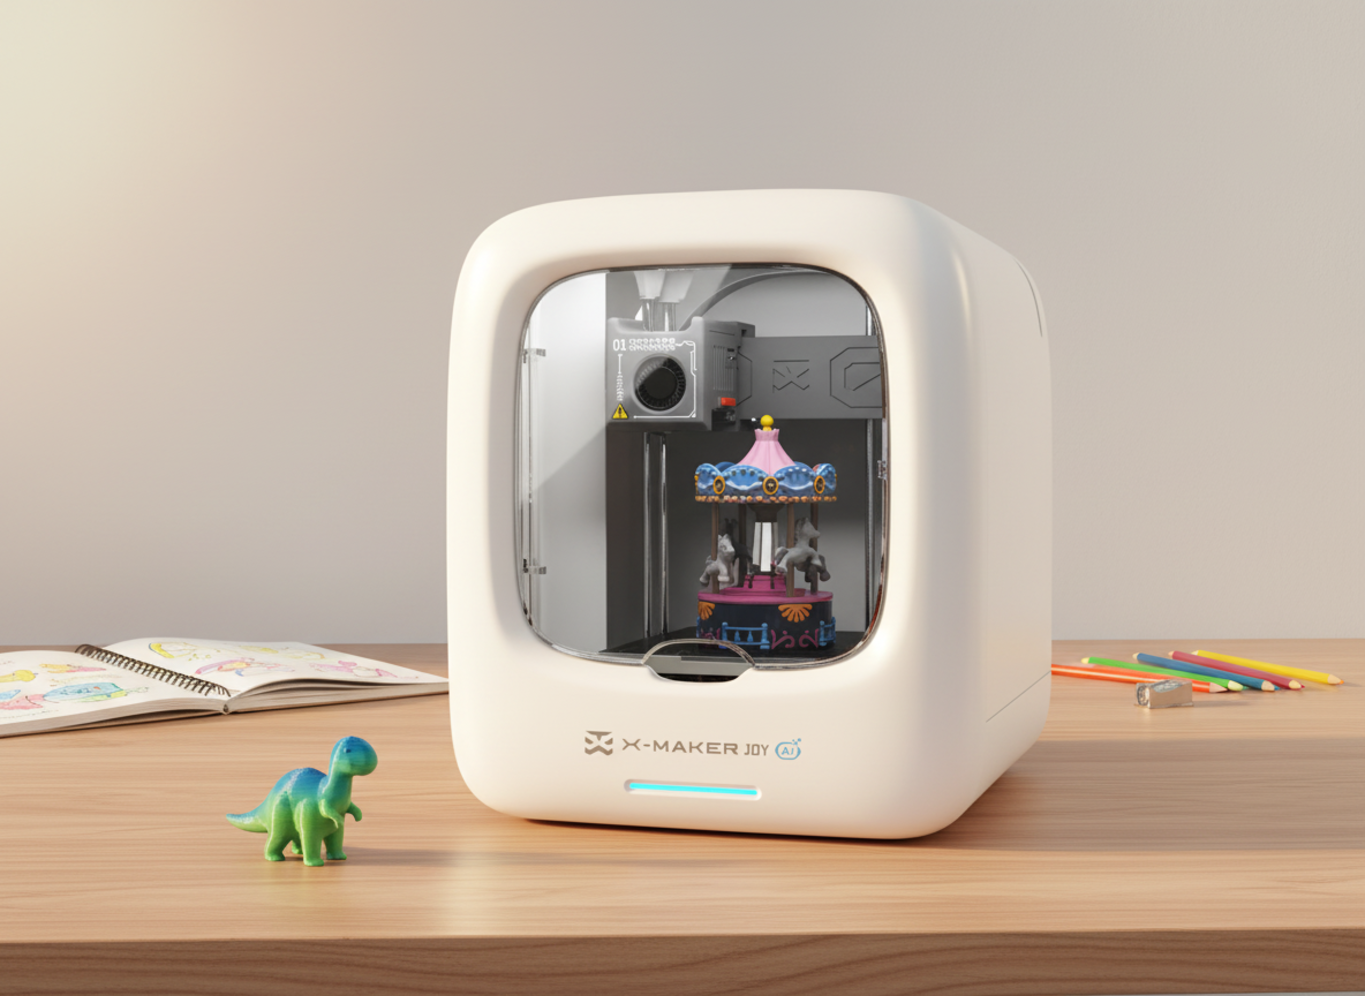
This guide covers five curriculum-aligned activities for Grades 3–5, each designed to use the classroom 3D printer as the manufacturing arm of a lesson plan rather than a novelty. All five activities run on the AOSEED X-MAKER JOY — an enclosed, non-toxic PLA printer suitable for classroom use from Grade 3 up.
|
5 activities
Cross-curricular — science, maths, design, engineering, history
|
3–5
Grade level range covered
|
FDM
The safest 3D printing type for classroom use
|
< 90 min
Longest single session — earth layer print
|
Curriculum Alignment Map — 5 Activities, 5 Subjects, Learning Outcomes
|
Activity
|
Subject area
|
Grade 3–5 curriculum concept
|
Learning outcome
|
|
1. Earth layer models
|
Earth Science
|
Geological structure: crust, mantle, outer core, inner core
|
Students can name and describe each layer from a physical model they built
|
|
2. Geometry shapes
|
Mathematics
|
3D solid geometry: vertices, edges, faces, volume, surface area
|
Students measure their own printed shapes — abstract formula applied to real object
|
|
3. Classroom tools
|
Design Technology
|
Product design cycle: identify a need, design a solution, test it
|
Students deliver a functional object used by the teacher every day
|
|
4. Engineering prototypes
|
Engineering / STEM
|
Design-Build-Test iteration cycle: prototype, test, improve
|
Students fail, identify why, redesign, and succeed — the full engineering process
|
|
5. Historical artifacts
|
History / Social Studies
|
Cultural artefacts: architecture, tools, and objects from ancient civilisations
|
Students handle replica artefacts from cultures otherwise inaccessible in the classroom
|
Why 3D Printing Works in the Elementary Classroom
 Science Buddies' collection of 3D Printing STEM Activities identifies hands-on making as the single most effective activator of STEM understanding for K–12 learners — because the student who designed and printed an object has applied the concept rather than received it.
The Active Learning Difference
A 3D printer classroom setup changes the role of the student from consumer to producer. The student who printed a dodecahedron for their geometry lesson counted faces, measured edge lengths, and calculated surface area on an object they manufactured. The student who saw a picture of a dodecahedron in a book received a representation.
This distinction matters especially for tactile and visual learners — students for whom the physical reality of an object produces a different quality of understanding than a diagram or description.
Three Classroom Management Points Before Starting
|
Challenge
|
Practical solution
|
|
Print time can exceed a single lesson period (30–90 min)
|
Start print jobs in one lesson and collect results in the next. Use the wait time for written reflection, sketching, or paired discussion about expected results.
|
|
Multiple students needing printer access
|
Rotate groups: one team runs the print session while others work on the design phase or post-print activity. Each team gets one full session per project cycle.
|
|
Students want to take items home before the lesson ends
|
Explain the 'display rule' before printing: all classroom-session objects stay in class for one week for peer review and group presentation before going home.
|
Activity 1 — 3D Printed Earth Models (Science, Grade 3–4)

Formlabs' guide, How to Get Started with 3D Printing in the Classroom, cites geological layer models as one of the most direct applications of 3D printing to science curriculum — because the printed cross-section makes visible a structure that textbooks can only approximate with concentric circle diagrams.
Why 3D Earth Models Are Perfect for Science Lessons
The earth's interior is one of the most commonly misunderstood Grade 3–4 concepts — not because students cannot read the diagram, but because a flat diagram cannot convey the depth relationship between layers, the curvature of internal boundaries, or the scale of each zone. A 3D cross-section model in the student's hand eliminates all three gaps simultaneously.
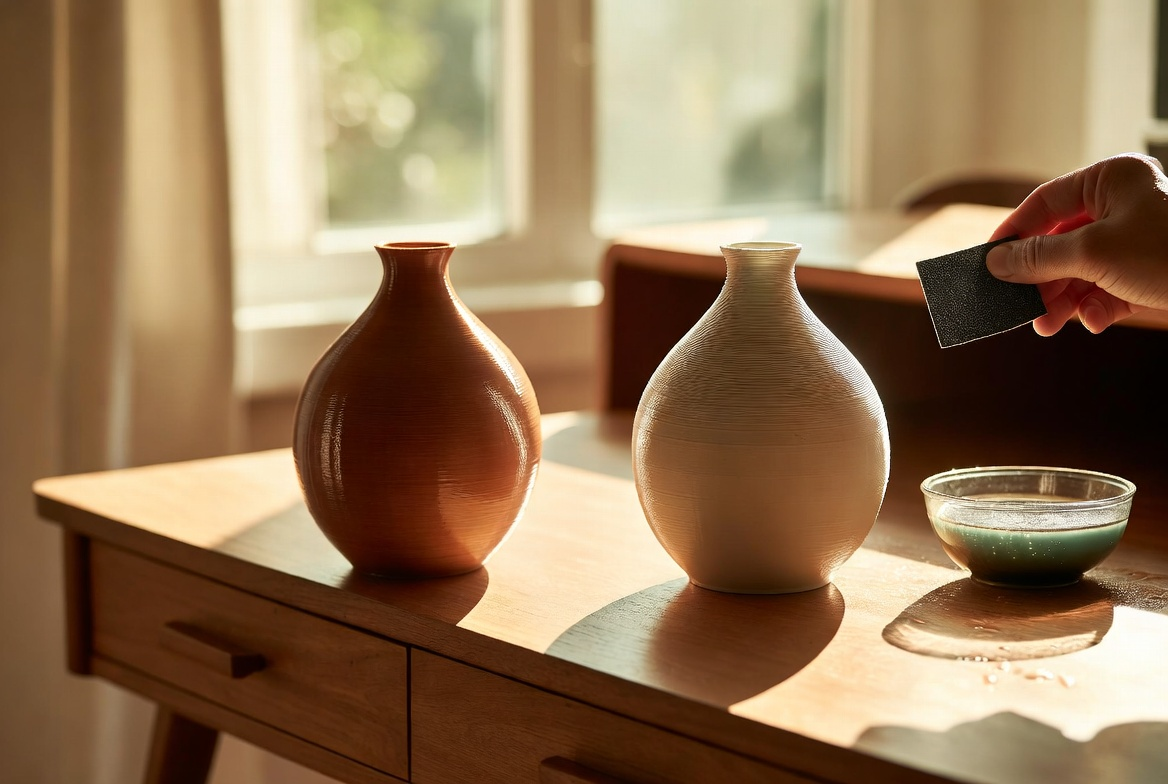
The painting step is not decorative — it is pedagogical. The student who mixes the orange-red for the upper mantle and the yellow-white for the inner core has made decisions that reinforce the temperature-depth relationship the lesson is teaching.
5-Step Earth Model Session Flow — From Design to Classroom Presentation
|
Step
|
Stage
|
What students do
|
Session time
|
|
1
|
Download or design the model
|
Students open Tinkercad or browse the model library. They locate or build a cross-section sphere showing geological layers.
|
15–20 min
|
|
2
|
Prepare the print
|
Students review the model: check dimensions, set layer count. Teacher approves the file before sending to the printer queue.
|
10–15 min
|
|
3
|
Run the print session
|
The printer runs. Students observe through the observation window and record observations in a science journal.
|
30–90 min print
|
|
4
|
Post-print decoration
|
Students paint each geological layer: outer crust (brown), upper mantle (orange), lower mantle (deep red), outer core (bright red), inner core (yellow).
|
20–30 min
|
|
5
|
Classroom presentation
|
Each student or team presents their model — names each layer, describes one physical property, points to the boundary zones.
|
10–15 min
|
|
Differentiation Tip: Geological Time Layer
Grade 5 extension: after the basic earth model, add a second print — a stratigraphic column showing rock layer ages. Label each layer with the geological period (Cambrian, Jurassic, etc.) and the type of rock deposited. The student who built both models understands deep time and geological structure as connected systems rather than separate diagrams.
|
Activity 2 — Printing Math Shapes and Geometry Tools (Maths, Grade 3–5)

Using 3D Printing for Geometry
Geometry is the STEM subject most directly served by 3D printing — because the object of study is a three-dimensional shape, and the tool produces three-dimensional shapes. A student who prints a triangular prism, counts its 5 faces with their fingers, measures each edge with a ruler, and calculates the surface area has completed the geometry lesson through the object itself.
The iteration aspect is particularly powerful: when a student prints a shape and their measurements do not match the expected formula, they have a real investigation on their hands. Was the model not quite right? Did they measure incorrectly? The printer produces a physical falsifiable hypothesis.
Geometry Print Guide — Solids, Grade Level, Measurement Activity, and Extension
|
3D solid to print
|
Grade level
|
Mathematical property students measure
|
Extension activity
|
|
Cube (regular hexahedron)
|
Grade 3
|
6 equal square faces, 12 edges, 8 vertices — surface area = 6s²
|
Count faces with blindfold — tactile spatial recognition challenge
|
|
Rectangular prism
|
Grade 3–4
|
Volume = l×w×h — students fill with rice or water to verify
|
Design a box to hold a specific object — applied measurement
|
|
Triangular prism
|
Grade 4
|
5 faces (2 triangles, 3 rectangles) — calculate surface area of each face type
|
Compare to cylinder: same height, different cross-section
|
|
Square pyramid
|
Grade 4
|
5 faces (1 square base, 4 triangular lateral faces) — apply Pythagorean theorem
|
Stack with others — visualise how pyramids tile space
|
|
Dodecahedron
|
Grade 5
|
12 pentagonal faces — more complex spatial reasoning challenge
|
Calendar: label each face with a month — functional math object
|
|
Möbius strip (topological)
|
Grade 5 extension
|
One side, one edge — a non-orientable surface from paper that prints in 3D
|
Cut down the middle — produces two linked loops. Tangible topology.
|
Three ways to increase the maths engagement of a geometry printing session:
-
Print in pairs: one student prints the shape, the other predicts its measurements before printing. Compare predictions to measured results after cooling. Data collection + geometry + estimation in one session.
-
Print at two scales: print the same shape at 50% and 100%. Calculate the volume ratio. Students discover that halving each dimension reduces volume by a factor of 8 — the cube law in a concrete form.
-
Build a net first: before printing a solid, have students construct a paper net of the same shape. Then print the solid and unfold understanding — they now know which faces correspond to which net panels.
Activity 3 — 3D Printing Classroom Tools (Design Technology, Grade 3–5)

Practical Classroom Uses for 3D Printing
This activity teaches a concept that STEM education often struggles to deliver: the design-to-function cycle. A student who designs a pencil organizer, prints it, places it on the desk, and then watches a teacher use it daily has completed the full product design process in a single project. The feedback loop — 'does the teacher actually use this?' — is immediate and real.
The classroom tools activity also has the highest repeat-use value of all five activities in this guide: the objects produced are used every school day for the rest of the term. The student who designed the grading stamp sees it in use every day they attend class.
6 Classroom Tool Ideas — Teacher's Problem, Student's Design Role, and Print Time
|
Classroom tool
|
Teacher's problem it solves
|
Student's design role
|
Print time
|
|
Custom desk nameplate
|
Students and supply teachers do not know who sits where
|
Student designs their own name in the app — selects font, size, and a small icon representing their favourite subject
|
25–45 min
|
|
Pencil and marker organizer
|
Shared markers and pencils go missing or are unorganized
|
Student measures the pens/markers, designs a holder with the correct interior width, and adds their class group number to the side
|
35–60 min
|
|
Grading stamp or seal
|
Teachers repeat the same written feedback endlessly — stamps save time
|
Student designs the stamp text: 'Check This Again', 'Great Detail', 'See Me'. Teachers use it all term.
|
20–35 min
|
|
Classroom library bookmark holder
|
Bookmarks slide behind shelves — class reads without markers
|
Student designs a wall-mount holder that fits 30 bookmarks. Installed near the reading corner.
|
45–70 min
|
|
Tablet or phone stand
|
Screens lie flat during video lessons — poor viewing angle
|
Student measures the device, prints a stand at the correct angle for video calls and lesson display
|
30–50 min
|
|
Modular supply bin set
|
Shared supply station has no defined homes for items
|
Teams design one bin each for their table station — same exterior size, different interior labels
|
35–55 min per bin
|
|
🛠 Running This as a School Store Project
Grade 5 entrepreneurship extension: after making classroom tools for their own teacher, students can design a second production run for other classrooms. Set a price (school-currency or real fundraising price), manage orders, and print to order. This single extension adds product development, market research, production planning, and financial literacy to the design technology activity.
|
Activity 4 — Design and Print Custom Prototypes (Engineering, Grade 4–5)

Why Prototypes Are Important in Engineering
The engineering prototype activity is the only activity in this guide where a failed print is a better educational outcome than a successful one. When a student's bridge prototype collapses under the required load, they have produced a hypothesis, tested it, and falsified it. That is the scientific method in action. What they do next — identify the failure mode, redesign, and reprint — is engineering.
For Grade 4–5 students, the most powerful aspect of this activity is discovering that professional engineers do this too. Every bridge built, every product launched, every aircraft designed went through exactly this cycle. The student's printed prototype that failed and was improved is not a toy project — it is the real process, at a scale appropriate for their current skill level.
5 Engineering Challenge Prompts — Criteria, Success Test, and STEM Concept
|
Engineering challenge prompt
|
Success criteria (testable)
|
STEM concept demonstrated
|
|
Design a bridge that spans 20 cm and holds 200g
|
Bridge must hold the weight for 30 seconds without collapsing or deflecting more than 5 mm
|
Structural engineering: load distribution, material stress, arch vs beam comparison
|
|
Print a container that holds exactly 100ml of water without leaking
|
Container filled to 100ml mark, set on desk for 2 minutes — no leakage
|
Measurement precision, watertight design, iteration of wall thickness
|
|
Design a phone stand that holds a device at 60° without sliding
|
Device placed at 60° angle, phone released — stand holds independently for 10 seconds
|
Angle geometry, center of mass, friction and surface stability
|
|
Build a gear system where turning one gear turns a second gear faster
|
Two-gear assembly: larger driver gear, smaller driven gear — speed increase visible
|
Mechanical engineering: gear ratio, torque, speed, rotational direction
|
|
Create a puzzle with 4 interlocking pieces — no glue, snap together
|
Child from another class assembles the puzzle without instructions in under 5 minutes
|
Tolerance engineering: precision dimensions, joint design, assembly sequencing
|
How to structure the iteration cycle in a classroom session:
-
Session 1 (Design phase): Students sketch their solution on paper. Define dimensions. List materials needed. Identify likely failure mode before printing.
-
Session 2 (Print phase): Students submit file, printer runs. Meanwhile, students predict test results in writing — this creates a falsifiable hypothesis on record.
-
Session 3 (Test phase): Object printed and cooled. Test against success criteria. Record result: pass or fail. If fail, document why.
-
Session 4 (Iterate phase): Students with a failed prototype identify the weakness, modify the design, and reprint. Students who passed design a harder version.
-
Session 5 (Present phase): Each team explains their design process: first attempt, failure, modification, and final result. The journey is the assessment content.
Activity 5 — 3D Printed Historical Artefact Models (History, Grade 3–5)

Teaching History with 3D Printing
Most historical artefacts are inaccessible to most classrooms. The Rosetta Stone is in the British Museum. The Aztec sun calendar is in Mexico City. The Colosseum arch can only be seen in Rome. 3D printing removes the geographic barrier without compromising the tangibility that makes artefacts powerful as learning objects.
When a student holds a scale model of a Doric column, they can touch the flutes, trace the capital, and compare it to an Ionic column beside it. This tactile comparison encodes the architectural vocabulary in a way that photographs cannot. History becomes material rather than textual.
Historical Artefact Print Guide — Civilisation, Curriculum Concept, and Classroom Activity
|
Historical model
|
Civilisation / period
|
Curriculum concept
|
Classroom use after printing
|
|
Egyptian pyramid (scaled cross-section)
|
Ancient Egypt, 2500 BCE
|
Architecture, slave society, burial customs, mathematical precision
|
Display piece for the Egypt unit — students compare proportions to their own creations
|
|
Roman Colosseum arch section
|
Ancient Rome, 70 CE
|
Arch engineering, gladiatorial culture, Roman construction methods
|
Arch vs beam load testing — print both and compare structural behaviour
|
|
Parthenon column (Doric/Ionic/Corinthian)
|
Ancient Greece, 440 BCE
|
Classical column orders, democracy, architectural styles
|
Teach column classification — students identify which order from a tactile comparison
|
|
Aztec sun calendar disk (simplified)
|
Mesoamerica, 1427 CE
|
Calendar systems, astronomical knowledge, religious symbolism
|
Compare to modern calendar — same function, different cultural expression
|
|
Viking longship cross-section
|
Medieval Scandinavia, 800 CE
|
Shipbuilding technology, exploration, adaptation to environment
|
Float test: can the printed hull stay upright in a tray of water?
|
|
Ancient tool set (flint, chisel, needle)
|
Prehistoric, Neolithic period
|
Material culture, how tools define civilisations, progression of technology
|
Timeline activity — students arrange tools in chronological order by material and design
|
Cross-subject extensions for historical artefact printing:
-
Maths connection: calculate the scale factor of the model. If the Parthenon's original column is 10 metres and the printed model is 10 cm, what is the scale? (1:100.) Apply the scale factor to calculate the original dimensions of other features.
-
Science connection: compare ancient building materials (stone, clay, wood) with the PLA material used to print the model replica. What properties made stone suitable for columns? What properties make PLA suitable for a model?
-
English / writing connection: after handling the model, students write a first-person account from the perspective of someone in that civilisation. The physical object provides sensory detail that enriches descriptive writing.
Choosing the Right 3D Printer for the Classroom

Not all 3D printers are suitable for regular classroom use. The safety requirements for a classroom printer are different from those for a home or professional environment: the printer must be enclosed, must use non-toxic materials, must be manageable by a non-technical teacher, and must be reliable enough to produce results in front of a waiting class.
Classroom 3D Printer Requirements — Safety, Setup, and Sustainability
|
Requirement
|
Why it matters in a classroom
|
How the X-MAKER JOY addresses it
|
|
Fully enclosed design
|
Prevents students from touching the hot nozzle or moving build plate during printing
|
Enclosed structure with observation window — students can watch without access to working parts
|
|
Non-toxic filament
|
Teachers and students should not need ventilation equipment
|
Uses PLA filament only — food-grade corn starch base, no harmful fumes at standard print temperatures
|
|
App-led workflow
|
A non-technical teacher should be able to run a session without specialist knowledge
|
App-controlled: model selection, print start, and monitoring happen on a shared tablet or phone — no slicer software expertise needed
|
|
Toy Library / model access
|
Teachers need a starting library of models aligned with curriculum — not just adult design files
|
1500+ models including geometry shapes, historical objects, classroom tools, and science models — directly relevant to the 5 activities in this guide
|
|
First-layer reliability
|
A print that fails in front of a class disrupts the lesson and undermines confidence
|
Level calibration is guided by the app — the printer walks the teacher through the first-layer check in a single setup session
|
Conclusion
A 3D printer that runs in a classroom for a full school term produces five different kinds of learning: earth science through geology models, mathematics through geometry solids, design thinking through classroom tools, engineering through prototype cycles, and history through artefact replicas. That range is not replicated by any other single classroom technology.
The key is integration rather than novelty. The printer that runs once in a special session and then sits on a shelf is a novelty. The printer that is part of the lesson plan for at least one subject every two weeks is an educational tool. The five activities in this guide are designed to build toward that level of integration.
For educators choosing a classroom printer, AOSEED 3D printers for kids shows both current models with guidance on which is appropriate for supervised classroom sessions versus independent student use at Grade 5 and above.
FAQs
How can 3D printers be used in the classroom?
The five most effective classroom uses are: (1) science model creation — earth layers, molecular structures, anatomical cross-sections; (2) mathematics manipulatives — geometric solids for hands-on measurement and volume calculation; (3) design technology projects — custom tools and organizers that students design for real classroom use; (4) engineering prototyping — design-build-test cycles with real success criteria; (5) history artefact replicas — scale models of monuments, tools, and objects from civilisations being studied. All five uses keep the printer actively contributing to curriculum outcomes rather than existing as a separate technology activity.
What are 5 benefits of 3D printing in education?
The five most consistently cited educational benefits are: (1) active learning — students produce an object rather than consume a description, producing deeper understanding; (2) cross-curricular application — one printer serves maths, science, history, design technology, and engineering sessions; (3) design thinking development — the design-build-test cycle builds iterative problem-solving habits that transfer across all STEM disciplines; (4) inclusion of tactile learners — students who struggle with text-based or diagram-based learning engage fully when the learning object is physical; (5) career readiness — 3D printing skills are directly applicable to engineering, architecture, medicine, and product design careers.
What questions should teachers ask about 3D printing?
Before introducing 3D printing to a classroom, the most useful questions are: (1) Is the printer fully enclosed? Open-frame printers are not appropriate for unsupervised classroom use. (2) What filament does it use? PLA is the only classroom-appropriate material — ABS, resin, and industrial materials are not suitable. (3) How does a non-technical teacher start a print session? If the answer involves slicer software, command-line tools, or manual bed leveling, the printer is not classroom-ready. (4) What model library comes with it? The printer should include or connect to a library with models relevant to primary school curriculum. (5) How long does a typical print take? A print that runs longer than 90 minutes is hard to manage in a standard school day without advance planning.
What are the 4 types of 3D printers?
The four main 3D printing technologies are: (1) FDM — Fused Deposition Modeling, which melts plastic filament and deposits it layer by layer. This is the only type appropriate for classroom use — it uses non-toxic PLA, is the safest, and is the most affordable; (2) SLA — Stereolithography, which uses UV light to cure liquid resin. The resin is toxic and requires ventilation — not appropriate for school classrooms; (3) SLS — Selective Laser Sintering, which uses a laser to fuse powder. High cost and industrial equipment requirements — not a classroom technology; (4) PolyJet — uses inkjet-like print heads to deposit photopolymer. Multi-material capability but requires industrial handling. For any Grade 3–5 classroom, FDM is the only appropriate choice.
Why do we need 3D printing in education?
The case for 3D printing in primary education rests on three arguments. First: active learning is more effective than passive reception — the student who makes a model of the earth's layers understands geological structure more deeply than the student who reads a diagram. Second: many key curriculum concepts are three-dimensional in nature — geometry, molecular structure, architectural history, mechanical engineering — and are poorly served by two-dimensional representation. Third: the design-build-test cycle that 3D printing enables is the fundamental problem-solving method of every STEM career, and exposing students to it in Grade 3 builds habits that persist through secondary education and beyond.
Do most schools have 3D printers?
Adoption varies significantly by country, district, and funding level. In the UK, the United States, and Australia, 3D printers are increasingly common in secondary schools and in well-funded primary schools with active STEM programs. In primary schools specifically, enclosed consumer-grade FDM printers have become accessible enough in price that many classrooms now purchase one from department budgets or through grant funding programs. The key adoption barrier has shifted from cost to teacher confidence — most teachers who have a printer underuse it because they lack a clear curriculum integration plan. The five activities in this guide are designed specifically to address that gap.
What is the biggest problem with 3D printing in classrooms?
The two most commonly cited classroom challenges are: (1) print management — multiple students, limited print time, and one printer create a scheduling challenge. The solution is a planned rotation system, not first-come-first-served access. Teams submit print files during one lesson and collect results in the next, keeping the printer continuously in use. (2) Teacher technical confidence — most classroom 3D printing breakdowns are not hardware failures but operator unfamiliarity. Choosing a printer with an app-led workflow, a guided first-setup session, and a support resource eliminates the most common sources of teacher frustration. A printer that a non-technical teacher can operate independently from day 5 of ownership is a classroom printer. A printer that still requires specialist help in week 3 is a lab printer.
Sources
- Science Buddies — 3D Printing STEM Activities, 3D Printing STEM Activities, 2026.
- Formlabs — How to Get Started with 3D Printing in the Classroom, How to Get Started with 3D Printing in the Classroom, 2025.
- Tinkercad (Autodesk) — 3D Printing for Teachers, 3D Printing for Teachers, 2026.
- All3DP — 3D Printing in Education, 3D Printing in Education, 2025.
- Edutopia — Using 3D Printers in the Classroom, Using 3D Printers in the Classroom, 2025.


You may also like
Further reading

Printable STEM Challenges for Grades 4-6 Using 3D Printing
These printable STEM challenges turn 3D printing into real engineering by adding a problem, rules, testing, and redesign instead of stopping at a finished souvenir.Print a dinosaur and you've made ...

Small Group 3D Printing Activity With One Printer
This small group 3D printing activity shows teachers how to organize teams, rotate jobs, and keep one printer useful for the whole class.
The ratio sounds broken until you stop treating the printer...

Elementary STEM 3D Printing: Simple Projects Teachers Can Actually Run
This elementary STEM 3D printing guide focuses on fast classroom projects, simple routines, and beginner-friendly builds teachers can run in one class period.
the math most elementary teachers face...

Follow-Along 3D Printing Project: Make a Simple Toy
Most beginner 3D printer guides explain how the technology works, then stop. You end up with theory but no finished object. A follow-along project closes that gap. Pick a model. Prepare it. Print i...


