


STEM Crafts for Kids: 12 Projects That Mix Art and Engineering
STEM crafts for kids hide a science lesson inside something you’d stick on the fridge anyway. Black marker turns blue and yellow on a wet coffee filter.
A mobile won’t hang level until the weights are right, and a cardboard bird nods because of a lopsided wheel hidden in the box.
This list has 12 of them. Nine use paper, paint, string and other things from the craft drawer, and three are made on a kids’ 3D printer.
For each STEM craft idea we explain the concept, list the supplies and suggest one small test, which is what separates STEM art projects from regular ones.
Most take under an hour. The ages below are rough, and younger kids can do nearly all of them if a grown up handles the cutting.
12 STEM Crafts for Kids at a Glance
Here’s the full set in one place. Times are hands on time only, since paint has to dry and prints take a while.
|
Craft |
Ages |
STEM concept |
Time |
|
Coffee filter chromatography flowers |
5 to 10 |
Capillary action, mixtures |
30 min plus drying |
|
Cellophane suncatcher |
5 to 9 |
Light and color filters |
30 min |
|
Shadow tracing art |
5 to 10 |
Earth’s rotation, light |
10 min, three times a day |
|
Mirror kaleidoscope |
8 to 12 |
Reflection and symmetry |
45 min |
|
Magnet painting |
4 to 7 |
Magnetism |
20 min |
|
Pendulum painting |
6 to 12 |
Pendulum motion, gravity |
45 min |
|
Balanced hanging mobile |
7 to 12 |
Center of mass, balance |
45 min |
|
Pop up architecture card |
7 to 12 |
Paper engineering |
30 min |
|
Cardboard automaton |
9 to 12 |
Cams and rotary motion |
About 1 hour |
|
3D printed name tag |
6 to 12 |
Measurement, 2D to 3D |
20 min plus printing |
|
3D printed flexible animal |
7 to 12 |
Joints and clearance |
15 min plus printing |
|
3D printed pen holder |
8 to 12 |
Stability and size |
30 min plus printing |
What Turns an Art Project Into a STEM Craft?
Mostly, a question. A painted flower is art. A flower made by watching water pull marker ink apart is chemistry that also happens to look nice on the fridge.
Art Gives Kids the Choices
Kids pick the colors, the animal, the shape of the roof. That bit of ownership matters, and it’s usually what keeps a seven year old at the table for forty minutes instead of four.
STEM Adds Something to Figure Out
The STEM part is whatever the child has to work out. Maybe the mobile tips left, or purple ink splits into pink and blue. Kids start looking closer and guessing, and they check the guess themselves, often before you’ve said a word.
STEM or STEAM
Some schools call it STEAM, with an A for art squeezed in. Every craft here could wear either label, honestly. We use STEM because that’s what most parents type into a search bar.
Test It, Then Change One Thing
After the first try, change one thing and try again. A longer string on the pendulum. A heavier shape on the mobile. That small loop of test and tweak is the engineering part, and kids don’t need anyone to name it.
Color and Light STEM Art Projects
Light, color and a little water. This group is where we’d start a five year old, because something visible happens fast and the cleanup is one damp towel.
1. Coffee Filter Flowers (Marker Chromatography)
Washable markers hide more colors than the cap suggests.
Your child draws a thick marker ring partway out from the center of a flat coffee filter. On a plate, with a dropper, water goes into the middle a few drops at a time.
As it spreads, the ring smears outward, and black ink can come apart into blue, purple and sometimes yellow.
What’s happening is capillary action. Water creeps through the tiny gaps between paper fibers and drags the ink with it, while each dye in the mix travels at its own pace. If your kid asks why, this chromatography lesson from Vanderbilt’s science volunteers has a kid level explanation.

None of this needs a store run if there’s coffee in the house. Filters, washable markers, a dropper or spoon, a plate and pipe cleaners. Give the filters an hour to dry, then pinch each one at the center and wrap a pipe cleaner around it for a stem.
Worth trying afterward: the same color from two different brands on two filters. They almost never split the same way, and a permanent marker barely budges.
2. Cellophane Suncatcher: Mix Colors With Light
Black cardstock frame, clear contact paper on the back, and scraps of red, blue and yellow cellophane pressed onto the sticky side. That’s the whole build. A few scraps should overlap on purpose, because the overlaps are where it gets interesting once the thing is taped to a bright window.
Each sheet of cellophane acts as a filter, letting some colors of light through and soaking up others, so two layers let less light pass than one. The University of Wisconsin’s subtractive color mixing exhibit shows the same idea with lamps.
Before red goes over blue, get a guess. Purple is the usual answer. In a sunny window it tends to look closer to muddy brown, nearly black, and kids want to know why right away.
3. Shadow Tracing Art: Draw With the Sun
This one needs a sunny day and some patience. Around 9 a.m., tape the paper down on a patio or porch step, stand a toy dinosaur on it, and let your child trace the shadow.
Leave both exactly where they are. The second tracing happens at lunch, the third around 3.
By the third tracing the shadows point in three directions, and the noon one is stubby next to the others. The Sun didn’t really move. Earth turned underneath it. UCAR’s sunshine and shadows activity is good backup reading on why a low Sun makes long shadows.

You’ll use paper, tape, a small toy, a pencil and crayons. Kids tend to see creatures in the overlapping outlines, so coloring each one differently usually ends in a three headed monster.
Next clear day, ask where the afternoon shadow will land before anyone traces it.
4. Mirror Kaleidoscope: Patterns From Reflections
Mirror board, the shiny card sold at craft stores, folds into a long three sided prism that slides inside a paper towel tube.
One end gets clear plastic, a pinch of beads, then a second layer of plastic to trap them. Wrap the outside in patterned paper first, since that’s the part kids get attached to.
Three mirrors facing each other bounce the same few beads around again and again, so one messy pile becomes a neat repeating pattern. Reflection and symmetry, in a tube. Skip glass mirrors here. The card version is safer and plenty shiny.
One fun thing to count is how many times a single bead appears around the circle. Swapping the beads for sequins or torn tissue paper changes the whole pattern. And the one rule, said twice if needed: never aim it at the Sun.
Motion and Balance STEM Crafts
Gravity and magnets do most of the work in this group. They’re messier and louder than the light crafts, which is half the fun.
5. Magnet Painting: Move Paint Without Touching It
Preschoolers love this one. A paper plate sits on a tray with three or four blobs of washable paint and a steel paper clip dropped in the middle. Your child holds a magnet wand underneath and steers, and the clip drags paint into squiggles with no brush involved.
What to notice is that the magnet works right through the plate, since magnetic force doesn’t need contact. You’ll want paper plates, paint, a few paper clips or steel washers, one large magnet wand and a tray to catch drips.
Afterward, drop a coin, a plastic bead and a paper clip in the paint and see which ones follow the wand. Kids can sort the rest into magnetic and not magnetic. Big wands only with little ones.
6. Pendulum Painting: Let Gravity Draw
Outside is best for this one. The frame is just a broom handle resting across two chair backs. A paper cup with a hole about the size of a pencil tip hangs from a string tied to the handle, with a big sheet of poster paper on the ground below.
Cover the hole, pour in watered down paint, pull the cup to one side and let go.
A pendulum is basically a weight that gravity keeps pulling back to the middle, and this Science Buddies pendulum activity walks through it with kids. Because every swing loses a little energy, the

paint doesn’t retrace one line. It curls inward into loops and spirals.
Thinned paint travels, so an old sheet under the paper saves the patio. Then shorten the string to about half and swing again. The cup moves noticeably faster, and the loops come out tighter.
7. Balanced Hanging Mobile: Art That Has to Level Out
A doorframe is the easiest place to hang this. One string runs from the frame to the middle of a dowel or craft stick, roughly at your child’s eye level.
Kids cut shapes from cardstock, color them and hang one off each end with thread. Then comes the fiddly part, sliding the strings until the stick hangs flat.

A heavy shape has to hang closer to the middle than a light one, like a big kid scooting toward the center of a seesaw.
That’s center of mass, and most kids get it after three or four tries. For a harder round, hang a second, smaller stick off one end and balance everything again.
The sculptor Alexander Calder built a whole career on this one problem. Supplies are two or three dowels, thread, cardstock, markers, tape and a hole punch.
Paper Engineering Crafts That Move
Cuts, folds and one cardboard box. These two take the most patience, and they’re the ones kids tend to show off afterward.
8. Pop Up Architecture Card: A Building That Stands Up
Paper engineering sounds fancy. In practice it’s a folded card, two snips and one push.
Fold cardstock in half and cut two slits in from the fold, about an inch long and an inch apart. Shove the little tab between them inside out and crease it flat.
When the card opens, that tab jumps forward as a box. Kids glue a door and windows onto it and suddenly it’s a bakery.
Those folds behave like hinges. Snip longer and the box pokes out farther, which is basically the design rule behind the giant pop up books at the library. You’ll need cardstock, a ruler, scissors, a glue stick and markers.
Once one works, try snips twice as long on a second card and line them up. Put three different heights together and you’ve got a skyline.
9. Cardboard Automaton: A Character That Nods
An automaton is a moving sculpture you crank by hand. Start with a small box, like a snack box, and push a wooden skewer straight through both sides for an axle. Glue a cardboard circle onto the skewer with the hole off center. That lopsided wheel is the cam.
Then poke a hole in the lid and push a bit of straw into it. A second skewer slides down through the straw and sits on the cam.

Tape a paper bird to the top of that skewer. Every turn of the crank lifts it and lets it fall, so the bird looks like it’s pecking. Grown ups should handle the hole poking.
Cams turn round and round motion into up and down motion, which is how plenty of old toys and engines work. Science Buddies has a cardboard automata activity with more ideas. Try an egg shaped cam next, or one with two bumps.
3D Printed STEM Crafts
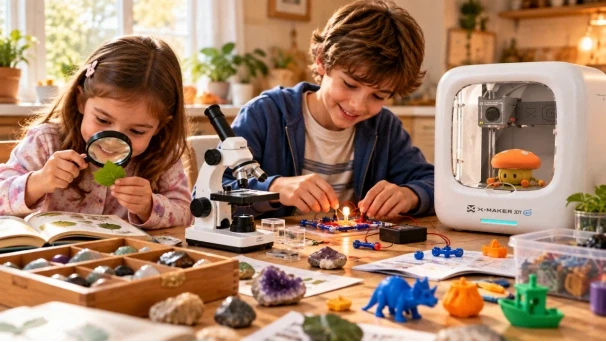
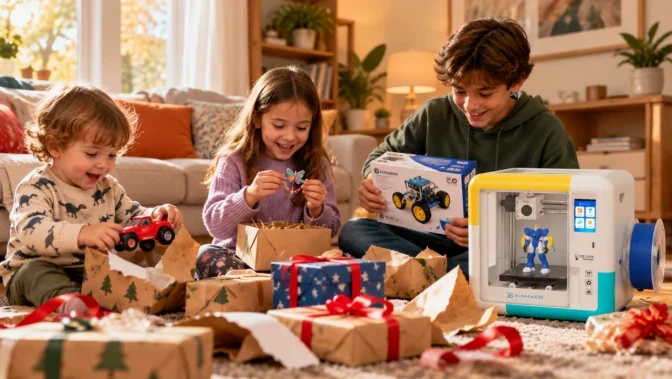
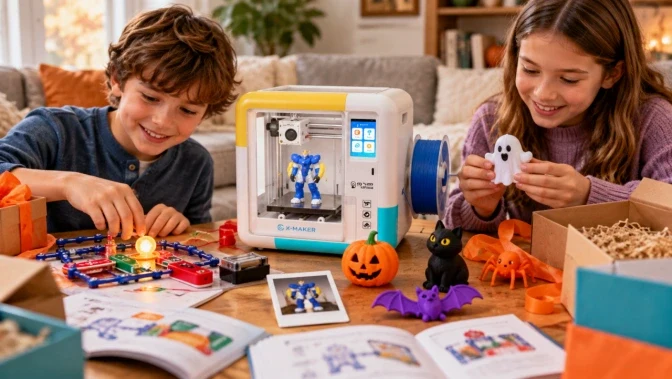
A kids’ 3D printer turns a design on a screen into something your child can hold, which makes it a natural next step for a kid who likes making things. These three are good first projects.
|
WHO DOES WHAT AT THE PRINTER Your child picks or customizes the design and starts the print. You load the filament, keep the printer in a good spot and pop finished pieces off the plate. Print times below are estimates, so check the app before promising anything. If you’re comparing machines for different ages, start with these AOSEED 3D printers for young makers. |
10. 3D Printed Name Tag: Turn Letters Into a Real Object
Most kids start here. They type their name, pick a chunky font and a background shape, and the letters get raised a couple of millimeters off a flat base. A hole at one end turns it into a backpack tag.
With the app guided AOSEED X-MAKER JOY, made for ages 4 to 12, kids start from a ready model in the AOSEED app and change the text themselves. No modeling experience needed. A small tag usually finishes in well under an hour.

The STEM side is measurement and scale, plus watching a flat design gain height. You’ll need PLA filament and a key ring. Print the same name in a thin font and a thick one, and kids see right away why thin letters snap off.
11. 3D Printed Flexible Animal: Joints That Print in Place
Flexible animals, like a wiggly dinosaur or an octopus, print in one piece with tiny gaps between the body sections. PLA is stiff plastic. The animal bends anyway, because those sections are linked like a bike chain.
That gap is called clearance, and it’s the lesson here: moving parts need a little space or they fuse together. Choose a model designed to print flat without supports, and print it in a bright color from a four color PLA filament set. A small one takes roughly an hour.
When it comes off the plate, count how many joints move freely. Don’t force a stuck one, because that snaps the link. Printing the same animal slightly bigger often loosens things up.
12. 3D Printed Pen Holder: Useful Has to Be Stable
Start with a ruler. A standard pencil is about 7.5 inches long, so a holder around half that height with a wide base won’t tip. That fits easily inside a printer with a 120 mm build space. Kids add initials or a pattern to the outside.

This one is about stability. Tall skinny cups tip easily because their center of gravity sits high. Short wide ones don’t. A ruler, PLA, a simple model and some paint markers cover it. A plain holder takes a few hours to print, so start it after school.
AOSEED’s X-Art creation kit builds on this with a digital clock pen holder project and 12 acrylic markers for coloring prints. To test any holder, load it with pens and bump the table, then compare a narrower paper version of the same height.
Picking STEM Craft Ideas by Age
Attention span matters more than the birthday number. A quick win early on is what makes a kid ask for the next project.
Ages 4 to 6
Magnet painting, the cellophane suncatcher and chromatography flowers. All three show results within minutes, and an adult handles any cutting.
Ages 7 to 9
Shadow art, the mobile, pop up cards and a first 3D printed name tag. Kids this age can follow four or five steps and like changing one thing to see what happens. When they want more, try these easy 3D printing ideas.
Ages 10 to 12
The kaleidoscope, the automaton, flexible animals and the pen holder. If moving parts are their thing, AOSEED’s 3D printing creation kits go further, with printed pieces that become music boxes and little cars.
Safety Notes for Paint, Magnets and Printers
With a grown up in the room these are all low risk. A few habits keep them that way.
Paints, Markers and Glue
Look for the AP seal. ACMI’s guide to classroom art materials safety suggests checking for it on supplies for kids in sixth grade or younger. Washable paint also makes the pendulum painting a lot easier to clean up.
Magnets and Small Pieces
Use one large magnet wand for magnet painting. Small magnets are a different story. According to the CPSC’s page on magnets, two or more swallowed magnets can pull toward each other inside the body. Beads and sequins should stay out of toddler reach too.
3D Printer Setup
Put the printer in a room with some airflow, keep kids’ hands out of the print area while it runs, and let an adult remove parts. Illinois State University’s 3D printing safety page also warns never to touch the nozzle right after a print.
Check Printed Pieces Before Play
A flexible animal is fine for an eight year old and a choking risk for a two year old sibling. Before printed pieces get passed around, run through our parent checklist for 3D printed toy parts.
Final Thoughts on STEM Crafts for Kids
The best STEM crafts for kids leave something behind, whether that’s a paper flower in a jar, a mobile turning over the bed or a name tag clipped to a backpack. Pick one project that fits your child’s age, try the test, then change one thing.
When paper and glue aren’t enough anymore, a kids’ 3D printer gives them a way to design the next craft themselves. See how families design, print and play with AOSEED’s creative 3D printers.
FAQs
What are easy STEM crafts for kids?
Coffee filter flowers are the classic, and magnet painting and a cellophane suncatcher are close behind. Each one costs a few dollars and is done in under half an hour, which is about the limit for a lot of kindergartners.
Is there a difference between STEM and STEAM crafts?
Only on paper. STEAM adds the arts to science, technology, engineering and math, but with crafts the line mostly disappears, since a balanced mobile is a sculpture and a physics problem at the same time.
Which STEM crafts use household items?
More than you’d think. Pendulum painting runs on a paper cup and string. Shadow tracing needs one toy and some tape. The automaton is basically an empty snack box with skewers in it.
Which STEM crafts work for 5 year olds?
Anything short where the result shows up fast. Magnet painting and suncatchers are favorites at that age. Coffee filter flowers also work at five, though the pipe cleaner stems may need some help.
What STEM art projects suit elementary students?
Shadow tracing art, pendulum painting, balanced mobiles and pop up architecture cards. Each one pairs drawing or color with a real idea, from Earth’s rotation to center of mass.
Can kids design their own 3D printed crafts?
Sure, as long as the tools are simple. Most start by changing a ready model, maybe adding a name to a tag, and the AOSEED app’s kid friendly design tools let them build basic shapes without any CAD.
How do you decorate 3D printed crafts?
Acrylic paint markers are the easiest option on PLA. A quick scuff with fine sandpaper helps the paint stick to shiny spots. Our guide to painting PLA prints with kids has the full steps.
How long do 3D printed crafts take?
It depends on size. A small name tag is often done in under an hour, a flexible animal in about an hour, and a pen holder can take a few. Infill and settings change it too, so check the app’s estimate first.




Further reading

Is a Toy 3D Printer a Real 3D Printer? What Parents Should Check
6 Best 3D Pens for Kids, and When to Upgrade to a 3D Printer
10 Engineering Toys for Kids Who Like to Figure Out How Things Work


