

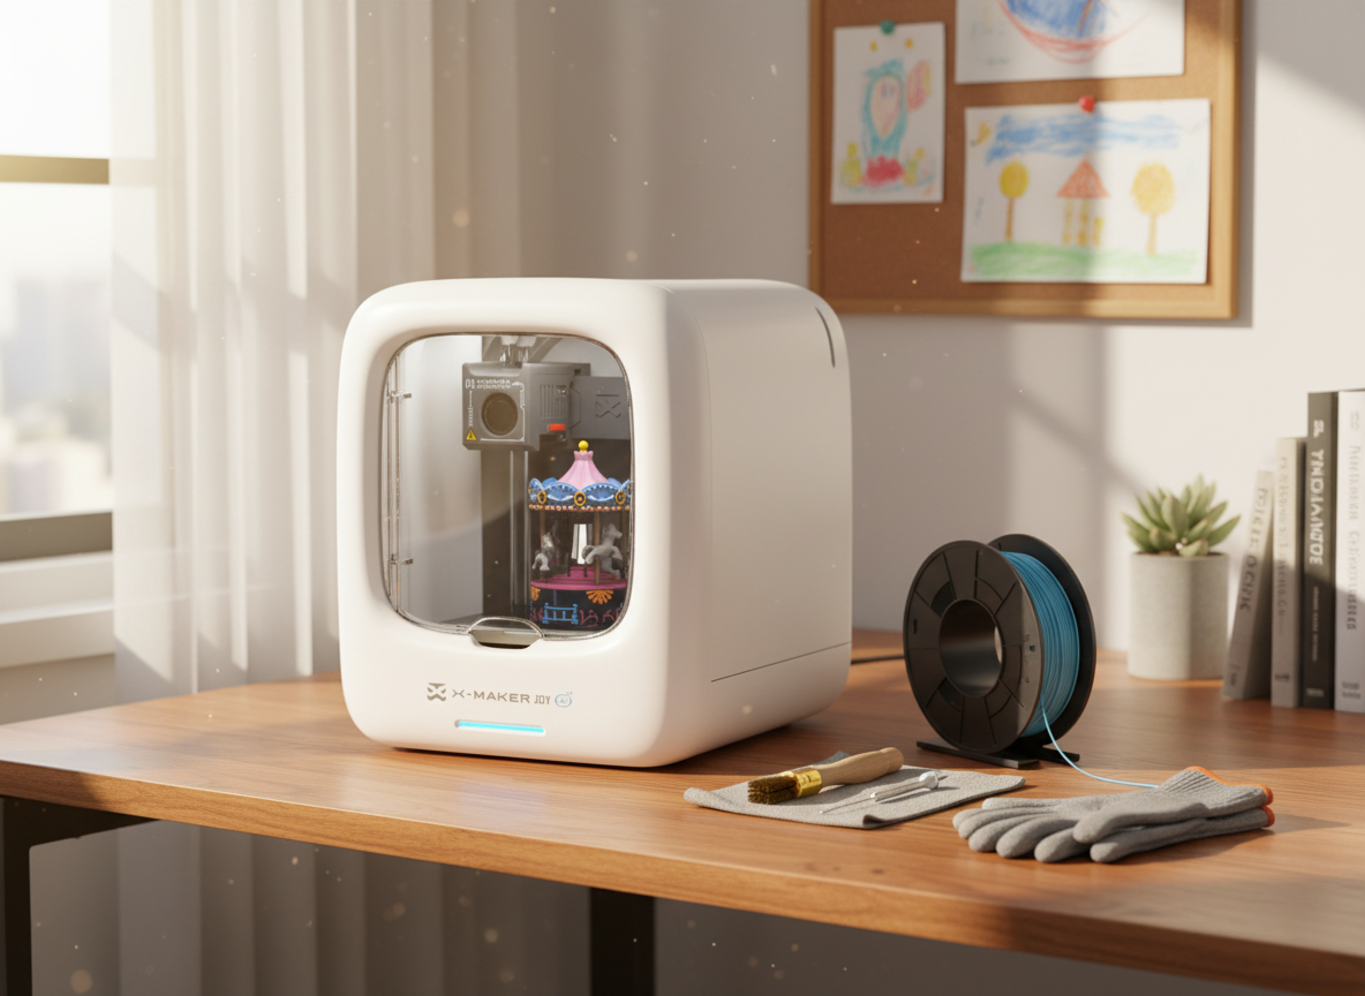
How to Clean a 3D Printer Nozzle: Step-by-Step Guide
Most makers find this answer the first time a print starts clicking mid-job and the filament refuses to flow. The good news lands fast: 90% of clogs come out with a brass brush wipe or a single cold pull, both of which take under ten minutes and cost almost nothing. No disassembly. No solvents. No starting over.
The harder questions are the ones nobody warns you about — which method to try first, when to stop cleaning and just swap the nozzle, and which steps are safe enough to do on the kitchen table with a kid in the room. This guide walks through the prevention habits that head off most clogs, the three core cleaning methods in the order you should try them, and the rarer workshop techniques reserved for adults. The whole workflow works on the PLA-friendly hardware that ships with AOSEED's family-friendly 3D printing platform.
Before You Start Cleaning
Three things have to line up before any of the methods below earn their time.
A nozzle worth cleaning
Some nozzles aren't. If the opening looks visibly oval, off-center, or wider than the original 0.4 mm spec, the brass is worn out and no cleaning brings the geometry back. Replace it. A new brass nozzle costs less than a coffee, and on AOSEED's quick-swap design, the swap takes about a minute. Cleaning is for clogs; replacement is for wear.
The right method for the material
PLA, the default for kid-friendly printers, responds beautifully to brass brushing, cleaning needles, and cold pulls with nylon. ABS adds acetone soaking to that toolkit — but it isn't a kid-friendly material and isn't what most family printers run. PETG sits between, responding to mechanical methods but not solvents. Match the method to what your printer actually prints.
Workspace and safety
A small table. Decent light. Heat-resistant gloves. A pair of pliers. For families, here's the rule that matters most: anything that involves a heated nozzle is adult-only. Kids can sort tools, prep the cleaning filament, and run the test print afterward. Hot metal — 200 °C and up — stays in adult hands. No exceptions.
|
Quick tip Confirm what filament your printer uses before picking a method. Almost every consumer printer under $400 runs PLA by default. AOSEED's family lineup is PLA-friendly, which means brass brush and cleaning needle are the daily methods, not acetone soaks. |
Why a Clean Nozzle Is Worth the Effort

A clogged nozzle isn't just a slow extrusion problem. It misprints first layers, strips filament, jams mid-print, and quietly ruins the precision of every model that comes after. The math is straightforward — even a 10% partial clog drops extrusion volume by enough to ruin small detail.
Research catalogued by NIH PubMed Central documented FDM particle release dropping noticeably after thorough nozzle cleaning, evidence that residue affects more than just print quality. A NIST additive-manufacturing program note pointed out that maintenance protocols are part of the reason additive parts can hit consumer-grade reliability. Translation: a clean nozzle is the difference between a printer that ships finished work and a printer that wastes filament.
The practical payoff:
- First layers stick cleanly without re-leveling the bed
- Layer adhesion stays consistent across every print
- Filament strips stop happening at the extruder gear
- Small details — gear teeth, text, fine geometry — come out as intended
- The next family project doesn't get canceled by a half-hour clog hunt
Stop Clogs at the Source: Settings and Habits That Help

The fastest path to a clean nozzle is to never need a deep clean. Three habits handle most of the prevention work.
|
Habit |
What it prevents |
How often |
|
Sealed filament storage |
Wet filament hissing and popping inside the nozzle |
Always between sessions |
|
Match temperature to filament |
Carbonized residue inside the bore |
Every reload |
|
Brass-brush exterior wipe |
Burnt build-up before it migrates inside |
Every 5–10 prints |
Keep filament dry
Moisture is the silent killer. Sealed airtight boxes with desiccant packs keep PLA dry indefinitely. Filament that has absorbed water pops and hisses through the nozzle, leaving micro-bubbles that solidify into clogs three prints later. If your filament sounds like bacon while extruding, it's wet — dry it in a filament dryer at 45 °C for four hours before the next session.
Match temperature to filament
Print PLA between 200 °C and 210 °C. PETG between 230 °C and 245 °C. Too hot, and the polymer carbonizes inside the bore — that black crusty residue that needs a cold pull to remove. Too cold, and the filament doesn't fully melt, leaving rough patches and partial blockages. Each spool runs a few degrees different from the next, so a temperature tower the first time you load a new brand is worth the ten minutes.
Wipe every few prints
Sixty seconds with a brass brush, every five to ten prints, prevents 90% of the gnarly clogs that need cold pulls. The brush catches surface residue before it migrates inside. It's the single highest-value habit in the entire workflow.
How to Clean a 3D Printer Nozzle Step by Step

Three methods, in order of escalation. Start with the easiest, escalate only if you need to.
What you'll need: a 0.4 mm cleaning needle (usually in the printer's accessory kit); a brass wire wheel or brush; a length of nylon or commercial cleaning filament; heat-resistant gloves; needle-nose pliers; safety glasses for kids who help out.
Method 1 — Brass Brush Exterior Wipe

The least invasive method. Heat the nozzle to your usual print temperature, then brush the outside gently with a brass wire brush. Short strokes angled toward the nozzle tip, not the silicone sock above it. Wipe once with a dry cloth.
This handles surface residue — the dark crusty buildup that's been dragging black flakes through the last few prints. Do it every five to ten prints and you'll rarely need anything else.
One thing to watch: on open-frame printers, brass bristles can short against exposed heater connectors. Users on the Prusa community forum have reported sparks from this. Enclosed family printers, where the heater block is sealed in a silicone sock, make this far less likely.
Method 2 — Cleaning Needle for Partial Clogs

If brushing didn't restore flow, move to the inside. Heat the nozzle to print temperature (around 220 °C for PLA, 240 °C for PETG). With heat-resistant gloves on, insert a 0.4 mm cleaning needle straight up through the nozzle opening. Straight up — not sideways. Sideways scratches the bore and you'll see the marks in every print after.
Push gently. A small amount of softened filament will ooze out as the blockage breaks loose. Extrude another 20–30 mm of fresh filament to flush whatever's left.
Don't force it. If the needle hits hard resistance, stop. Pushing harder either bends the needle or widens the nozzle hole — and a widened hole ruins print accuracy until you replace the nozzle entirely.
This method handles roughly 60% of clogs you'll see. The other 40% need a cold pull.
Method 3 — The Cold Pull for Deep Clogs

The cold pull (also called atomic pull) is the most useful single technique in any 3D printer owner's toolkit. Temperature changes grab the gunk inside the hot end and yank it out from above. Done right, the filament tip comes out shaped like a tiny dental impression of the inside of the nozzle — that's how you know it worked.
Full sequence:
- Unload whatever filament is currently in the printer.
- Heat the nozzle to 250 °C. Nylon or a dedicated cleaning filament works best; PLA works in a pinch for light cleaning.
- Push the cleaning filament through the hot end by hand until a clean strand flows from the tip.
- Drop the temperature. Target 90 °C for PLA, or 110 °C for ABS and nylon. Keep light downward pressure on the filament while it cools.
- When the target temperature hits, pull the filament out of the top of the hot end in one firm, fast motion.
- Look at the tip. It should look like a sharp little pin showing the inside of the nozzle. Fuzzy, smudged, or has dark flecks? Repeat.
Two or three pulls usually clear even stubborn residue.
|
Method |
Best for |
Time |
Adult-only? |
|
Brass brush |
Surface buildup, prevention |
2 minutes |
Hot step — adults only |
|
Cleaning needle |
Partial clogs near tip |
3 minutes |
Hot step — adults only |
|
Cold pull |
Deep clogs, color changes |
8 minutes |
Hot step — adults only |
|
Family-friendly tip Kids can be involved in cool steps — unloading filament, trimming the pulled tip, inspecting the result under good light, running the post-clean test print. The hot steps stay with the adult. That split makes nozzle maintenance feel like a project the family does together, not a chore one parent owns alone. |
|||
When Cleaning Doesn't Work: Soak or Swap
Some clogs resist every in-place method. Burnt PETG, carbonized PLA, and composite materials like wood-fill or carbon-fiber-fill can cement themselves inside the bore. At that point, two options remain.
Solvent soaking for stubborn residue
Let the nozzle cool, then unscrew it with a wrench. For ABS residue, drop the nozzle in a small glass of acetone overnight — the ABS dissolves out and the brass comes back clean. For PLA, the trick is heat rather than solvent, since PLA doesn't respond to common household solvents. A careful blowtorch pass outdoors, with the nozzle held in metal pliers, burns the residue away.
The NIST additive-manufacturing program notes that different polymers respond to different chemistries, which is why PLA and ABS need entirely different approaches.
Quick-swap nozzle replacement
If you've spent more than 30 minutes trying to clean a single nozzle, swap it. A new brass nozzle costs $2 to $4. On AOSEED's quick-swap design, the swap takes about a minute — which matters when there's a school project due tomorrow and an overnight soak isn't realistic.
Replace any nozzle with a visibly widened opening, an off-center hole, or wear at the tip. Once the geometry is gone, no amount of cleaning brings print quality back.
Hotend Disassembly — Workshop Method, Adults Only
|
Adults only Full hotend disassembly involves heated metal, tight clearances, and Z-offset recalibration. Not a kids' project. Never unsupervised. |
For clogs that survive the cold pull and live in the heat break (the narrow channel above the nozzle), full hotend disassembly is the last resort. This is rare on well-maintained printers — most home users never need it.
Quick steps for adults comfortable with the work:
- Cool the printer completely. Disconnect power.
- Use a two-wrench technique to break the nozzle from the heater block — one wrench holds the block, the other turns the nozzle. Single-wrench attempts strip threads.
- Inspect the heat break for stuck filament. Push it through with a cleaning needle while the assembly is cool.
- Reassemble at print temperature (hot tightening) to seal the junction and prevent leaks.
- Re-do Z-offset calibration before the next print.
Most family-focused printers, AOSEED's included, are designed to make the hot end accessible without taking the whole printer apart. If full disassembly is the only option, follow the manufacturer's guide rather than improvising.
Match the Method to the Material and Project

The right cleaning method comes down to what your printer prints and how often something gets stuck.
|
Material / Symptom |
First method |
Backup |
Kid-friendly to help? |
|
PLA — surface residue |
Brass brush wipe |
Cleaning needle |
Cool steps only |
|
PLA — partial clog |
Cleaning needle |
Cold pull with nylon |
Cool steps only |
|
PLA — deep clog |
Cold pull |
Quick-swap nozzle |
Inspection step |
|
PETG — sticky residue |
Cold pull |
Brass brush + needle |
Cool steps only |
|
ABS — stubborn clog |
Cold pull |
Acetone soak |
Adults only |
|
Wood-fill / carbon-fiber |
Cold pull |
Replace nozzle |
Cool steps only |
|
Switching colors |
Single cold pull |
Brass wipe |
Inspection step |
For most kid projects printed in PLA, the brass brush handles 80% of the cleaning work, and the cleaning needle handles the rest. The cold pull comes out for deeper jams or when switching to a very different color. Families just getting started should browse the kid-friendly 3D printers built for beginners — printers with enclosed builds and quick-swap nozzles need less aggressive cleaning, simply because there's less room for debris to settle. For older kids and teens running more intensive print schedules, theSTEM 3D printer for older kids and teens from AOSEED includes the quick-swap design that makes replacement a one-minute job when cleaning isn't worth the time.
|
FOR FAMILIES — THE EASIEST APPROACH The cleanest nozzle isn't the one cleaned hardest; it's the one that stays clean. AOSEED's X-MAKER series ships with enclosed build chambers, dust-resistant hot ends, and quick-swap nozzles that turn a 30-minute cleaning session into a one-minute swap. Pair that with sealed filament storage and a brass-brush wipe every few prints, and the whole workflow stays kitchen-table friendly. No solvents. No torches. No subscription. |
Conclusion
The shortest path to a clean nozzle runs through prevention. Sealed filament storage, the right print temperature for the spool, and a brass-brush wipe every five to ten prints — that handles 80% of the work. When a real clog shows up, escalate one step at a time: brush, needle, cold pull. Soak and swap are for the rare deep clog or a worn-out brass tip. Anything past that is for adults with the right ventilation.
AOSEED's PLA-friendly printers handle the gentler methods cleanly. The harsh chemical methods aren't needed, and shouldn't be — that's the whole point of a family creativity platform. Buy the right printer once, build the cleaning habits once, and the workflow becomes something the family runs together for years.
FAQs
What can I use to clean a 3D printer nozzle?
Honestly, way less than you'd think. The kit your printer came with — the little needle, maybe a small brass brush, a piece of cleaning filament if you got lucky — covers almost every job. Buy nylon filament if you didn't get any, and grab a brass brush from any hardware store if yours is missing. Steel brushes are tempting because they're everywhere, but they'll chew up the brass and you'll see scratch marks in your prints for weeks. Acetone? Only useful if you're printing ABS, and most family printers don't.
How do I tell if a 3D printer nozzle is clogged?
The first layer is where you'll catch it. Patchy lines, missing bits, or filament curling back up toward the nozzle instead of sticking to the bed — those are the early signs. After that you might hear a soft clicking from the extruder, which is the motor trying to push past the blockage. Quick way to check: heat the nozzle to print temp and shove 20 mm of filament through by hand. Clean nozzle drops a straight line. Clogged one hisses, curls, or just sits there.
What is the correct way to clean a clogged nozzle?
Start with the easy stuff and only go further if you have to. Brass-brush the outside first — about 8 times out of 10 that's all it needs, because what looked like a clog was just crud on the tip. If the flow's still bad, push a 0.4 mm needle straight up through the tip (gloves on, nozzle hot). Still nothing? Cold pull with nylon. Pulling it apart or buying solvents is way down the list — most people never get that far if they wipe the outside every few prints.
How do I dissolve PLA from a nozzle?
You mostly can't. Acetone does nothing to PLA, even though it works great on ABS. The chemicals that do break down PLA — dichloromethane, ethyl acetate — aren't really stuff you want lying around the house. Easier route: heat the nozzle to about 250 °C for a minute or two until the PLA softens, then push fresh filament through. If the nozzle's already off the printer, a quick pass with a small torch outside burns it clean. But for $3 you can just buy a new one, which is what most people end up doing.
Can I use isopropyl alcohol to clean print heads?
Not for clogs, no. Alcohol doesn't touch any of the common filaments — PLA, PETG, ABS, all of them shrug it off. It's fine for wiping dust or oily fingerprints off a cooled nozzle, and it's actually great for prepping the print bed before you spray glue. Just don't expect it to do anything to whatever's stuck inside. That job belongs to brushes, needles, cold pulls, or — if you're on ABS — acetone.
What is the lifespan of a 3D printer nozzle?
A brass one is good for somewhere between 500 and 1,000 hours of normal PLA or PETG. Print anything abrasive — carbon fiber, wood-fill, glow-in-the-dark, that kind of thing — and you can burn through one in under 100. Hardened steel lasts way longer, maybe 2,000+ hours, but it costs more upfront and isn't necessary unless you're regularly printing the abrasive stuff. You'll know it's done when the hole looks wider or off-center, or when prints just stop coming out clean even though everything else is fine.
Do I need to disassemble the entire hotend?
Almost never. Honestly. Cold pulls and needle cleaning solve 95% of clogs without touching a single screw. Full disassembly is for clogging way up in the heat break (the narrow tube above the nozzle), and that's rare unless the printer's been neglected for months. If you do end up doing it, work cold, use two wrenches so you don't strip the threads, and remember to re-do your Z-offset before printing again. Most family printers are built so you can get to the hot end without dismantling the whole thing anyway.
Sources
- NIST — Additive Manufacturing Research ProgramPolymer behavior and maintenance protocols across different filament types.
- NIOSH (CDC) — 3D Printing Health & Safety GuidanceVentilation and safe-handling recommendations for FDM printing in shared spaces.
- NIH PubMed Central — FDM Particle Emissions ResearchPeer-reviewed studies on how nozzle condition affects particulate release during printing.
- U.S. EPA — Indoor Air Quality GuidanceFederal guidance on ventilation and air quality in home and shared workspaces.




Further reading

Graduation Gifts for Kids: Keepsakes for Kindergarten to Fifth Grade

How to Clean a 3D Printer: A Routine for Families

3D Printer Filament Holder: Options, Setup and a Version You Can Print


