


3D Printer Unclog Nozzle Techniques: Troubleshooting Guide
Your print looks fine for the first few layers. Then the lines thin out, the extruder starts clicking, and nothing comes out. A 3D printer nozzle clog can kill a print in minutes — and clear in under twenty, if you pick the right method.
Most clogs trace back to four things: moisture in the filament, incorrect printing temperature, dust inside the hotend, or old residue left after a material change. Fix the cause and the nozzle stays clean. Chase symptoms only and the block comes back every few prints.
|
Quick fix path: Heat the nozzle to the last material's temperature. Push filament through by hand. Still weak? Try a cleaning needle. Still blocked? Run a cold pull. Nothing moves at all — remove and soak the nozzle, or replace it. Each method is in the numbered section below. |
What a 3D Printer Nozzle Clog Looks Like
Clogs rarely appear without warning. The printer signals a problem through sound, filament shape, or gaps in the print — usually before a complete failure. Catching these early saves the print and the nozzle.

Weak, Thin, or Delayed Extrusion
The printer moves, the extruder runs, but the lines are thin and broken. That is a partial clog — the nozzle opening is narrowed but not sealed. You will see gaps between walls, rough top surfaces, and a stringy first layer. Left alone, a partial clog usually hardens into a full one within a few prints.
Stop the print. Heat the nozzle and extrude a short length manually. If it comes out thin or curled, start with Method 1 below.
Clicking or Grinding From the Extruder
A rhythmic click means the extruder gear is skipping — the nozzle resistance is too high to feed filament. Each skip grinds a flat spot into the strand, and those plastic shavings fall into the extruder mechanism. Stop the print immediately. Continuing packs filament dust into the gear teeth, turning a nozzle problem into an extruder problem.
Filament Curling Up at the Nozzle
Extrude filament in open air and watch its path. Clean flow drops straight down. A curl or sideways bend means one side of the opening is narrowed. The filament follows the path of least resistance and comes out off-centre — and drags burnt debris across the print surface on its way back down.
No Filament Coming Out at All
The head moves, the motor runs, nothing comes out. That is a full block. Heat to the last material's temperature and try pushing filament through by hand with light pressure only. If it will not move, skip straight to Method 4 — the cold pull.
|
Clog Type |
What You See or Hear |
Start Here |
|
Partial |
Thin lines, gaps in walls, curled extrusion |
Manual push or cleaning needle |
|
Full |
No filament, extruder clicking, gear grinding |
Cold pull, nozzle removal, or swap |
Why Your 3D Printer Nozzle Keeps Clogging
One clog is bad luck. Two in a week is a pattern. Repeat blockages almost always come from one of the causes below — and fixing the root cause stops the problem returning after every clean.

Damp or Low-Quality Filament
Filament absorbs moisture from air. PETG can take on enough water overnight in a humid room to bubble during extrusion. That moisture flashes to steam at 230°C — you hear popping, the flow becomes uneven, and deposits harden inside the melt zone. Cheap filament adds a second problem: inconsistent diameter. Strands varying between 1.68 mm and 1.82 mm create pressure spikes that leave deposits. Store spools sealed with desiccant. If you hear bubbling, dry the spool at 50°C for four to six hours before printing again.
Wrong Printing Temperature
Too low and the filament never fully melts — the extruder pushes semi-solid material until it seizes. PLA at 175°C instead of 200°C is a common example. Too high and the filament burns. Sitting at 240°C idle for ten minutes can carbonise whatever is inside the nozzle. Hard black deposits do not clear with a needle; they need a cold pull or a soak. Start at the middle of the filament maker's recommended range and adjust in 5°C steps.
Heat Creep
Heat creep happens when the hotend cooling fan fails to keep the heat break cold. Heat migrates upward, the filament softens before it reaches the melt zone, and it swells to seal the path. PLA is the most vulnerable — its glass transition temperature is around 60°C, far lower than ABS or PETG. The Bambu Lab clog troubleshooting guide confirms heat creep is the leading cause of extruder-side clogs in enclosed printers. Open the front door or top panel during long PLA prints; dropping chamber temperature by 5–10°C significantly reduces the risk.
Filament Changes Without Purging
Switching from ABS (230–250°C) to PLA (190–220°C) without purging leaves ABS residue that hardens when the nozzle drops to PLA temperature. The new filament pushes against a plug. Fix: set the nozzle to the higher material's temperature, push at least 200 mm of new filament through until the colour runs clean, then drop to the new material's setting.
Retraction Too Aggressive
Retraction above 6–7 mm on Bowden or above 1–2 mm on direct drive yanks hot filament into cooler sections of the heat break. The filament cools, expands slightly, and forms a plug above the nozzle. This shows up after travel moves or between small parts on a multi-object print. Lower retraction in 0.5 mm steps until clogs stop.
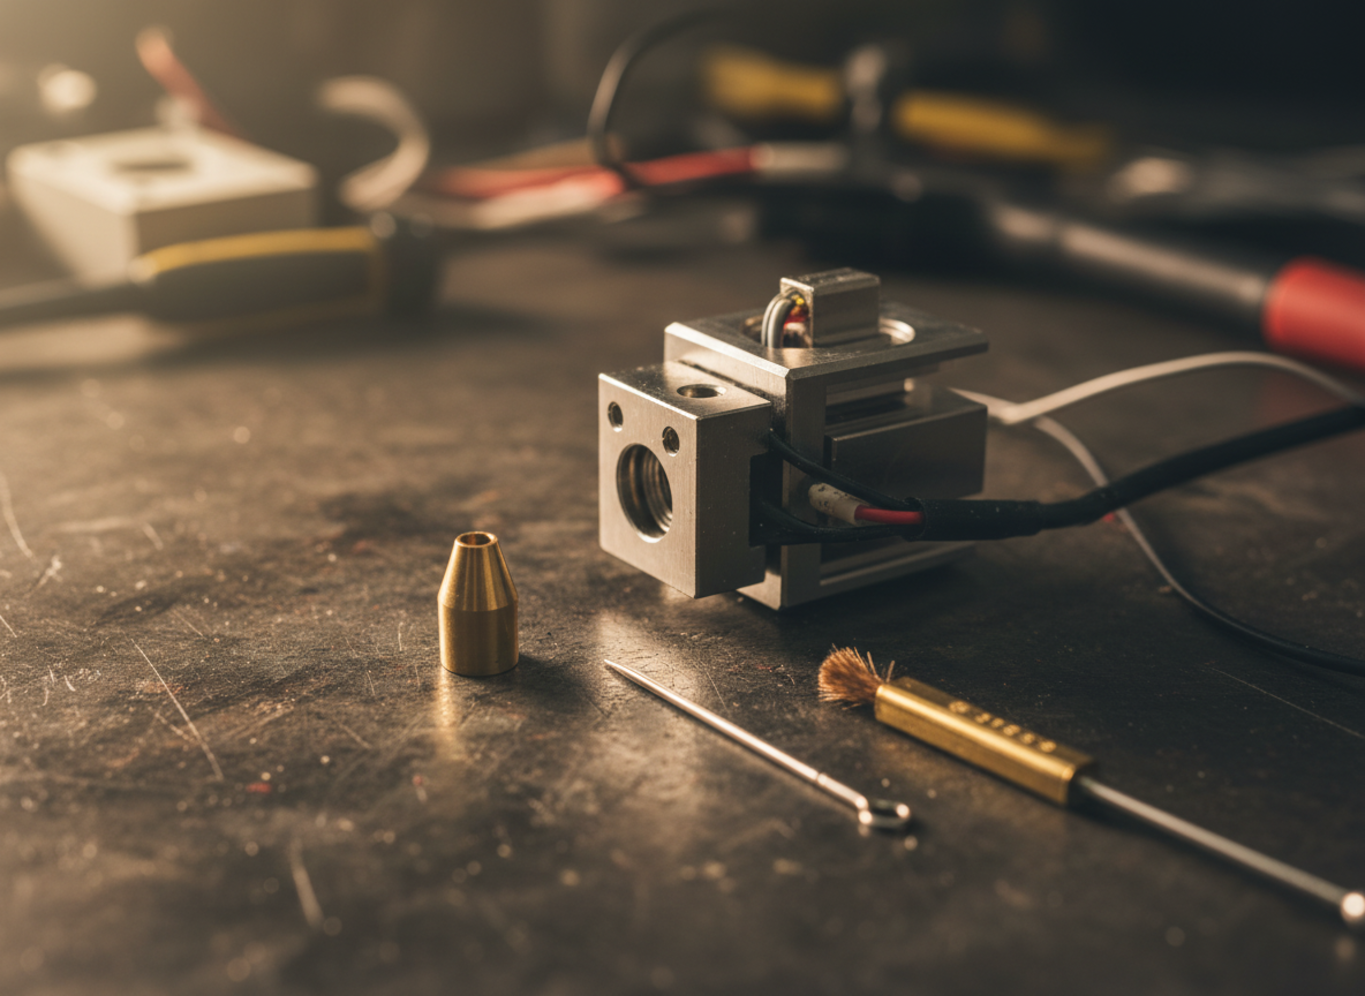
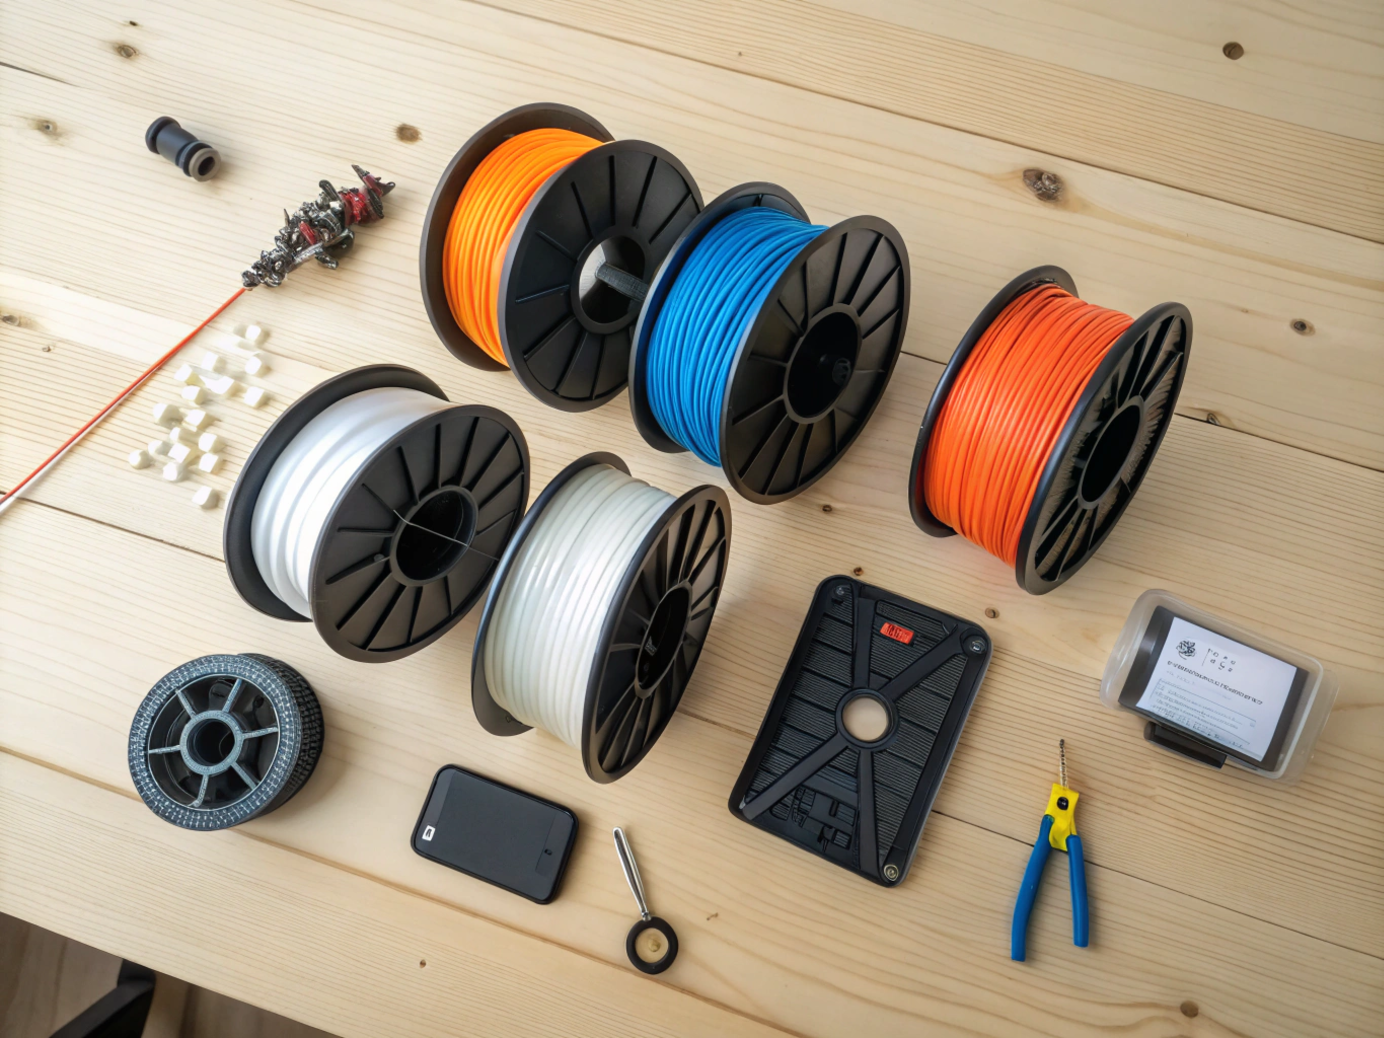
What You Need Before You Start

|
Non-negotiable: Turn off and unplug the printer unless the specific step requires heat. The heater block reaches 220°C+ and stays hot for minutes after power-off. Wear heat-resistant gloves near the active hotend. Safety glasses any time you use a needle, compressed air, or brittle filament. |
|
Tool |
Used For |
Notes |
|
Cleaning needle / fine wire |
Partial tip blockages |
Match to nozzle size — 0.35–0.4 mm for standard 0.4 mm nozzles |
|
Brass brush |
External burnt-plastic buildup |
Softer than steel — will not scratch the nozzle surface |
|
Cleaning or nylon filament |
Cold pulls, material-change purges |
Holds together better than PLA; grabs internal debris more reliably |
|
Socket wrench + hex key |
Nozzle removal and reinstall |
Two-tool grip: one holds the heater block, one turns the nozzle |
|
Acetone |
ABS residue — removed nozzle only |
Does not dissolve PLA or PETG. Use away from flames. |
|
Heat gun |
Severe clogs on a removed nozzle |
More controlled than flame. Stop before visible discolouration. |
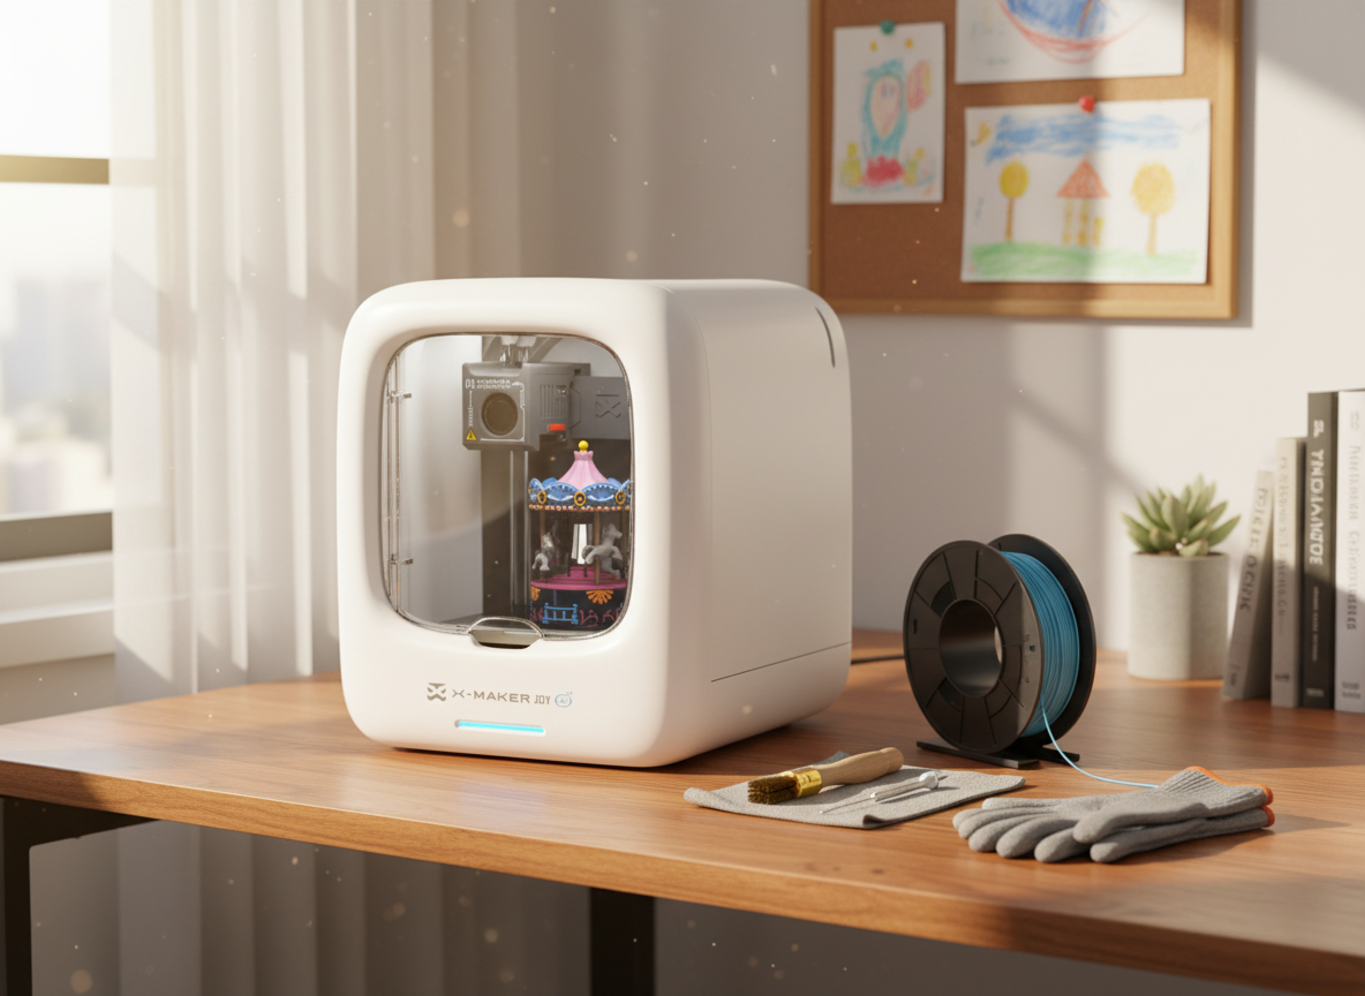
AOSEED X-MAKER JOY users: the quick-swap nozzle starter printer for families handles a blocked nozzle in under two minutes — no wrench needed, no heater-block support. For families, that changes maintenance from a project into a pause.
|
WHEN A KID IS THE ONE PRINTING
A child does not want a maintenance session. They want to design something, watch it build, and play with the result. One blocked nozzle mid-print — especially with no adult around — breaks that loop. Open-frame budget kits tend to end with a parent troubleshooting on a Saturday. Pre-assembled enclosed machines designed for ages 4–12 — like the AOSEED X-MAKER JOY at around $299, which ships with 1,500+ ready-to-print models — handle most nozzle issues through the app before they reach the child. If a child is the main user, see the kid-friendly 3D printer lineup before buying. |

8 Proven Unclog Nozzle Techniques

Work through these in order. Each step is slightly more involved than the last. Stop the moment the clog clears — the goal is minimum force needed.
Method 1 — Manual Filament Push
Best for: soft partial clogs where filament still moves slightly
- Heat the nozzle to the filament's normal printing temperature.
- Release the extruder arm tension if your printer allows it.
- Push filament into the hotend with steady, light hand pressure.
- Watch the nozzle tip — clean, even flow means the clog is clear.
|
Stop if: The filament will not move with light pressure. Forcing it strips the strand and packs debris tighter. Move to Method 2. |
Method 2 — Cleaning Needle for Tip Blockages
Best for: small debris at the nozzle opening
- Heat the nozzle to printing temperature.
- Insert a 0.35–0.4 mm needle into the nozzle tip about 10 mm deep.
- Move it up and down with light pressure — five or six strokes.
- Extrude filament to confirm clean flow. Repeat once if still weak.
Method 3 — Brass Brush for External Buildup
Best for: burnt plastic on the outside of the nozzle dragging into prints
- Heat nozzle until surface plastic is soft and tacky.
- Brush tip and sides from multiple angles with light strokes.
- Extrude briefly to flush loosened debris.
Method 4 — Cold Pull (Atomic Method)
Best for: moderate clogs, post-material-change cleaning, dark carbonised residue
The cold pull removes residue from inside the nozzle without disassembly. The Prusa Knowledge Base cold pull guide and the MatterHackers nozzle unclogging guide both recommend nylon or dedicated cleaning filament — both stay cohesive during the pull and grab debris that PLA leaves behind.
- Heat to printing temperature. Load cleaning filament and push until it flows.
- Drop temperature to the pull point for your material (see table below).
- Grip the filament firmly and pull upward in one smooth, fast motion.
- Inspect the tip. Dark specks or a nozzle-mould shape means it worked. Repeat until the tip comes out clean.
|
Filament |
Heat-To Temp |
Pull-At Temp |
|
PLA |
200°C |
90–100°C |
|
ABS |
240°C |
110–120°C |
|
PETG |
235°C |
120°C |
|
Nylon / Cleaning filament |
250°C |
90–110°C |
Method 5 — Cleaning Filament Purge
Best for: colour changes, switching material types, routine maintenance
- Heat to the cleaning filament's recommended range.
- Feed until the extruded strand looks clean and even.
- Follow with a cold pull for a deeper result.
Method 6 — Remove and Soak the Nozzle
Best for: clogs that survive multiple cold pulls, heavily carbonised ABS residue
- Heat nozzle to 200°C to soften residue. Turn off and unplug the printer.
- Hold heater block with one wrench; loosen the nozzle with a second tool.
- Soak in acetone for ABS (30 min to overnight). Use isopropyl for light PLA buildup on outer surfaces only.
- After soaking, clear remaining debris with a needle and brush.
- Dry completely. Reinstall while the hotend is warm to seat the threads properly.
|
Solvent rule: Soak the nozzle only — never the full hotend. Keep acetone away from the heater block, wires, and thermistor. Acetone is flammable; work away from heat sources. |
Method 7 — Heat Gun for Severe Clogs
Best for: severely carbonised nozzles that soaking alone cannot clear
- Remove the nozzle first (Method 6, steps 1–2).
- Place on a ceramic tile. Hold with metal pliers.
- Apply heat gun until stuck filament softens or burns to ash. Stop before the metal glows.
- Cool, clear loosened debris with a brush, then reinstall.
Method 8 — Replace the Nozzle
Best for: worn nozzles, visible damage, clogs returning after multiple cleaning attempts
Nozzles are consumables. A brass nozzle printing heavy carbon fibre can show wear after 500 grams. Cleaning it at that point is less productive than a swap — and a new nozzle costs less than the filament a failed print wastes.
- Heat hotend to printing temperature to soften residue in the threads.
- Hold heater block steady. Remove old nozzle with a socket wrench.
- Thread new nozzle in by hand, then tighten firmly at temperature.
- Extrude 100 mm of filament to flush debris before the first print.
AOSEED X-MAKER JOY users: the quick-swap nozzle starter printer for families skips this process entirely — the nozzle module detaches and reattaches in under two minutes, no heater block support needed.
|
QUICK BENCHMARK Methods 1–3 take under five minutes each. A cold pull (Method 4) runs 10–15 minutes including heat-up and cool-down. Full nozzle removal and soak (Method 6) takes 30 minutes to overnight. Replacement (Method 8) takes under 10 minutes once the new nozzle is in hand. |
Nozzle Clogs by Filament Type

Different materials clog differently. Match the fix to what was loaded when the block appeared.
|
Filament |
Most Common Clog Cause |
Fix First |
Solvent if Soaking |
|
PLA |
Heat creep / weak cooling fan |
Cold pull; check hotend fan |
None — mechanical only |
|
ABS |
Residue after material switch |
Purge at 240°C; cold pull |
Acetone (removed nozzle only) |
|
PETG |
Moisture absorption; sticky residue |
Dry spool 65°C / 4h; brass brush + cold pull |
Isopropyl (external only) |
|
TPU |
Buckles in feed path before nozzle |
Half print speed; check extruder tension |
N/A |
|
CF / Fill |
Particle bridging; brass nozzle wear |
Use 0.6 mm hardened nozzle; replace sooner |
None — replace nozzle |
How to Prevent Future Nozzle Clogs

Most clogs are preventable. Five habits stop the majority of blockages before they start.
Store Filament Sealed and Dry
Use airtight boxes or vacuum bags with silica gel desiccant. A hygrometer card inside each box tells you when the desiccant needs replacing — anything above 20% relative humidity means it does. PETG, nylon, and TPU are especially hygroscopic; treat open spools as if they expire.
Match Temperature Every Time
Two brands of the same material can need 10–15°C different settings. Start at the middle of the listed range and adjust in 5°C steps. Keep a short log — it prevents the same temperature mistake from causing the same clog twice.
Purge Before Every Material Change
Set the nozzle to the higher temperature material's range. Push the new filament through until colour runs completely clean — 100–200 mm of purge material is usually enough. Cleaning filament grabs residue more reliably than standard materials during the transition.
Clean on a Schedule, Not Just After Failures
|
How Often |
Task |
|
After every print |
30-second brass brush wipe on the nozzle tip while still warm |
|
Every material change |
Full purge at the higher material's temperature |
|
Every 20–50 print hours |
Cold pull — even if flow looks fine |
|
Quarterly |
Deep-clean or replace nozzle. Check hotend fan, extruder gear, and heat sink. |
Check the Hotend Fan
A failing hotend fan is the most common cause of repeat PLA clogs. Spin it by hand — it should rotate freely. If PLA clogs start happening 30–45 minutes into prints, the fan is likely the cause.
When to Clean vs. When to Replace
Keep Cleaning When
- Flow improves after a needle clean, cold pull, or purge — even partially.
- The nozzle orifice looks round and undamaged up close.
- Print quality was good before this specific clog.
Replace the Nozzle When
- Three or more cold pulls have not restored smooth extrusion.
- The orifice looks oval, enlarged, or has visible scratches.
- Walls are rough and detail is soft — even after a successful clean.
- The nozzle has been used heavily with abrasive filament for 500+ grams.
|
Editor note: Brass nozzles are cheap. The filament wasted across a week of failed prints is not. Keep two or three spare nozzles in the right size for your printer. When cleaning stops working, a five-minute swap gets you back to printing the same day. |
When the Problem Is Above the Nozzle
If filament will not feed even with the nozzle removed, the block is in the heat break, Bowden tube, or extruder — not the nozzle. Disconnect the Bowden tube from the extruder end and push filament through by hand. If it catches, the tube is blocked. If the extruder gears cannot grip, they are packed with shaved filament dust and need cleaning.
For step-by-step first-maintenance guidance, the AOSEED Learning Center — part of AOSEED's family-friendly 3D printing platform — walks new users through both nozzle and extruder maintenance in plain language before things escalate.
Conclusion
A nozzle clog is solvable almost every time — but only if you match the method to the severity. Thin lines need a needle. Clicking with no flow needs a cold pull. A nozzle that survives three cold pulls needs to come off for a soak or a swap. That escalation path covers the vast majority of blockages most people will ever see.
Repeat clogs mean there is a cause to fix, not just a nozzle to clean. Wet filament, a failing fan, wrong temperature, aggressive retraction — one of those four is almost always behind it. Find it, fix it once, and the same clog stops coming back every few prints.
The other thing nobody tells you before buying a printer: the first clog is the worst one. Not because it is the most severe, but because you do not know yet that it is normal, fixable, and usually done in under fifteen minutes. After the second or third time, it stops feeling like a crisis and starts feeling like routine maintenance — the same way a paper jam stopped being alarming after you owned a printer for a month.
Replace the nozzle when cleaning stops working. It is the fastest fix at that stage, and a new nozzle costs less than the filament a bad print wastes. Keep two spares in the drawer and you will never lose a print day to a worn tip again.
For families looking to reduce the maintenance loop entirely, thekid-friendly 3D printer lineup andAOSEED's family-friendly 3D printing platform — with enclosed, app-guided machines and quick-swap nozzle systems — handle most prevention steps automatically, so the printer stays on making things rather than waiting for a fix.
FAQs
What to do if a 3D printer nozzle is clogged?
Heat the nozzle to the last filament's printing temperature. Push filament through by hand with light pressure. If flow is weak, use a cleaning needle with gentle up-and-down strokes. If nothing moves, run a cold pull: load nylon or cleaning filament, cool to 90–100°C for PLA, pull in one firm motion.
Never force filament through a blocked nozzle. The extruder gear grinds the filament into dust that makes the next clean harder. If all methods fail, remove and soak the nozzle or replace it — a new nozzle costs less than a failed print.
Practical tip: check temperature first. A nozzle set 10–15°C too low is one of the most common causes of a full block, and the fix takes seconds.
How do you unblock the nozzle?
Work in order: manual push, cleaning needle, brass brush for external buildup, cold pull, cleaning filament purge, nozzle removal and soak. Each step handles a different clog depth. The cold pull is the most effective non-invasive option — repeat until the pulled filament tip comes out completely clean.
For ABS residue, a removed nozzle soaked in acetone overnight dissolves most hardened material. The Prusa clogged nozzle guide recommends repeating cold pulls until the filament tip shows no dark particles at all. PLA does not respond to acetone; use mechanical cleaning or a heat gun on the removed nozzle instead.
How do you stop a nozzle from clogging?
Four habits prevent most clogs: store filament sealed with desiccant, match temperature to the filament spec, purge the hotend before every material change, and run a cold pull every 20–50 print hours. Most repeat clogs trace to one of these four being skipped.
Moisture is the most underestimated cause. PETG left open overnight in a humid room can absorb enough water to bubble inside the nozzle. Nylon is even more sensitive. Sealed storage with active desiccant is the highest-return change most users can make. Families choosing the kid-friendly 3D printer lineup will also find that app-guided preset profiles reduce temperature-related clogs by eliminating manual dial-in for most filament types.
What is the lifespan of a 3D print nozzle?
A brass nozzle printing standard PLA typically lasts three to six months. With carbon fibre or glow filament, that same nozzle can show measurable wear after 500 grams — the particles act like sandpaper on the inner bore, gradually widening the orifice.
A worn nozzle does not always block; it causes inconsistent line width, rougher walls, and softer detail without a classic clog. When those symptoms appear and cleaning does not help, the nozzle tip is the problem. The Obico nozzle troubleshooting guide recommends replacing when the orifice appears oval or enlarged under close inspection. Switch to hardened steel or a ruby-tipped nozzle for abrasive materials — they last five to ten times longer than brass.
Why does my PLA keep clogging?
Usually heat creep, not temperature being too low. PLA softens around 60°C — well below what the heat break sees during long prints or in enclosed spaces. When the hotend cooling fan weakens, the softening zone creeps upward and PLA swells before reaching the melt zone.
Diagnose it: if the clog happens 30–45 minutes into a print rather than at the start, heat creep is likely. Open the printer enclosure and see whether the clog timing changes. Also check whether the cooling fan spins freely and at full speed.
Can I use isopropyl alcohol to clean print heads?
Isopropyl alcohol is useful for cleaning exterior surfaces of the hotend, wiping the print bed, and cleaning tools. It is not effective for hardened PLA, PETG, or ABS inside the nozzle — those materials need mechanical cleaning or material-specific solvents.
For PLA residue inside the nozzle, heat and mechanical methods — needle, cold pull, heat gun on a removed nozzle — are far more effective. For ABS inside a removed nozzle, acetone is the right solvent. IPA is for surfaces that are already mostly clean.
How to tell when a 3D printer nozzle needs replacing?
Three signals: multiple cold pulls and cleaning attempts have not restored smooth extrusion and the clog keeps returning; print quality problems persist even after a successful clean (rough walls, inconsistent line width, soft detail); or close inspection of the nozzle tip shows an oval or enlarged orifice, visible scratching, or a rounded edge.
Trying to extend nozzle life past this point costs more in failed prints and wasted filament than a replacement nozzle would.
What is the unclogging tool for 3D printers?
There is no single universal tool — the right tool depends on the clog type. For tip blockages: a 0.35–0.4 mm acupuncture-style cleaning needle. For external buildup: a brass wire brush. For deep internal residue: nylon or dedicated cleaning filament for cold pulls. For severe or carbonised clogs: acetone (ABS only) for soaking a removed nozzle, or a heat gun for burnout cleaning.
Most 3D printer maintenance kits include a set of cleaning needles, a brass brush, and a few lengths of cleaning filament. That covers the majority of blockages without needing additional tools.
Sources
- Bambu Lab Wiki, "3D Printer Clog."
- Prusa Knowledge Base, "Cold Pull."
- Prusa Knowledge Base, "Clogged Nozzle."
- MatterHackers, "How to Unclog a 3D Printer Nozzle."
- UltiMaker Support, "Print Core Cleaning Maintenance."
- Obico, "Step-by-Step Guide to Unclogging Your 3D Printer Nozzle."
- Reddit, r/3Dprinting, "Best Way to Unclog Nozzle."


You may also like
Further reading

Printable STEM Challenges for Grades 4-6 Using 3D Printing

Small Group 3D Printing Activity With One Printer

Elementary STEM 3D Printing: Simple Projects Teachers Can Actually Run


