

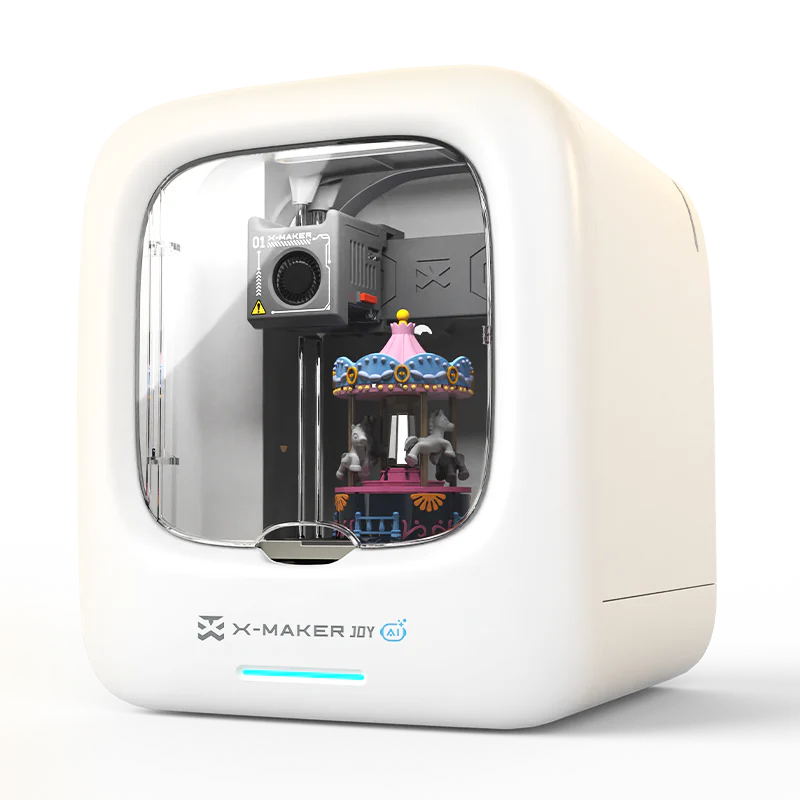
7 Beginner 3D Printing Mistakes Families Can Avoid
Most beginner 3D printing mistakes have nothing to do with the printer being wrong. They come from the same small set of skipped steps and incorrect assumptions that every new family encounters in the first two weeks. The good news: every mistake in this list is avoidable before the first session, not after.
This guide covers the seven most common beginner errors — with the specific impact each one has, the root cause behind it, and the straightforward fix that prevents it. It also covers the two AOSEED models most families choose between and explains how each one is designed to eliminate the most common errors by default.
If you are still deciding which printer fits your family, the AOSEED X-MAKER JOY and AOSEED X-MAKER are the two models covered in the product comparison section at the end of this guide.
|
7 mistakes Covered in this guide — all preventable |
45% Of beginners question 3D printing after early failures |
Mistake 1 Bed leveling — the most common first-session failure cause |
PLA The only beginner material — prevents 3 of the 7 mistakes by default |
Cost of Each Mistake — Time, Material, and Session Impact
|
Mistake |
Time cost |
Material waste |
Session impact |
Prevention effort |
|
Skipping bed leveling |
30–120 min |
1–3 sessions of filament |
Complete session failure |
30 seconds — run auto-level before start |
|
Poor-quality filament |
Variable — clogs unpredictably |
Up to full spool |
Partial or complete session failure |
One decision: buy sealed brand-verified PLA |
|
Wrong software settings |
30–60 min troubleshooting |
1–2 hours of material |
Degraded quality, not always failure |
Use app-managed presets for first 10 sessions |
|
Ignoring the first layer |
Immediate — failure starts at layer 1 |
Partial — stopped early |
Failure before session produces anything |
3-minute plate clean + Z-offset check |
|
Printing too fast |
10–30 min |
Partial — print forms but poorly |
Poor quality but sometimes salvageable |
Set first layer speed and never increase it |
|
Overloading the build plate |
2–4 hours of a failed batch |
Multiple models all failed |
High-effort session with nothing to show |
Print 1 model per session for first month |
|
No supports on overhangs |
15–30 min |
Partial print salvageable |
Model incomplete or rough |
One checkbox in slicer before every session |
7 Beginner 3D Printing Mistakes — Each One Explained

How-To Geek's guide Don't Make This Common Beginner's 3D Printing Mistake identifies filament quality and first-layer attention as the two single changes that would resolve the majority of beginner failures across all printer types. The seven mistakes below expand that analysis into the full set of common errors families encounter in the first month of 3D printing.
MISTAKE 1 · Skipping Bed Leveling

|
MISTAKE 2 · Using Low-Quality or Wet Filament

|
MISTAKE 3 · Ignoring Slicer Software Settings

|
MISTAKE 4 · Not Watching the First Layer

|
MISTAKE 5 · Printing Too Fast or Too Hot

|
MISTAKE 6 · Crowding the Build Plate

|
MISTAKE 7 · Not Using Supports on Overhangs

|
Beginner Settings Reference — What to Use and When
ItsMeAdMade's guide to 3D Printing Mistakes Every Beginner Makes identifies incorrect software settings (slicer speed, temperature, and infill) as one of the most common sources of beginner frustration — and the one that beginners are least likely to know how to fix because they do not know which setting caused the problem.
PLA Settings Reference — Beginner to Session 20+
|
Setting |
Family beginner (default) |
Second week adjustment |
Advanced (session 20+) |
|
First layer speed |
20–30 mm/s — slow enough to bond |
20–30 mm/s — keep this permanently for first layers |
20–25 mm/s — do not increase first layer speed |
|
Standard print speed |
40–50 mm/s — cautious start |
45–55 mm/s — once first layer habit is established |
50–60 mm/s — only after 10+ consistent sessions |
|
PLA nozzle temp |
200°C — reliable across all PLA grades |
200–205°C — if slight under-extrusion |
205–210°C — for silk PLA or older spools |
|
PLA bed temp |
60°C — standard starting point |
60–65°C — if corner lifting occurs |
65°C — for large flat-base models in dry rooms |
|
Infill density |
10–15% — sufficient for decorative objects |
15–20% — for toys that will be handled and played with |
20–30% — for creation kit mechanical parts and gears |
|
Layer height |
0.2mm — best balance of speed and quality |
0.15mm — smoother surface if session time allows |
0.1mm — for highly detailed figurines and gift objects |
|
The One Rule for Software Settings For the first 10 sessions: use the default preset. Change nothing. Once you have 10 successful prints using the default settings, you have the reference point needed to understand what a change does. Every beginner mistake related to settings comes from changing multiple variables without a baseline. The default preset is your baseline. |
Infill Density — What Each Level Actually Means
|
Infill density |
Structure produced |
Best for |
Avoid for |
|
10–15% (recommended for first sessions) |
Sparse honeycomb — plenty of air space |
Figurines, keychains, decorative objects, most Toy Library projects |
Objects that will be actively thrown, dropped, or used mechanically |
|
20–30% (week 2 expansion) |
Denser grid — visible cross-hatch through top layer |
Fidget toys, vehicles, puzzles — anything handled during active play |
High-detail figurines where surface matters more than strength |
|
40–50% (strong functional parts) |
Near-solid structure — heavy, slow print |
Creation kit mechanical parts, gear mechanisms, functional enclosures |
Most decorative family session projects — wastes time and filament |
|
100% (avoid for beginners) |
Completely solid — longest print time |
Nothing a family beginner session needs |
All beginner sessions — solid infill adds no strength benefit over 40-50% |
AOSEED X-MAKER JOY vs X-MAKER — Which Is Right for Your Family?

The two mistakes that hurt families most are Mistake 1 (bed leveling) and Mistake 3 (software settings). Both are addressed at the product level by AOSEED's design choices. The comparison below shows how each model handles these variables — and which family scenario each one is designed for.
Product Comparison — Specifications, Pros, Considerations, and Best For
|
|
Which printer eliminates the most beginner mistakes by default?
- Mistake 1 (bed leveling): X-MAKER JOY — factory pre-leveled eliminates manual calibration entirely on setup day.
- Mistake 2 (filament quality): Both — AOSEED filament is brand-verified PLA sealed at purchase.
- Mistake 3 (software settings): X-MAKER JOY — app-managed presets for all Toy Library sessions.
- Mistake 4 (first layer): Both — enclosed design + built-in camera (X-MAKER JOY) support first-layer monitoring.
- Mistakes 5, 6, 7: X-MAKER JOY — app optimized session presets prevent speed and temperature errors by default.
What Is 3D Printing — For Parents New to the Technology

3D printing (also called FDM — Fused Deposition Modeling) builds physical objects by melting a thin plastic strand and depositing it in layers, from the bottom upward, until the complete object is formed. The printer reads a digital file and executes the build automatically.
For family use: a child chooses a design in the app, confirms a filament color, and presses start. The printer does the rest. The child's active involvement is in design selection, decoration, and play — not in managing the printer's mechanics. That is the model that produces consistent family making sessions.
|
3D printing term |
What it means (parent language) |
Why it matters |
|
FDM (Fused Deposition Modeling) |
The most common type: melts plastic and deposits it in layers |
The format used by all AOSEED printers — accessible and safe for home use |
|
PLA (Polylactic Acid) |
Non-toxic, plant-based plastic — the beginner standard |
The correct material for all family sessions — avoids most temperature and fume concerns |
|
Slicer software |
The app that converts a 3D design file into printer instructions |
X-MAKER app manages slicing automatically — no manual intervention needed for Toy Library models |
|
First layer |
The initial printed foundation — the most critical phase |
If this bonds correctly, the session usually succeeds. If not, the session fails at layer 1. |
|
Infill |
The internal structure — not visible from outside the object |
10–15% is sufficient for most family toys. Higher infill wastes time and filament. |
|
Support structures |
Temporary scaffolding for overhanging parts |
Required for certain models. Toy Library models are tested for support requirements. |
|
STL / 3MF files |
Digital 3D design files — the 'blueprint' the printer reads |
3MF is newer and more precise. The Toy Library provides pre-tested files in the correct format. |
Conclusion
Seven mistakes. Seven preventable causes. The pattern is the same across all of them: beginner 3D printing failures happen when variables are left unmanaged. A dirty plate, wet filament, default settings that were not checked, first layers that were not watched. Every mistake in this list has a prevention action that takes under 5 minutes.
The families who avoid these mistakes consistently are the ones who build the session habits described in this guide before the first print — not after the second failure.
For families choosing their first printer, AOSEED 3D printers for kids shows both models with guidance on which setup features reduce first-session failure rates for beginning families.
FAQs
What is the biggest problem with 3D printing for beginners?
Inconsistency — prints that work one day and fail the next for no apparent reason. This inconsistency almost always traces to one of three sources: filament moisture (absorbed from storage), a build plate that shifted slightly since the last session, or a software setting that was changed between sessions. The most reliable fix is a consistent pre-session checklist: clean plate, sealed filament, default settings. Three checks that take under 3 minutes and prevent the majority of repeat failures.
What are the 7 types of 3D printing?
The seven main 3D printing technologies are FDM (Fused Deposition Modeling), SLA (Stereolithography), DLP (Digital Light Processing), SLS (Selective Laser Sintering), DMLS (Direct Metal Laser Sintering), SLM (Selective Laser Melting), and MJF (Multi Jet Fusion). For family home use, FDM is the correct technology — it uses solid plastic filament, produces no liquid resin or laser exposure, and is designed for safe home operation. All AOSEED printers use FDM. SLA and DLP use liquid resin that requires different safety precautions and is not suitable for children's home use.
What is the 45-degree rule in 3D printing?
The 45-degree rule describes the maximum overhang angle that an FDM printer can bridge without support structures. Any feature of a model that extends outward at an angle steeper than 45 degrees from vertical will droop or fail without a temporary support printed beneath it. For practical family use: if a model has outstretched arms, horizontal platforms, or jutting features, check whether supports are required in the slicer settings before starting the session. Many Toy Library models are designed to be self-supporting at angles under 45 degrees to eliminate this variable.
Is 3D printing difficult for beginners?
With the right setup, it is not. The difficulty comes from the gap between what a beginner expects (press start, get a perfect object) and what early 3D printing actually requires (correct bed level, sealed filament, correct temperature, first-layer monitoring). Printer choices that close that gap — like factory pre-calibration, app-managed settings, and enclosed designs — significantly reduce the beginner learning curve. Most families using a family-focused printer with an app-led workflow reach consistent successful sessions within 3 to 5 attempts.
Can I print 0.2mm layer height with a 0.4mm nozzle?
Yes. 0.2mm layer height with a 0.4mm nozzle is the standard beginner setting and produces the best balance of print speed and surface quality for family sessions. The general rule is that layer height should be between 25% and 75% of the nozzle diameter — so for a 0.4mm nozzle, the usable range is 0.1mm to 0.3mm. The 0.2mm standard setting is squarely in the reliable zone. Printing at 0.1mm is possible and produces smoother surfaces but doubles the print time. For beginner family sessions, 0.2mm is the recommended default.
Is 40% infill strong?
40% infill is strong for most family session uses — toys, figurines, creation kit components, and household gadgets. It is significantly stronger than the 10–15% beginner default but uses twice the material and time. The practical guide: use 10–15% for decorative objects and anything that will sit on a shelf; use 20–30% for objects that will be actively played with; use 40% for mechanical parts and structural components in creation kits. 100% infill is almost never needed for family projects and wastes both session time and filament.
What is the best material for 3D printing for beginners?
PLA is the correct starting material for every beginner family session — no exceptions. It is non-toxic (plant-based, from corn starch), has the lowest shrinkage of any common material (meaning less warping and bed adhesion failures), produces minimal odor at printing temperature, and is compatible with the widest range of bed surfaces. PETG is the correct next material once 10+ successful PLA sessions have established the baseline session habit. ABS requires high bed temperatures and an enclosure to manage fumes and is not appropriate for family home use with children.
Should I always monitor the first few minutes of a print?
Yes — for the first 10 sessions, without exception. After that, the first-layer confirmation check becomes a 3-minute routine rather than active monitoring. The specific thing to watch: the first layer lines should be flat and bonded to the plate, not round beads sitting on top of it. If the lines are round or not sticking in any zone of the build plate, stop the session and correct the Z-offset or re-clean the plate before restarting. Catching a first-layer failure at minute 2 saves the entire session's material. Catching it at minute 20 wastes 20 minutes of filament.
Sources
- How-To Geek — Don't Make This Common Beginner's 3D Printing Mistake, Don't Make This Common Beginner's 3D Printing Mistake, 2022.
- ItsMeAdMade — 3D Printing Mistakes Every Beginner Makes, 3D Printing Mistakes Every Beginner Makes, 2023.
- Simplify3D — Print Quality Troubleshooting (Common Problems and Solutions), Print Quality Troubleshooting (Common Problems and Solutions), 2026.
- 3D Hubs — Common 3D Printing Mistakes Beginners Make, Common 3D Printing Mistakes Beginners Make, 2025.
- LayerShift — 12 Common 3D Printing Mistakes Beginners Should Avoid, 12 Common 3D Printing Mistakes Beginners Should Avoid, 2024.



Further reading

Graduation Gifts for Kids: Keepsakes for Kindergarten to Fifth Grade

How to Clean a 3D Printer: A Routine for Families

3D Printer Filament Holder: Options, Setup and a Version You Can Print


