

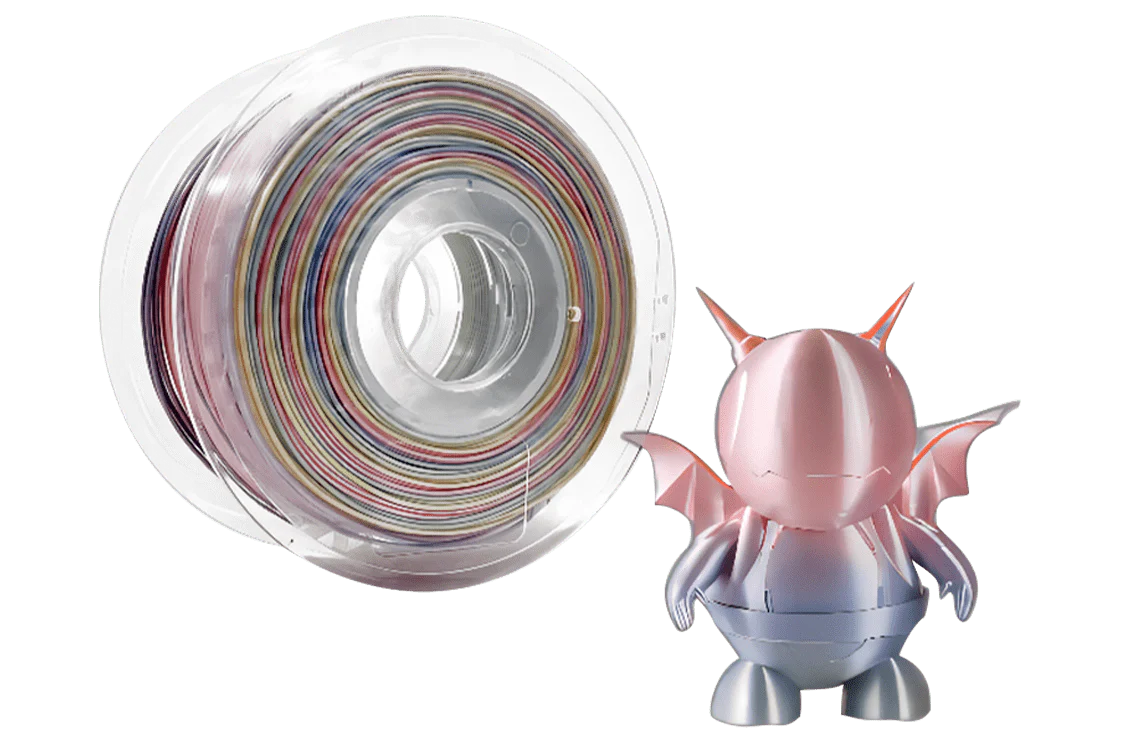
Filament Stuck? A Simple Guide for Parents and First-Time Users
Halfway through a print, the extruder starts clicking. Nothing is coming out. The child is watching the printer move but the object is not growing. Something is stuck in the tube.
This is one of the most common mid-session failures in 3D printing. It almost always sounds more serious than it is. Most cases of filament stuck in the PTFE tube — the clear guiding tube that connects the extruder to the heated nozzle — resolve in under 10 minutes with no replacement parts and no special tools.
This guide covers how to diagnose which type of jam you have, how to fix it safely as a parent, and how to set up a session routine that prevents the same failure from happening again. The AOSEED app's guided Unload function handles most end-of-session tube jams automatically — but when a session jam happens mid-print, this guide is the step-by-step resource.
|
10 min Most PTFE tube jams resolve in under 10 minutes |
4 fixes Increasing complexity — start with Fix 1 before Fix 4 |
No tools Fixes 1–3 require only the app and your hands |
90% Of jams prevented by the 45° tip + sealed storage routine |
How the Filament Tube System Works — Parent-Friendly Anatomy

You do not need to understand the engineering to fix a jam. But knowing the names of the parts helps when following the fix steps. The table below translates every relevant component into plain language and explains what typically goes wrong at each point.
|
Component |
What it does (parent language) |
What goes wrong here |
|
Spool |
Holds the plastic filament. Rotates as the printer pulls material through. |
Tangles and knots. Check the spool visually before every session. |
|
Extruder motor |
The motor that grips and pushes the filament forward into the tube. |
Slipping gears (the clicking sound). Happens when filament is stuck further down. |
|
PTFE tube (Bowden tube) |
The clear or white tube that guides the filament from the extruder to the hot nozzle. |
Filament stuck in PTFE tube is the most common jam location. Also: heat creep (see below). |
|
Hotend / nozzle |
The heated tip where the plastic melts and is deposited onto the print. |
Partial and full clogs. Charred debris buildup. Filament expanding from over-temperature. |
|
Push-to-connect fitting |
The small plastic ring that secures the PTFE tube to the hotend and extruder. |
Requires pressing down to release tube. Easy to damage if forced without pressing ring first. |
What Is Heat Creep? — The Most Misunderstood Jam Cause
|
What is heat creep? |
Signs in a family session |
How to prevent it |
|
Heat creep happens when the hot nozzle's heat travels up into the cooler part of the tube, softening the filament before it reaches the melt zone. The softened plastic expands and sticks to the tube wall — producing the most common type of filament stuck in PTFE tube jam. |
A session that starts fine but stops after 20–30 minutes. Clicking from the extruder. Filament has a 'mushroomed' tip when retracted — the end is wider than the tube. Happens more on long sessions or with high room temperatures. |
Ensure the printer's cooling fan is running during printing. Check that the fan is not blocked by the enclosure placement. For enclosed printers: keep the room below 28°C during long sessions. Never print PLA above 215°C for extended periods. |
Common Causes of Filament Sticking in 3D Printers

The 3DSourced Guide: How To Fix Filament Stuck In PTFE Tube identifies three root causes that account for nearly all PTFE tube jams in home printing environments: filament quality, incorrect temperature, and wear on the tube itself. All three are preventable with the session habits in the Prevention section of this guide.
Diagnose Before You Fix — What Are You Hearing and Seeing?
|
What you hear or see |
What it usually means |
Where to start |
|
Clicking or grinding noise from extruder |
Extruder motor is slipping — it is pushing but the filament will not move |
Filament stuck in PTFE tube or nozzle. Start with Fix Step 1 (heat and retract). |
|
Motor runs but nothing extrudes |
Complete blockage — either the tube or nozzle |
Start with Fix Step 2 (manual retract). If nothing moves, Fix Step 3 (tube disconnect). |
|
Filament comes out curled or stringy |
Partial clog — nozzle partially blocked, not the tube |
Run the nozzle clean cycle from the app. Fix Step 4 (nozzle cold pull). |
|
Print stopped — filament visibly snapped |
Filament broke inside the tube path |
Fix Step 3 (tube disconnect) is required. Push-to-connect release to access broken piece. |
|
Print layers visible but missing sections |
Under-extrusion from partial clog building up over sessions |
Fix Step 4 (nozzle cold pull) + check filament storage. Likely moisture in the spool. |
Filament Type and Quality
Not all filament is equal. Low-quality filament spools often have inconsistent diameters — thicker sections can wedge tightly against the PTFE tube wall and become filament stuck in the Bowden tube without any heat or clog involvement. Filament that has been stored in humid conditions becomes brittle and snaps easily during a retract, leaving a broken piece inside the tube that requires manual extraction.
The safest practice: use only sealed filament from a reputable supplier. Check the expiry date if printed. Reseal the bag after every session with the desiccant pack inside.
Incorrect Temperature Settings
Too low: the filament does not melt fully in the nozzle and the extruder grinds against a plug of semi-solid plastic. Too high: heat creep occurs — the heat travels backward up the tube, softening the filament above the intended melt zone and causing it to expand against the tube wall. The correct temperature for PLA in standard family sessions is 190–210°C. Staying within this range across sessions is the single most reliable way to prevent heat creep.
|
Material |
Standard nozzle range |
When to go higher |
Heat creep risk |
|
PLA |
190–210°C |
Only if under-extrusion persists after 2 sessions — raise by 5°C maximum |
Moderate — fan must run. Keep room below 28°C on long sessions. |
|
PETG |
220–250°C |
PETG needs higher temp by design — do not reduce below 220°C |
Low — PETG tolerates heat better in the tube |
|
ABS |
220–250°C |
ABS is not recommended for family sessions — requires enclosure + high temp management |
High — ABS in a home environment without full enclosure has highest heat creep risk |
Clogged Nozzle
The nozzle is the most common jam origin. Charred debris, residue from a previous filament color or material, or a piece of dust that entered with the filament can all produce a partial or full clog. A clogged nozzle does not immediately stop the print — it causes under-extrusion first (thin lines, gaps in layers, inconsistent surface), then a complete jam as debris builds up into a full blockage. The extruder then starts clicking because it is pushing against a wall.
Step-by-Step Solutions to Fix Stuck Filament

The AOSEED Filament Stuck Instructions (PTFE tube fix) on the official AOSEED guide covers the specific sequence for X-MAKER and X-MAKER JOY printers. The four fix steps below follow the same sequence and apply those instructions in the parent-friendly format used throughout this guide.
|
Work through the fixes in order Fix 1 takes 3 minutes. Fix 2 takes 5 minutes. Fix 3 takes 8–10 minutes and requires disconnecting the tube. Fix 4 (cold pull) is the nozzle-specific fix used after the tube is clear but under-extrusion continues. Most jams resolve at Fix 1 or 2. |
|
FIX 1 · Heat and Retract |
||
|
When to use this fix: The extruder is clicking. A session just stopped mid-print. Nothing has snapped. Use this first. |
||
|
||
|
Safety note: The nozzle is above 190°C during this step. The child does not touch the printer during this fix. Their role is screen reading and observation only. |
|
FIX 2 · Manual Push-Through |
||
|
When to use this fix: Fix 1 did not retract the filament. It moved slightly but stopped. The filament is partially stuck in the PTFE tube. |
||
|
||
|
Safety note: Temperature is higher in this fix — 210°C for PLA. The child stays in the screen-monitor role only. No hands near the printer during the push-through step. |
|
FIX 3 · Disconnect the PTFE Tube |
||
|
When to use this fix: Filament has snapped inside the tube. Manual retract failed. A broken piece is visible inside or suspected. |
||
|
||
|
⚠ Safety note: Printer must be fully powered off and cooled before this fix. No heat involved. The child can help with lighting and observation once the printer is confirmed off and cool. |
|
FIX 4 · Cold Pull — Nozzle Clear |
||
|
When to use this fix: Tube is clear after Fix 3 but the nozzle is still partially clogged. Under-extrusion continues after reloading. |
||
|
||
|
Safety note: Nozzle temperature during the heat phase is 200°C. Child monitors only. Parent performs all physical steps. At 90°C the nozzle is safe to approach with the filament — but not to touch directly. |
Preventing Filament Sticking in the Future

Most PTFE tube jams are preventable with three session habits: seal the filament after every session, use the app's Unload function at the end of every print, and cut the tip at a 45-degree angle before every load. These three actions eliminate the conditions that produce the most common jam types.
5-Column Prevention Quick Reference
|
Filament storage |
After-session routine |
Loading tip |
Temperature check |
When to replace tube |
|
Sealed bag or airtight box with desiccant pack. Never leave spool open overnight. Moisture causes brittle filament that snaps in the tube. |
Unload filament while the printer is still warm. Use the app's Unload function. Never leave loaded filament in a hot nozzle for more than 30 minutes after a session. |
Snip the filament tip at a 45-degree angle with scissors before every load. Straighten the tip. This prevents the most common load-entry catch point. |
If the printer runs noticeably hotter than usual mid-session, check for heat creep. PLA at 220°C or above for extended periods can soften plastic in the tube above the heat break. |
Replace the PTFE tube if: the interior looks yellowed or brown, the tube has kinks, or jams recur at the same print length across multiple sessions. |
Correct Filament Loading and Unloading
The 45-degree tip rule — why it matters:
- A blunt or curved filament tip catches on the entry point of the PTFE tube or the extruder gears and creates the leading edge of a future jam.
- A 45-degree angle cut produces a pointed tip that slides cleanly through the push-to-connect fitting and into the tube without catching.
- Straighten the tip after cutting — it should be straight, not curved at the end from the spool's natural coil tension.
- This one-second cut before every load is the most reliable jam prevention habit available to a first-time user.
End-of-session unload — when and why:
- Use the app's Unload function while the printer is still warm from the session — not after it has been off for 10 minutes.
- A warm nozzle means the filament slides out cleanly. A cooled nozzle means the plastic has solidified at the tip and the retract pulls hard against the tube wall.
- Never leave loaded filament in a printer that will be unused for more than a day. Moisture absorption and heat cycling both degrade the filament at the tube entry point.
How to Help Your Child Fix Stuck Filament

A filament jam is one of the best early technical teaching moments in a family maker session. It is non-urgent, visible, and fixable in under 10 minutes. The parent handles all heat-adjacent steps. The child participates in a structured, safe supporting role throughout.
Parent and Child Task Division — Filament Jam Session
|
Task |
👩 Parent handles |
🧒 Child can do (with parent present) |
|
Heating the nozzle to unstick filament |
Set preheat temperature. Monitor display. |
Call out temperature reading from the screen as it climbs. |
|
Running the app's Unload function |
Navigate to the Filament menu and tap Unload. |
Watch the filament retract through the observation window. |
|
Cutting the filament at 45 degrees |
Use scissors to cut the tip cleanly. |
Hold the spool steady while the parent cuts. |
|
Loading the new filament tip |
Feed the tip into the entry hole and guide it into the tube. |
Push the final 3–5cm under parent hand guidance — feel the resistance. |
|
Disconnecting the PTFE tube (for jams) |
Press the push-to-connect ring and pull the tube free. |
Hold the torch or flashlight to illuminate the extruder area. |
|
Cold pull (nozzle clearing technique) |
Follow the heating, pause, and pull sequence (see Fix 4). |
Watch the cold pull tip emerge and name the color of the debris. |
Safety First: Supervision During the Process
The three non-negotiable safety rules during any filament jam fix:
- The nozzle is above 190°C during Fixes 1, 2, and 4. The child does not touch the printer during any heated step. Screen monitoring is the safe child role.
- Fix 3 (tube disconnect) requires the printer to be fully powered off and cooled before any child participates in any supporting role.
- Pliers are a parent tool — not a child tool — during stuck filament removal. The tension in a stuck piece can release suddenly. Child observes from the other side of the table.
Encouraging Problem-Solving
Do not fix the jam in silence. Narrate each step. Ask the child: 'The motor is turning but nothing is coming out — where do you think the blockage is?' Let them point at the diagram. Let them say 'the tube' or 'the nozzle' before you start the fix. By session 10, many children can correctly diagnose the jam type from the symptom before the parent has finished reading the screen.
For families using the AOSEED X-MAKER JOY, the app's guided Unload workflow shows the child exactly what is happening at each step of the filament retract — the progress is visible in the app and audible from the extruder. This makes the app itself the first problem-solving tool, and keeps the parent's physical involvement to a minimum in the most common jam scenarios.
Troubleshooting Tips for Parents
Fixing Print Failures Beyond the Tube
A filament stuck in the PTFE tube is the most common jam type. But some failures in this category also involve the extruder gears and the nozzle simultaneously. The quick-reference table below covers the full failure pattern.
|
Failure pattern |
Root cause |
First action |
|
Clicking from extruder + nothing extruding |
Jam in tube or nozzle — extruder gears slipping against resistance |
Fix 1 (Heat and Retract). Check tube + nozzle if fix fails. |
|
Print started well, then stopped at 30–45 min |
Heat creep — filament softened above heat break zone |
Fix 2 or Fix 3. After clearing: check cooling fan operation and room temperature. |
|
Filament loads but extrudes very thin and inconsistent |
Partial nozzle clog — tube clear but nozzle obstructed |
Fix 4 (Cold Pull). Repeat twice if residue appears on pulled tip. |
|
Filament snapped flush with the extruder opening |
Brittle filament — likely from moisture absorption |
Fix 3 (Tube Disconnect). Replace filament spool — seal the new one. |
|
Jam returns within 3 sessions at same print length |
PTFE tube interior damaged — char or yellowing visible |
Replace the PTFE tube. Available as part of AOSEED maintenance kit. |
|
Printer prints normally for 5 min then under-extrudes |
Wet filament — steam bubbles visible from nozzle |
Dry the spool (50°C oven, 4–6 hours). Store sealed with desiccant. |
When to Seek Help
Contact AOSEED support if: Fix 3 is not accessible because the push-to-connect fitting appears damaged or will not release with the ring press technique; the tube is correctly installed but jams at the same position every session despite being a new tube; or the extruder makes grinding noises even with no filament loaded — indicating a gear or motor issue rather than a filament jam.
|
📞 AOSEED Support — Learning Center First Before contacting support, open the app and tap Learning Center. The guided troubleshooting flow for filament jams covers all four fix types in visual step format. It also shows the specific push-to-connect release technique for the X-MAKER JOY with photos. If the Learning Center flow does not resolve the issue, support tickets are answered within 24 hours. |
Conclusion
A filament stuck in the PTFE tube is not a broken printer. It is a 10-minute fix that becomes a 30-second prevention habit once you have done it twice.
The four-fix sequence in this guide resolves every common type of tube jam in order of severity. Most families stop at Fix 1. Families who add the 45-degree cut tip and the end-of-session unload to their routine rarely see Fix 3 at all.
The bigger picture: a jam cleared together is a stronger maker session than one where everything worked perfectly. The child who watches a parent calmly diagnose and fix a jam learns that setbacks in creative work are manageable — not terminal.
For parents choosing their first family printer, AOSEED 3D printers for kids shows both models with guidance on how the app-led session structure reduces the frequency and complexity of filament jams for beginner families.
FAQs
How to get stuck filament out of a tube?
Start with Fix 1: heat the nozzle to standard print temperature, engage the extruder lever, and use the app's Unload function or a steady hand-retract. If the filament does not move, try Fix 2 — push the filament forward gently before retracting, which often breaks the jam. If the filament has snapped, Fix 3 is required: power off, cool down completely, press the push-to-connect ring and remove the tube, then push the broken piece out from the top of the tube using a fresh filament as a rod.
How to remove filament from the feeding tube?
The cleanest method when filament is still intact: heat the nozzle to printing temperature, hold the extruder lever open, and pull the filament with a slow firm pressure. The lever-open step is critical — without releasing the extruder grip, the gears resist the retract and can snap the filament. If the filament has already snapped at the entry point, Fix 3 (tube disconnect) is the only reliable extraction method for that piece.
Why does filament get stuck in the nozzle?
Four main causes: charred debris from a previous session that builds up in the nozzle bore over time; a piece of dust or foreign material that entered with the filament and burned at the nozzle tip; printing at too low a temperature for the filament, causing a semi-solid plug at the tip; or heat creep, which softens the filament above the intended melt zone and causes it to expand against the tube wall just before the nozzle. Cold pull (Fix 4) resolves debris clogs. Correct temperature settings prevent the last two causes.
How to fix a jammed extruder?
If the extruder motor is clicking but the filament is not moving, the extruder gears are slipping because the filament cannot advance. The fix is not in the extruder motor — it is in whatever is blocking the filament's forward progress. Start by checking the tube (Fix 1 and 2) and the nozzle (Fix 4). Once the blockage is cleared, the extruder motor will operate normally again. If the extruder is clicking even with no filament loaded, that is a gear or motor issue — contact support.
How to prevent filament from getting stuck?
Three session habits eliminate most jams: (1) Cut the filament tip at a 45-degree angle with scissors before every load and straighten it; (2) Use the app's Unload function at the end of every session while the printer is still warm; (3) Store filament in a sealed bag with a desiccant pack after every session — never leave a spool open overnight. These three habits take under 2 minutes total and prevent the conditions that produce the most common tube, nozzle, and heat creep jam types.
How to remove clumped filament from a nozzle?
A cold pull clears most nozzle clumps. Heat the nozzle to 200°C, then turn off heat and let it cool to 90°C while maintaining gentle upward tension on the filament. At 90°C, pull in a single firm motion. The plug that emerges should carry the debris with it — the tip of the pulled filament will be brown or black if debris was present. Repeat until the pulled tip emerges clean and translucent. If cold pull does not clear the clog after three attempts, the nozzle requires replacement — use the Quick Swap Nozzle procedure on AOSEED printers.
What does overextruding look like?
Overextruding means too much plastic is being pushed through the nozzle per unit of movement. The most visible signs are: the first layer looks bulged and squished outward from the model's footprint (elephant's foot); surfaces appear rippled or bumpy rather than smooth; layers are wider than designed and touch adjacent features. Overextruding is the opposite problem from a jam — but the same visual scan that reveals overextruding also confirms there is no clog: plastic is flowing freely, just at excessive volume.
How to release a stuck 3D print from the build plate?
This is a different problem from a tube jam but comes up in similar sessions. For a print that will not release from the build plate: first ensure the plate has fully cooled — PLA adheres strongly when warm but releases easily at room temperature. For flexible magnetic build plates (like those on AOSEED printers): remove the plate from the printer and flex it gently from the corners — the print pops off without tools. For glass beds: a thin plastic spatula slid under one edge is the correct tool — never a metal scraper, which risks cracking the glass.
Sources
- 3DSourced — How To Fix Filament Stuck In PTFE Tube, 3DSourced Guide: How To Fix Filament Stuck In PTFE Tube, 2023.
- Prusa Forums — Filament stuck in filament tube (how to retrieve), Prusa Forums — Filament stuck in filament tube, 2025.
- Prusa Forums — Filament stuck in PTFE tube (won't extrude or unload), Prusa3D Forum — Filament stuck in PTFE tube, 2020.
- Prusa Help — Removing filament from extruder manually, Prusa Help — Removing filament from extruder manually, 2025.
- UltiMaker Community — Method for removing jammed PLA filament from Bowden tube, UltiMaker Community — method for removing jammed PLA filament, 2017.



Further reading

Graduation Gifts for Kids: Keepsakes for Kindergarten to Fifth Grade

How to Clean a 3D Printer: A Routine for Families

3D Printer Filament Holder: Options, Setup and a Version You Can Print


