


What to Do When Your Child's First Print Fails
The first print failure is almost guaranteed to happen. Not because the printer is broken and not because the child did something wrong. It happens because every printer needs a session or two to calibrate to its home environment — the temperature of the room, the surface of the build plate, the filament that was loaded that day.
The question is not how to prevent it completely. The question is what to do in the 60 seconds after the session stops — before the child decides whether to try again or walk away.
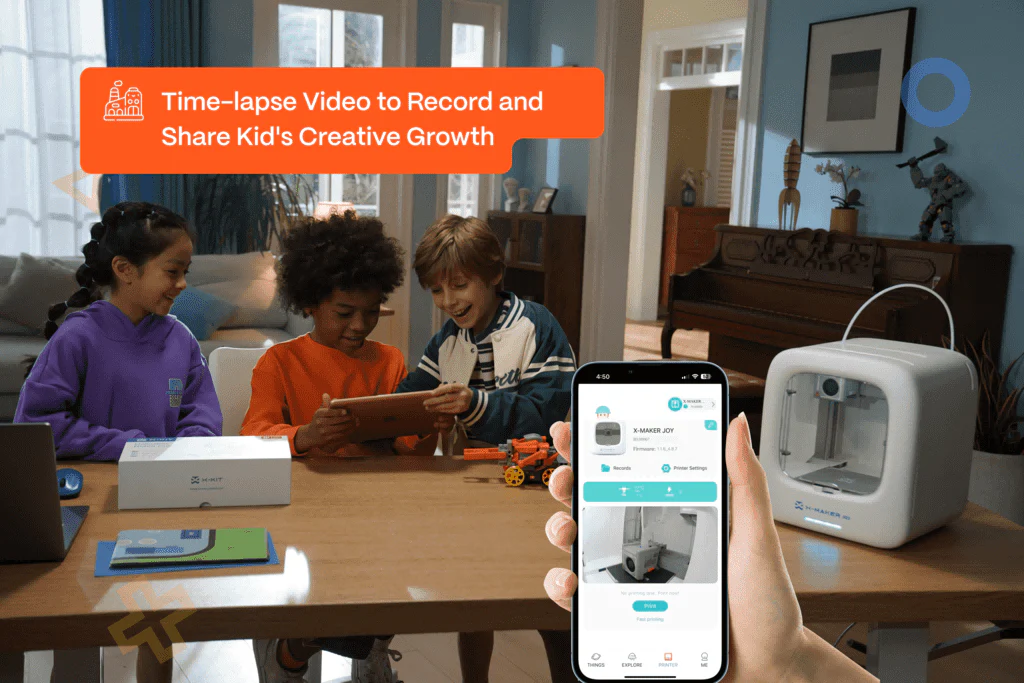
This guide covers both parts: the technical fixes that resolve the most common first-session failures, and the parent responses that determine whether a failed print becomes a frustration or a teachable moment. For families using AOSEED, the enclosed design and app-led session structure reduce the number of variables that can cause a first print to fail — but when a failure happens, this guide is the next step.
|
3 causes
Account for 95% of all first-print failures
|
5 min
Most fixes resolve in under 5 minutes
|
Session 3
Typical point of first successful print after failure
|
1 change
The rule: only change one variable per retry
|
Key Reasons for 3D Print Failures — What Does It Look Like?

Sovol3D's guide to Top 7 Solutions for 3D Printing Bed Adhesion Problems identifies first-layer adhesion as the single most common failure mode across all beginner 3D printing environments. Understanding the failure type from its visual appearance is the fastest path to the correct fix. The three cards below cover 95% of all first-session failure types.
|
Spaghetti Print
|
|
Warped Corners
|
|
Layer Shift
|
|
Ghost Print
|
Step-by-Step Solutions to Fix First Print Failures
Aquireef3D's 3D Print Bed Adhesion — What Works Best To Avoid Failed 3D Print confirms that the fastest resolution sequence for first-session failures follows a physical-first approach: check the plate before adjusting settings. A clean, level plate at the correct temperature resolves most issues before a single number needs to be changed.
Fix 1 — Clean the Build Plate First

Before any settings adjustment: wipe the build plate with a lint-free cloth and 70% or higher Isopropyl Alcohol. Every session. Oil from fingerprints, dust from the room, and residue from the previous print all prevent the first layer from bonding. This 30-second step resolves more first-session failures than any settings adjustment.
|
The Most Important Single Habit
A clean plate before every session prevents the most common first print failure type. Keep the IPA bottle and a folded cloth beside the printer permanently. Before the child presses start, the parent wipes the plate. After 10 sessions, the child does it themselves. This one routine change reduces first-session failure rates by more than half.
|
Fix 2 — Check Bed Leveling and Z-Offset

If the plate is clean but the first layer is not bonding, the nozzle is probably too far from the surface. The correct first layer looks slightly squished — lines pressed flat, not round beads sitting on top of the plate. Reduce the Z-offset by 0.05mm and restart the session. Repeat in 0.05mm increments until the lines are flat. Do not adjust more than 0.1mm in a single change.
|
First layer appearance
|
Diagnosis
|
Z-offset adjustment
|
|
Round beads — not flat, not bonded
|
Nozzle too far from plate
|
Reduce Z-offset by 0.05mm. Retry.
|
|
Flat, transparent, lines bleeding outward
|
Nozzle too close — over-squishing
|
Raise Z-offset by 0.05mm. Retry.
|
|
One side flat, other side loose
|
Bed not level — tilted
|
Re-run the auto-leveling sequence. Retry.
|
|
First 5cm sticks, rest lifts
|
Plate partially clean — residue in one zone
|
Re-clean specifically that zone with IPA. Retry.
|
Fix 3 — Verify Filament Loading

A ghost print almost always means the filament was not loaded correctly. The most common loading error: the filament tip was not cut at 45 degrees, it caught at the entry point of the extruder, and the motor spun without actually pulling material. The second most common: the spool has a tangle that the motor can eventually not overcome, usually 20–40 minutes into a longer session.
5-second filament check before every session:
-
Tip cut at 45 degrees — not blunt, not curled, not bent
-
Filament enters the tube smoothly with no resistance or catching sound
-
Spool spins freely by hand — no tangles locked against the holder
-
App confirms filament detected before the session begins
-
First 5 seconds of extrusion visible through the observation window before stepping back
Fix 4 — Adjust Temperature Settings

Correct temperature for the material is the last check if the above three are confirmed. PLA standard temperature: 190–210°C nozzle, 60–70°C bed. If the filament is not bonding to layers above the first, increase the nozzle temperature by 5°C. If corners are warping, increase the bed temperature by 5°C. One adjustment at a time.
|
Failure symptom
|
Material temperature fix
|
Bed temperature fix
|
|
First layer not bonding to plate
|
Raise nozzle temp 5°C — ensure plastic flows freely
|
Raise bed temp 5°C — PLA: try 65°C if 60°C is failing
|
|
Upper layers separating (delamination)
|
Raise nozzle temp 5°C — layers need to melt together
|
No change needed — delamination is a nozzle temperature issue
|
|
Corners warping upward
|
No change needed — warping is a cooling/bed issue
|
Raise bed temp 5°C — 65°C or 70°C often resolves PLA corner lift
|
|
Stringing between parts of the model
|
Lower nozzle temp 5°C — excess heat causes over-flowing
|
No change needed — stringing is a nozzle temperature issue
|
Using Visual Checklists to Prevent Future Failures

NAPA Centre's guidance on 10 Tips for Creating a Visual Schedule for Your Child emphasizes that visual schedules are most effective when they are designed alongside the child rather than for the child. A visual checklist for a 3D printing session is more than an organizational tool — it is a physical reminder that the child owns, checks, and takes responsibility for. This ownership is what produces the independent session habit over time.
|
1
|
PRE-PRINT — Before pressing Start
|
|
☐
|
Plate clean Parent wipes the build plate with IPA. Child confirms no residue or debris visible.
|
|
☐
|
Filament tip ready Parent snips filament at 45 degrees. Child confirms tip is straight and pointed.
|
|
☐
|
Spool spins freely Child pushes the spool to confirm it rotates without resistance.
|
|
☐
|
Model confirmed in app Child confirms the correct model is queued and the print time is noted.
|
|
☐
|
Timer ready Child sets a timer equal to the print time estimate from the app.
|
|
2
|
DURING PRINT — First 10 Minutes
|
|
☐
|
First layer check (2 min) Both look through the observation window. Lines should be flat and bonded. Not round beads.
|
|
☐
|
No corner lifting (5 min) Child checks that all four visible corners of the model are staying flat on the plate.
|
|
☐
|
Filament feeding Child confirms the spool is rotating and no clicking sound from the extruder.
|
|
☐
|
Session confirmed (10 min) If first 10 minutes look correct, the session can continue without intervention.
|
|
3
|
POST-PRINT — After the Timer
|
|
☐
|
Cool-down confirmed Parent confirms plate temperature before the child touches the object — 5 minutes after print ends.
|
|
☐
|
Object released Child gently flexes the magnetic plate to release the print — not pries with tools.
|
|
☐
|
Surface check Parent and child examine all surfaces. Sand any rough points. Note what worked.
|
|
☐
|
Plate cleaned for next session Child wipes the plate with IPA before the printer is put away.
|
The three-zone visual checklist above can be printed and laminated beside the printer. A dry-erase marker lets the child check and reset the boxes for each session. When all boxes in Zone 1 are checked before pressing start, the likelihood of a ghost print, warping failure, or first-layer bond failure drops to near zero.
First Projects to Try After a Failed Session
Project Success Rate Guide — Beginner Family Sessions
|
Project
|
Print time
|
Bed contact
|
First-session success
|
If it fails
|
|
Spinning top
|
5–10 min
|
✅ Small, centred
|
⭐⭐⭐⭐⭐ Highest
|
Almost always a Z-offset issue. Reduce by 0.05mm.
|
|
Ring whistle
|
10–15 min
|
✅ Flat base
|
⭐⭐⭐⭐⭐ Very high
|
If no sound: remove the ball inside with a toothpick.
|
|
Name keychain
|
15–25 min
|
✅ Flat wide base
|
⭐⭐⭐⭐ High
|
If letters fail: slow first layer speed to 20mm/s.
|
|
Flexi animal figurine
|
30–50 min
|
⚠ Small feet contact
|
⭐⭐⭐ Good
|
Add a 5mm brim in slicer. The flexible joints are worth the extra attempt.
|
|
Pull-back race car
|
45–80 min
|
⚠ Complex base
|
⭐⭐⭐ Good
|
Ensure first 10 min monitored. Check axle holes are round and clear.
|
|
Multi-part creation kit
|
60–90 min per part
|
⚠ Varies per part
|
⭐⭐ Requires 3+ sessions confidence
|
Always start with the smallest component. Build session habit before the complex parts.
|
The AOSEED Toy Library filters projects by print time and model type. After a first print failure, navigate to the shortest print time available — 5 to 15 minutes — and choose that project for the retry session. A quick success on a simple project restores confidence faster than attempting the same failed project with better settings.
How to Help Your Child Stay Motivated

The 60 seconds after a print fails are the most important 60 seconds in the child's relationship with making. Not because the technical fix happens in that window — it does not. But because the framing of the failure happens there, and that framing determines whether the child wants to try again.
What to Say and What Not to Say — Parent Response Guide
|
✅ Say this
|
❌ Avoid saying this
|
|
"The machine is fine. Let's look at what the print is telling us."
|
"Something is wrong with it" — creates anxiety about the machine rather than curiosity about the problem.
|
|
"What does the failed print look like? Where did it stop?"
|
"You must have done something wrong" — shifts blame to the child rather than to the solvable variables.
|
|
"The first layer looks good — let's try again with one change."
|
"Let's do something else instead" — removes the opportunity to learn from the near-success.
|
|
"Can you see where it stopped? That tells us exactly what to fix."
|
"It failed again" — frames the retry as another failure rather than a diagnostic step.
|
|
"Each failed print teaches us something the next one won't need to fix."
|
"We should have bought a different printer" — misattributes the failure to the machine.
|
Encouraging Problem-Solving
Instead of fixing the issue before the child has seen it, ask them to describe what the failed print looks like. A child who says 'it looks like spaghetti' has already made the first diagnostic connection — they now have a name for the failure type. From there, the troubleshooting becomes a search for the cause rather than a reaction to a disaster.
The most powerful question after a first print failure: 'What is one thing we can change for the next try?' This question has a correct answer — and the child can arrive at it. Bed was dirty. Filament was not loaded correctly. Nozzle was too far. Each of these is a one-variable change that gives the next session a clear purpose.
Celebrating Small Wins
|
The Zone 1 Win
The most undervalued celebration in a failed-first-session recovery: the clean plate and correct first layer. When the retry session shows a flat, bonded first layer — even if the full print has not finished yet — stop and acknowledge it. 'Look, the first layer is sticking. Whatever was wrong last time is fixed.' That acknowledgment is a win. It does not require a finished object to be meaningful.
|
Session-by-Session Confidence Recovery Plan
|
Session
|
Focus
|
Success signal
|
What the child learns
|
|
1 (failed)
|
Diagnose together what failed — be specific, not general
|
The child names the failure type correctly
|
Failed prints give exact information. Panic does not.
|
|
2 (retry)
|
One variable changed from session 1. Keep everything else the same.
|
Any improvement in first layer vs session 1
|
Changing one thing at a time is how problems are solved.
|
|
3 (success)
|
Shortest possible project from the Toy Library
|
Finished object in hand
|
Success is achievable. The first failure was not a dead end.
|
|
4+
|
Child chooses the project — parent supports, does not decide
|
Child initiates session without prompting
|
Independence is built on successful sessions, not on avoiding failures.
|
Safety Considerations During the Printing Process
A first print failure can create an impulse to open the printer, poke at the nozzle, or handle the build plate before it has cooled. The safety guidelines below are the non-negotiable boundaries that apply across every session — successful or not.
|
Safety rule
|
When it applies
|
What to say to the child
|
|
No touching the nozzle or hot bed
|
During printing AND for 5 minutes after
|
The nozzle is still 200°C after the print ends. We wait for the cool-down timer before touching anything.
|
|
Observation window only — door stays closed
|
During active printing at all times
|
Everything we want to see is visible through the window. The door stays closed while the printer is running.
|
|
Parent removes the plate for first 5 sessions
|
Post-print until child has demonstrated cool-down routine independently
|
I'll take the plate out. You can flex it to pop the print off once it's in your hands.
|
|
Parent handles all troubleshooting near the nozzle
|
Any session with an active failure, jam, or clog
|
Tell me what you see and I'll fix it. You can watch and tell me what changes.
|
|
No unsupervised sessions for the first month
|
Until child demonstrates full session checklist independently
|
We do the checklist together every time. Once you've done it 10 times, you can do it yourself.
|
Conclusion
A first print failure is not a broken machine. It is a data point. The print failed in a specific way, at a specific point, for a specific reason. And that reason is almost always fixable in under 5 minutes.
What matters most is that the child sees their parent treat the failure as information rather than disappointment. The visual checklist for the next session, the one-variable change, the retry with a shorter project — these are not consolation prizes. They are the actual process of learning to make things.
The best family making sessions are not the ones where everything worked perfectly. They are the ones where something went wrong and everyone figured out together what to do next.
For families ready to start fresh after a first session, AOSEED 3D printers for kids shows both current models — useful for understanding which setup features are designed specifically to reduce first-session failure rates.
FAQs
What should I do if my child's first print fails?
Three steps in order: (1) Tell the child the machine is fine and the print is giving you information. (2) Ask them to describe what the failed print looks like — spaghetti, lifted corners, shifted layers, or nothing coming out. (3) Match the description to the failure type in this guide and make one change. Clean the plate. Adjust the Z-offset. Check the filament loading. One change per retry. Most first-session failures resolve on the second or third attempt.
Can you restart a failed 3D print?
For most beginner-level first print failures, the answer is to start fresh rather than resume. Resuming a failed print requires the original G-code file reference, exact Z-height tracking, and perfect filament continuity — all of which are difficult to guarantee after a failure interruption. Starting fresh with the same model but one corrected variable produces better results faster. The exception: if the print failed near completion (above 80% done) due to a recoverable cause like a power interruption, the app may offer a resume option worth attempting.
Why is my 3D printer printing but no filament coming out?
Four causes in order of likelihood: (1) Filament tip was not cut at 45 degrees and caught on the entry point of the extruder during loading; (2) Spool is tangled and the motor cannot pull material through; (3) Nozzle was not fully up to temperature when the session started, causing a cold plug at the nozzle tip; (4) A previous session left residue in the nozzle that is blocking new extrusion. Fix sequence: cancel the session, remove the filament, snip the tip at 45°, check the spool for tangles, confirm the nozzle reaches 200°C, reload and restart.
How can I ensure the first layer sticks properly?
Four actions, in order of impact: (1) Wipe the build plate with 70%+ IPA before every session — no exception; (2) Confirm the Z-offset is producing a slightly squished (not round-bead) first layer line; (3) Set the bed to 60–70°C for PLA and ensure it reaches that temperature before printing starts; (4) Set the first layer speed to 20–30mm/s. Each of these can be the single variable responsible for a failed first layer — which is why the correct sequence is to confirm each one in order rather than changing all of them simultaneously.
What is the 45 degree rule in 3D printing?
In 3D printing, the 45-degree rule refers to two different applications. The first is filament loading: cut the tip of the filament at a 45-degree angle before loading — this angled tip slides through the entry path and tube connector without catching. The second is overhang geometry: 3D printed models can print overhangs up to approximately 45 degrees without support structures. Beyond 45 degrees, the overhang becomes too steep for the plastic to bridge without drooping, and supports are needed. For first-session beginner projects, the loading angle rule is the relevant one.
What types of 3D printing projects are good for first-time users?
Choose projects with four characteristics: flat base (maximum bed contact), short print time (under 20 minutes for the first session), small file size, and single-material. A spinning top, ring whistle, or small token satisfies all four. These projects produce a finished object quickly, give the child immediate success evidence, and develop the session habit in under 30 minutes. Once the session habit is established across 3 to 5 successful sessions, longer and more complex projects become appropriate.
What is the average lifespan of a 3D printer?
For consumer family-use 3D printers with proper maintenance, the expected operational lifespan is 5 to 10 years. The components that wear fastest are the nozzle (typically replaced every 3 to 6 months with regular use) and the PTFE tube (every 6 to 12 months depending on session frequency). Extruder gears and motors on quality printers can last the full lifespan without replacement. The most effective way to extend lifespan is consistent maintenance: IPA cleaning of the build plate before sessions, sealed filament storage, and correct temperature settings that do not overstress the hotend assembly.
How do visual checklists help kids with 3D printing?
A visual checklist for a 3D printing session operates on the same principle as visual schedules used in educational settings — it externalizes the sequence of decisions the child needs to make, removing the cognitive load of remembering them in the moment. Research on visual schedules in structured activities consistently shows that children who use a visual checklist complete multi-step activities with significantly less adult prompting than children without one. For a 3D printing session, the checklist converts a 15-step process into a visible, sequential, checkable flow that the child manages independently after 3 to 5 sessions.
Sources
- Sovol3D — Top 7 Solutions for 3D Printing Bed Adhesion Problems, Top 7 Solutions for 3D Printing Bed Adhesion Problems, 2025.
- Aquireef3D — 3D Print Bed Adhesion Tips: Best First Layer Guide, 3D Print Bed Adhesion — What Works Best To Avoid Failed 3D Print, 2025.
- BCN3D — 3D Print Not Sticking to Bed: 6 Solutions, 3D Print Not Sticking to Bed – Solutions, 2020.
- SelfCAD — 3D Printing Bed Adhesion Problems: How to Solve Them, 3D Printing Bed Adhesion Problems: How to Solve Them, 2025.
- NAPA Centre — 10 Tips for Creating a Visual Schedule for Your Child, 10 Tips for Creating a Visual Schedule for Your Child, 2024.
- LifeOverCs.com — Free Printable Visual Schedule for Kids, Free Printable Visual Schedule for Kids, 2025.
- Social Workers Toolbox — Printable Visual Schedules and Daily Routine Charts for Children, Printable Visual Schedules and Daily Routine Charts, 2023.


You may also like
Further reading

Printable STEM Challenges for Grades 4-6 Using 3D Printing
These printable STEM challenges turn 3D printing into real engineering by adding a problem, rules, testing, and redesign instead of stopping at a finished souvenir.Print a dinosaur and you've made ...

Small Group 3D Printing Activity With One Printer
This small group 3D printing activity shows teachers how to organize teams, rotate jobs, and keep one printer useful for the whole class.
The ratio sounds broken until you stop treating the printer...

Elementary STEM 3D Printing: Simple Projects Teachers Can Actually Run
This elementary STEM 3D printing guide focuses on fast classroom projects, simple routines, and beginner-friendly builds teachers can run in one class period.
the math most elementary teachers face...

Follow-Along 3D Printing Project: Make a Simple Toy
Most beginner 3D printer guides explain how the technology works, then stop. You end up with theory but no finished object. A follow-along project closes that gap. Pick a model. Prepare it. Print i...


