


Homeschool 3D Printing Projects for Beginner Families
The homeschool advantage is the freedom to let a concept become real. A child who reads about geological layers in a textbook can print a cross-section of the earth and hold it. A child who studies bridge forces in a physics chapter can design a bridge, print it, test it to failure, and redesign it based on what they observed.
3D printing is the tool that converts the homeschool's curriculum flexibility into physical outcomes. It does not require a full day of setup. It does not require engineering expertise. It requires a design decision, a filament color choice, and the patience to watch an object form layer by layer.
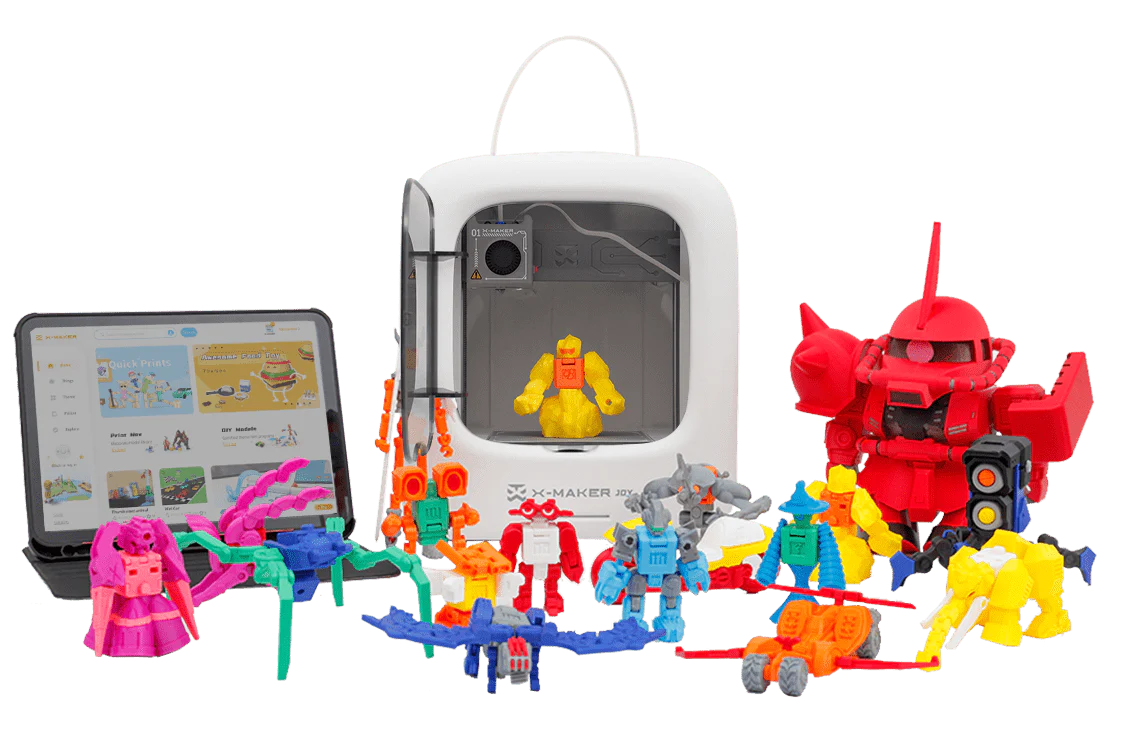
This guide covers six curriculum-aligned homeschool STEM projects across maths, biology, engineering, astronomy, art, and history — each with a session guide for beginner families using the AOSEED X-MAKER JOY. All six projects are designed for families with no prior 3D printing experience.
|
6 subjects Maths / Biology / Engineering / Astronomy / Art / History |
8 planets Full solar system print guide with notebook prompts |
5 biology Cell and anatomy models with post-print discussion guides |
3 iterations Bridge engineering project — design, print, test, redesign |
6 Homeschool STEM 3D Printing Projects — Subject, Age, and Family Outcome

|
Project |
Subject |
Age sweet spot |
What the family makes together |
|
1. Geometry shapes |
Mathematics — 3D solids, volume, surface area |
8–13 |
A complete set of printed geometric solids used as maths manipulatives all year |
|
2. Biology models |
Science — anatomy, cell structure, organisms |
9–14 |
Printed cross-sections of cells, organs, or skeletal components — labelled and displayed |
|
3. Engineering bridges |
Engineering — structural design, load testing, iteration |
9–14 |
A bridge that the family designs, prints, tests to failure, redesigns, and reprints |
|
4. Solar system |
Astronomy / Science — planetary scale, orbital science |
7–12 |
A to-scale solar system set — each planet a different filament color |
|
5. Art and design |
STEAM — design thinking, creative expression, product design |
8–14 |
A functional art piece: custom jewelry, personalized organizer, or original sculpture |
|
6. Historical artefacts |
History / Social Studies — cultural artefacts, civilisations |
8–13 |
A collection of artefact replicas used as reference objects for the history unit |
Homeschool Curriculum Map — How 3D Printing Adds a Dimension to Each Subject

|
Homeschool subject |
Where 3D printing adds a dimension |
Specific learning outcome not possible without printing |
|
Mathematics |
Geometry: 3D solids, volume, surface area, Platonic and Archimedean forms |
Student calculates surface area of a printed solid they measured themselves — formula applied to a real object they made |
|
Science / Biology |
Cell biology: organelles and cell wall structure; anatomy: skeletal and organ systems |
Student removes and replaces the 'mitochondria' from a printed cell model — function and position encoded in tactile memory |
|
Physics |
Forces: load distribution, tension, compression, gear ratios, Newton's Laws |
Student tests their printed bridge to failure, records deflection, and uses the data to redesign — the scientific method as a physical experience |
|
Astronomy |
Planetary scale and orbital mechanics; topographic surface features |
Student holds both Earth and Moon models and sees scale relationship physically — proportional distances as a tangible reality |
|
History / Social Studies |
Material culture: artefacts as windows into civilisations |
Student asks 'how was this held?' while holding a printed Viking compass or Roman arch — questions a photograph never produces |
|
Art / STEAM |
Design thinking: from concept sketch to physical object |
Student produces a functional art piece — jewelry, organizer, or sculpture — using the design cycle from brief to finished product |
Why 3D Printing Works Especially Well for Homeschool Families
Snapology's guide to STEM Homeschool Curriculum Ideas identifies hands-on experiential learning as the most effective format for homeschool STEM — because the homeschool environment has one advantage a classroom never has: the freedom to follow a concept past the lesson end time and into a full investigation.
The Homeschool Advantage in STEM Learning
A classroom teacher stops the geometry lesson when the bell rings. A homeschool parent can let the child measure every face of their printed dodecahedron, calculate its surface area, and then spend the afternoon designing their own variant. This depth of engagement is what converts a textbook concept into a genuinely understood principle.
3D printing specifically suits the homeschool environment because the printer runs independently. The parent does not need to manage the printing session — the child selects the model, the app guides the setup, and the printer runs. The parent is free to continue other subjects or household activities while the session runs.
|
🏡 The Parent's Role in a Homeschool 3D Printing Session The parent's role is in the learning conversation before and after the print — not in the technical management during it. Before: 'what do you predict this will look like from the side?' After: 'what surprised you? What would you change?' The printer handles the making. The parent handles the thinking questions. This is a more efficient use of homeschool time than any worksheet. |
Project 1 — 3D Printed Geometric Shapes for Maths

Why Geometric Models Are Great for Homeschool STEM
Geometry is the STEM subject most immediately served by 3D printing — because the object of study is a three-dimensional form, and the printer produces three-dimensional forms. A homeschool student who prints a triangular prism, counts its five faces with their fingers, measures each edge with a ruler, and calculates the surface area from their own measurements has completed the geometry concept through a physical session rather than a worksheet exercise.
The prediction step before printing is as important as the print itself. A student who predicts the number of faces and is wrong has identified a gap in their spatial understanding — which is more valuable than a correct answer produced without engagement.
4-Step Geometry Session Guide for Beginner Families
|
Step |
Activity |
What the child does |
Time |
|
1 |
Choose the solid |
Child opens the app or browses the model library — selects a specific geometric solid (cube, triangular prism, dodecahedron) and tells the parent why they chose it. |
5 min |
|
2 |
Predict before printing |
Before printing, child draws the solid, counts its expected faces, edges, and vertices, and writes down their volume prediction. |
15 min |
|
3 |
Print and observe |
Print runs. Child watches the first few layers and records: 'the base is a triangle — there are three triangular faces visible.' Predicts what happens next. |
30–60 min print |
|
4 |
Measure and compare |
Child measures the printed solid with a ruler, calculates surface area, compares to prediction. Identifies where the prediction was right and where it was wrong. |
20 min |
|
Solid to print |
Maths concept |
Measurement activity after printing |
Grade level |
|
Cube |
Faces, edges, vertices — equal sides, right angles |
Calculate surface area (6s²). Verify by wrapping exactly with paper. |
Grades 4–6 |
|
Triangular prism |
5 faces, 2 triangle + 3 rectangle |
Calculate area of each face type separately, then total surface area. |
Grades 5–7 |
|
Square pyramid |
5 faces, 1 square base + 4 triangular lateral faces |
Apply Pythagorean theorem to find slant height before calculating area. |
Grades 6–8 |
|
Dodecahedron |
12 pentagonal faces — more complex spatial reasoning |
How many edges? (30.) How many vertices? (20.) Verify Euler's formula: V – E + F = 2. |
Grades 7–9 |
|
Möbius strip |
One side, one edge — topological surface |
Cut down the middle with scissors — produces two linked loops. Why? |
Grades 7–9 extension |
Project 2 — 3D Printing for Biology Lessons

Using 3D Models to Teach Anatomy and Cells
Biology contains a fundamental learning challenge: the structures being studied are either microscopic (cells, organelles, molecules) or internal (organs, skeletal joints). A textbook diagram provides a representation. A 3D model the student printed provides a reality.
The most powerful aspect of a printed biology model for homeschool use: the student can interact with it during every future review of that topic. The cell model does not go back in the textbook — it lives on the shelf and is picked up again whenever the concept appears in the curriculum.
Homeschool Biology 3D Model Library — 5 Models with Session Activities
|
Biology model |
Curriculum connection |
How the family uses it after printing |
Print time |
|
Animal cell cross-section |
Cell biology: nucleus, mitochondria, endoplasmic reticulum |
Child labels each organelle with sticky dots. Parent asks: 'which organelle makes the energy?' — child points to it. |
45–75 min |
|
Plant cell cross-section |
Cell biology: cell wall, chloroplast, vacuole — compare to animal cell |
Side-by-side comparison with animal cell. Child identifies the differences — physical evidence for the lesson. |
45–60 min |
|
Human heart (two-chamber view) |
Anatomy: four chambers, valves, blood flow direction |
Child traces the blood path with a finger while explaining the circulatory route. Tactile memory of a complex system. |
60–90 min |
|
DNA double helix strand |
Genetics: base pairs, sugar-phosphate backbone, major and minor grooves |
Child counts the turns in the helix, identifies the groove types, measures the pitch — molecular geometry made physical. |
45–70 min |
|
Skeletal joint (ball and socket) |
Anatomy: range of motion, cartilage function, joint types |
Child moves the printed joint through its range and compares it to their own hip or shoulder movement. |
30–50 min |
The AOSEED Toy Library includes biology-themed models organized by category. For homeschool families building a subject-specific model library, the biology section includes cell cross-sections, skeletal components, and simplified organ models appropriate for homeschool sessions from Grade 5 upward.
Project 3 — Building 3D Printed Bridges for Engineering

Exploring Engineering Concepts with 3D Printed Structures
The bridge project is the most important engineering project in this guide — not because of what the first print produces, but because of what the failure teaches. A student who designs a bridge, prints it, tests it to failure, and then examines the failure point has completed the most foundational engineering lesson: prototypes are hypotheses, and tests are experiments.
For homeschool families, the bridge project is also the best family bonding STEM session of the six. Everyone tests the bridge together. The failure is shared. The redesign is a family conversation. The success of version 3 is genuinely exciting.
3-Iteration Bridge Engineering Session — Design, Test, Redesign
|
Version |
Design decision |
Test result and what it revealed |
Change for next version |
|
V1 (First print) |
Flat beam bridge — 4 mm depth, 20 cm span |
Held 50g. Deflected 15 mm under 100g — too flexible. Tells us: more depth needed for bending resistance. |
Increase beam depth from 4 mm to 10 mm |
|
V2 (Redesign) |
Deeper beam — 10 mm depth, same span |
Held 200g. Deflected 3 mm under 200g — within limit. New test: how does it fail under 500g? |
Failed by crushing at the support — need to reinforce the abutment where beam meets support |
|
V3 (Refinement) |
Wider abutment base + deeper beam combination |
Held 500g without visible deflection. Structural challenge: what is the actual failure load? |
Add triangular gussets at abutment — introduce triangulation for the highest strength version |
Five discussion questions to ask during the bridge testing session:
- 'Where do you predict it will break?' Ask before the test. Compare to where it actually breaks.
- 'What does the failure point tell us about where the forces are highest?' This connects the physical failure to structural theory.
- 'What is the lightest bridge design that still meets the success criteria?' Introduce the engineering concept of efficiency — not just strength, but strength-to-weight ratio.
- 'Would this bridge design scale up? Why or why not?' This introduces the scale problem in engineering — small models do not always scale linearly.
- 'What would a real bridge engineer do after a test like this?' Research: bridge engineers use finite element analysis software to predict failure — what was your method?
Project 4 — 3D Printed Solar System Models for Astronomy

Bringing Astronomy to Life with 3D Printing
The solar system is an astronomy concept where scale makes the learning. Reading that Jupiter is 11 times the diameter of Earth means little compared to holding a printed Jupiter model and a printed Earth model and comparing them physically. The size relationship is immediately and permanently understood.
The solar system project is also the best project in this guide for developing an astronomy notebook habit. Each planet session produces a printed model, a recorded fact set, and a comparison note. After 8 sessions, the family has a complete solar system set and a notebook that is genuinely encyclopedic in its coverage.
8-Planet Print Guide — Filament Color, Print Time, and Astronomy Notebook Prompt
|
Planet |
Filament color |
Print time |
Key fact the child records in their astronomy notebook |
|
Mercury |
Grey or silver |
15–20 min |
Smallest planet. No atmosphere. Surface temperature swings from -180°C to 430°C. |
|
Venus |
Yellow-white |
20–25 min |
Hottest planet despite not being closest to the sun. Thick CO₂ atmosphere traps heat. |
|
Earth |
Blue and green (two-tone possible) |
20–30 min |
Only known planet with liquid surface water and life. Axial tilt of 23.5° creates seasons. |
|
Mars (with Olympus Mons) |
Red or rust |
25–35 min |
Largest volcano in the solar system (Olympus Mons) is visible as a raised print feature. |
|
Jupiter (banded) |
Orange-tan striped |
30–45 min |
Largest planet. Great Red Spot is a storm larger than Earth that has raged for centuries. |
|
Saturn (with ring) |
Gold with ring piece |
35–50 min |
Ring system is mostly ice and rock. Rings are paper-thin relative to their diameter. |
|
Uranus |
Pale blue |
20–25 min |
Rotates on its side — its axial tilt is 98°. Possibly knocked over by a collision early in solar system history. |
|
Neptune |
Deep blue |
20–25 min |
Strongest winds in the solar system — up to 2,100 km/h. 164 Earth years to orbit the sun. |
|
🪐 The Scale Challenge Extension Activity After printing all eight planets, assign the family a scale calculation challenge: if the Earth model is 4 cm in diameter, where does each other planet sit relative to Earth's size? How far apart would the models need to be to represent the actual orbital distances to scale? (Answer: at this scale, Neptune would be approximately 1.2 km away.) This single calculation activity produces more understanding of astronomical scale than any diagram. |
Project 5 — 3D Printing for Art and Design (STEAM)

Enhancing Creativity with 3D Printing in Homeschool
The A in STEAM is not decoration. It is where the child's aesthetic sense, empathy for other people's needs, and creative problem-solving converge. A 3D printing art and design project for a homeschool student is the project most likely to produce a visible sense of ownership and pride — because the outcome is something they decided, designed, and made.
Design thinking is also the most transferable skill in this guide. A student who has practiced 'identify a need, design a solution, test it, refine it' across multiple 3D printing design sessions has learned a thinking process that applies to writing, science, social problems, and professional work across any field.
5 Creative 3D Printing Design Projects — What Is Made and What Is Developed
|
Design project |
What the child designs and produces |
4 Cs skill it develops |
|
Custom name pendant necklace |
Child designs their name in 3D text, selects a backing shape and filament color — prints a wearable pendant |
Creativity: aesthetic decisions. Communication: explaining design choices. Critical thinking: does the name legibility hold at the chosen scale? |
|
Personalized desk organizer |
Child measures their pencils and rulers, designs a holder with correct interior dimensions — functional design from measurements |
Critical thinking: precision measurement informs design. Engineering: tolerance design. |
|
Character from a story (original or fiction) |
Child designs a physical character from a book they are reading — translates a written description into 3D form |
Creativity: visual interpretation of text. Communication: explaining which details they included and why. |
|
Voronoi geometric sculpture |
Child creates a patterned surface using organic cell-pattern geometry — purely aesthetic structural object |
Creativity: mathematical beauty in natural patterns. STEM-art connection: cellular biology meets visual design. |
|
Personalized bookmarks set |
Child designs a set of bookmarks for each family member — each reflects one characteristic of the recipient |
Empathy and design thinking: 'what does this person love?' before the design begins. Communication: presenting the gift. |
How to run the design thinking process for any of these projects:
- Brief: who is the design for and what does it need to do? (5 min conversation — do not skip this)
- Sketch: draw 3 possible designs on paper before opening the app. Choose the best one with a reason.
- Design: build the chosen design in the app — accept that the first version will need changes.
- Print: run the print session. Do not modify the design during printing.
- Test and evaluate: does it do what the brief required? What one change would most improve it?
- Iterate: make the one change. Print version 2. Compare. This is the design-thinking loop.
Project 6 — 3D Printing Historical Artefacts for History

Printing Historical Artefacts for History Lessons
History is usually taught through text and images. The reader knows about the artefact — its name, its age, its cultural context. 3D printing converts knowing about an artefact into knowing the artefact as an object. The student who holds a printed Viking sun compass asks different questions than the student who reads its description in a book.
For homeschool families, printed historical artefacts also function as curriculum anchors: the Aztec calendar disk sits on the shelf during the Mesoamerica unit, and the child references it during every lesson in that period. It is present in a way that a textbook image is not.
5 Historical Artefact Projects — Civilisation, Curriculum Concept, and Discussion Prompt
|
Artefact |
Civilisation |
Curriculum concept |
Homeschool discussion prompt |
Time |
|
Roman arch section |
Ancient Rome, 70 CE |
Arch vs beam engineering — compression forces |
'How does this shape let buildings stand without modern steel?' Test by printing an arch and a beam and comparing load. |
30–50 min |
|
Egyptian pyramid cross-section |
Ancient Egypt, 2500 BCE |
Burial customs, mathematical precision, ancient engineering |
'How did they align it to true north with no modern tools?' Research the astronomy of pyramid alignment. |
45–70 min |
|
Viking compass (sun stone) |
Norse, 800 CE |
Navigation without GPS — optical mineralogy and solar tables |
'How did they know where they were going?' Model sunstone navigation using the printed compass replica. |
20–35 min |
|
Greek Doric column section |
Ancient Greece, 440 BCE |
Classical architecture, column orders, aesthetic proportion |
'What makes a Doric column different from Ionic?' Print one of each — compare fluting, capital, proportion side by side. |
35–55 min per column |
|
Aztec calendar disk (simplified) |
Mesoamerica, 1427 CE |
Calendar systems, astronomical knowledge, religious symbolism |
'What was the sun god's role in Aztec society?' Map the calendar symbols to their meaning — child creates a legend. |
40–60 min |
Three ways to extend the historical artefact project beyond the print session:
- Cross-reference with primary sources: find a museum's actual photograph or description of the original. What details did the 3D print include? What did it simplify? Why does simplification matter for understanding?
- Material science connection: compare the material of the original (stone, bronze, bone) with PLA. What properties made the original material appropriate for this object? What would happen if a Viking made their sun compass from PLA?
- Engineering challenge: for artefacts with structural function (arch, bridge, tower), test the printed model under load. A Roman arch print can be tested to see how much weight it holds — connecting architecture history to structural engineering.
A 6-Week Homeschool 3D Printing Curriculum Plan
For families integrating 3D printing for the first time, the clearest path is one project per week across six weeks — one per subject. This schedule produces six completed projects, a growing model library, and a child who is confident in the full session cycle: select, print, learn, document.
|
Week |
Project |
Subject |
What the family has at end of week |
|
Week 1 |
Geometry shapes — start with cube, triangular prism, pyramid |
Maths |
Three printed solids, measurement worksheet completed, Euler's formula verified physically |
|
Week 2 |
Cell models — animal cell and plant cell |
Biology |
Two printed cell models, organelle labels applied, animal vs plant comparison complete |
|
Week 3 |
Bridge engineering — Version 1 + Version 2 |
Engineering |
Two printed bridges, load test records, redesign rationale documented in engineering notebook |
|
Week 4 |
Solar system — Mercury through Mars (4 planets) |
Astronomy |
Four planet models, filament color matched to planet appearance, 4 astronomy notebook pages |
|
Week 5 |
Solar system — Jupiter through Neptune (4 planets) + scale calculation |
Astronomy |
Complete 8-planet set, scale comparison exercise complete, solar system shelf display assembled |
|
Week 6 |
Art and design — child selects their own project from the 5 options |
STEAM |
One designed-and-printed functional art piece, design rationale written and presented to family |
The history artefact project is not included in the 6-week plan because it is most valuable when paired with a specific history unit being studied at the time. The family adds it when the curriculum reaches a civilisation covered in the artefact library.
Conclusion
A 3D printer in a homeschool works differently from a 3D printer in a classroom. The classroom printer is managed across 30 students in structured rotation. The homeschool printer is managed by one family, across whatever subjects are being studied that week, at whatever depth the child's curiosity requires.
That depth is the advantage. A homeschool student who becomes genuinely interested in the structural reason their bridge failed in version 1 can spend the afternoon designing version 3. A classroom student cannot. The homeschool printer is not a classroom tool used at home — it is a tool that is most powerful precisely in the environment where it currently sits.
For families choosing their first printer, AOSEED 3D printers for kids shows both models with guidance on which is appropriate for first-session homeschool projects versus advanced design work in the later curriculum.
FAQs
What are examples of homeschool STEM projects?
The six highest-value homeschool STEM projects that use 3D printing as the primary tool are: (1) geometric solids for maths — prints used as measurement and volume manipulatives all year; (2) cell and anatomy models for biology — organelle labels applied to printed cross-sections; (3) bridge engineering with iteration — design, print, test to failure, redesign, reprint; (4) solar system to scale — 8 planets printed in individual sessions with astronomy notebook prompts; (5) art and design thinking — custom jewelry, personalized organizer, or original character from a current reading book; (6) historical artefacts — printed when the curriculum reaches the relevant civilisation. Each project produces a physical object the family keeps and references across the curriculum year.
What are the 4 C's of STEM activities?
The 4 C's are Critical Thinking, Collaboration, Communication, and Creativity. In a homeschool 3D printing context: Critical Thinking develops through the bridge iteration cycle — student analyzes why the bridge failed and what structural change addresses the failure. Collaboration develops when the family tests the bridge together or designs the solar system scale calculation as a shared problem. Communication develops when the student presents their finished design project to the family and explains their choices. Creativity develops through the art and design project — from brief to sketch to printed object. All four are most effectively developed together in a single project cycle, not as separate activities.
How do I structure homeschool STEM at home?
The most effective structure for homeschool STEM is a dedicated session once per week rather than daily short bursts. A single 90-minute session produces more learning than six 15-minute sessions because the design-print-test cycle requires continuous focus. The pre-print prediction and post-print measurement activities are where the STEM concept is actually taught — the print session in between is the experimental phase that connects the two. Reserve the session for a subject that is currently in the curriculum: if this week is geometry, print geometry solids. If next week is cells, print cell models. The printer follows the curriculum rather than running a separate 'maker' track.
What are some easy STEM projects for beginners with a 3D printer?
The easiest first session for a beginner family is the geometry project — specifically a cube or triangular prism. Both print in under 45 minutes, require no support material, produce a clean result on the first attempt, and connect directly to a primary school maths curriculum topic. The second easiest is a planet model — small, fast, no complexity, and the connection to astronomy is immediately obvious to the child. Both projects produce a visibly satisfying physical object within a single 90-minute session, which is what first sessions need: a successful result that creates confidence for the next one.
Is STEM learning structured enough for homeschool children who prefer predictable routines?
3D printing STEM projects are among the most structured hands-on learning formats available — which makes them particularly well-suited for children who prefer predictable, low-ambiguity activities. The session has a fixed structure: select model (5 min), predict outcome (15 min), run print (30–90 min), measure and document (20 min), record in notebook (10 min). The same structure applies to every project across all six subjects. The child knows what comes next at every stage. The printer's predictability — it does what the design file says, every time — also provides a reliable, low-frustration experience for children who find open-ended creative sessions challenging.
What do kids do in STEM activities?
In a well-designed STEM activity, children observe, predict, test, measure, and document. In a 3D printing STEM session specifically: before printing, they predict what the object will look like from different angles and what measurements it will have. During printing, they observe and record the layer-by-layer build process. After printing, they measure their predictions against the actual printed object, test it against criteria (does the bridge hold the required weight?), and document both the result and the learning in a notebook. This cycle of predict-observe-measure-document is the scientific method applied at a pace appropriate for a homeschool session.
What are some good STEM resources for homeschool families?
The highest-value free resources for homeschool 3D printing STEM are: Tinkercad (Autodesk) for beginner CAD design — the browser-based drag-and-drop interface is appropriate for students from age 8; Science Buddies for curriculum-aligned STEM activity guides with measurable outcomes; Edutopia for research-backed homeschool learning strategies; The Homeschool Scientist for hands-on science activity ideas that pair well with 3D printing sessions. For printable models aligned with curriculum topics, the AOSEED Toy Library organizes models by subject category. For free community-contributed models across all six subject areas in this guide, the Thingiverse education section is the most comprehensive resource.
Sources
- Snapology — STEM Homeschool Curriculum Ideas, STEM Homeschool Curriculum Ideas, 2025.
- STEM101 — Top STEM Projects for Homeschooling Parents, Top STEM Projects for Homeschooling Parents, 2025.
- The Homeschool Scientist — STEM Activities for Kids, STEM Activities for Kids, 2025.
- TinkererBox — Homeschool Learning STEM Activities, Homeschool Learning STEM Activities, 2024.
- Tinkercad (Autodesk) — Learn 3D Design for Beginners, Learn 3D Design for Beginners, 2026.
- All3DP — 3D Printing for Beginners, 3D Printing for Beginners, 2025.


You may also like
Further reading

Printable STEM Challenges for Grades 4-6 Using 3D Printing

Small Group 3D Printing Activity With One Printer

Elementary STEM 3D Printing: Simple Projects Teachers Can Actually Run


