


About Us

BLOG
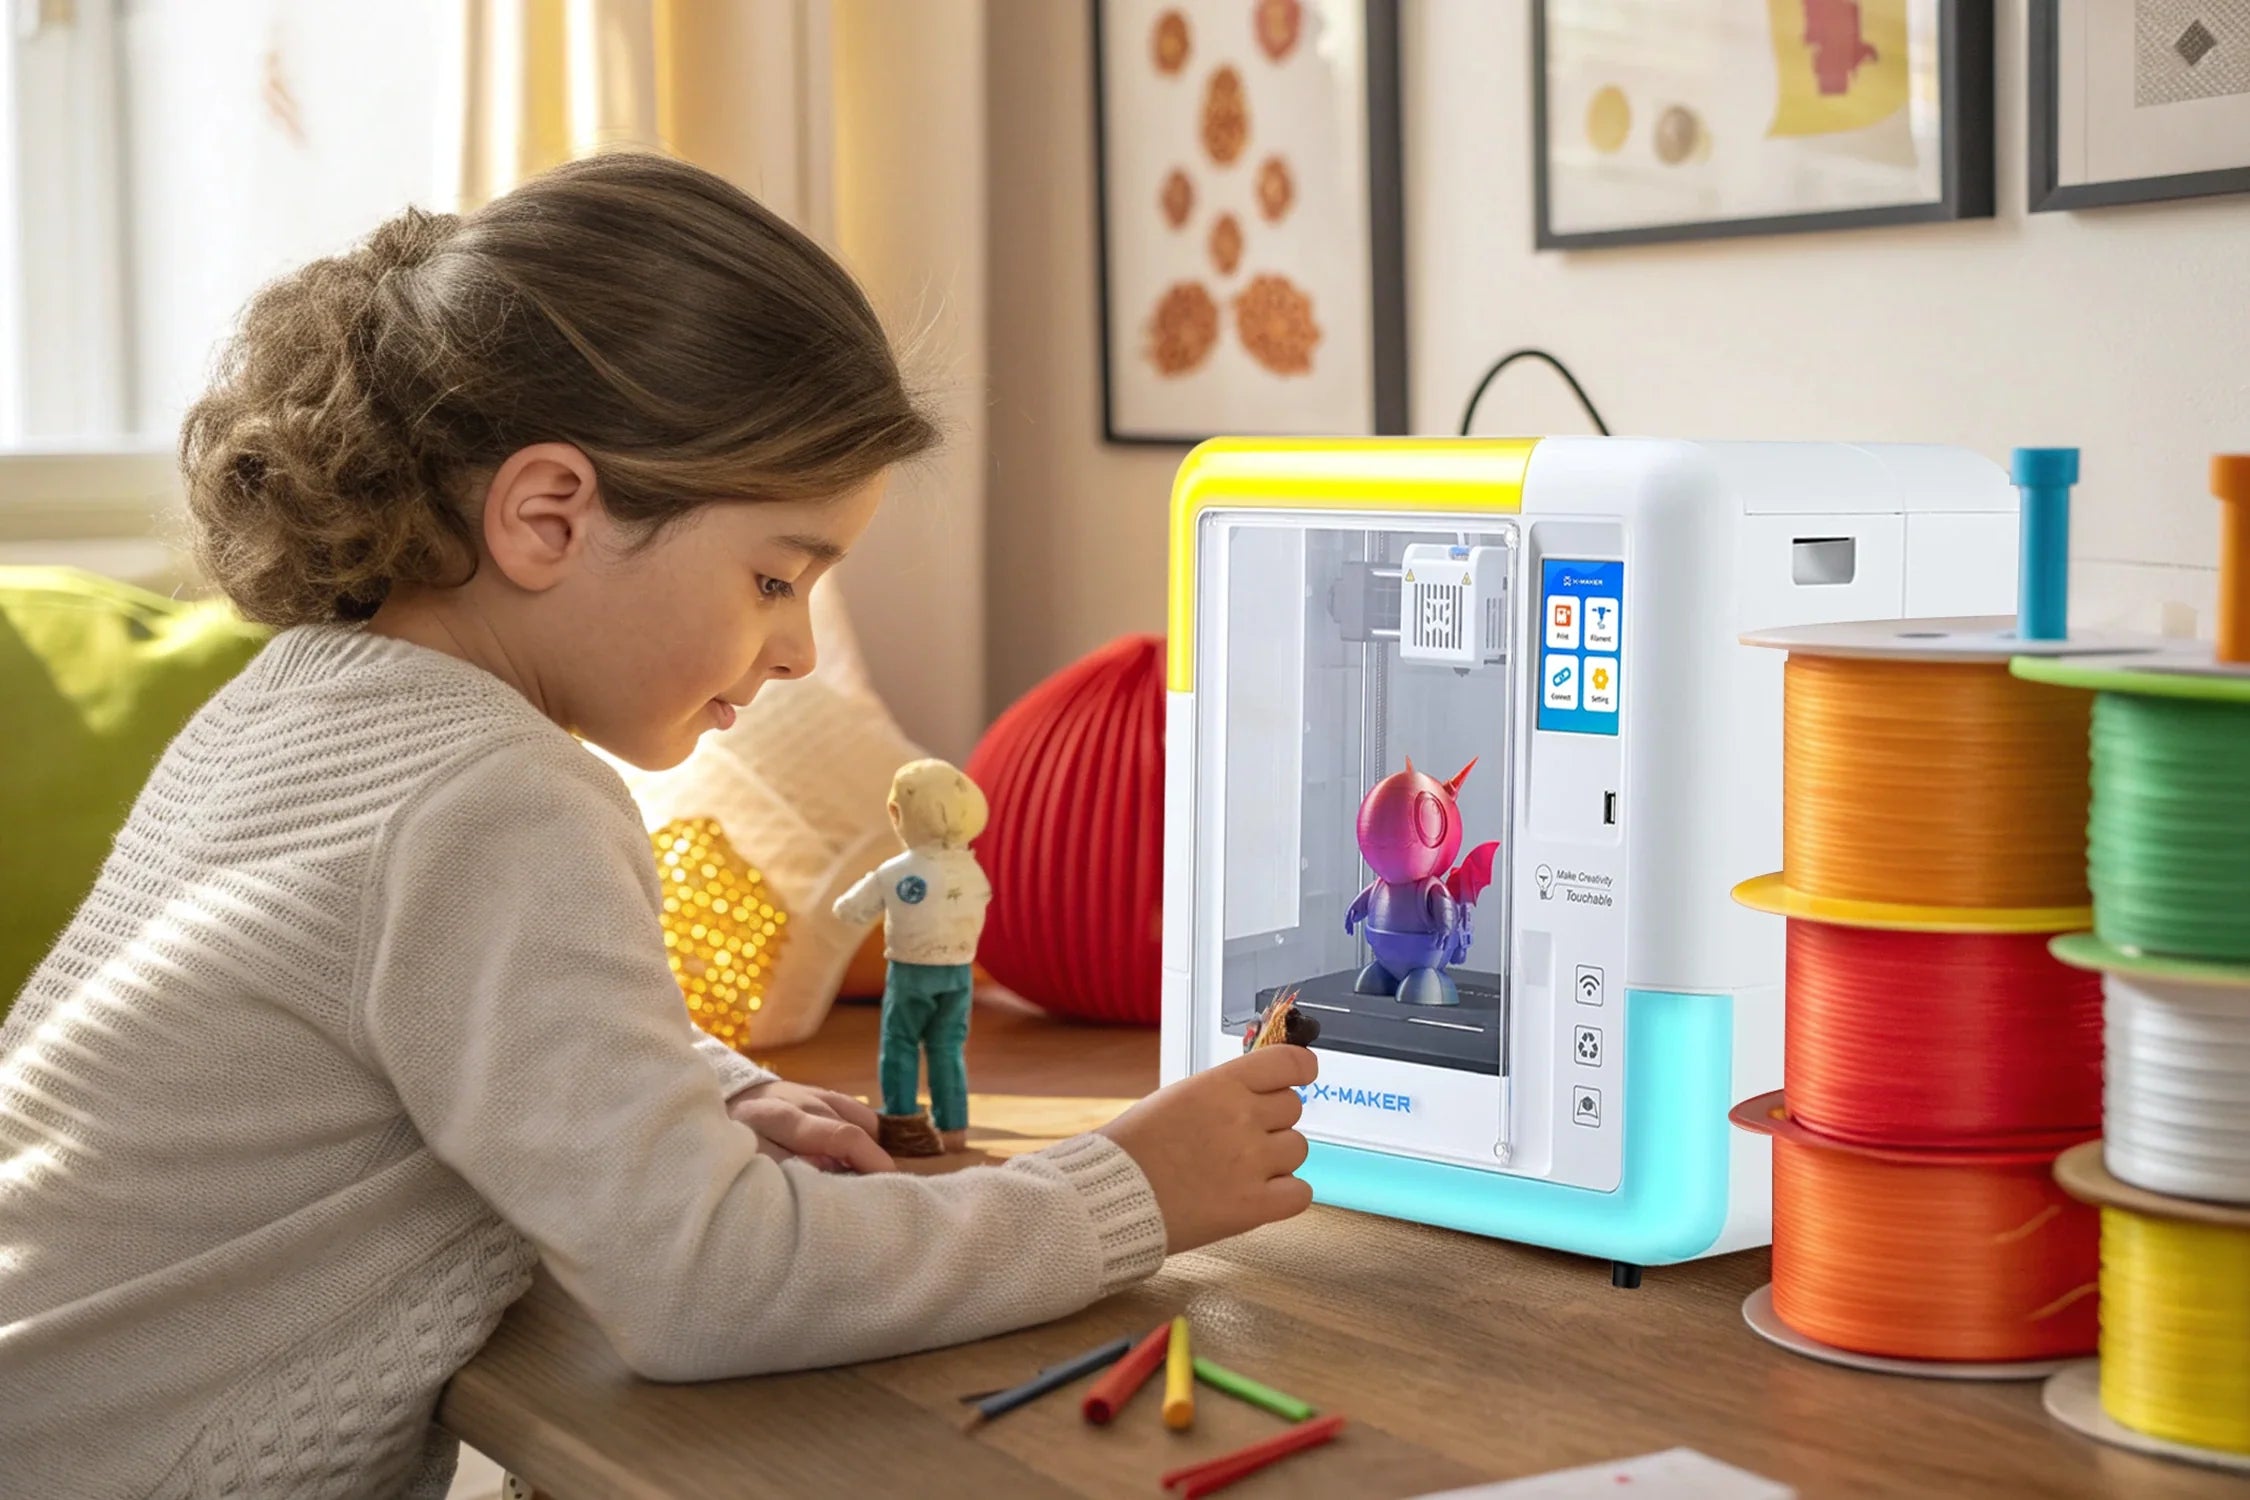
Where Learning Meets Play
#3d printer
#aoseed
#Buying & Safety
#classroom
#edu
#education
#Inclusive / Screen-Light
#is 3d printing safe for kids
#Projects & Play
#schools
#stem
#xkit
Show All

News.
Latest press from AOSEED
Why Your 3D Print Won't Stick: Easy Fixes for Beginners

The most common 3D printing failure is also the easiest to prevent. A print that does not stick to the build plate is almost always caused by one of four things: the bed is not level, the nozzle is not at the right height, the surface is not clean, or the temperature is off. None of these take more than 5 minutes to fix.
This guide walks through the most common causes of poor bed adhesion in plain language — what causes it, how to recognize which problem you have, and exactly what to do. It is written for parents and beginners, not for engineers.
If you are using an AOSEED X-MAKER JOY, the fully enclosed design and pre-leveled factory calibration eliminate most of the common adhesion variables described here — the magnetic build plate, app-managed temperatures, and enclosed chamber all work together to make the first layer stick reliably across sessions. If a session fails despite this, the six fixes below will resolve it.
|
90%+ Of adhesion failures fixed by 3 steps: clean, level, Z-offset |
5 min To diagnose and fix most first-layer issues |
PLA Easiest material — lowest thermal shrinkage of common options |
0.05mm The increment for Z-offset adjustments — small but critical |
Diagnose Your Failure First — What Does It Look Like?
|
🔴 Corners lifting or curling |
🟡 First lines don't adhere |
🟣 Whole print detaches mid-way |
|
Thermal shrinkage — the plastic cools faster than the bed holds it. Increase bed temperature by 5°C. Turn off the cooling fan for the first 3 layers. |
Z-offset too high — nozzle is not close enough to produce the 'squish' that bonds the first layer. Reduce Z-offset by 0.05mm increments until lines flatten. |
Advanced warping — the above problem progressed past the first layer. Start with corners: check bed level, increase bed temp, add a Brim in slicer settings. |
Key Causes of 3D Prints Not Sticking

BCN3D's guide to 6 solutions for 3D prints not sticking to the bed identifies bed leveling and nozzle distance as the two most reliable first diagnostic points — before any material or temperature adjustments are made. If the physical setup is correct, most adhesion issues resolve without any settings changes at all.
Bed Leveling Issues
An uneven build plate means the nozzle is at different heights in different parts of the bed. In the area where the nozzle is too far from the surface, the filament lands without the squish needed to bond. In the area where it is too close, the nozzle can drag through the filament and block extrusion.
How to check: slide a standard sheet of paper between the nozzle and the bed at each corner and the center. You should feel a slight, consistent drag at every point. If one corner is looser or tighter than the others, that corner needs adjustment. Modern printers — including the X-MAKER JOY — use factory pre-leveling and auto-calibration to eliminate this as a daily task.
Incorrect Nozzle Height
The Z-offset is the vertical distance between the nozzle and the build plate at the start of a print. A Z-offset that is too high produces a first layer that does not stick — the filament drops onto the surface without the pressure needed for a mechanical bond. The fix is to reduce the Z-offset in 0.05mm increments while printing a test square until the lines are visibly flattened and pressed together.
|
🔧 The Squish Test A correct first layer looks slightly flattened and pressed together — not round and bead-like, not transparent from over-compression. If the lines are round, the nozzle is too far. If the layer is transparent and bleeds outward, the nozzle is too close. The target is slightly squished, smooth, and consistent across the whole surface. |
Print Speed for the First Layer
If the printer moves too quickly during the first layer, the filament does not have enough time in contact with the surface to form a thermal bond. The nozzle moves on before the plastic has gripped. Standard recommendation: set the first layer speed to 20–30 mm/s or 50% of normal speed in slicer settings. Once the first two layers are down, normal speed can resume.
Temperature Settings
Temperature Reference Table — Bed and Nozzle by Material
|
Material |
Bed Temp |
Nozzle Temp |
Fan for Layer 1 |
Difficulty |
|
PLA |
60–70°C |
190–210°C |
Off or 10% |
Beginner — easiest adhesion. Best starting point. |
|
PETG |
70–80°C |
220–250°C |
Off for layers 1–3 |
Intermediate — bonds strongly. Use IPA cleaning + slight Z-offset increase. |
|
ABS |
100–110°C |
220–250°C |
Off — for entire print |
Advanced — use an enclosure. High shrinkage. Not recommended for first prints. |
Temperature is the second most common diagnostic variable after Z-offset. A bed that is too cold allows the plastic to cool and shrink before it has bonded to the surface. A nozzle that is too cold produces filament that does not flow freely enough to press into the surface. For PLA, the most common first-session failure is a cold bed — warming it to 60–65°C resolves most cases within the first test print.
Easy Fixes to Ensure Better Adhesion

Snapmaker's analysis of ways to fix 3D print not sticking to the bed confirms that more than 90% of adhesion failures are resolved by the first three actions: clean the bed, level the bed, and check the Z-offset. The fixes below follow that priority order.
|
1 |
Clean the Build Plate |
|
Why it happens: Oils from fingertips leave a microscopic film on the build surface. This film acts as a lubricant between the filament and the bed — preventing the plastic from bonding at a molecular level. Even a brief touch of a clean-looking plate is enough to cause a failed first layer. What to do: Wipe the plate with a lint-free cloth and 70% or higher Isopropyl Alcohol (IPA) before every session. Allow the IPA to fully evaporate before printing. For a deep reset after buildup, remove the plate and wash with warm water and grease-cutting dish soap, then dry fully. Expected result: The most common cause of a sudden adhesion failure on a printer that was working perfectly before. If a session fails without any settings change, clean the bed first. |
|
2 |
Re-Level the Print Bed |
|
Why it happens: A bed that shifts between sessions produces a different Z-offset at different positions across the surface. One corner may stick well while another lifts cleanly off the plate. What to do: Run the auto-leveling routine from the app or settings menu. For printers with manual leveling, perform the paper test at all four corners and the center before starting a new session after transport or any movement of the printer. Expected result: Consistent first layer adhesion across the full build area. No more one-corner-lifts-but-the-rest-stays-down failures. |
|
3 |
Adjust the Z-Offset |
|
Why it happens: A Z-offset that is even 0.1mm too high produces round filament beads that do not bond to the surface. This is the most precise adjustment in the first-layer sequence. What to do: Print a large single-layer test square. While printing, adjust the Z-offset in 0.05mm decrements until the lines are flat, pressed together, and no gaps are visible between adjacent lines. Never adjust by more than 0.1mm at a time. Save the new value once the layer looks correct. Expected result: Flat, consistently bonded first layer lines. Print stays on the plate for the full duration regardless of session length. |
|
4 |
Apply Adhesive to the Build Plate |
|
Why it happens: Some prints or materials need additional mechanical grip beyond what a clean surface provides. This is especially true for small-base models, ABS, and PETG on glass surfaces. What to do: Apply a thin, even layer of a PVA glue stick to the build plate before the print. Apply to a cool or room-temperature plate. Hairspray works as an alternative — hold it 20cm from the surface and apply a light coat. Specialized products like Magigoo are the most reliable option for consistent results across many sessions. Expected result: Improved first-layer grip across the full contact area. Also acts as a release agent for PETG, which can otherwise bond permanently to smooth glass. |
|
5 |
Slow Down the First Layer |
|
Why it happens: High first-layer speeds mean the filament spends less time in contact with the heated surface, reducing the thermal bond that forms during deposition. What to do: In your slicer settings, find Initial Layer Speed or First Layer Speed. Set to 20–30 mm/s, or 50% of your normal print speed. The X-MAKER app manages this automatically for all models in the Toy Library. Expected result: Longer contact time between plastic and heated surface produces a stronger adhesion bond. Particularly effective for PETG and for large flat-base models. |
First Layer Settings Reference

|
⚡ First Layer Speed |
📐 First Layer Height |
📏 First Layer Line Width |
|
Target: 20–30 mm/s Slow enough for the filament to bond before the nozzle moves away. Most slicers allow a % of normal speed — 50% is a reliable starting point. |
Target: 0.2–0.3mm Slightly thicker than the rest of the print. A thicker first layer is more forgiving of small bed leveling errors and provides better thermal contact. |
Target: 120% of nozzle diameter For a 0.4mm nozzle, set to 0.48mm. A wider line means more plastic in contact with the surface, producing a stronger mechanical bond. |
Using Rafts and Brims
Brim vs Raft — Which One and When?
|
Brim — recommended default |
Raft — last resort only |
|
|
What it is |
Single-layer border added around the print's base — like a hat brim |
Thick flat platform printed under the entire model before it starts |
|
Surface area |
Increases contact area without touching the model bottom |
Covers the entire print base — maximum contact surface |
|
Material use |
Minimal — a few extra grams |
Significant — adds 10–20% extra print time and material |
|
Bottom finish |
Clean — does not affect the model's bottom surface |
Rough — raft leaves a textured mark on the model's base |
|
When to use |
Default for any print with small base area or corner lifting risk |
When surface is damaged, badly uneven, or base contact point is tiny |
|
Remove method |
Snap off cleanly by hand after cool-down |
Peel off — may need light sanding to smooth the base |
The brim is the right default for most adhesion challenges. It adds surface area to the print's contact footprint without changing the print's bottom surface finish. Enable it in your slicer by setting the brim width to 5–8mm. For the vast majority of first-session failures with small-base models, adding a 5mm brim resolves the issue entirely.
Materials and Tools to Improve Bed Adhesion

Choosing the Right Material — Adhesion by Filament Type
PLA is the right starting material for every first session and most sessions after that. It has the lowest thermal shrinkage of any common filament — meaning it does not pull away from the surface as it cools. PETG is the right next step for prints that need more durability. ABS is the hardest material for bed adhesion and is not recommended for family use or early sessions.
Quick material selector for parents:
- First session: PLA. Always. Non-toxic, lowest adhesion difficulty, correct at the factory default settings.
- Active toys and race cars: PETG after session 10. Stronger, slightly more flexible, more durable under repeated play.
- Avoid ABS for all family sessions: high shrinkage, requires enclosure, high bed temperature, not suitable for children's home use.
Bed Surface Options
Build Surface Comparison
|
🟫 Glass Bed |
🔷 PEI Sheet |
🧲 Magnetic Flex Plate |
|
Very flat. Excellent surface for PLA. Needs cleaning with IPA before every session. |
Grips when hot. Releases when cool. No glue needed. Long-lasting. |
Flexible. Print removal is easy — flex the plate. Suitable for PLA and PETG. |
|
Best adhesion WITH a thin glue stick layer (PVA or hairspray) |
The most reliable surface for families. Works with PLA across all sessions. |
Check manufacturer heat tolerance — some flex plates do not suit high-temp printing. |
|
Clean with warm soapy water for a deep reset after buildup. |
Clean with IPA only. Avoid dish soap — it leaves a film. |
Clean with IPA between sessions. Inspect for damage after every 20 prints. |
The AOSEED X-MAKER JOY uses a magnetic flex build plate — a format that produces reliable PLA adhesion at the recommended bed temperature without additional adhesives in most sessions, and releases prints with a simple flex once cooled. The magnetic attachment means the plate is fully removable for IPA cleaning between sessions.
Troubleshooting Common Bed Adhesion Issues

Warping and Curling
Warping is the result of thermal contraction. As the plastic cools from the outside in, the edges contract faster than the center, pulling the corners upward off the build plate. For PLA: increase the bed temperature by 5°C and disable the part cooling fan for the first three layers. For PETG: use the same approach with the bed at 75–80°C. For ABS: without an enclosure, warping is nearly impossible to prevent — this is why ABS is not a family session material.
|
⚠️ Draft Prevention — Underrated Fix A cold draft across the printer during the first 5 minutes of printing is the most commonly missed cause of corner lifting in sessions that were otherwise correctly calibrated. Move the printer away from air conditioning vents, fans, and open windows. Even a gentle airflow can cool the first layer fast enough to cause shrinkage before the subsequent layers arrive to hold it flat. |
Uneven First Layers
If one side of the first layer looks flat and well-bonded while another side looks loose and stringy, the bed is not level. One corner is further from the nozzle than the others. Re-run the leveling sequence before the next session. If auto-leveling is available, use it. If leveling manually, perform the paper test at all four corners and the center without skipping the center check — a bed that is level at the corners can still be bowed in the middle.
Uneven first layer — quick diagnosis checklist:
- One corner sticks but opposite corner lifts → bed is tilted. Level again, checking the diagonal.
- Center of print looks loose but edges stick → bed is bowed upward in the center. Adjust Z-offset slightly lower.
- Edges stick but a wide strip in the middle does not → bed is bowed downward in the center. Check bed support and warping.
- Everything looks correct but one spot consistently fails → clean that spot specifically with IPA and check for residue.
Print Failures Halfway Through
A print that starts well but fails after 30 to 60 minutes is almost always a warping failure rather than an initial adhesion failure — the corners lifted gradually while the print was running. The other common mid-session failure is a filament jam: the extruder stops pushing material, the nozzle moves but nothing comes out, and the print becomes a partial outline of its own shape.
|
Mid-Print Failure Type |
Most Likely Cause |
Immediate Fix |
|
Corners lifting at height |
Warping from thermal contraction — bed cooled or draft introduced |
Increase bed temp, add Brim on retry, remove drafts from print environment |
|
Print moves or shifts |
Print base detached — first layer adhesion insufficient for build weight |
Re-clean bed, add adhesive, reduce first layer speed on retry |
|
Nothing comes out after layer 10 |
Filament jam in extruder or nozzle |
Pause print. Unload filament. Check spool for tangles. Re-load with fresh cut tip. |
|
Print looks fine but layers split |
Under-extrusion or printing too cold — new layers not melting into previous ones |
Increase nozzle temp by 5°C. Slow overall print speed by 20%. |
|
Print looks rough or stringy |
Filament moisture — stored spool has absorbed humidity |
Store filament sealed with desiccant. Use a filament dryer for affected spools. |
How AOSEED Printers Reduce Adhesion Variables

Most bed adhesion problems come from a set of variables that open-frame printers leave to the user to manage: bed level calibration, temperature consistency, draft management, and surface selection. The enclosed design of AOSEED printers addresses several of these simultaneously.
What the enclosed design handles:
- Draft elimination — the sealed chamber prevents airflow from cooling the first layer during printing.
- Consistent ambient temperature — the enclosure maintains a warmer internal environment, reducing thermal shrinkage in PLA sessions.
- Observation without intervention — the child watches through the window without reaching in, keeping the print environment stable.
The app-managed temperature settings mean the parent does not need to look up or configure bed and nozzle temperatures manually — the app sets the correct temperature profile for the selected material automatically. And the magnetic flex build plate removes the need for adhesives in standard PLA sessions: it grips when warm, releases when cool, and cleans with IPA in under 30 seconds.
For parents who have experienced adhesion failures on earlier sessions and are looking for a more reliable first-session experience, the AOSEED Toy Library is organized by project complexity and print time — the shortest, most reliably adhesion-proof projects appear first and are flagged as the correct starting point for early sessions.
Conclusion
A 3D print that will not stick is not a sign that something is broken. It is almost always a sign that one variable — bed cleanliness, nozzle height, temperature, or print speed — is slightly off. Most of the time, cleaning the bed and adjusting the Z-offset by 0.05mm is enough to produce a clean first layer on the very next attempt.
Work through the fixes in the order they appear in this guide. Start with physical checks (clean and level) before adjusting digital settings (temperature, speed, Z-offset). And once the first layer is sticking consistently, the session habit is established — the problem does not come back if the session routine includes a quick IPA wipe before every print.
For families at the beginning of their printing journey, AOSEED 3D printers for kids shows both models with guidance on which one is designed to minimize first-session adhesion variability for beginners.
FAQs
How do I fix a 3D print that isn't sticking?
Start with the three physical checks in order: (1) wipe the build plate with IPA and a lint-free cloth; (2) re-run the leveling sequence and confirm the paper test at all four corners; (3) reduce the Z-offset by 0.05mm increments until the first layer lines are visibly squished flat. These three steps resolve more than 90% of adhesion failures without any other changes. If they do not, check the bed temperature is within the correct range for the material being printed.
What causes poor layer adhesion?
Layer adhesion (layers not sticking to each other rather than the bed) has different causes from first-layer bed adhesion. Poor layer-to-layer adhesion is almost always caused by printing too cold — the new layer does not melt into the previous one because the plastic is not fluid enough. Increase the nozzle temperature by 5°C and slow the overall print speed by 20%. If the layers are visibly separated and rough, filament moisture is also a common factor — store filament in a sealed bag with a desiccant pack between sessions.
Why are my 3D prints failing halfway through?
A print that starts successfully but fails mid-session is almost always a warping failure — the first-layer adhesion was sufficient initially but the thermal contraction force built up over multiple layers until it exceeded the bed grip. Fixes: increase bed temperature by 5°C for the next session, add a brim in slicer settings, eliminate any draft sources (air conditioning, windows), and ensure the bed IPA wipe was done before the session. If the failure happens at the same layer every time, check for a filament tangle on the spool at that position.
Does a hotter bed help with PLA adhesion?
Yes, within a specific range. PLA adheres best at 60–70°C. Below 60°C, the plastic cools too quickly after deposition and the first layer can pop off as it contracts. Above 70°C, the bottom layers of the print can become too soft, causing the 'elephant's foot' effect — the base splays outward. If standard PLA sessions are failing, increase the bed temperature by 5°C increments from your current setting until adhesion stabilizes.
What is the best first layer height for adhesion?
For most home printing sessions with PLA, the optimal first layer height is 0.2–0.3mm — slightly thicker than the rest of the print layers. A thicker first layer provides more thermal mass (more plastic in contact with the surface stays warm longer), is more forgiving of minor bed level inconsistencies, and produces a wider, more stable foundation for subsequent layers. Most slicer software allows a separate first-layer height setting alongside the main layer height.
What causes a 3D print to spaghetti?
A spaghetti print — where the printer continues moving but the plastic strings into the air rather than building a coherent object — is caused by complete bed adhesion failure. The print detached from the build plate at some point and the nozzle continued printing in open air, depositing plastic onto itself or the printer's interior. Prevention: ensure the first layer is correctly bonded before leaving the printer unattended. Monitor the first 5 minutes of every session. If the first layer looks loose or shows lifting corners, stop the session and fix the adhesion issue before restarting.
What is the best 3D glue for bed adhesion?
For PLA on magnetic flex plates or PEI surfaces, IPA cleaning alone is sufficient in most sessions — no adhesive needed. When adhesive is required (small-base prints, PETG on glass, ABS), PVA glue stick (purple school glue stick, water-soluble) is the most reliable and mess-free option. Apply a thin even layer to a cool plate and allow it to tack before printing. For persistent adhesion challenges, specialized products like Magigoo provide the most consistent results and are specifically formulated to clean off after printing without damaging the plate.
Why is my 3D print not smooth on the bottom surface?
A rough bottom surface on an otherwise successful print usually means the Z-offset was too high during the first layer — the filament was deposited too far from the surface, producing gaps between lines rather than a compressed, smooth layer. Other causes: the build plate surface was not fully clean (debris embedded in the first layer), the first layer speed was too high, or the bed temperature was too low for the first layer to bond flat. For the smoothest bottom surface, use a PEI surface or glass with adhesive, ensure a clean IPA wipe before the session, and confirm the Z-offset produces a flat, gapless first layer.
X-MAKER JOY Setup Guide: What the Child Does vs What the Parent Does
Setup anxiety is one of the most common reasons a 3D printer stays in its box longer than it should. The parent reads 'calibration' and 'filament loading' and puts the lid back on. The child sees it go back in the box and never asks about it again.
The X-MAKER JOY setup process is designed to prevent exactly this. Most of the technical work has already been done at the factory — the bed is pre-leveled, the printer ships calibrated and ready. What remains is mostly physical and takes under 30 minutes.
This guide shows how to split that 30 minutes between parent and child so both feel useful, no one feels overwhelmed, and the first print happens on the same day the box opens. Every section uses the same format: what the parent handles and what the child gets to do. For the full official setup documentation, visit the AOSEED X-MAKER JOY product page.
|
30 min
Total setup time — unbox to first print
|
Pre-calibrated
Factory-set — no manual bed leveling needed
|
App-led
Child operates independently after session 3
|
PLA only
Non-toxic — the right material for all ages
|
X-MAKER JOY Setup — 6-Step Overview
|
1
Unbox
|
2
Assemble
|
3
Filament
|
4
Network
|
5
First Print
|
6
Post-Print
|
|
Parent leads — child identifies parts
|
Parent secures — child hands tools
|
Parent loads — child watches and feeds
|
Parent sets Wi-Fi — child monitors app
|
Child chooses model — parent confirms
|
Parent confirms cool — child removes
|
What Makes the X-MAKER JOY Designed for Family Use
Before the unboxing starts, it helps to understand what the printer is designed to do and what it is designed not to require. The table below translates every relevant X-MAKER JOY feature into what it means on setup day and in regular sessions after that.
|
X-MAKER JOY Feature
|
Parent-Friendly Benefit
|
What It Means on Setup Day
|
|
Factory pre-calibrated
|
No manual calibration required on day one
|
Unbox → assemble → print. The bed is ready.
|
|
Fully enclosed design
|
Peace of mind — nozzle and hot bed inside sealed chamber
|
Child observes through the window — no reaching inside
|
|
App-led one-press printing
|
Child initiates print independently after setup
|
Parent's role reduces to oversight after session 3
|
|
2.4GHz Wi-Fi connection
|
Standard home network compatible
|
No special router needed — most home setups work
|
|
Magnetic build plate
|
Easy print removal — no scraping tools needed
|
Child can flex the plate to remove cooled prints safely
|
|
Quick Swap Nozzle
|
Maintenance without technical expertise
|
Nozzle replacements are user-level tasks — no technician needed
|
|
Built-in camera + timelapse
|
Parent can monitor from anywhere during the print
|
Check print progress from the kitchen or another room
|
The Initial Setup Process
The X-MAKER JOY Unboxing and Setup Instructions on the official AOSEED Wiki document every physical step with photos and video links. This section adapts those steps into the parent-child role-split format used throughout this guide.
Step 1 — Unboxing the X-MAKER JOY
|
STEP 1 · UNBOXING
|
|
💡 Setup note: The X-MAKER JOY ships with DIY sticker sheets. Store these for the decoration phase — they are a reward for completing the first print, not a distraction during setup.
|
What's in the Box — Component Checklist
|
|
🖨 Component
|
Who handles it?
|
|
☑
|
X-MAKER JOY 3D printer
|
Parent — place on stable, level surface
|
|
☑
|
Power adapter (inside foam)
|
Parent — connect to dedicated socket
|
|
☑
|
200g PLA Silk filament spool (pre-loaded in some versions)
|
Child — help identify the spool and its color
|
|
☑
|
Magnetic build plate
|
Parent — place along edge of bed, child can hold it in position
|
|
☑
|
Spool holder
|
Parent installs at back, child can hand over the holder
|
|
☑
|
Calibration card
|
Parent uses for bed leveling if needed — factory pre-calibrated
|
|
☑
|
Quick Guide booklet
|
Child — browse and identify components in pictures vs physical
|
|
☑
|
DIY sticker sheets
|
Child — keep for decoration phase after first print
|
|
☑
|
Pliers (tool kit)
|
Parent — store for maintenance. Keep out of child's reach.
|
Step 2 — Assembling the Printer
|
STEP 2 · ASSEMBLY
|
|
💡 Setup note: The magnetic build plate aligns to the bed edge by design — no precise measurement needed. If it slides freely and snaps flat, it is correctly positioned.
|
Preparing the Printer for Use
Step 3 — Loading the Filament
|
STEP 3 · FILAMENT LOADING
|
|
💡 Setup note: The filament tip must be angled at 45 degrees and straightened — a curled or blunt tip is the most common cause of loading failure. The parent does the tip preparation; the child does the final push.
|
Step 4 — Connecting to the Network
The X-MAKER JOY Setup Instructions specify that the printer connects via 2.4GHz Wi-Fi only. This is the most common first-session difficulty — a household router broadcasting on 5GHz needs to have its 2.4GHz band enabled separately. The six-step Wi-Fi guide below covers the full connection process.
|
Step
|
Action
|
Notes
|
|
1
|
Open the AOSEED app on your smartphone or tablet
|
Apple App Store or Google Play — free download
|
|
2
|
Power on the X-MAKER JOY. Wait for the indicator light to show network search status
|
Indicator light: solid white = powered on, flashing = searching for network
|
|
3
|
In the app, tap Add Printer and follow the on-screen pairing instructions
|
Keep the phone within 2 metres of the printer during first connection
|
|
4
|
Select your home Wi-Fi network. Enter the password
|
Network must be 2.4GHz. If your router shows two networks (2.4 and 5GHz), select the 2.4GHz one
|
|
5
|
Wait for the printer indicator light to turn solid to confirm connection
|
If connection fails: restart the printer and router, then retry
|
|
6
|
Name the printer in the app. The child chooses the name.
|
Naming the printer is the child's first creative decision of the setup process
|
|
STEP 4 · NETWORK CONNECTION
|
|
💡 Setup note: The printer requires 2.4GHz Wi-Fi. If the connection fails, check the router settings. Most dual-band routers display the 2.4GHz and 5GHz networks as separate networks — connect to the 2.4GHz one.
|
First Print Setup
Step 5 — Loading the First 3D Model and Starting the Print
|
🖨 The X-MAKER JOY First Print Promise
No slicer software. No manual bed leveling. No temperature settings. Open the app, tap the Toy Library, choose a model, and press print. The app handles every technical parameter automatically. The setup is complete when the child can do this last step independently.
|
|
STEP 5 · FIRST PRINT
|
|
💡 Setup note: The Toy Library is organized by print time and model type. For the first session, choose a print under 20 minutes. The goal is not an impressive object — it is a complete session that builds the child's maker confidence.
|
The AOSEED Toy Library is updated weekly with new models. After the first session, it becomes the child's weekly browsing destination — the source of the 'what are we making this week?' conversation. It is organized by session length, age, and interest type, making project selection a child-led activity from session two onward.
Safety Guidelines During the Printing Process
The X-MAKER JOY's enclosed design handles the primary physical safety requirement automatically. The nozzle, heated bed, and moving belts are inside a sealed chamber. The child's interaction during printing is through the observation window — watching, not touching. These four guidelines complete the safety setup for every session.
|
✓
|
Observation window — not the door: The child watches through the window during active printing. The door stays closed until the print is complete and the cool-down period has passed (5 minutes after the printer stops).
|
|
✓
|
Cool-down before the child touches: Parent confirms the surface temperature before handing the printed object to the child. Touch the object yourself first. For the youngest children, wait the full 5-minute cool-down before any contact.
|
|
⚠
|
Parent does the filament loading: The extruder area involves a heated nozzle and moving components. Filament loading is a parent task across all first sessions. Children observe and learn the motion — they do not perform it alone until they have seen it done at least five times.
|
|
✓
|
PLA only — no alternative materials: The X-MAKER JOY is designed for PLA filament. PLA is non-toxic, plant-based, and produces minimal odor. The printer's settings are optimized for PLA. No first session requires any other material.
|
Step 6 — Post-Print Care
|
STEP 6 · POST-PRINT CARE
|
|
💡 Setup note: The magnetic build plate makes first-session print removal the easiest part of the process. A gentle flex at the corners usually releases the object without any tools. If it does not release, cool for 2 more minutes and try again.
|
How to Encourage Kids to Design Their Own Prints
Moving from choosing pre-made models to designing originals is a natural progression that happens gradually across sessions. The goal of the first five sessions is not original design — it is complete session habit. Design independence builds from there.
Child Design Progression — Session by Session
|
Session Range
|
Child's Design Role
|
Tool Used
|
Example Output
|
|
Sessions 1–5
|
Selects model from Toy Library. Chooses filament color.
|
X-MAKER app Toy Library
|
Spinning top, ring, animal figurine in child-chosen color
|
|
Sessions 6–10
|
Selects model and adds name or initial before printing
|
X-MAKER app Name tool
|
Personalized keychain or custom nameplate
|
|
Sessions 11–20
|
Adjusts size of a model or combines two shapes in the app
|
X-MAKER app Design screen
|
Scaled figurine, personalized gift, modified animal
|
|
Session 20+
|
Designs from scratch using basic geometric shapes
|
X-MAKER app full design mode / Tinkercad
|
Original creation — character, gear, custom object
|
Introducing 3D Design Software
The X-MAKER app's beginner design tools are the right entry point for children who want to move beyond the Toy Library. The modification path is less intimidating than blank-canvas design: take an existing model, add a name, change a size, or add a detail. This produces a personalized object without requiring the child to invent the entire form.
What the parent does in the design introduction session:
-
Open the design screen together. Explain one feature at a time — not the whole interface.
-
Demonstrate how to add the child's name to a model before printing. Let them type it.
-
Explain scale: 'If we make it bigger, it will take longer to print. If we make it smaller, it will print faster.'
-
Do not redesign the child's decision. If they choose a color or a size that surprises you, let the print happen and discuss it afterward.
What the child does:
-
Type their name or choose an icon to add to the model.
-
Adjust the print size using the scale tool in the app.
-
Press Print when the design is complete.
-
Hold the finished personalized object and describe the creative decisions they made to produce it.
Customizing 3D Prints
For children who want to go further, the AOSEED X-MAKER creation kits are the natural next step — multi-session builds where the child designs individual components that assemble into a working mechanical toy. Each session builds one component toward the complete object. This format produces the strongest long-term maker engagement because the child invests in the object across multiple sessions rather than completing it in one.
Conclusion
The X-MAKER JOY setup is designed to be complete in under 30 minutes, with the first print starting the same day the box opens. The factory pre-calibration removes the most intimidating technical requirement from the parent's list. The app-led workflow removes the ongoing technical management from the parent's daily session involvement.
What remains is the creative experience — the child chooses, the printer executes, and the object appears. That is the experience the X-MAKER JOY setup process is designed to deliver as quickly and reliably as possible.
After the first session, the child has the session structure. After the fifth session, they have the independence. After the twentieth session, they have the creative confidence to design something original.
To compare the X-MAKER JOY with other models and check current availability, visit AOSEED 3D printers for kids.
FAQs
What is the first step when setting up the X-MAKER JOY?
The first step is unboxing — parent-led, with the child participating by identifying components against the Quick Guide booklet. The parent removes the printer from packaging, removes interior foam, locates the power adapter, and places the printer on a stable level surface. The child's role in Step 1 is identification and organization, which builds familiarity with the machine before it is powered on.
How do I connect the X-MAKER JOY to Wi-Fi?
Download the AOSEED app, power on the printer, and follow the app's Add Printer prompts. The printer requires a 2.4GHz Wi-Fi network — if your router broadcasts on 5GHz only, enable the 2.4GHz band in the router settings first. Enter the network password in the app. The printer's indicator light confirms a successful connection. The child's role in this step is to monitor the app's connection progress and choose the printer's name once paired.
How fast is the AOSEED X-MAKER JOY?
The X-MAKER JOY prints at a speed appropriate for family-quality PLA models. A small spinning top or whistle ring prints in 5 to 15 minutes. A flexi animal figurine prints in 30 to 60 minutes. A pull-back car or gear mechanism runs 45 to 90 minutes. Print speed is set automatically by the app based on the model and quality settings — the parent or child does not need to configure speed manually.
Do I need a computer to use a 3D printer like the X-MAKER JOY?
No. The X-MAKER JOY is operated entirely through the smartphone or tablet app. No computer, no separate slicing software, and no manual file management are required for standard home use. The app handles model selection, slicing, print settings, and monitoring. A computer can be used for more advanced design work — importing custom models via the app's design import function — but it is not required for any session in this setup guide.
How to reset the X-MAKER JOY?
A soft reset: power the printer off, wait 30 seconds, and power it back on. This resolves most connectivity and error state issues. A factory reset (if required) is available in the printer's Settings menu — follow the app's guided reset flow. Note that a factory reset clears the printer's Wi-Fi settings and requires the network connection to be re-established following the Wi-Fi setup steps in this guide.
Why is my X-MAKER JOY not connecting to Wi-Fi?
Three most common causes and fixes: (1) Router is on 5GHz only — check router settings and enable the 2.4GHz band or create a 2.4GHz separate network; (2) Too far from the router during first connection — bring the printer within 2 metres during initial pairing; (3) App and printer out of sync — restart both the printer and the app, then retry the pairing process from the Add Printer step.
How to unclog the X-MAKER JOY nozzle?
Standard first-session filament loading does not cause nozzle clogs. Clogs are most commonly caused by using filament that has absorbed moisture (filament stored open in a humid environment), printing at an incorrect temperature (non-AOSEED filament with different thermal requirements), or an incomplete purge cycle after a filament change. For a clogged nozzle: run the unload cycle from the app, perform a cold pull using the app's nozzle maintenance guide, or use the Quick Swap Nozzle replacement procedure for persistent blockages.
Can my child use the X-MAKER JOY independently?
After three to five sessions following the structure in this guide, most children between ages 7 and 12 can initiate, monitor, and complete a print session independently — selecting the model, loading the filament with prior instruction, pressing start, monitoring through the observation window, and reporting when the print is complete. Physical safety tasks (filament loading from scratch, post-print removal, nozzle maintenance) should involve adult oversight until the child has demonstrated consistent safe habits across at least 10 sessions.
What is the best material for printing with the X-MAKER JOY?
PLA is the only recommended material for the X-MAKER JOY for family use — and the only material the printer is optimized for. It is non-toxic, plant-based, low-odor, and requires no ventilation. AOSEED Silk PLA filament produces the smoothest surface finish and is the most reliably print-ready across the full temperature range. Do not use ABS, resin, or third-party materials with non-standard thermal profiles in family session contexts.
First Print Checklist for Parents Using AOSEED
The printer arrived. The children are excited. The box is open. And for about 30 seconds the parent is the only person in the room who has no idea what happens next.
This is the moment the first print checklist is designed for. Not a technical manual. Not a full explainer. A practical, sequential list of what to do — in order — so that the first session ends with a child holding a finished object rather than a parent troubleshooting a failed print.
The checklist below is organized into five zones: workspace setup, filament loading, file selection, active printing, and post-print care. Each zone has between three and five checks. Complete all zones in sequence and the first print will succeed. At AOSEED, the session structure described in this guide is the same one that produced a successful first print for families of every age range and prior experience level.
|
5 zones Complete all 5 → first print succeeds |
20 checks Total across all zones |
10 min Setup time before first print starts |
PLA only The right material for every first session |
What Is 3D Printing? — Quick Parent Explainer
|
What is 3D printing? |
What does it feel like to the child? |
|
A 3D printer reads a digital file and deposits plastic in thin horizontal layers — building from the bottom up until the object is complete. Home printing uses FDM (Fused Deposition Modeling) — the most accessible and family-safe format. The printer melts a thin strand of plastic and places it precisely, layer by layer. |
They choose the model from the app and press start They watch the object appear through the observation window They wait for cool-down, then hold the finished object They decorate it and decide where it will live |
Essential Steps to Take Before Printing with AOSEED

Community guidance from the first print checklist for 3D printers compiled by experienced makers consistently points to the same finding: most first print failures are not equipment failures. They are setup failures. Something was skipped in the preparation phase that would have taken under two minutes to complete. The zones below close every common setup gap.
Zone 1 — Workspace and Printer Setup

|
ZONE 1 · WORKSPACE AND PRINTER SETUP |
|
Level surface Place the printer on a stable, level surface. A wobbling printer produces rough first layers and may produce failed prints on longer sessions. |
|
Away from drafts Move the printer away from fans, air conditioning vents, and open windows. Drafts during printing cause layer separation and warping. |
|
Power connected Connect the printer to power. Do not use extension cords with multiple other devices. A dedicated socket is best. |
|
Enclosure clear Open the enclosure door and verify the interior is clear of packaging material, loose filament ends, or any objects from a previous session. |
|
App connected Open the AOSEED app on your device. Confirm the printer is connected and responds to the app. If this is the first time, follow the app's pairing instructions. |
Zone 2 — Filament Loading

|
ZONE 2 · FILAMENT LOADING |
|
PLA selected For every first session, use PLA. Non-toxic, plant-based, low odor. The right material regardless of the project. Do not experiment with other materials in the first session. |
|
Spool inspected Check the spool for tangles before loading. Unwind 20–30cm by hand and confirm it runs freely. A tangled spool during printing is the most common cause of mid-session stops. |
|
Filament tip prepared Snip the tip of the filament at a 45-degree angle with scissors. A clean angled tip feeds through the loading path without catching. |
|
Filament loaded and confirmed Feed the filament through the loading path as shown in the app. Wait for the app confirmation that filament is detected. Do not proceed without this confirmation. |
|
Purge run if needed If this is not a fresh spool or there is a color change, run the app's purge cycle — 5cm of filament is extruded to clear the previous color. Skip for fresh spools. |
Materials Reference — PLA vs PETG

|
|
PLA — Recommended for All First Prints |
PETG — For Active Toys and Older Kids |
|
Origin |
Plant-based — corn starch or sugarcane |
Petroleum-based polymer, food-grade safe |
|
Toxicity |
Non-toxic. Low odor at print temperature |
Non-toxic. Slightly more odor than PLA |
|
Handling after print |
Cool to touch quickly — safe in 5 min |
Slightly longer cool-down — 8–10 min |
|
Durability |
Good for display, moderate play |
Higher impact resistance — better for active toys |
|
Best for |
Every first print. All ages. All project types |
Race cars, fidget mechanisms, creation kit parts |
|
Storage |
Cool dry place — reseal after use |
Same — especially important in humid climates |
Zone 3 — File Selection and First Project

|
ZONE 3 · FILE SELECTION AND FIRST PROJECT |
|
First project selected For the very first session, choose the fastest project available — a spinning top (5 min) or ring whistle (15 min). These produce an immediate finished object and build session confidence before attempting longer prints. |
|
File confirmed in app The model should be visible in the app's print queue before starting. Confirm the model name, print time estimate, and filament color are correct. |
|
Print time acknowledged Note the estimated print time and share it with the child. A visual timer set to the print time reduces 'when is it done?' questions during the session. |
|
Decoration supplies ready Set out paint markers, stickers, or whatever decoration supplies are available. These should be visible and accessible before the print starts — not hunted for during the cool-down phase. |
First 3D Printing Ideas — Projects by Session Length
|
⚡ Quick Wins (under 20 min) |
Strong First Sessions (20–45 min) |
Second-Week Projects (45–90 min) |
|
Spinning top |
Print-in-place puzzle |
Flexi animal figurine |
|
Ring whistle |
Name keychain |
Pull-back race car |
|
Fidget ring |
Mini animal figurine |
Growing block set (1 block) |
|
Small coin or token |
Custom game piece |
STEM gear mechanism |
The AOSEED Toy Library covers every category in the grid above with multiple variants per type. Filter by print time in the app to find the right project for the child's available patience window on any given day. Weekly additions ensure the library grows alongside the family's session history.
Step-by-Step Checklist for First-Time 3D Printing with AOSEED
Roland DG's guidance on the pre-print checklist for 3D printers identifies the final walkthrough before pressing start as the most important single step in the first-print checklist. After all the preparation zones, a 60-second final check prevents the most common immediate failure modes.
Zone 4 — Active Printing

|
ZONE 4 · ACTIVE PRINTING |
|
Final safety zone check Before pressing start: enclosure door closed, no objects on or near the printer, child briefed on 'observation window only — no touching during printing.' |
|
Start pressed Press the start button in the app or on the printer. Stay with the printer for the first 3–5 minutes to confirm the first layer is adhering correctly. |
|
First layer confirmed The first layer should be smooth, flat, and sticking to the plate. If it looks rough, raised at edges, or is not adhering, pause and re-check the plate cleanliness and level. |
|
Print monitored Check in every 10–15 minutes. You do not need to watch continuously — the printer runs independently. One mid-print visual check is sufficient for most sessions under 60 minutes. |
|
Child engaged during wait While the printer runs, the child can draw a habitat for the animal being printed, plan what color to paint it, or choose next week's project in the app. Purposeful wait time reduces impatience. |
Zone 5 — Post-Print Care

|
1 |
Cool-down confirmed Touch the object only after the cool-down timer finishes. 5 minutes after the print completes. |
|
2 |
Surface check Run a finger along all surfaces. Sand any rough points. Verify no part is small enough to be a choking hazard for the youngest child. |
|
3 |
Filament sealed Reseal the filament bag or box after every session. Moisture shortens filament life and causes rough print surfaces. |
|
4 |
Decoration supplied Set out paint markers or stickers before the cool-down ends so the decoration phase starts immediately. |
|
5 |
Object displayed Place the finished object on the display shelf. Name it. The session is complete when the object is displayed. |
|
✅ The Zone 5 Rule The session is not complete until all five after-session checks are done. The cool-down check keeps children safe. The filament seal keeps the next session high quality. The display moment closes the session with social recognition that reinforces the maker habit. |
Best Practices for Monitoring Kids During 3D Printing Projects

An enclosed printer design handles the physical safety automatically — the nozzle, heated bed, and moving belts are inside a sealed chamber. Parental monitoring during a session is therefore about the child's creative experience rather than active safety management. These two practices produce the most positive first session outcomes.
Safety Measures for Kids
|
✓ |
Observation window only — throughout the session: The child's interaction with the printer during printing is through the observation window. The door stays closed until the cool-down check confirms the print is ready. This boundary is the same across every session and every age. |
|
✓ |
Cool-down confirmed before any touching: Five minutes after the print finishes, the parent touches the object first to confirm it is safe to handle. This single step prevents the most common first-session minor incident: a child picking up an object before it has fully cooled. |
|
⚠ |
Sharp edges check before decoration phase: A brief surface check is Zone 5 step 2. For younger children, verify that no part is under 25mm in any dimension. Sand any rough points with fine-grit sandpaper before handing the object to the child. |
|
✓ |
PLA only — no resin, no ABS, no chemical processes: Every safety property of the first session is built around PLA. Non-toxic, low-odor, plant-based. A first session that uses any other material introduces variables that PLA removes. No first session needs any material other than PLA. |
Encouraging Kids to Design
The AOSEED app's beginner design tools are the correct entry point for children who want to move beyond pre-made models. Starting point: modify an existing model by adding a name, changing a size, or choosing a color within the app before printing. This is genuine design work without blank-canvas anxiety.
Design progression by session number:
- Sessions 1–5: Choose from the Toy Library. No design required — creative decision is the color choice.
- Sessions 6–10: Use the app's name or icon tools to add a personal element to a pre-made model.
- Sessions 11–20: Use the beginner design screen to adjust size, shape, or add a simple element.
- Session 20+: Use the full design workflow for original model creation — text, basic 3D shapes, export.
Common Troubleshooting Tips for Parents
Most first-session issues resolve with one of the six fixes in the table below. If the issue does not appear here or persists after the suggested fix, see the Learning Center in the app or contact the AOSEED support team.
Fixing Print Failures
Troubleshoot Quick-Reference
|
What You See |
Most Likely Cause |
Quick Fix |
|
Print not sticking to plate |
Plate not clean, or nozzle too far from surface |
Wipe plate with damp cloth. Re-run auto-leveling in app. Restart session. |
|
Filament comes out tangled or kinked |
Spool tangle or filament not loaded straight |
Open filament bay. Unspool 10cm manually. Trim at 45°. Re-load. |
|
Print stops mid-way |
Filament ran out, or session interrupted |
Check spool level before each session. Resume if app offers continue — otherwise restart with a small project. |
|
Print looks rough or stringy |
Print temperature slightly off for this filament |
Check filament type in app matches the spool loaded. PLA and PETG need different temperatures. |
|
First layer OK but upper layers peel |
Draft or vibration during print |
Move printer away from fan, window, or air vent. Ensure table is not shaking. |
|
Nothing comes out at start |
Air bubble in filament path or cold nozzle |
Wait for full heat-up. Run the purge cycle from the app. Try again. |
When to Seek Help
Contact AOSEED support when: the printer displays an error code that persists after a full restart; the nozzle does not reach operating temperature within 3 minutes of starting; or there is an unusual sound (grinding, clicking) during movement that was not present in previous sessions. Do not disassemble any part of the printer before contacting support.
|
AOSEED Learning Center and Support The AOSEED app includes a Learning Center with step-by-step guided troubleshooting for every common first-session issue. Open the app, tap the Learning Center icon, and follow the guided flow. For issues not covered there, the AOSEED support team responds to all tickets within 24 hours. |
What Is 3D Printing — For Common Family Questions
If family members (including grandparents or siblings) ask what the printer does: it is a machine that reads a digital file and builds a physical object one thin layer at a time, from the bottom up. The family-use version melts a small strand of plastic at a controlled temperature and deposits it precisely, building a car or animal or puzzle from nothing in under an hour. The child chooses the design. The machine executes it. The child decorates the result.
The most accurate answer to 'what is 3D printing?' for a first-session family is simply: it is the machine that turns the child's choice into a physical object they can hold.
Conclusion
The first print checklist exists because first sessions do not fail for complicated reasons. They fail because Zone 1 was incomplete, or the filament tip was not prepared, or the cool-down was skipped. Each of those takes under two minutes to fix in advance.
Complete all five zones. Choose the shortest project for session one. Stay with the printer for the first five minutes. Let the child press start and mark the cool-down timer. Celebrate the finished object together.
Session two is easier. Session five is something the child initiates independently. The checklist is the tool that gets you there.
For parents choosing their first printer for a family maker session, AOSEED 3D printers for kids shows both current models with age guidance — useful for matching the printer to the session structure in this checklist.
FAQs
What is the first step in the 3D printing process for kids?
Zone 1 of this checklist: workspace setup and printer placement. The printer goes on a stable, level surface away from drafts, connected to a dedicated power socket, with the interior clear of packaging. This zone takes under 5 minutes for a first-time setup and under 1 minute for every subsequent session. The child's role in Zone 1 is to watch — Zone 3 (file selection) is where their creative decisions begin.
What should you check before printing?
The five zone checks in this guide cover every pre-print verification that affects first session success: workspace stability, filament loading quality, file selection, final safety confirmation, and print start monitoring. The most commonly skipped check in first sessions is the filament tip preparation — a 30-second step that prevents the most frequent loading failure.
What is preflight printing?
In commercial printing, preflight is the verification process that happens before a print job is sent to the press — checking that the file is correctly formatted, the colors are set up for print output, and the settings match the physical material being used. For 3D printing with AOSEED, the equivalent is Zone 2 and Zone 3 of this checklist: filament loaded correctly, file confirmed in the app, print time acknowledged, and decoration supplies ready. Completing these three steps before pressing start is the 3D printing preflight.
How do I ensure my child's safety during 3D printing?
Four specific practices cover the full safety requirement for a family 3D printing session: PLA filament (non-toxic, low-odor, no ventilation needed), enclosed printer design (nozzle and heated bed inside sealed chamber), observation-window-only rule during printing (child watches through window — does not reach inside), and Zone 5 cool-down confirmation (parent touches object first before passing to child). All four are consistent practices across every session, not special precautions.
What is the best material for 3D printing with kids?
PLA for every first session and most sessions after that. It is plant-based (corn starch), non-toxic, produces minimal odor at printing temperature, and requires no ventilation. It comes in a wide range of colors and produces smooth, decoration-ready surfaces. PETG is the right upgrade when the child is printing functional toys — race cars, fidget mechanisms, creation kit components — that will be used actively every day and need more impact resistance than PLA provides.
How long does a 3D print typically take?
The range is wider than most first-time parents expect: a spinning top or ring whistle prints in 5 to 15 minutes; a name keychain prints in 15 to 20 minutes; a flexi animal figurine prints in 30 to 60 minutes; a pull-back car prints in 45 to 90 minutes; and a multi-part creation kit component can take 60 to 180 minutes. For a first session, choose a project that finishes before the child's patience window closes. Look up the print time estimate in the app before the session starts and set a timer at the beginning of Zone 4.
Can kids design their own 3D prints?
Yes, using the AOSEED app's beginner design tools. The practical entry point is modification rather than original design: the child takes an existing model and adds their name, adjusts a size, or changes a detail. This produces a genuinely personalized object without requiring blank-canvas design skills. Full original design (creating a model from scratch using 3D shapes) is achievable by most children after 15 to 20 sessions, when they have internalized the session structure and have enough design confidence to attempt something original.
What 3D printing ideas are best for kids?
Session 1: spinning top or ring whistle. Session 2: name keychain. Sessions 3–5: animal figurine or print-in-place puzzle. Sessions 6–10: pull-back car, custom game piece, or fidget mechanism. Session 10+: growing block collection, personalized gift, or STEM gear model. The right idea for any session is the one that matches the child's current patience window and the parent's current involvement level — not necessarily the most impressive project available.
How do I fix a failed 3D print?
Check Zone 5 of this checklist first: was the plate clean before the session started? Was the first layer monitored? Was the filament loaded with the tip prepared at a 45-degree angle? Most first-session failures trace to one of these three. The troubleshoot table in the Common Troubleshooting section above covers the six most common symptom-and-fix pairs. If none of the six matches the issue, open the Learning Center in the app for guided troubleshooting.
Sources
- 3D Printing Reddit community — First Print Checklist for 3D Printers, First Print Checklist for 3D Printers, 2026.
- Roland DG — Pre-Print Checklist for 3D Printers, Pre-Print Checklist for 3D Printers, 2023.
- Formax Printing — Quick Checklist for Printing (pre-print preparation principles), Quick Checklist for Printing, 2023.
- 3D Printing Experts — Pre-Print Checklist for Beginners, Pre-Print Checklist for Beginners, 2024.
- 3D Hubs — Beginner's Guide to First 3D Prints, Beginner's Guide to First 3D Prints, 2024.
5 Visual Checklists That Make First Projects Easier for Kids
The first 3D printing session often fails not because the technology is difficult — but because there are too many steps and no clear way to keep track of them. A child who knows the object is coming but cannot see where they are in the process loses interest somewhere between 'press start' and 'wait for it to cool.'
A visual checklist project for kids solves this before the session begins. It turns the invisible workflow into a visible, checkable, ownable sequence of steps. The child follows the list, checks each box, and arrives at the finished object with clear evidence of everything they did to get there.
This article provides five ready-to-use visual checklist templates for the five best starter 3D printing projects. Each one is designed to be printed, laminated, and kept beside the printer. Each one is built around the session structure that families using AOSEED have found most reliably produces a successful, independent first session.
|
5 Ready-to-use visual checklists |
5 steps Each checklist — no more, no less |
Ages 4+ All checklists have an age version |
✓ Each box = one micro-achievement |
Why Visual Checklists Are Crucial for Kids' Success

Research on visual schedules for kids consistently shows that structured visual tools reduce the adult prompting required to complete multi-step activities by up to 80% within the first three to five sessions. Children stop asking 'what's next?' and start asking 'can I start the next step?' — a complete inversion of who is driving the session.
|
✅ Independence |
📉 Frustration |
🏆 Confidence |
|
Children follow each step without asking 'what's next?' — the checklist answers before they feel blocked. Studies show children on visual schedules complete multi-step activities without adult prompting within 3–5 sessions. |
Knowing what comes next removes the anxiety of ambiguity. When the child can see the full process before it begins, the unknown — the main source of creative frustration — disappears entirely. |
Every checked box is a micro-achievement. A 5-step checklist produces 5 moments of completion per session. Across 10 sessions, that is 50 small wins — each one reinforcing the child's identity as a capable maker. |
Encouraging Independence with Clear Steps
A visual checklist projects for kids framework does one thing above all else: it gives the child a direct answer to 'what should I do next?' without requiring the parent to speak. Every step removed from the parent's verbal guidance is a step added to the child's independent self-direction. After five sessions with the same checklist, most children complete the full sequence without looking at the list at all — they have internalized the structure.
Reducing Frustration Through Predictability
Frustration in creative sessions almost always comes from ambiguity — not knowing how long something will take, not knowing if they are on the right track, or not knowing when they are done. A visual checklist removes all three forms of ambiguity simultaneously. The child can see the full workflow before starting. They know the print has to cool before touching. They know the session ends with decoration. Nothing is a surprise.
Building Confidence in Kids
The Inspired Treehouse explains in their research on how visual checklists can help kids follow directions that the physical act of checking off each step produces a meaningful confidence signal — the child accumulates micro-evidence that they are capable of managing the task. A 5-step checklist produces 5 confidence moments per session. By session 10, the child who started with significant anxiety about the process is typically initiating sessions independently.
How to Create Effective Visual Checklists for Kids

An effective visual checklist is not simply a list of steps. It is a tool designed specifically for the child who will use it — at their reading level, with their session type, in their home or classroom environment. The four design rules below apply across all five checklists in this guide.
Age-Appropriate Visual Checklists

Checklist Design Guide by Age
|
Age |
Steps per list |
Format |
What each step looks like |
|
Ages 4–6 |
3–4 steps |
Emoji + single action word |
🔵 Choose color 🖨 Press start ❄ Let it cool 🎨 Decorate |
|
Ages 7–9 |
5–6 steps |
Symbol + short instruction |
☐ Pick your model ☐ Load filament ☐ Press start ☐ Watch the print ☐ Cool 5 min ☐ Decorate |
|
Ages 10–12 |
6–8 steps |
Action verb + brief detail |
☐ Browse library, pick model ☐ Choose color and load ☐ Start print ☐ Monitor first layer ☐ Check support removal ☐ Sand if needed ☐ Paint or decorate |
|
Ages 13+ |
8–12 steps |
Full text with sub-tasks |
Includes: design modification, file export, slice settings review, print monitoring, post-processing, testing, and iteration decision |
Using Pictures and Symbols for Easy Understanding

For children between ages 4 and 7, the most effective checklists use emoji or simple drawn icons rather than text. An image of a filament spool beside a color swatch communicates 'choose your filament color' faster and more reliably than any written instruction. For older children, symbols and text work together — the symbol provides quick visual scanning, the text provides confirmation.
|
Every effective 3D printing visual checklist for kids includes these four zones |
|
🔵 Zone 1 — Safety Check Before anything starts: observation window clear, no loose objects near the printer, no very young children in direct reach. One symbol per item, three items maximum. |
|
🖨 Zone 2 — Preparation Model selected in app, filament color confirmed and loaded, printer turned on. This zone is the 'ready to begin' signal — all boxes checked means the print can start. |
|
⏱ Zone 3 — Active Printing Start button pressed, first layer confirmed, timer started. One or two observational check-ins during the print — child notes a visible milestone (halfway, full height visible). |
|
🎨 Zone 4 — Completion Print cooled, surface checked, decoration supplies ready. Final box: object displayed or wrapped. Session complete when all Zone 4 boxes are marked. |
Keeping Instructions Simple and Clear
Each step should be writable in five words or fewer for ages under 9 — and each word should be an action the child performs, not a condition they observe. 'Press start' is correct. 'The printer should now be running' is not. Action-oriented steps give the child something to do, check, and own.
|
📌 One Rule for Every Checklist Five steps maximum per checklist for ages 4–9. Seven steps maximum for ages 10–12. No step should take longer than 2 minutes of active child effort (print time is wait time — it is tracked by a timer, not a step). If the project needs more steps than this, split it into two checklists: 'Setting Up' and 'Finishing.' |
Using 3D Printing with a Visual Checklist — The Session Timeline
|
Before (3 min) |
Setup (3 min) |
Start (1 min) |
Wait (print time) |
Cool (5 min) |
Finish (10–30 min) |
|
Checklist out, safety zone clear, model confirmed in app |
Filament loaded, printer on, Zone 2 all checked |
Button pressed, Zone 3 box 1 checked |
Timer running. Child can draw, decorate last session's object, or plan next project |
Timer alerts. Child checks Zone 3 box 2. No touching until Zone 4 opens |
Inspect, decorate, display. Final box checked. Session complete. |
The 5 Visual Checklists — Starter 3D Printing Projects

These five checklists are designed to be printed and kept beside the printer as a laminated card. Each one follows the same four-zone structure described above. Each one matches a specific project type and age range. Read the 'Why this works' note on each card before the first session — it explains the specific session behavior the checklist is designed to produce.
Checklist 1 — Customizable Keychains

|
CHECKLIST 1 🔑 Customizable Keychain — Name or Initial Ages 6+ · 15–20 min |
||||||||||
|
||||||||||
|
📋 Why this works: The fastest checklist on this list — under 20 minutes from start to finished object. Perfect for the first session because it builds the full 5-step habit before the child's patience is tested. Find this project: AOSEED Toy Library |
Checklist 2 — Mini Race Cars and Tracks

|
CHECKLIST 2 🚗 Mini Race Car — Print and Race Ages 5+ · 30–60 min |
||||||||||
|
||||||||||
|
📋 Why this works: The track-building activity during the print wait fills the waiting time with physical creative work — the child arrives at the play phase with both car and course ready simultaneously. Find this project: AOSEED Toy Library |
Checklist 3 — 3D Printed Animal Figurines

|
CHECKLIST 3 🦊 Animal Figurine — Print and Decorate Ages 4+ · 30–60 min |
||||||||||
|
||||||||||
|
📋 Why this works: The drawing activity during the print window ensures the child arrives at the decoration phase with creative investment already built — they have been thinking about this animal for 40 minutes before holding it. Find this project: AOSEED Toy Library |
Checklist 4 — Fidget Toys

|
CHECKLIST 4 ✋ Fidget Toy — Spinner, Ring, or Whistle Ages 5+ · 5–20 min |
||||||||||
|
||||||||||
|
📋 Why this works: The functional test at Step 4 is the most direct success signal on this list — the fidget either works or it does not. This immediate feedback loop is particularly effective for building the 'I can verify my own work' habit. Find this project: AOSEED Toy Library |
Checklist 5 — Puzzles and Brain Games

|
CHECKLIST 5 🧩 Print-in-Place Puzzle — Make and Solve Ages 6+ · 30–45 min |
||||||||||
|
||||||||||
|
📋 Why this works: A puzzle the child helped manufacture is a puzzle they approach with different patience — they want to solve it because they made it. The personal investment produces longer, more focused play than a commercially purchased puzzle of equivalent complexity. Find this project: AOSEED Toy Library |
The AOSEED Toy Library covers all five project types across multiple variants — so each checklist can be used across multiple sessions with a different model each time. The checklist structure stays the same. Only the project changes. This is the most efficient way to build the session habit: consistent structure, varied content.
How to Use Visual Checklists in 3D Printing Projects

Break Projects Into Smaller, Manageable Steps
The five-step rule is not arbitrary — it matches the typical attention span and working memory capacity of a child between ages 4 and 12 completing a novel multi-step activity. Studies on working memory in children consistently show that five to seven items is the maximum reliable recall range without external support. A checklist of five steps does not ask the child to hold the sequence in memory — it holds it for them, freeing their attention for the creative work.
Practical tips for breaking down 3D printing sessions:
- Print the checklist at A5 size and laminate it — a dry-erase marker lets the child check and reset boxes without reprinting
- Use a visual timer beside the checklist during print time — the countdown keeps the wait phase structured
- Place the checklist to the left of the printer, at the child's eye level — not on a drawer or shelf above or below
- For multi-session projects (creation kits), split into two checklists: Session 1 ends with the chassis printed, Session 2 starts with the motor mount
- Let the child mark the boxes themselves — never mark a box for them unless they are physically unable to
Encourage Kids to Check Off Tasks
The physical act of checking a box is not incidental — it is the primary mechanism through which the checklist builds independent agency. A child who checks their own boxes is making an active decision at each transition: 'This step is complete. I am ready for the next one.' This decision-making practice at low stakes (printer steps) transfers directly to higher-stakes sequential tasks at school and in other creative work.
|
✅ The Self-Check Rule From session one: the child checks every box. The parent checks nothing. If the child forgets to check a box mid-session, the parent points at the checklist rather than speaking the step. This single behavioral rule is the most impactful design decision you can make in a visual checklist project for kids. |
Celebrate Small Wins Along the Way
After Zone 2 is fully checked, say something aloud. 'Setup complete — you're ready.' After Zone 4, display the object together. These verbal acknowledgments of completed zones anchor the checklist to the child's emotional experience of the session. Over time the positive feeling of a completed checklist becomes its own motivation — children start sessions specifically because they want to mark all five boxes.
For families using the AOSEED X-MAKER JOY, the app's guided session workflow maps directly to the checklist structure above — Zone 2 completion corresponds to the app's 'Ready to Print' confirmation state. This alignment means the checklist and the app reinforce each other across every session, making the full session habit faster to establish.
Safety Checklist — Included in Every Session
The safety check is Zone 1 of every checklist in this guide. It is not optional and it never changes. The same three steps appear at the top of every checklist regardless of project type or child age.
|
☐ |
Window clear — observation only: The child's active zone is the observation window. Before every session, confirm nothing is placed on, against, or under the printer. The printer surface and floor beneath it are clear. |
|
☐ |
No reaching through the enclosure: The child never opens the printer door during printing. The enclosure is the boundary. Zone 3 of the checklist (active printing) includes no steps that require opening the printer. |
|
☐ |
Cool-down confirmed before touching: Zone 4 always starts with the cool-down step. The child sets a 5-minute timer and marks this box only when the timer has finished and the surface has been touched by the parent first. |
|
✓ |
PLA — default for all 5 checklists: Non-toxic, plant-based, low odor. No ventilation requirement. Every project on every checklist in this guide uses PLA as the default. The filament choice does not change the checklist steps. |
Conclusion
A visual checklist project for kids does not make 3D printing simpler. It makes the child's relationship with complexity clearer.
The same printer, the same filament, the same session — but with a laminated five-step card beside it, the session belongs to the child in a way it does not without one. They know where they are. They know what is next. They know when they are done. And they know they did it.
Print the five checklists in this guide. Laminate them. Put them beside the printer at eye level. Use session one to run through the structure together. By session three, step back and watch what happens.
For families building a first printing station with these checklists, AOSEED 3D printers for kids shows both current models — useful for choosing the printer whose app workflow aligns most closely with the checklist zone structure described here.
FAQs
What are visual checklists for kids?
Visual checklists are structured task guides that use pictures, symbols, or simple text to represent a sequence of steps for an activity. They are an Applied Behavior Analysis tool that helps children follow multi-step activities without adult verbal prompting. In the context of a 3D printing project for kids, a visual checklist covers the four zones: safety check, preparation, active printing, and completion.
How can visual checklists help kids with 3D printing projects?
A 3D printing session has between 8 and 15 individual steps from setup to finished object. Without a checklist, children rely on adult prompting for most transitions. With a checklist, they manage those transitions independently — typically reaching full independence within three to five sessions. The checklist also holds the cool-down and safety steps in the flow, so they are never forgotten under the excitement of a finished print.
What should be included in a 3D printing checklist for kids?
Every effective 3D printing checklist for kids includes four zones: Zone 1 (safety check — three items), Zone 2 (preparation — model selected, filament loaded, printer on), Zone 3 (active printing — start confirmed, timer running, one mid-print check), and Zone 4 (completion — cool-down confirmed, surface inspected, decoration complete, object displayed). The total should not exceed seven boxes for children under 12.
How do visual checklists improve learning?
Visual checklists support three specific cognitive skills simultaneously: sequencing (understanding that steps have an order), working memory (offloading the sequence to the visual tool frees memory for the creative task), and metacognition (checking a box requires the child to evaluate whether a step is actually complete). These three skills together form the foundation of independent project management — a capability that transfers across academic, social, and creative domains.
How do I create an effective visual checklist for my child?
Five design rules: (1) maximum five steps for ages 4–9, seven for ages 10–12; (2) each step begins with an action verb; (3) each step takes under two minutes of active child effort; (4) print time is tracked by a timer, not a checklist step; (5) the child marks every box themselves. A checklist built on these five rules is more effective than a longer, more detailed list because it matches the child's working memory capacity and preserves their agency at every transition.
Can visual checklists be used for other crafts or activities?
Yes. The four-zone structure (safety / preparation / active / completion) applies to any multi-step creative activity. The same structure works for baking, LEGO building, model assembly, and craft projects. The specific steps change per activity, but the zone framework transfers directly. For families using visual checklists in 3D printing, the easiest expansion is to create a matching checklist for the decoration phase that follows the print.
What are some challenges kids face with open-ended projects?
The three most common challenges are choice paralysis (too many simultaneous decisions), ambiguity about completion (no clear signal for when the activity is finished), and frustration from unexpected results (the art looks different from the imagined output). A visual checklist addresses all three: it provides a defined starting decision (the checklist's first step), a clear ending signal (the last box), and a predictable sequence (reducing unexpected moments).
How long does it take for kids to complete 3D printing projects?
The five projects in this article range from under 20 minutes (keychain) to 45–60 minutes including decoration (race car, animal figurine). The child's active time in any session is always much shorter than the total session time — the printer runs independently while the child completes the wait-phase activity on their checklist. For Checklist 3 (animal figurine), the child draws a habitat during the 40-minute print and arrives at the decoration phase having been active throughout.
How can I help my child stay motivated while completing a 3D printing project?
Three specific practices work consistently: first, browse the project together the evening before the session so the child has been anticipating it for 12 to 16 hours before the printer turns on; second, let the child physically check every box — do not do it for them; third, at the end of Zone 4, place the finished object somewhere visible before leaving the station. A growing display of past sessions is one of the most reliable long-term motivation drivers — the child can see the accumulating evidence of their own making habit.
Sources
- KidsHealth from Nemours — How Visual Schedules Benefit Kids, How Visual Schedules Benefit Kids, 2024.
- ADDitude Magazine — How to Use Visual Schedules for Kids with ADHD, How to Use Visual Schedules for Kids with ADHD, 2023.
- Social Workers Toolbox — Printable Visual Schedules and Charts for Kids, Printable Visual Schedules and Charts for Kids, 2023.
- The Trip Clip — Visual Organizers for Kids (customizable), Visual Organizers for Kids, 2024.
Parent-Supported Maker Time: What to Do and What to Let Kids Do
The best creative sessions are not the ones where the parent has done the most work. They are the ones where the child has.
When a parent sets up a 3D printing session and then gradually hands over every decision to the child — which model, which color, when to start, how to decorate — the child does not just produce an object. They produce an object they can describe as entirely their own. That ownership is what converts a one-time activity into a lasting habit.
Parent-supported maker time is a specific kind of involvement: parent as facilitator, not director. At AOSEED, the sessions that generate the most repeat engagement are those where the parent handled the setup and the child handled everything else. This guide is organized around that principle — showing clearly what to do, and what to hand over.
|
2 roles Parent facilitates. Child creates. |
1 rule Child leads all creative decisions |
5 sessions Typical time to full child independence |
Ages 4–15 Spectrum from watch to lead |
Why Parent-Supported Maker Time Matters
 The research on maker-based learning is clear. Edutopia's analysis of parent-supported learning through maker projects identifies that children in parent-facilitated making environments develop stronger problem-solving habits and more durable creative confidence than children in unsupported environments — precisely because the parent's presence reduces the anxiety of failure without removing the ownership of success.
Enhancing Learning and Creativity
3D printing sessions are among the most complete learning experiences a child can have at home. A single session involves visual design thinking (what do I want to make), material science (which filament color and how it behaves), mechanical understanding (how the printer works), patience (waiting for the print), and tactile creativity (decorating the finished object). No single classroom subject delivers all five in the same afternoon.
Building Confidence Through Creativity
The confidence-building effect of maker time is specifically connected to object permanence — the child makes something and it stays made. The printed object does not disappear when the session ends. It goes on the shelf. It gets used. It gets described to grandparents on a Sunday. Every session that ends with a physical object adds one more piece of evidence that the child is a maker — and that identity compounds across sessions in a way that abstract praise alone cannot.
Learning Effective Collaboration
The Child Mind Institute's guidance on how parents can support their child's creativity emphasizes that shared creative work is most effective when both participants have defined, complementary roles. When a parent is 'the one who sets it up' and a child is 'the one who decides what gets made,' both roles are clear and meaningful. This complementarity is what prevents the parent from taking over and the child from disengaging.
How to Support Your Kids During Maker Time
Support in a maker session is not the same as supervision. Supervision watches for problems. Support creates the conditions for independent success. The two table formats below define both the role distribution and the involvement level appropriate for different stages of your child's maker journey.
What to Do and What to Let Kids Do — Session by Session
|
|
Parent Does |
Child Does |
|
Setup |
Position the printer, load filament, confirm first layer |
Watch through the observation window. Name what they see. |
|
Software |
Open the app. Navigate to the Toy Library. Filter by age. |
Browse, scroll, choose the model. Press download. |
|
Session planning |
Set out decoration supplies before the session begins |
Choose the filament color. Decide what they want to make next. |
|
Print monitoring |
Remain available — not hovering. Check in every 15 minutes. |
Watch the layers appear. Note the progress out loud. |
|
Post-print check |
Inspect for sharp edges. Confirm parts are cool to touch. |
Pick up the finished object. Test it. Celebrate. |
|
Decoration |
Set out supplies. Describe options briefly. |
Lead entirely — color, technique, and what to paint. |
|
Next session |
Keep the Toy Library updated. Note what the child enjoyed. |
Choose next week's project. Describe what they want to make. |
Providing Clear Guidance Without Taking Over
|
The Facilitator Rule Handle everything that requires physical safety awareness (hot nozzle, bed temperature, filament tension) or software knowledge (slicing settings, file transfer). Leave everything that involves creative preference (model choice, color, decoration, display) entirely to the child. When these two categories are consistently separated across sessions, children internalize their creative role very quickly. |
Encouraging Independent Problem-Solving
The fastest way to reduce a child's creative independence is to solve problems before they feel them. A print that looks slightly unexpected is an opportunity — not a failure — if the parent responds with curiosity rather than correction. The guiding question table below provides specific language for the most common maker session challenges.
|
Situation |
Guiding Question Instead of a Fix |
|
Print looks wrong |
'What do you think is different from what you expected? What could we try to change?' |
|
Child gives up |
'How much is done already? What is the smallest next step we can take right now?' |
|
Wrong color choice |
'Does that change how much you want to play with it? How could you use that color?' |
|
Decoration goes off-plan |
'Is this what you wanted? Does that bother you, or do you like it anyway?' |
|
Print takes too long |
'What would you like to do while we wait? What could you be planning for the decoration phase?' |
|
Assembly doesn't fit |
'What part needs to move to connect? Could we try a different angle?' |
Balancing Involvement and Independence
Parent Involvement Spectrum — Where Are You in the Session?
|
Level 1 Full setup |
Level 2 Available |
Level 3 Collaborative |
Level 4 Advisory |
Level 5 Independent |
|
Parent sets up everything. Child watches and observes. |
Parent present in room. Child operates with permission check. |
Both decide together. Parent explains; child executes. |
Child leads. Parent answers questions when asked. |
Child plans, sets up, prints, and decorates independently. |
Most families begin at Level 1 or 2 — this is correct. The printer is new, the workflow is unfamiliar, and the child needs to see the full session flow before they can lead any part of it. By session five, most families reach Level 3. By session ten to fifteen, Level 4 and 5 become possible depending on the child's age and the session type chosen.
Best 3D Printing Projects for Kids
Matching the right project to the child's current skill level and the parent's current involvement level produces the most independent, engaged sessions. The skill table below provides the complete framework.
|
|
Beginner Ages 4–7 |
Intermediate Ages 8–12 |
Advanced Ages 13+ |
|
Project type |
Single-piece, no assembly |
Multi-part, simple assembly |
Custom design or creation kit |
|
Parent role |
Full setup + present throughout |
Setup + available for questions |
Setup filament only |
|
Child role |
Choose model + color + watch |
Choose + modify + decorate |
Plan + design + print + build |
|
Print duration |
5–25 min |
25–60 min |
45–120 min |
|
Session end |
Object in hand immediately |
Object + decoration = complete |
Testing and iteration may take more than one session |
|
Skill developed |
Creative confidence + patience |
Problem-solving + decoration |
Engineering + design thinking |
Simple and Fun 3D Printing Ideas for Beginners

|
Beginner Ideas — Single-Part, Instant Play Ages 4–7 · 5–25 min |
|
Bonding note: The adult-present but child-directed session is where creative confidence is first built. The more the child leads in sessions 1–5, the more independently they will approach session 6. Find it: AOSEED Toy Library |
Intermediate 3D Printing Projects for Kids

|
Intermediate Ideas — Multi-Part with Assembly Ages 8–12 · 25–60 min |
|
Bonding note: This is the level where a parent describing themselves as 'helping with maker time' is most accurate — the child is doing the substantive creative and technical work, and the parent is there for support. Find it: AOSEED Toy Library |
Advanced 3D Printing Projects for Teens

|
Advanced Ideas — Custom Design and Creation Kits Ages 13+ · 45–120+ min |
|
Bonding note: The teen-level creation kit session is where maker identity is fully formed. The parent who resists involvement at this stage is giving the most valuable gift: complete creative ownership of a complex, multi-session build. Find it: AOSEED X-MAKER STEM sessions |
The AOSEED Toy Library covers all three levels. The session-length and complexity filters make it straightforward to find the right project for any given afternoon and any given level of parent involvement. Weekly additions mean there is always a new option without needing to look outside the ecosystem.
How to Choose the Right 3D Printing Ideas for Your Child
 The best ideas for 3D printing are the ones that match three variables simultaneously: the child's current interest, the appropriate session length for the day, and the project complexity that fits the current involvement level. Use the interest grid below as the starting filter.
|
Loves vehicles |
Loves animals |
Loves giving |
Loves how things work |
|
Race cars, pull-back mechanisms, train cars. Clear mechanical behavior. Functional success signal: the vehicle moves. |
Flexi figurines, habitat projects, species collection. Personal emotional investment. Decoration phase is naturally engaging. |
Name keychains, gift frames, personalized objects. Recipient is the creative anchor. Purpose-driven sessions are highly motivated. |
STEM gear sets, spinning tops, fidget mechanisms. Test of success is physical and immediate. Engineering curiosity drives patience. |
Age-Appropriate Designs
The single most important thing to know about age-appropriate project selection is not about the child's skill level — it is about session length. A 4-year-old can engage with a sophisticated-looking project if it prints in 10 minutes. A 14-year-old might struggle with a technically simple project if it takes 90 minutes and provides no intermediate success signals. Match session length to the child's current patience window first, then match complexity to their current skill level.
Matching Interests with Projects
The parent's role in project selection is not to decide what gets made — it is to surface relevant options and let the child choose between two or three of them. 'Do you want the dinosaur or the elephant?' is a parent-supported creative decision. 'We're printing the dinosaur today' is not. This distinction matters because the child who made the choice is the child who is invested in watching the print and excited to decorate the result.
Ensuring a Clear Outcome
For families new to maker time, every project should end with an object the child can hold and use immediately. The AOSEED X-MAKER JOY app-led workflow is designed with this in mind: the model library shows the finished object before the session starts, so the child always knows what they are working toward. This preview is a small detail with a significant effect on session motivation — the child who can see the goal is the child who stays engaged through the print wait.
Safety Considerations for 3D Printing with Kids
 Safe maker time is the foundation of repeated maker time. When every session runs without safety concerns, the parent's attention can stay on the child's experience rather than the equipment. These four rules make that possible across every session type and age range.
|
✓ |
PLA — safe for all ages and all session types: Non-toxic, plant-based, low odor, wide color range. The default material for every beginner, intermediate, and advanced project in this guide. No ventilation requirement. |
|
✓ |
PETG — for functional and active toys: More durable and impact-resistant. Good choice for vehicles, fidget mechanisms, and creation kit components that will be used daily. Same non-toxic profile as PLA. |
|
⚠ |
Post-print inspection — parent task, every session: Brief surface check before the object passes to the child. This stays a parent task across all involvement levels until the child has demonstrated the habit independently, typically around Level 3–4. |
|
✗ |
No resin or ABS for family maker sessions: Both require conditions incompatible with shared family spaces. Neither is needed for any project type in this guide. PLA and PETG cover every use case described here. |
Selecting Safe Materials
The filament color the child chooses is a creative decision. The filament type the parent loads is a safety decision. Keeping these two decisions clearly separated — the child picks the color, the parent confirms the material is PLA — is a practical model that works at every involvement level from 1 to 5 and communicates the underlying safety principle without making it a restrictive rule.
Preventing Hazards During 3D Printing
Building the post-print inspection into the session as a named transition step prevents it from feeling like an interruption. 'Now we check it before you start decorating' becomes a reliable part of the session flow. Children who have seen the check happen in every session begin to perform it themselves without prompting — typically within ten to fifteen sessions, depending on age.
Ensuring Safety During the Printing Process
An enclosed printer design is the most significant single safety feature for family maker sessions because it creates a permanent physical boundary between the print in progress and the child's hands. The child's role — watching through the observation window — is physically defined by the enclosure. This means the safety feature and the session role are the same thing. The child is not kept away from the printer; they are given the correct, safe way to engage with it.
How to Make 3D Printing Fun and Easy for Kids
 A maker session stays engaging when the setup is smooth, the decisions belong to the child, and the session ends with something real. These five setup steps produce that experience reliably.
|
1 |
Choose the project the evening before Browse the Toy Library with the child on Sunday evening. Two or three options, child picks one. By the time the session starts the next day, the decision is already made and the anticipation has been building overnight. |
|
2 |
Set up the printer before the child is present Load the filament, confirm settings, and position the printer before the session begins. The child's first moment with the printer is pressing start — not watching a parent struggle with setup. |
|
3 |
Describe the five-step session flow once at the start 'We choose, we load, we press start, we watch, we decorate.' One sentence. Then begin. Children who know the session structure arrive at each phase with correct expectations. |
|
4 |
Set out decoration supplies before the cool-down ends Paint markers, stickers, and whatever else is available — out and ready before the print cools. The transition from print-done to decoration begins immediately. No searching for supplies. |
|
5 |
Display the finished object together Name it. Choose where it lives. Tell someone else in the household about it. These three small acts of social recognition close the session properly and generate the anticipation for the next one. |
Choosing Projects that Match Their Interests
Interest-matched sessions produce the most patient print waits. A child who is watching a dinosaur print does not need to be reminded to be patient — they are managing their own patience because the outcome matters to them. The parent's role in interest matching is to build a library of two to three projects per category (vehicles, animals, gifts, STEM) and present the right category for the right child on the right day.
Starting with Structured, Easy-to-Follow Projects
Single-piece prints that come off the plate immediately usable are the right entry point for every new maker and every new session type. The child who has experienced a successful 5-minute session is a child who will sit through a 45-minute session without anxiety — because they know the session structure works and the object at the end is real.
Adding Customization and Personalization
Customization grows in scope across sessions: filament color (session one), decoration choices (session two onward), model modification (sessions ten to fifteen onward), original design (advanced level). Introducing one new customization type per session phase keeps the creative development visible and exciting for the child without overwhelming any individual session.
Conclusion
Parent-supported maker time is not about how involved the parent is. It is about what the child owns. The parent who sets up the printer, loads the filament, and then sits beside the child and asks 'what do you want to make?' has done exactly the right amount. The child who chooses the project, watches every layer appear, holds the finished object, and decorates it the way they decided — that child has had a complete maker session.
Start at Level 1. Run the same session structure every week. Watch the involvement level drop as the child's confidence grows. Notice when the child starts asking to do sessions without you.
For families setting up their first parent-supported maker station, AOSEED 3D printers for kids shows both current family models with age guidance — useful for choosing the printer that best supports the involvement level and session types described in this guide.
FAQs
What are parent-supported maker activities?
Parent-supported maker activities are hands-on creative sessions where the parent's role is defined and limited: set up the tools, ensure safety, and create conditions for the child's creative work. The key distinction from other types of family activity is that the child holds all creative decisions — what to make, what color, how to decorate. The parent handles everything that requires technical or safety knowledge.
How do I get my child started with 3D printing?
Run the first session as a complete five-step demonstration: choose a model together (let them pick), load filament together (you load, they watch), start the print together (they press the button), watch the print together, decorate together. The entire first session should be joint so the child has seen the full structure before they are asked to navigate any part of it independently. Session two starts with more child-led steps.
What are the best 3D printing ideas for kids?
The best easy 3D printing ideas for a first session are those with the shortest print time and the most immediate play value: a spinning top (under 5 minutes, spins immediately), a ring whistle (under 20 minutes, makes sound immediately), or a flexi animal figurine (30–60 minutes, joints move immediately off the plate). All three are single-piece, require no assembly, and provide an unambiguous success signal.
How can parents support their kids during maker time?
Define your role clearly before each session. Handle setup and safety. Hand over the creative decisions. Ask guiding questions rather than solving problems. Be present enough to be reassuring and distant enough to require the child to initiate requests. The specific balance shifts across sessions as the child's experience grows — the involvement spectrum earlier in this article provides a session-by-session progression to guide that shift.
What is the 7-7-7 rule in parenting?
The 7-7-7 rule is an informal parenting principle suggesting that children need 7 minutes of focused attention, 7 days of consistent behavior from a parent to form a habit, and 7 weeks of repeated experience to establish a lasting pattern. Applied to maker time, this suggests that a 7-week run of weekly maker sessions — even very short ones — is sufficient to establish the habit and the child's identification with the maker role.
Are 3D printers safe for kids?
Yes, with PLA filament and an enclosed printer design. PLA is plant-based, non-toxic, and produces minimal odor. An enclosed design keeps the nozzle, heated bed, and belts inside a sealed chamber — the child's interaction is through the observation window and the start button. A brief surface inspection after cool-down completes the safety routine. All of these are consistent session habits rather than special precautions.
What are the benefits of 3D printing for kids?
Regular 3D printing sessions develop five things simultaneously: creative decision-making confidence, spatial and mechanical reasoning, patience through the print-to-result cycle, fine motor skill and aesthetic judgment during decoration, and the habit of starting a project and seeing it through to a physical result. The last of these is the rarest and most transferable benefit — the experience of 'I imagined this, I chose it, I waited, I held it' applies to every domain the child enters.
How long does it take to 3D print a toy for kids?
The range is wide and should be used actively in session planning. The fastest cool 3D printing ideas (spinning top, whistle ring) finish in under 5 minutes. Most easy 3D printing ideas suitable for sessions 1 through 10 fall in the 15–45 minute range. Longer intermediate and advanced builds run 45 to 90 minutes. The right duration for any given session is the one that matches the child's patience window that day — choose short on difficult days, longer on calm ones.
Can kids design their own 3D prints?
Yes, and this is the natural progression for children who have completed regular sessions across several months. The AOSEED app's beginner design tools let children modify existing models — changing a name, adjusting a dimension, adding a detail — before the design-from-scratch stage. This modification phase is the bridge between using the Toy Library and creating original designs. Most children reach comfortable model modification within 10 to 20 sessions.
Sources
- Edutopia — Parent-Supported Learning Through Maker Projects, Parent-Supported Learning Through Maker Projects, 2023.
- Maker Faire — Maker Time for Parents and Kids, Maker Time for Parents and Kids, 2023.
- Common Sense Media — How Parents Can Encourage Hands-On Learning, How Parents Can Encourage Hands-On Learning, 2023.
- Tinkercad — 3D Printing Ideas for Parent-Child Collaboration, 3D Printing Ideas for Parent-Child Collaboration, 2026.
- National PTA — Supporting Maker Projects at Home, Supporting Maker Projects at Home, 2023.
Calm Play Ideas: Low-Frustration Projects Families Can Make Together
There is a particular quality that the best family activities share. They do not require everyone to be in a good mood to begin. They are patient with interruptions. They produce something real at the end. And they leave the room feeling slightly calmer than it was when they started.
These are not easy conditions to meet. Most family activities either need sustained energy or produce frustration when something goes wrong. A 3D printing session, done at the right pace with the right project, meets all four conditions naturally.
The projects in this guide are chosen specifically for their calm play value — their ability to hold a child's focus without tipping into frustration. At AOSEED, the quietest, most sustainable family sessions are always the ones where the project was sized right for the child's current patience and the outcome was visible before they started. This guide is organized around exactly that principle.
|
Low frustration Primary design goal for every project |
5–90 min Session length — child chooses |
Ages 4+ All ages included |
Co-regulation Parent + child making together |
Why 3D Printing Is a Great Calm Play Activity for Families

|
What is 3D printing? |
Why is it a calm activity? |
|
3D printing is additive manufacturing — a digital file is read by a printer that deposits material in thin horizontal layers until a physical object appears. For families, the process matters more than the definition: the child makes creative choices, the printer builds the result, and the object is ready to play with in 20–60 minutes. |
✓ The printer runs quietly — no loud noise, no mess ✓ The session has a visible beginning, middle, and end ✓ The child produces a real object — not a screen outcome ✓ Sessions can be as short as 5 minutes or as long as 90 |
Research from the Harvard Center on the Developing Child confirms that building resilience through play requires activities that balance challenge with predictability — the child needs to be just stretched enough to stay engaged without being pushed into frustration. 3D printing sits in that zone consistently, because the difficulty of the activity is always adjustable: choose a shorter print, simplify the model, or start with just the color choice and let the machine do the rest.
Hands-On Creativity and Learning
A calm creative session is one where the child's hands are busy but their nervous system is not overwhelmed. 3D printing provides tactile engagement at every phase — loading the filament, pressing the start button, watching through the window, removing the cooled print, and decorating at the table. Each of these actions is brief, purposeful, and produces immediate visible feedback.
That feedback loop — action, visible result, next action — is what keeps calm play sessions from drifting into boredom or escalating into frustration. The child always knows what just happened and what comes next.
Fostering Problem-Solving Skills — Without Frustration
The Child Mind Institute notes in its guide to emotional regulation for kids that the most effective learning activities for children who struggle with frustration tolerance are those where the steps can be pared down when needed. 3D printing has this built in: a session that starts with just 'choose the color and press start' is just as valid as a full session that includes model selection, filament loading, and decoration. The steps can shrink to meet the child where they are.
A Screen-Light Alternative to Traditional Play
The most important thing about 3D printing as a calm activity is what it does not include. There is no scrolling, no comparison, no algorithm pushing the next stimulus. The printer runs. The child watches. Something is being made. This quality — the focused, purposeful quality of watching something appear — is one of the rarest sensory experiences a child can have in a home full of instant gratification.
The AOSEED X-MAKER JOY's enclosed design keeps the whole process self-contained. The observation window is the focus. The door stays closed. The child's job is simply to wait, watch, and plan what they will do with the finished object — which is some of the most naturally creative thinking the session produces.
Calm Activity Rating — All 8 Project Types
|
Activity |
Calm Level |
Frustration Risk |
Repeat Value |
Best For |
|
Spinning top (3D print) |
🟢 Very high |
🟢 Very low |
🟢 High |
All ages, first sessions |
|
Whistle / ring toy |
🟢 Very high |
🟢 Very low |
🟡 Medium |
Ages 4–8, sensory play |
|
Print-in-place puzzle |
🟢 High |
🟡 Low–medium |
🟢 High |
Ages 6+, focused play |
|
Animal figurine + paint |
🟢 High |
🟢 Low |
🟢 Very high |
Ages 4–10, creative |
|
Building block set |
🟡 Medium |
🟡 Low–medium |
🟢 Very high |
Ages 5+, constructive |
|
Race car (print + race) |
🟡 Medium |
🟡 Low–medium |
🟢 High |
Ages 5+, competitive |
|
STEM gear model |
🟡 Medium |
🟠 Medium |
🟡 Medium |
Ages 8+, curious minds |
|
Creation kit RC car |
🔴 Active |
🟠 Medium–high |
🟢 Very high |
Ages 10+, longer sessions |
The calm level column rates how much the activity tends to lower arousal during the session. Low frustration risk means the activity rarely produces 'give up' moments. High repeat value means children return to the same session type across multiple weeks without losing interest.
Best 3D Printing Projects for Calm Family Pla

|
🌿 What Makes a Project Low-Frustration Three things keep a project in the calm zone: (1) the outcome is visible before the session starts — the child knows what they are working toward; (2) the print time matches the child's current patience window — start under 20 minutes for younger children; (3) the child has at least one real creative decision in every session — color, decoration, or model choice. |
Mini Race Cars and Tracks

|
🚗 Mini Race Cars and Tracks · Ages 5+ · 30–60 min |
|
Parent: Load the filament, confirm the model is correct, start the print. Sit beside the child at the window. Name what you see happening. |
|
Child: Choose the car color. Watch the layers appear. Plan where the race will happen before the print finishes. |
|
Calm note: The anticipation phase — watching the car appear layer by layer — is where the calm play value lives. The race at the end is the reward for patient waiting. |
3D Printed Puzzles and Brain Games

|
🧩 Print-in-Place Puzzle · Ages 6+ · ~30 min |
|
Parent: Set up the print, then sit with the child and take turns describing what the puzzle might feel like to solve — before the print finishes. |
|
Child: Choose the filament color. Watch the print. Solve the puzzle as soon as it cools. Try to beat yesterday's time. |
|
Calm note: A puzzle that the child helped make is a puzzle they approach differently — with more patience, more curiosity, and less willingness to give up. Model: Birdy Family 3D Art Project |
Board Games and Interactive Toys

|
🎲 Custom Game Tokens + Board Night · Ages 6+ · 15–40 min per piece |
|
Parent: Help design the token character using the app. Print during the afternoon. Set up the board game for after dinner. |
|
Child: Choose what their token looks like. Decorate it while the next one prints. Deal out cards for game night as the last token cools. |
|
Calm note: The child who made the game piece is more patient during the game — they have creative investment in the object, which transfers to the activity using it. |
Animal Figurines and Action Figures

|
🦊 Flexi Animal Figurine · Ages 4+ · 30–60 min |
|
Parent: Start the print. While it runs, ask the child which habitat the animal lives in. Draw it together on paper — the printed animal will live there. |
|
Child: Choose the species and color. Draw the habitat while waiting. Give the animal a name the moment it cools. |
|
Calm note: The drawing activity during the print window keeps the waiting period calm and purposeful. Children arrive at the decoration phase already invested in the character. Model: Birdy Family 3D Art Project |
Educational STEM Models

|
⚙️ Gear Mechanism / Simple Machine · Ages 8+ · 30–60 min |
|
Parent: Start the print. Ask one question about how gears work — not a test, a genuine question. Wait for the answer together as you both watch. |
|
Child: Watch the gears print. Turn the mechanism by hand the moment it comes off the plate. Ask the parent what they notice. |
|
Calm note: STEM models work as calm play when the child's role is observer and experimenter rather than student. The gear that turns another gear teaches without explaining. |
Building Blocks and Construction Sets

|
🏗️ Growing Block Collection · Ages 5+ · 25–45 min per piece |
|
Parent: Print one new block each session. Store them in a visible collection. Let the child see the set grow week by week. |
|
Child: Choose each new block's color and shape. Add it to the collection. Build with all blocks collected so far. |
|
Calm note: The incremental growing collection is one of the most quietly motivating calm play structures available — each session adds one piece to something the child can see becoming more complete. |
The AOSEED Toy Library includes all six categories above with session-length filters — making it straightforward to find a model that fits the child's available patience window on any given day. Weekly additions mean there is always a new option without needing to search outside the ecosystem.
How to Choose the Right 3D Printing Projects for Your Child

Matching a calm play project to the child's current state is the most important variable. The same child who successfully manages a 60-minute STEM build on a calm Sunday will not manage the same project on a difficult Tuesday after school. The project should flex to the child's state, not the other way around.
|
Current state: calm |
Current state: restless |
Current state: frustrated |
Current state: curious |
Current state: tired |
|
Any project — match to interest |
Under 20 min — spinning top or whistle |
Colour choice only — let machine do rest |
STEM model or puzzle — feed the question |
Animal figurine — quiet colour + watch |
For Kids Who Love Cars
Vehicle projects are naturally engaging for kinetic, action-oriented children, but they can also be among the calmest sessions when framed correctly. A pull-back car that prints in 45 minutes gives the child 45 minutes of anticipation. The race at the end is the payoff for the patient session. If the child is struggling with patience that day, print a spinning top first — same interest area, shorter session — and save the car for the following day.
For Animal Lovers
Animal prints are the most reliably calm project category for children who find uncertainty difficult. The animal has a known visual identity before the print starts. The child can hold the image in mind throughout the session. When the print comes off the plate, it looks like what they expected — which is a small but meaningful experience of the world behaving as anticipated. Follow the print with decoration time: paint the animal, give it a name, place it in its drawn habitat. The session's calm extends naturally into open-ended imaginative play.
For STEM-Focused Kids
STEM models are best for children who regulate well through intellectual engagement — the curiosity about how something works overrides the restlessness of waiting. For these sessions, the wait is part of the activity: predict what will happen, observe whether it does, adjust the prediction. The AOSEED X-MAKER creation kits extend this into multi-session engineering builds — a chassis, a motor mount, a wheel assembly — across several calm Sunday mornings. The incremental nature of the build makes each session feel like progress rather than starting from scratch.
For Kids Who Enjoy Customization
|
🔤 Name Projects |
🎨 Color Decoration |
📐 Size Choice |
🌍 Habitat Building |
|
Personalized keychain or name tag. One decision — the name — with a beautiful visible result. Best for children who want full ownership. |
Print in white or light PLA, decorate after with paint markers. Two distinct calm phases: watching + creating. |
Let the child choose between two printed sizes in the app. Bounded decision, clear consequence, visible result. |
Print the animal, draw the habitat, place the animal inside. Three connected calm sessions that build on each other. |
Safety Considerations for 3D Printing Calm Play

Safe materials and an enclosed printer design are the two things that let a calm session stay calm. One unexpectedly sharp edge or one moment of hot nozzle proximity is all it takes to end an otherwise peaceful afternoon.
|
✓ |
PLA for all calm play sessions: Plant-based, non-toxic, low odor, wide color range. The right default for every project in this guide. No ventilation requirements means the session can happen in any family room. |
|
✓ |
PETG for active toys and competitive play: Higher impact resistance and durability. Good choice for race cars and puzzle mechanisms that will be used daily. Same non-toxic profile as PLA with better performance. |
|
⚠ |
Make the inspection part of the session ritual: A brief surface check before decoration time is a predictable, calm transition step. Run a finger along surfaces, sand any rough edges. For children under 3, verify no part under 25mm. |
|
✗ |
No resin or ABS in calm family sessions: Resin requires chemical handling that disrupts session calm immediately. ABS requires ventilation. Neither belongs in a session designed around low-frustration predictability. |
Best 3D Printing Materials for Kids
PLA is specifically the right material for calm play sessions because it removes a layer of concern from the parent's mind. Non-toxic, low-odor, and plant-based — the parent can be fully present with the child during the session without managing environmental worry about material safety. That parent-present calm is itself one of the most regulating inputs a child can receive during a making activity.
Avoiding Sharp Edges and Small Parts
The post-print inspection is most effective when it is part of the session ritual rather than an adult task the child watches. Invite the child to help: 'Let's check it together before you decorate it.' This brief inspection step teaches safety habits while keeping the child engaged and the session moving forward.
Why an Enclosed 3D Printer Is Safer for Calm Sessions
An enclosed printer is not just a physical safety feature — it is a session management tool. The clear physical boundary between child and printer means the parent does not need to maintain a separate supervision mode during the print. Both parent and child can sit together, watch through the window, and talk about the print in progress. The printer's enclosure makes the session fully shared rather than half-monitored.
How to Make 3D Printing a Reliably Calm Activity for Kids

The five most common reasons a 3D printing session stops being calm and starts being difficult are all preventable with small setup choices made before the session begins.
|
1 Match print time to mood |
2 Decide the project before the session |
3 Keep the decoration phase always ready |
4 Offer only two options at each decision point |
5 Celebrate the process, not just the object |
|
A restless child needs a 5-minute whistle print, not a 60-minute car. Judge the session length by the child's state that day, not by the project you planned. |
Decision fatigue turns calm sessions into difficult ones. Browse the Toy Library the evening before. The model and color are chosen before the printer is approached. |
Paint markers and stickers in the same spot every session. When the print cools, the next phase starts immediately with no hunting for supplies. |
'This one or this one?' is a calm-play question. 'Pick anything from the whole library' is not. Bounded choices lower decision stress for children and parents equally. |
'You watched the whole print' is worth saying. The habit of patient waiting is being built, and naming it helps the child recognize it in themselves. |
Start with Simple, Structured Projects
The first calm play session should end with a child holding a finished object before anyone is tired. A spinning top prints in under 5 minutes. A ring whistle prints in under 20. These quick wins establish the session pattern — and the child's memory of a completed session is the most powerful motivator for the next one.
Encourage Creativity Through Customization
Post-print decoration extends the calm quality of the session into a different creative mode. The printing phase is watching and waiting — calm, focused, low-decision. The decoration phase is active, expressive, and child-directed. Together they cover the full calm play spectrum: regulatory waiting followed by free creative expression. Both phases are valuable and both belong in the session.
Create a Dedicated Printing Space
|
1 |
Place the printer at the child's eye level The session is naturally calmer when the child can see the observation window without being lifted. Eye-level means independent observation without adult involvement in the watching phase. |
|
2 |
Keep one 'next project' card visible A small card or note with the next session's chosen project removes the gap between sessions — the child knows what they are working toward, which sustains engagement between sessions. |
|
3 |
Establish a calm ritual before each session Two slow breaths together before pressing start. One deliberate color choice. A brief description of what the object will be used for. These small rituals frame the session as intentional, not impulsive. |
|
4 |
Maintain the decoration station consistently Same supplies, same location, same ritual for cleaning up after. The predictability of the decoration phase is part of what makes it reliably calming rather than occasionally chaotic. |
|
5 |
End every session with a display moment Place the finished object somewhere visible. Name it. Tell someone else in the household about it. The social recognition of having made something provides closure and builds the confidence needed to start the next session. |
Conclusion
A calm play idea is not just an activity without conflict. It is an activity that creates the conditions for connection — between parent and child, between intention and result, between a child's current state and the steady rhythm of something being made.
3D printing meets these conditions when it is approached with the right project, the right session length, and the right level of creative ownership for the specific child on the specific day. Start with the spinning top. Watch it appear. Race it at the kitchen table. Notice the room.
Then ask what they want to make next.
For families exploring calm, low-frustration maker activities, AOSEED 3D printers for kids shows both current models with age guidance — useful when choosing the printer that best fits the calm session structure in this guide.
FAQs
What are calm activities?
Calm activities are those that lower arousal, support focus, and produce a sense of completion without requiring sustained high energy. The most effective calm activities for children have predictable outcomes, involve physical engagement with materials, and have a natural start and end. 3D printing qualifies on all three: the outcome is visible before the session starts, every step is hands-on, and the finished object signals clear completion.
How do you calm kids down after recess?
Brief hands-on activities with visible, controllable outcomes are among the most effective transition tools. A child who can immediately focus on choosing a filament color, pressing a start button, and watching a 5-minute print shifts from high arousal to quiet focus more reliably than a child who is asked to sit still and be calm. The activity does the transitioning — the child does not have to do it alone.
What activities calm you down?
Activities that calm children tend to share three qualities: predictable sensory input, a clear end state, and a personal decision embedded somewhere in the process. 3D printing provides all three. So does baking, painting, and building with familiar materials. The key is that the activity is well-matched to the child's current state — a child who needs to wind down benefits from a shorter, quieter session rather than an ambitious project.
What are 10 ways to calm down?
Ten reliable calm-down approaches for children: slow deliberate breathing, a focused hands-on task with visible progress, sensory engagement with a known texture, a predictable routine that the child has done before, a brief walk, a quiet five-minute making activity, choosing something from a limited set of options, watching something being built (including watching a 3D print through an observation window), a gentle conversation with an adult who is also calm, and access to a familiar object that the child finds comforting.
What is 3D printing?
What is 3D printing in family terms: a printer reads a digital file and deposits material in thin horizontal layers until a physical object appears. The process takes between 5 minutes and several hours depending on the object's size. For family use, the relevant version is FDM printing — which uses spools of plastic filament, requires no special ventilation with PLA material, and produces objects children can hold, play with, and decorate immediately after the print cools.
What are calm activities for preschoolers?
For preschool-aged children, the most effective calm activities are those with strong sensory engagement and very brief active phases. A 5-minute spinning top print, followed by watching it spin and then decorating it with one color of marker, covers the full calm play session for a 3 to 5-year-old. The color choice is the creative decision, the watching is the regulatory phase, and the spinning is the play reward. All three fit within a preschooler's available patience window.
What are the 5 main relaxation techniques?
For children, five consistently effective relaxation approaches are: slow deliberate breathing (deep breath in, slow exhale — the physiological basis that HealthyChildren.org recommends as a foundation for all calm-down work), progressive muscle release, sensory grounding (naming what you can feel, see, and hear), purposeful slow movement, and focused low-demand creative tasks. 3D printing session watching — sitting still and observing the printer through the window — functions as a form of focused sensory attention that draws on the same mechanism as the last category.
How can structured 3D printing projects help kids?
Structured 3D printing projects with predictable steps and clear outcomes support children's calm regulation by giving them exactly what the research on low-frustration activities identifies as most important: knowing what comes next, having a real decision that belongs to them, and experiencing a reliable relationship between their effort and the result. A child who has completed ten structured printing sessions has practiced these regulatory habits ten times — which is the kind of repetition that builds lasting emotional skill.
Sources
- HealthyChildren.org — Just Breathe: The Importance of Meditation Breaks for Kids (AAP), Just Breathe: The Importance of Meditation Breaks for Kids, 2023.
- Harvard Center on the Developing Child — Building Resilience Through Play, Building Resilience Through Play, 2022.
- Child Mind Institute — Emotional Regulation for Kids: How to Help, Emotional Regulation for Kids: How to Help, 2025.
- ZERO TO THREE — Your Calm Is Their Calm: Co-Regulation Strategies for Infants and Toddlers, Your Calm Is Their Calm: Co-Regulation Strategies, 2025.
- Autodesk — What is 3D Printing? (additive manufacturing, plain language definition), What is 3D Printing, 2026.
- Tinkercad — Birdy Family 3D Art Project (all-ages family 3D art session), Birdy Family 3D Art Project, 2021.
- PBS KIDS for Parents — How To Make A Glitter Jar To Help Kids Stay Calm, How To Make A Glitter Jar To Help Kids Stay Calm, 2023.
Structured Hands-On Activities for Kids Who Prefer Predictable Routines
Some children work best when they know what comes next. They find calm in clear steps. They engage most deeply when the beginning, middle, and end of an activity are visible before they start. For these children, open-ended creative play is not always the right entry point — they need structure first, and creativity follows from inside that structure.
3D printing offers exactly this. The session has a predictable shape: choose a model, load the color, press start, watch the print, cool down, decorate. Each step leads to the next. The outcome is visible before the activity begins. And within that structure, the child makes real creative decisions — decisions that feel safe because they happen inside a framework they understand.
This guide is for parents looking for structured, calm, repeatable creative activities that produce something real at the end. At AOSEED, the Toy Library is organized around exactly this experience: a clear project path, predictable session structure, and a finished object every time. These are not open-ended activities. They are structured maker sessions where the child always knows what they are working toward.
|
5 steps Every session follows this structure |
Clear end Object in hand every session |
Ages 4+ Full age range, same structure |
Repeatable Same process, new project each time |
Why Structured Hands-On Activities Are Important for Kids

Structured activities give children something that unstructured play sometimes cannot: a reliable relationship between effort and outcome. The child follows the steps. The steps produce the result. The result is what was expected. This reliability is the foundation of the confidence and focus that structured activities develop.
|
|
Open-Ended Activity |
Structured 3D Printing Session |
|
Predictability |
Outcome varies — hard to know what to expect |
Clear steps, known outcome, repeatable process |
|
Entry point |
Unclear — where do I start? |
Model chosen, color loaded, button pressed — done |
|
Completion signal |
Activity drifts — no clear end |
Print finishes. Object in hand. Session complete. |
|
Next session |
Starts from scratch |
New model from same library — structure carries over |
|
Child confidence |
Requires social navigation and improvisation |
Independent decisions within a clear framework |
Benefits of Structured Routine
|
Clear Expectations |
Completion and Confidence |
Repeatable and Sustainable |
|
A structured activity tells the child what each step involves and what the outcome will be. This transparency reduces decision fatigue and produces calmer, more focused engagement — particularly valuable for children who find unpredictability stressful. |
Every structured 3D printing session ends with a finished object. This clear completion signal is one of the most important elements for children who need to know when something is done. The object in their hand is unmistakable evidence that the activity was a success. |
Because the session structure does not change between projects, children can internalize the routine quickly. By session three or four, many children manage the full session independently. The structure becomes a resource they own. |
Hands-On Activities for Engagement
Hands-on structured activities engage children at a level that passive alternatives cannot reach. Edutopia's research on hands-on learning through play shows that manipulative-based structured activities consistently produce higher retention, longer attention spans, and more confident self-directed learning than instruction-based alternatives. 3D printing is a manipulative-based activity — the child handles the filament, presses the start button, and decorates the finished object. Every step is physical, visible, and within the child's control.
Promoting Creativity Through Structure
The most effective creative work for children who prefer predictable routines does not ask them to start from nothing. It offers a structure inside which creative decisions are possible. Choosing between a dinosaur and a penguin is a creative decision. Choosing the blue filament instead of red is a creative decision. Deciding to paint eyes on a figurine is a creative decision. All of these happen inside the structured session framework without requiring the child to improvise the activity itself. The Child Development Institute explains in its guide to what is structured play that structured creative activities are particularly effective at building creative confidence in children who need the security of knowing the rules before they begin.
The 3D Printing Session — 5-Step Predictable Routine
|
Step |
Phase |
What Happens |
Child's Role |
|
1 |
Choose |
Child browses the Toy Library or model links. Chooses the project and filament color. |
Full creative ownership — the only decision that needs to be made |
|
2 |
Load |
Parent loads the filament (one-time learning step for older children). Printer confirms it is ready. |
Watch and learn; older children do this independently after session two or three |
|
3 |
|
Child presses start. Printer runs. Child watches through the observation window. |
Calm waiting — visible progress through the window keeps the session structured |
|
4 |
Cool |
Print finishes. Brief cool-down before touching. Child inspects from outside. |
Patience practice with a clear endpoint — the cooling beep or timer signals the next step |
|
5 |
Decorate |
Child decorates with non-toxic paint markers. Session completes with a finished object. |
Full creative ownership — the decoration phase is entirely theirs |
Best 3D Printing Projects for Kids Who Like Structure

|
How These Project Cards Are Designed Each project card shows the activity as a 4-step structured process — exactly what the child does at each stage. This format matches the activity to the way structured learners process new experiences: step by step, with clear transitions. The calm play value note at the bottom describes what kind of focused engagement the project provides. |
Mini Race Cars and Tracks

|
Mini Race Cars and Tracks · Ages 5+ · ⏱ 30–60 min |
|
How it works (4 steps): 1 Browse the library and choose a car model in a specific color 2 Load the filament, press start, watch the print through the observation window 3 Cool-down period — child can prepare the race track while waiting 4 Race the car. Discuss what would make it faster. Plan the next print. |
|
Model: Linkable Train Cars Calm play value: Physical play with predictable physics — the car always behaves consistently |
Simple Building Blocks

|
Simple Building Blocks · Ages 5+ · ⏱ 25–45 min each |
|
How it works (4 steps): 1 Choose one block shape and one filament color for this session 2 Print the block — straightforward single-piece print, no assembly required 3 Add the new block to the growing collection from previous sessions 4 Build with all the blocks collected so far — creative work inside a known set |
|
Model: Tinkercad 3D Printing Lessons Calm play value: Incremental collection building — every session adds one clear unit to a growing structured set |
Puzzle Toys

|
Puzzle Toys · Ages 6+ · ⏱ ~30 min |
|
How it works (4 steps): 1 Choose the puzzle model and filament color 2 Print — the puzzle arrives already assembled (print-in-place design) 3 Cool completely before attempting to move the puzzle mechanism 4 Solve the puzzle. Reset. Solve again. Time each attempt if the child wishes. |
|
Model: Puzzle Cube Print-in-Place Calm play value: Repeated solving with a predictable outcome — same puzzle, same steps, satisfying completion signal each time |
Fidget Toys

|
Fidget Toys · Ages 5+ · ⏱ 2–20 min |
|
How it works (4 steps): 1 Choose the fidget model — whistle, spinner, or tactile ring 2 Print — most fidget designs are under 20 minutes, some under 5 3 Cool completely before handing to child — no sharp edges 4 Use the fidget during other structured activities, quiet work time, or travel |
|
Model: Optimized Dual Chamber Whistle Calm play value: Tactile and auditory engagement in a compact, repeatable format — predictable sensory output |
Personalized Gifts

|
Personalized Gifts · Ages 6+ · ⏱ 15–60 min |
|
How it works (4 steps): 1 Choose a gift model — keychain, figurine, or small desk object — and the recipient's favorite color 2 Add the recipient's name or a detail using the design app, then print 3 Inspect the print, sand any rough spots, let the child decorate 4 Wrap with a handmade tag. Session ends with a complete, usable object. |
|
Model: Tinkercad 3D Printing Lessons Calm play value: Clear completion signal (object wrapped and delivered) — strongest structured closure on this list |
The AOSEED Toy Library organizes models by session type and completion time — making it straightforward to find the right structured project for any available session window. Weekly updates add new options while the session structure itself never changes.
How to Choose the Right 3D Printing Projects Based on Kids' Interests

The best structured activity for a child combines predictable session structure with content the child finds personally meaningful. When both conditions are met, the child does not need to be encouraged to participate — they initiate.
|
Age |
Best Project Type |
Session Length |
What Provides Structure |
|
Ages 4–6 |
Spinning tops, animal figurines, whistles |
10–20 min max |
Color choice + press start + watch window |
|
Ages 7–9 |
Pull-back cars, puzzle cubes, train sets |
20–45 min |
4-step session flow: choose, load, print, decorate |
|
Ages 10–12 |
Fidget mechanisms, STEM gear sets, gifts |
30–60 min |
Model modification before printing + full session ownership |
|
Ages 13+ |
Creation kits, custom CAD builds, sets |
45–90 min |
Independent project cycle — plan, design, print, test, iterate |
For Kids Who Love Cars
Vehicle-focused children do best with projects where the printed object has a clear mechanical behavior — the car rolls, the train connects, the pull-back mechanism winds and releases. This predictability of function matches the predictability of structure that these children appreciate. Print a train car set one session at a time: engine on day one, first carriage on day two. Each session adds one piece to a growing structured collection.
For Animal Lovers
A child who loves animals and structured routines does particularly well with an animal collection project — a defined set of species to print across a defined number of sessions. Twelve animals, twelve sessions. Each session follows the same five-step structure. The collection grows in a predictable way toward a visible completion goal. The child can see both what has been done and what remains to be done.
For STEM-Focused Kids
Structured STEM builds give these children a problem with a correct solution — the gear turns the other gear, the lever lifts the load, the car completes the course. The AOSEED X-MAKER creation kits are well-suited for this profile: multi-session structured builds with defined steps, predictable outcomes, and a working mechanical object at the end. The session structure and the STEM structure reinforce each other — the child follows both simultaneously.
For Kids Who Enjoy Customization
|
Name and Text |
Color Selection |
Size Adjustment |
Decoration |
|
Name keychains, personalized tags, and text-engraved objects give the child a customization decision that is structured and bounded — one name, one font, one color. |
Choosing the filament color before every session is the simplest form of structured customization — one decision, made once, with visible consequence throughout the print. |
Guided design apps let children adjust object size within defined limits — a bounded creative decision with a predictable visual outcome. |
Post-print decoration with markers and paint is an open creative space within a bounded object — the child paints what they want but cannot change the shape of what they paint. |
Safety Considerations for 3D Printing for Kids
 Structured sessions work best when every safety element is also predictable and consistent. These four rules apply to every session in this guide.
|
✓ |
PLA — the structured session default: Non-toxic, plant-based, low odor, available in bright colors. Safe for every project in this guide from the youngest to the oldest child. The same material every session — no variation, no uncertainty. |
|
✓ |
PETG — for mechanical and active toys: More durable and impact-resistant. Good for fidget mechanisms, race cars, and train sets that will be used daily. Same safety profile as PLA with higher performance for high-use objects. |
|
⚠ |
Inspect before every session's play phase: A brief surface check is part of the structured session routine — it happens at the same point every session (after cool-down, before decoration) so it is a predictable step rather than an interruption. |
|
✗ |
No resin or ABS for structured family sessions: Both require variable-condition handling that disrupts session predictability. Neither belongs in a structured family session regardless of age. |
Best 3D Printing Materials for Kids
PLA is the right default for every structured project in this guide. Using the same material every session removes one variable from the routine — the child knows PLA means their project is safe to handle after the cool-down step. This material consistency supports session predictability in a practical way.
Avoiding Small Parts or Sharp Edges
For children who prefer predictable routines, the safety check can be incorporated into the session routine as a named step: after cool-down and before decoration, the child (with parent guidance for younger ages) runs a finger along all surfaces. This check happens at the same point in every session. Over time it becomes part of the session habit — predictable, brief, and reassuring.
Why an Enclosed 3D Printer Is Safer
An enclosed printer is particularly well-suited for structured sessions because it creates a clear, consistent physical boundary around the active elements of the printer. The child knows the window is for watching and the door is for the parent — the same boundary applies every session. The AOSEED X-MAKER JOY's door sensor pauses the print automatically if the chamber opens mid-session — a safety feature that also supports session structure by keeping the print paused rather than interrupted when the boundary is momentarily crossed.
How to Make 3D Printing Fun and Easy for Kids
 For children who prefer predictable routines, 'fun' and 'structured' are not opposites. The most enjoyable sessions are the ones where the child knows the path, makes their choices within it, and ends with the object they expected. These five steps establish that experience reliably.
|
1 |
Use the same session flow every time Choose model. Load filament. Press start. Watch. Cool down. Decorate. This five-step sequence is the session. Running it the same way every time means children internalize it quickly and start sessions confidently rather than tentatively. |
|
2 |
Prepare the model choice before the session begins Browse the Toy Library with the child the evening before or the morning of the session. The model and color are chosen before the printer is approached. The session starts with all decisions already made. |
|
3 |
Use a visual timer for the cool-down step A visible countdown timer for the 5-minute cool-down period gives children a concrete signal for the transition from the print phase to the decoration phase. Predictable transition signals support the session structure. |
|
4 |
Keep decoration supplies at the same location every session Markers and paint pens in the same small box in the same drawer. Consistency in supply location removes friction from the decoration phase and keeps the session flowing naturally. |
|
5 |
End every session with the finished object displayed The same shelf or display area for each session's output. The child sees the collection growing in a predictable way. Each session adds one object to the display — a visible record of completed structured sessions. |
Start with Simple, Structured Projects
The first session for a child who prefers predictable routines should be the whistle or the spinning top — under 5 minutes, functional, and immediately playable. The child follows the five-step structure from start to finish and ends with an object that does something real. This complete first session is the model for every session that follows.
Encourage Creativity Through Customization
Color choice is the simplest structured customization and the right starting point. After several sessions, the child can take on text customization (adding a name using the app) and then scale adjustments. Each new customization type is introduced as a defined option within the session structure — one new decision per session introduction, not several at once.
Create a Designated Printing Space
A permanent, organized creation station supports session predictability in the most direct way possible. The child knows where the printer lives, where the filament is stored, where the decoration supplies are kept, and where finished objects are displayed. This environmental consistency is itself a form of structure — the space does part of the work of organizing the session before it begins.
Conclusion
The five-step structured printing session works the same way every time. Model chosen. Filament loaded. Start pressed. Print watched. Object decorated. Session complete.
For children who find security in knowing what comes next, this reliability is not a limitation — it is the condition that makes creativity possible. The most expressive color choices, the most carefully decorated figurines, and the most enthusiastic sessions all happen inside the structure, not despite it.
Start with one session. Follow the five steps. Put the finished object on the shelf. Come back to the same structure next week with a new project.
For families beginning their first structured printing routine, AOSEED 3D printers for kids shows both current models with age guidance — useful for choosing the printer that best supports the session structure described in this guide.
FAQs
What are structured activities for children?
Structured activities are those that follow a defined sequence of steps, have a predictable outcome, and provide the child with clear transitions between phases. A structured 3D printing session has all three: the five-step session flow, the known finished object at the end, and clear signals (print finishes, cool-down timer, decoration supplies) that mark transitions. Structured activities are particularly effective for children who thrive in predictable environments.
What is a hands-on activity for kids?
A hands-on activity requires active physical participation rather than passive observation or consumption. Loading filament, pressing the start button, watching through the observation window, and decorating the finished object with markers are all hands-on actions that engage the child physically throughout the session. The combination of structured steps and physical engagement is what makes 3D printing one of the most effective hands-on activities for children who prefer routine.
What are the benefits of structured activities?
Structured activities contribute to several areas of development. They build cognitive skills by requiring the child to follow a sequence. They develop emotional regulation by providing predictable transitions and a clear completion signal. They build attention span by giving the child a goal that is visible from the start of the session. And they build confidence by producing a reliable relationship between the child's effort and the session outcome — the child who follows the steps gets the result.
What are 5 examples of structured hands-on activities?
Five structured hands-on activities with clear step sequences and predictable outcomes: 3D printing sessions following the five-step model in this guide, interlocking puzzle building, assembly-based construction kits with defined end states, step-by-step cooking or baking with a recipe, and structured art activities like printmaking where the process determines the outcome. Of these, 3D printing is the only one that produces a new permanent physical object in every session.
Why is hands-on activity important?
Hands-on activities engage children's physical, cognitive, and creative systems simultaneously. They produce stronger learning outcomes than passive instruction for most children because the physical engagement creates more memory pathways for the content. For children who prefer predictable routines, hands-on structured activities are particularly valuable because the physical actions of the session (loading, pressing, decorating) are themselves part of the routine — they become familiar, reassuring, and owned by the child through repetition.
What are the 7 types of 3D printing?
The seven main 3D printing technologies are FDM (fused deposition modeling), SLA (stereolithography), SLS (selective laser sintering), DLP (digital light processing), LOM (laminated object manufacturing), EBM (electron beam melting), and binder jetting. For structured family sessions with children, FDM is the only relevant type — it is safe, affordable, uses non-toxic PLA filament, and produces visible layer-by-layer results through an observation window that children find naturally engaging.
How can structured 3D printing projects help kids?
Structured 3D printing projects help children in three specific ways. First, the session routine builds the habit of sustained focus — children who practice following a five-step process become more comfortable with step-by-step activities in other contexts. Second, the reliable completion signal builds confidence — every session ends with a finished object, which means every session is a success. Third, the creative decisions within the structure build expressive confidence without requiring the child to improvise the activity framework itself.
Sources
- Printables — Optimized Dual Chamber Whistle (2-minute structured print), Optimized Dual Chamber Whistle, 2024.
- MakerWorld — Linkable Train Cars (modular structured assembly set), Linkable Train Cars, 2022.
- Tinkercad — Tinkercad 3D Printing Lessons (step-by-step structured projects), Tinkercad 3D Printing Lessons, 2026.
Screen-Free Creative Activities for Kids Who Like Making

Some children want to build something. They are not satisfied watching or consuming — they want to produce. They are the ones who rearrange the furniture to make a fort, take apart objects to see how they work, and lose track of time when something needs figuring out.
For these children, screen-free time is not a hardship. It is an opportunity — as long as there is something real to make. The challenge for parents is finding activities that match the creative ambition these children actually have. Crafts that feel too simple lose them immediately. Activities that require too much preparation become a parent project, not a child one.
3D printing sits in exactly the right position. The child makes genuine creative decisions. The printer handles the technical execution. The result is a physical object that did not exist before the session started. At AOSEED, the children who engage most deeply with the printer are almost always the ones who were already looking for something to make — they just needed the right tool. This guide is for them.
|
6 Making project categories |
Ages 4+ Full age range covered |
<60 min Most projects complete |
0 Screens needed to play |
Why 3D Printing Is a Great Screen-Free Activity for Kids

The word 'screen-free' is often used to describe activities that simply remove a screen from the picture. 3D printing does something more useful — it replaces the screen with a creative output loop that children find more satisfying than passive consumption, not just different.
|
Screen-Based Play |
3D Printing + Making |
|
|
Physical output |
None — no object at the end |
A printed toy, tool, or gift ready to use |
|
Child's role |
Consumer — content is produced by others |
Creator — every decision belongs to the child |
|
Problem-solving |
Minimal — choices are pre-set |
Constant — design, material, color, assembly |
|
Repeatability |
Diminishing — novelty fades |
Growing — each print session reveals a new option |
|
After the session |
Child looks for the next screen |
Child plans what to print in the next session |
Hands-On Creativity and Learning
|
Design and Decide |
Watch and Understand |
Make and Customize |
|
From the first tap in the model library to the moment the print cools, the child makes every creative decision — what to make, what color, how to decorate. These decisions are genuine, and the child knows it. |
Layer-by-layer printing through a clear observation window is one of the most naturally educational experiences available to a young child. Questions about how it works emerge without prompting, because the process is visible and fascinating. |
Every printed object is a canvas. Paint markers, stickers, permanent markers — the decoration phase extends the making session and produces an object that looks like the specific child who made it, not a generic product. |
Fostering Problem-Solving Skills
A child who prints a spinning top and then discovers their top spins for a shorter time than their sibling's will ask why and start testing ideas. A child whose puzzle piece does not fit exactly will want to understand the tolerance. These are real problem-solving moments, and they happen naturally without a lesson plan. PBS Parents' 101 easy activities for kids identifies hands-on making activities — building, crafting, and problem-solving with physical materials — as consistently producing higher levels of sustained engagement than passive alternatives.
A Screen-Free Alternative to Traditional Play
The reason 3D printing works as a screen-free activity — rather than just a screen-reduced one — is that the play itself happens away from any screen. The printer runs. The child watches through the window, talks about the print, plans the next one, and eventually decorates the finished object at the table with paint and markers. The AOSEED X-MAKER JOY's app-led workflow means the only screen contact in a full printing session is the brief moment the child browses and selects their model — typically two or three minutes. The other 45 to 90 minutes of the session is entirely hands-on.
How 3D Printing Compares to Other Making Activities
|
Activity |
What Child Makes |
Skills Developed |
Replayable? |
|
3D Printing |
Custom toy, animal, gift, STEM model |
Design, engineering, patience, creativity |
Yes — new model every session |
|
Painting/Drawing |
2D art on paper or canvas |
Fine motor, color theory, expression |
Yes — unlimited paper |
|
Clay/Sculpting |
3D shape by hand |
Tactile creativity, patience, form |
Limited — materials run out |
|
Building blocks |
Temporary structure |
Spatial reasoning, architecture |
Yes — but resets each time |
|
Baking/Cooking |
Edible creation |
Measurement, chemistry, patience |
Yes — and produces something useful |
|
Sewing/Crafts |
Fabric or paper object |
Fine motor, planning, following steps |
Limited — materials run out |
Best 3D Printing Projects for Kids Who Like Making
|
The Maker's Test for Each Project Every project here passes the same test: the child makes a real decision, the printer responds to that decision, and the result is something the child can use, play with, or give to someone. None of these projects produce shelf ornaments by default — they produce tools, toys, and functional objects. |
Mini Race Cars and Tracks

|
⏱ 30–60 min |
Mini Race Cars and Tracks Ages 5+ |
|
MAKESKILL |
A pull-back car that actually races is one of the most satisfying quick-win prints for child makers. The pull-back mechanism means the physics are built in — the child winds it, releases it, and gets immediate feedback on whether the design works. Two cars in different colors produce a competition. A ramp printed in the next session extends the project. This is the print that most often leads directly to the question of what else can be made. Maker skill developed: Mechanical understanding — iterative design — competitive testing Model link: Spinning Top Easy Print No Support |
3D Printed Puzzles and Brain Games

|
⏱ 20–40 min |
Puzzles and Brain Games Ages 6+ |
|
MAKESKILL |
Print-in-place puzzles come off the build plate already assembled and require no post-print work. The child solves the puzzle the moment the print cools. The puzzle cube is particularly good for makers because it has a mechanical logic — it can be solved in multiple orientations, and the child who discovers this independently has had a genuine insight. Print two in different colors and the puzzle becomes a timed challenge. Maker skill developed: Spatial reasoning — logical thinking — discovery without instruction Model link: Puzzle Cube Print-in-Place |
Board Games and Interactive Toys

|
⏱ 15–45 min per piece |
Board Games and Interactive Toys Ages 6+ |
|
MAKESKILL |
Custom game pieces for board games the family already owns produce two things: a making session and a better game night. The child who designed their own game token is more invested in the game they play with it. Print custom dice, character tokens, and replacement pieces across several sessions. Over time, the family's board game collection becomes partly hand-crafted — which changes the relationship the children have with those games. Maker skill developed: Creative design — functional thinking — social play enhancement Model link: Spinning Top Easy Print No Support |
Animal Figurines and Action Figures

|
⏱ 30–60 min |
Animal Figurines and Action Figures Ages 4+ |
|
MAKESKILL |
Articulated flexi animals print in one session with no assembly required — the joints move immediately when the print comes off the plate. Child makers are drawn to these because they combine a technical challenge (how do the joints work?) with immediate tactile reward (the animal bends in their hand). Print a collection of animals across several making sessions. Each session adds to a set the child increasingly considers their own work. Maker skill developed: Form understanding — decoration skill — narrative creation Model link: Ring Whistle |
Educational STEM Models

|
⏱ 30–60 min |
Educational STEM Models Ages 8+ |
|
MAKESKILL |
Gear sets, lever mechanisms, and simple machine models are the highest-engagement prints for children who already identify as 'makers' or 'builders.' These are the projects where a child's natural engineering curiosity gets a direct physical outlet. The gear that turns another gear, the lever arm that moves a load — every mechanism produces a moment of recognition that is more memorable than any textbook diagram. Maker skill developed: Engineering principles — cause and effect — scientific observation Model link: Simple 3D Design Projects for Kids |
Building Blocks and Construction Sets

|
⏱ 25–45 min per piece |
Building Blocks and Construction Sets Ages 5+ |
|
MAKESKILL |
A custom building block set printed incrementally across multiple sessions is one of the best long-term making projects for children because it grows. Print five blocks on Saturday, five more the following week. The set develops its own character across sessions — colors chosen week by week, shapes added based on what the child wants to build. Makers appreciate that the collection they are building is genuinely theirs. Maker skill developed: Spatial reasoning — creative construction — long-term project management Model link: Optimized Dual Chamber Whistle |
The AOSEED Toy Library organizes models specifically for child makers — quick builds under 20 minutes, longer challenge builds, and creation kit components that extend into multi-session engineering projects. Weekly additions keep the library current so every making session has new options.
Project Quick Reference — All Six at a Glance
|
Project |
Time |
Age |
Why Makers Love It |
|
2–5 min |
5+ |
Fastest maker win — immediate competition, immediate physics lesson |
|
|
~30 min |
6+ |
Mechanical logic the child discovers independently — no instruction needed |
|
|
~20 min |
5+ |
Functional wearable — proves 3D printing makes things that work |
|
|
~2 min |
5+ |
Quickest functional print — child holds a working instrument in minutes |
|
|
30–60 min |
8+ |
Engineering curiosity fully engaged — physical machine to operate |
|
|
25–45 min |
5+ |
Long-term growing project — each session expands the maker's own set |
How to Choose the Right 3D Printing Projects for Your Kids

Matching a project to the child's age and attention span is the difference between a session that ends with a proud maker and one that ends with frustration before the print finishes.
|
Age |
Best Making Project |
Print Time Goal |
How They Contribute |
|
Ages 4–6 |
Spinning tops, animal figurines, chunky cars |
Under 20 minutes |
Choose color, press start, decorate after |
|
Ages 7–9 |
Pull-back cars, whistles, puzzles, ring toy |
20–45 minutes |
Browse library, choose model, assemble parts |
|
Ages 10–12 |
STEM gear sets, creation kits, custom prints |
30–60 minutes |
Modify model in app, manage full print session |
|
Ages 13+ |
CAD designs, creation kit builds, gifts |
45–90 minutes |
Independent session — full design to print cycle |
Ages 4 to 6: Chunky Shapes and Easy Assembly
The youngest makers need a result they can hold before their interest moves elsewhere. Under-20-minute prints with visible, satisfying shapes work best. A spinning top, a chunky animal, a whistle — all print fast and produce an immediately usable object. The child's contribution is the color choice and the press of the start button. Both are real contributions, and the child knows it.
Ages 7 to 9: More Intricate Designs with Moving Parts
Children in this range have the patience for 30 to 45-minute prints and the mechanical curiosity to engage with moving parts. The puzzle cube, the pull-back car, and the ring whistle all have mechanisms the child wants to understand. This age group typically asks the most questions during a print session and gets the most satisfaction from the moment they first interact with the finished mechanism.
Ages 10 and Up: Customizable, Complex Projects
Older child makers are ready to move from choosing a model to modifying one. The jump from selecting a library model to adjusting its size, adding a name, or designing a custom detail before printing is where making becomes genuine design work. The AOSEED X-MAKER creation kits are the natural home for older child makers — multi-part chassis builds with motors and electronics that produce working vehicles and robots. These are not just prints; they are engineering projects the child directs from first decision to final test.
Tailoring Projects to Kids' Interests
|
Natural Engineers |
Natural Collectors |
Competitive Makers |
Creative Decorators |
|
Gear sets, lever models, creation kit builds. This is the child who wants to know why the gear turns the other gear. |
Animal figurine series — a new species each session. The collection grows and so does the making habit. |
Spinning tops and race cars. Print two, race them, improve the design, race again. The competition is the driver. |
Any project with a decoration phase — animals, figurines, whistles. The making continues at the table after the print finishes. |
Safety Considerations for 3D Printed Gifts and Toys

For child makers, the safety rules are simple and cover the full session — from pressing start to playing with the finished object.
|
✓ |
PLA — right for all making projects: Non-toxic, biodegradable, minimal odor, available in every color a child might want to choose. The standard material for all six projects in this guide. |
|
✓ |
PETG — for active or competitive toys: More impact-resistant than PLA. Good for race cars and spinning tops that will be crashed or dropped repeatedly during sibling competitions. |
|
⚠ |
Inspect the print before play: 60-second surface check after every print: run a finger along all surfaces, sand any rough support-removal points, verify part sizes for young children. |
|
✗ |
No resin or ABS in making sessions: Resin requires PPE and chemical handling. ABS requires ventilation. Neither is appropriate for a child maker working in a shared family space. |
What Materials Are Best for Kids' 3D Printed Gifts?
PLA is the correct default for all child maker projects. It is plant-based, non-toxic, produces minimal odor at standard temperatures, and is available in the bright colors that make printed objects feel like intentional creative work rather than raw material. Make Magazine's overview of 10 simple maker activities for kids places 3D printing alongside paper circuits and woodworking as one of the most accessible entry points to real maker culture for children — and PLA is the material that keeps the entry point safe for the youngest makers in the room.
Inspecting Toys for Sharp Edges and Small Parts
A making session ends when the child plays with the finished object. The inspection between 'print finished' and 'ready to play' takes under 90 seconds and covers the full safety check: surface, support removal points, part size for the youngest child present. Sandpaper on any rough spots. For children under 3, every part of the finished print must exceed 25mm in any dimension.
Why an Enclosed 3D Printer Is Safer for Kids
Child makers want to be close to the printer. The observation window is part of the experience — watching the object appear layer by layer is one of the most reliably engaging parts of the session. An enclosed printer means the child can stand at the window for the entire print without any proximity risk. The nozzle, heated bed, and moving belts are all inside a sealed chamber. The child's curiosity and the machine's safety requirements are both fully served at once.
How to Make 3D Printing Fun and Easy for Kids

A child who likes making needs a setup that gets out of their way. The fewer logistical obstacles between an idea and a printed object, the more making happens. These five steps establish the conditions for that.
|
1 |
Keep the printer accessible at the child's eye level The printer should be somewhere the child can see and reach independently. When the printer lives in a cupboard or on an adult's desk, making sessions require adult initiation. When it lives at the child's level, the child initiates. |
|
2 |
Keep a 'what to print next' list Encourage the child to write down or save models they want to print next. The list means the next session can start immediately without browsing from scratch — important for makers who lose momentum during decision gaps. |
|
3 |
Let the child manage the full session independently After the first two or three guided sessions, step back. The maker identity develops fastest when the child discovers they can run the process themselves. Adult involvement should respond to specific requests, not preempt them. |
|
4 |
Keep decoration supplies always available The making session does not end when the print finishes — it continues at the decoration table. Markers, paint pens, and stickers always available means the session flows naturally from printing to customizing without a gap. |
|
5 |
Celebrate the made object, not just the process Display printed objects. Show them to visiting family. Let the child explain how they made it. The social recognition of having made something real is one of the strongest motivators for repeat making sessions. |
Conclusion
The child who likes making does not need activities that fill time. They need activities that match their ambition. A spinning top that prints in four minutes and can be raced immediately. A gear mechanism that takes an afternoon and still raises new questions at the end of it. A building block set that grows across weeks because the child keeps deciding what to add to it next session.
3D printing is the right tool for these children because it scales. The 5-year-old who presses start and watches the printer is using the same machine as the 12-year-old who is modifying a model in the design app before printing. The creative ceiling is genuinely high, and the entry point is genuinely low.
For families finding the right first printer for a child who likes making, AOSEED 3D printers for kids shows both current models with age guidance and what each one enables as the child's making ambitions grow.
FAQs
Are 3D printed toys safe for children?
Yes. 3D printed objects made with PLA filament and inspected for smooth edges and appropriate part sizes are safe for children from age 4 upwards. PLA is non-toxic, biodegradable, and the standard material for children's 3D printing. Perform a quick surface inspection before any young child plays with a finished print, and verify that no part is small enough to present a choking hazard for the youngest child in the household.
What can you make with a 3D printer?
For child makers: spinning tops for immediate racing competition, functional whistles that produce real sound, puzzle cubes with mechanical logic, articulated animal figurines that move, gear mechanisms and STEM models, custom building block sets, board game tokens, and name keychains. For older children and adults: creation kit RC cars and robots, engineering tools, custom home accessories, and replacement parts for broken objects. The range grows with the child's ambition.
What are the benefits of 3D printing for kids?
Children who regularly use a 3D printer develop design decision-making (what to make, how to make it), spatial reasoning (how the 2D file becomes a 3D object), mechanical curiosity (why the spinning top spins, why the gear turns), fine motor skill during decoration, and the deep satisfaction of having produced something real. These benefits compound — each making session builds on the skills developed in previous ones.
Is a 3D printer a good gift?
For children who like making, a 3D printer is among the highest-value creative gifts available because the output is not fixed. A drawing kit produces drawings. A 3D printer produces anything the child chooses to make — today a spinning top, next month a gear mechanism, a year from now a creation kit RC car. The gift grows with the child's ambition and interest.
What is the 20 toy rule for kids?
The 20 toy rule is a parenting philosophy suggesting that limiting a child's accessible toys to around 20 items produces deeper engagement and more creative play than a large collection. 3D printing fits this framework well — a maker child can 'retire' a print when they have extracted all the interest from it and print something new, keeping the collection intentional and the making habit active.
What are the 7 types of 3D printing?
The seven main 3D printing technologies are FDM (fused deposition modeling), SLA (stereolithography), SLS (selective laser sintering), DLP (digital light processing), LOM (laminated object manufacturing), EBM (electron beam melting), and binder jetting. For child makers at home, FDM is the only relevant type — it produces safe PLA objects, runs in any family space, and produces results visible through the observation window that children find genuinely compelling to watch.
What are some cool things kids can 3D print?
The coolest prints for child makers are the ones that do something. A spinning top that spins for over a minute. A whistle that actually whistles when you blow through it. A pull-back car that races across the kitchen floor. A gear mechanism where turning one gear turns all the others. These functional prints are consistently more satisfying for maker-minded children than decorative objects because they prove the printer made something that works.
Sources
- Printables — Puzzle Cube Print-in-Place (~30 min, hands-on brain game), Puzzle Cube Print-in-Place, 2022.
- Printables — Optimized Dual Chamber Whistle (2 min, real functional print), Optimized Dual Chamber Whistle, 2024.
- Thingiverse — Spinning Top Easy Print No Support (classic making challenge), Spinning Top Easy Print No Support, 2022.
- MakerWorld — Ring Whistle (~20 min, wearable functional print), Ring Whistle, 2024.
- Tinkercad — Simple 3D Design Projects for Kids (Autodesk Education), Simple 3D Design Projects for Kids, 2026.
3D Printing Ideas for Siblings to Make Together

Most sibling activities are competitive by nature. Who wins, who gets more, who finishes first. These are fine as far as they go. But some of the most useful time children spend together is working toward a shared goal — not racing each other but building something together.
3D printing is one of the best vehicles for that kind of collaborative play because the project requires multiple decisions. What to print. What color. How to assemble it. Who does which part. These are genuine negotiation opportunities wrapped inside a creative activity, and children do the negotiating naturally without needing to be told.
At AOSEED, the projects that generate the most sibling sessions are the ones where each child has a distinct role — one browses the library, one chooses the color, one assembles, one decorates.
This guide covers six project categories organized around exactly that dynamic.
|
6 |
2+ |
4–13 |
∞ |
Why 3D Printing Is Great for Siblings to Work on Together

A shared 3D printing project does something most sibling activities cannot — it produces an object that belongs to both children equally. Neither sibling won it. Neither received it as a gift. They made it together, and they both know it.
|
👤 Printing Alone |
👥 Printing With a Sibling |
|
|
Decisions made |
One child chooses |
Both children negotiate, discuss, decide together |
|
What is built |
What one person wanted |
A project that belongs to both of them |
|
Skills developed |
Design and patience |
Design, patience, communication, negotiation, and teamwork |
|
Who plays with it |
The child who printed it |
Both — each has ownership and investment in the result |
|
Session memory |
I made a thing |
We made a thing together |
Building Teamwork and Communication

|
🤝 Shared Decisions |
💬 Communication Practice |
🏆 Shared Ownership |
|
Every 3D printing session requires choices that siblings make together — what to print, which color, how to decorate. These low-stakes decisions build negotiation habits that carry into more important sibling dynamics. |
Explaining what you want a toy to look like, or why you think the blue filament is better than the green one, builds vocabulary and expressive confidence in both children. The younger sibling learns from the older; the older practices explaining clearly. |
A toy that both children made is less likely to become a source of conflict than a toy that belongs to one of them. Shared creation creates shared investment — and shared investment is the foundation of cooperative sibling relationships. |
Encouraging Creativity and Imagination
Siblings bring different creative instincts to the same project. An older child who wants precision and functionality works alongside a younger child who wants bright colors and the funniest-looking animal. The result is usually more creative than either would have produced alone. Inspiration Laboratories notes in its activities for siblings to play together guide that collaborative creative activities are among the most effective for building imaginative flexibility — the ability to adapt a creative vision to incorporate someone else's ideas.
Developing Problem-Solving Skills
When a print does not come out the way siblings imagined, the problem-solving conversation that follows is genuinely educational. Two children working out together why the puzzle piece does not fit or why the car wobbles rather than rolls straight are applying design thinking in real time. Verywell Family's research on benefits of sibling relationships shows that shared problem-solving activities between siblings consistently improve cooperation skills and mutual respect — outcomes that extend well beyond the specific project.
Best 3D Printing Projects for Siblings to Make Together
|
👫 How to Read These Project Cards Each project card shows what the older sibling does, what the younger sibling does, and what both learn from the session. The dual-role format is the key to a successful sibling project — when each child has a clear, age-appropriate contribution, cooperation happens naturally. |
Mini Race Cars and Tracks

|
🚗 Mini Race Cars and Tracks · Ages 5+ (both) · ⏱ 30–60 min |
|
Each sibling prints their own race car in a chosen color. The older sibling manages the print settings and builds the ramp from cardboard or printed sections. The younger sibling chooses their car color and sets up the starting line. The race happens the moment both cars cool down. If one car loses, the sibling who lost goes back to the printer to improve their design. The natural improvement cycle is built into the competition. |
|
Older sibling: Manages print settings, builds ramp, explains why design changes improve speed Younger sibling: Chooses color, sets up course, declares race winner Find it: Toys and Games STL Models Skills built together: Engineering iteration, friendly competition, shared project ownership |
Building Blocks and Interlocking Shapes

|
🏗️ Building Blocks and Interlocking Shapes · Ages 5+ (both) · ⏱ 25–45 min per piece |
|
One session prints a set of blocks in multiple colors. Siblings divide them by color or by shape. What gets built with the blocks is negotiated between them — sometimes one sibling designs the structure and the other adds details. The blocks grow session by session: print five on Saturday, five more the following weekend. The sibling construction set becomes a long-term shared project. |
|
Older sibling: Plans the structure, decides what to build, manages the build sequence Younger sibling: Chooses block colors, adds decorative elements, contributes their own structure sections Find it: Toys and Games STL Models Skills built together: Spatial reasoning, creative planning, cooperative construction |
Animal Figurines and Action Figures

|
🦊 Animal Figurines and Action Figures · Ages 4+ (both) · ⏱ 30–60 min each |
|
Each sibling picks an animal or character that matters to them. The older sibling may choose a more complex model — an articulated dragon with bending joints. The younger sibling picks a chunky, single-piece animal. Both print in the same session. Both decorate with paint markers at the table together. The result is a set of characters that becomes the cast of whatever story they invent together that afternoon. |
|
Older sibling: Chooses articulated model, manages print, explains joint mechanism to younger sibling Younger sibling: Chooses species and color, decorates their figurine, names the character Find it: Toys and Games STL Models Skills built together: Collaborative storytelling, creative ownership, peer mentoring |
Puzzles and Brain Games

|
🧩 Puzzles and Brain Games · Ages 6+ (both) · ⏱ 20–40 min |
|
Print-in-place puzzles come off the build plate already assembled and ready to solve. Siblings can race to solve the same puzzle type in different colors, or take turns helping each other through the challenge. For mixed-age siblings, the older child can explain the solving strategy to the younger — which reinforces the older child's own understanding while giving the younger child a patient, low-pressure learning environment. |
|
Older sibling: Solves faster, explains strategy to younger sibling, introduces complexity Younger sibling: Learns solving approach from older sibling, contributes their own observations Find it: Learn 3D Design with Projects Skills built together: Cooperative problem-solving, peer teaching, patience and communication |
Board Games and Interactive Toys

|
🎲 Board Games and Interactive Toys · Ages 6+ (both) · ⏱ 15–45 min per piece |
|
Print custom dice, game tokens, and character pieces for board games the family already owns. The older sibling customizes the token designs using the app. The younger sibling chooses which character they want to be and picks the colors. When game night arrives, the custom pieces are already on the table. The siblings who printed those pieces are more invested in the game than they would be with factory components. |
|
Older sibling: Designs token variations using app tools, explains design choices Younger sibling: Picks characters and colors, tests pieces to make sure they work in the game Find it: Toys and Games STL Models Skills built together: Creative collaboration, shared game ownership, design thinking |
Educational STEM Models

|
⚙️ Educational STEM Models · Ages 8+ (older) + 5+ (younger) · ⏱ 30–60 min |
|
Gear sets, lever mechanisms, and simple machine models give older siblings a STEM challenge while younger siblings engage at a different level. The older child assembles the mechanism and explains how it works. The younger child tests it, asks questions, and usually finds the most interesting way to describe what the mechanism does. The explanation the older sibling gives to the younger one is among the most effective forms of learning consolidation available. |
|
Older sibling: Assembles mechanism, understands gear ratios and mechanical principles, teaches younger sibling Younger sibling: Tests the mechanism, asks questions, describes what they observe in their own words Find it: Learn 3D Design with Projects Skills built together: Engineering principles, peer teaching, scientific observation |
The AOSEED Toy Library organizes models by age and category with weekly updates — useful for sibling sessions where an older child's project and a younger child's project need to be found and started in the same browsing session.
Sibling Project Quick Reference
|
Project |
Time |
Ages |
Why Siblings Love It |
|
30–60 min |
5+ |
Each sibling prints their own — competition is instant and built into the project |
|
|
25–45 min |
5+ |
Grows session by session — the sibling collection expands every weekend |
|
|
30–60 min |
4+ |
Each child picks their own species and decorates — different enough to be personal, shared enough to be collaborative |
|
|
20–40 min |
6+ |
Older teaches younger to solve — the teaching deepens the older child's own understanding |
|
|
15–45 min |
6+ |
Upgrades a game both children already love — family game night becomes a maker event |
|
|
30–60 min |
8+ |
Older assembles and explains — younger tests and describes — natural peer teaching dynamic |
How to Choose the Best 3D Printing Projects for Your Kids

Siblings at different developmental stages bring different strengths to a shared project. The table below matches common sibling pairings to project types and role distributions that make the session genuinely collaborative rather than one child helping a younger one.
|
Sibling Pairing |
Best Project Type |
Who Leads What |
What Both Learn |
|
Ages 4 + 7 |
Spinning tops, figurines, simple cars |
Older chooses model / younger picks color |
Turn-taking, patience, shared ownership |
|
Ages 6 + 10 |
Race cars, animal sets, puzzle pairs |
Older manages print settings / younger decorates |
Responsibility sharing, complementary roles |
|
Ages 7 + 11 |
STEM models, board game pieces, building blocks |
Older designs / younger assembles and tests |
Design iteration, peer mentoring, collaborative testing |
|
Ages 9 + 13 |
Creation kits, multi-part builds, custom projects |
Older engineers / younger personalizes and narrates |
Engineering thinking, creative independence, mutual respect |
How to Choose the Best 3D Printing Project for Your Kids
Ages 4 to 6: Simple Designs with Large Parts
For the youngest siblings in a sibling pair, the primary contribution is choice. They choose the color, choose the species, choose which print gets done first. These decisions are genuine creative contributions even if the younger child cannot manage the print settings or assembly. An older sibling who explains 'now you pick the color' is creating a real collaborative dynamic, not just performing one.
Ages 7 to 9: More Intricate Designs with Moving Parts
- Children in this range can manage snap-fit assembly, pull-back mechanisms, and simple puzzle structures independently.
- A sibling pair with a 7 and a 9-year-old can split a race car project genuinely: one manages the print settings, one sets up the track.
- The session has two distinct roles that the children can rotate next time.
Ages 10 and Up: Complex, Customizable Designs
Older siblings are ready for design-level decisions.
Guided apps let them modify a model before printing — which gives a genuine contribution that a younger sibling cannot replicate yet.
The AOSEED X-MAKER creation kits are well-suited for siblings with an age gap: the older sibling engineers the RC car chassis and electronics, the younger sibling decorates the body and assigns the car a name and racing number.
Both contributions are real. Both children recognize each other's role in the finished object.
Tailoring Projects to Kids' Interests
|
🏎️ Both Love Speed |
🦊 Different Interests |
🧩 Both Love Puzzles |
⚙️ STEM + Storytelling |
|
Two cars, one ramp. Each sibling designs their own car and the competition begins the moment both prints cool. |
Each prints what they want — animals for one, vehicles for the other. Both decorate and both contribute to the shared play session. |
Print two of the same puzzle in different colors. Race to solve, or team up to solve the other sibling's version. |
Older builds the gear mechanism. Younger invents a story about why the machine exists. Both contributions are valid and valued. |
Safety Considerations for 3D Printed Toys and Games for Kids

Sibling projects typically span a wider age range than solo projects. Safety considerations need to cover the youngest child in the pair, not just the older one.
|
✓ |
PLA for all sibling projects: Non-toxic, biodegradable, minimal odor at standard temperatures. The right material for every project in this guide regardless of the siblings' ages. |
|
✓ |
PETG for active or competitive toys: More durable and impact-resistant. Good for race cars that will be crashed repeatedly during sibling racing competitions. |
|
⚠ |
Safety check before younger sibling handles: Run a finger along all surfaces. Sand any rough edges from support removal. For siblings under 3, verify no part is smaller than 25mm. |
|
✗ |
Resin and ABS — not for sibling sessions: Resin requires PPE and chemical handling. ABS requires ventilation. Neither is appropriate in a shared family space with children of any age present. |
Safety Considerations for 3D Printed Toy and Games for Kids
What Materials Are Best for Kids' 3D Printed Toys?
PLA is the correct default for sibling projects at any age gap. It handles the full range of projects in this guide — from chunky animal figurines for 4-year-olds to gear mechanisms for 11-year-olds — without ventilation requirements or safety precautions beyond normal post-print inspection. When siblings will be using printed toys for active competition (race cars, spinning tops, repeated collision play), PETG's higher impact resistance makes it a useful upgrade.
Inspecting Toys for Sharp Edges and Small Parts
The safety standard for the youngest sibling in the pair applies to every object in a shared session. If a 5-year-old is playing alongside a 9-year-old with shared 3D printed objects, every object in the session needs to meet the 5-year-old's safety standard — not just the objects specifically printed for them. One quick inspection before any sibling play session takes about 90 seconds and covers this completely.
Why an Enclosed 3D Printer Is Safer for Kids
For sibling projects, an enclosed printer is not just a safety feature — it is a practical one. The AOSEED X-MAKER JOY's door sensor pauses the print automatically if the chamber opens during a session. When a younger sibling's curiosity about what is happening inside the machine exceeds their patience, the auto-pause means that curiosity is safely handled rather than hazardous. Both siblings can stand at the window and watch the print together without any risk.
How to Make 3D Printing Fun and Easy for Kids
The best sibling printing sessions have a structure that gives each child a clear role from the beginning. These five steps take about five minutes before the first session and make every subsequent sibling session smoother.
|
1 |
Let both siblings contribute to the project choice Browse the Toy Library together before the session. Each sibling picks one option. If they cannot agree, alternate — whoever did not choose last time chooses this time. |
|
2 |
Assign clear roles before the printer starts Older sibling: manages settings and monitors the print. Younger sibling: chooses color and announces when the print is done. These roles are explained before the printer starts, not during. |
|
3 |
Plan the post-print activity before the print begins A race, a game, a story, a gift for a grandparent. Both siblings know what they are building toward before the printer starts. The anticipation is part of the collaboration. |
|
4 |
Keep decoration supplies ready for both children Two sets of paint markers or two trays of stickers. Equal access removes a common source of sibling friction during the decoration phase. |
|
5 |
Alternate who leads the next session The sibling who had less control this session leads the next one. This rotation is explained before the first session ends, which gives the less-dominant sibling immediate ownership of the next project. |
Start with Easy-to-Assemble Projects
For a first sibling session, choose a project where both contributions are genuinely visible. A spinning top race where each child prints their own top is the simplest version of this — the older child manages the print settings, the younger child chooses the colors, and both race their tops immediately when the prints cool. The session has a clear winner, a clear rematch, and a clear reason to print again.
Encourage Creativity with Customization
Decoration time is the most naturally collaborative phase of any sibling printing session. Both children sit at the table with their printed objects and their paint markers. Neither child is in charge. Neither has better skills in a way that creates hierarchy. They share ideas, comment on each other's choices, and produce two unique objects from the same session. This is the phase parents most often describe as the best part of the afternoon.
Set Up a Dedicated Printing Area
A permanent creation station where both siblings know the printer lives, the filament is stored, and the decoration supplies are kept removes the setup friction that can turn a good sibling activity into a frustrating one before it starts. Children who know where everything is can initiate a sibling printing session independently — which is the highest form of success for any family activity.
Conclusion
The best sibling activities produce something that neither child could have made alone. Not because the project was too complex for one person, but because the decisions that shape the finished object — what to make, what color, what role each person plays — belong to both of them equally.
A 3D printing session does this naturally. The printer handles the technical work. The siblings handle the creative decisions. The object that comes off the build plate is evidence that the afternoon was spent together in a way that counted.
Start with two spinning tops in two different colors. Race them. Print a rematch. By the third session, the siblings will have a project rhythm that does not require adult organization — which is the most useful outcome any family activity can produce.
For families choosing their first family printer, AOSEED 3D printers for kids shows both current models with age guidance and pricing — useful for families with a wide sibling age gap deciding which model best serves the full range of children in the house.
FAQs
What are some questions to ask siblings during a 3D printing project?
The most productive questions open up creative decisions rather than testing knowledge. 'Which animal should we print next?' leads to negotiation. 'What color should yours be?' creates ownership. 'What do you think would make the car faster?' opens up engineering thinking. 'Can you show me how you solved that puzzle?' gives the younger sibling a teaching moment from the older one. These questions keep the collaborative session active without requiring adult facilitation.
What is a sibling project?
A sibling project is any activity where both siblings make genuine creative contributions to a shared outcome — not one child helping the other, but both children owning the result. In 3D printing terms, a sibling project is one where each child had a decision that shaped what was made. The older sibling chose the model. The younger sibling chose the color. Both printed in the same session. Both decorated. Both played with the result. That is a sibling project.
What activities can I do with my siblings?
3D printing works particularly well for siblings because it scales to different ages and skill levels naturally. The older sibling takes the more technical role; the younger sibling takes the more expressive one. Beyond 3D printing: building with the printed blocks both children contributed to, playing the board game with the custom tokens both children designed, racing the cars both children printed in different colors. The printed objects become the starting points for extended sibling activities.
What are good family projects?
The best family projects produce something visible that every participant contributed to. 3D printed building block sets that grow over multiple sessions, creation kit RC cars that older and younger siblings build together, custom board game piece sets for games the whole family plays — these work because each family member's contribution is part of the permanent result. The finished object is a record of collaboration.
What games can siblings play?
For siblings with a 3D printer: spinning top races where each sibling prints their own top in a chosen color, race car competitions where each sibling designs and prints their own car, puzzle races where both siblings solve the same print-in-place puzzle design, and family board games upgraded with custom-printed tokens and dice. The advantage of printed games over bought ones is that the siblings who print the game components are more invested in the games they play with those components.
What are 10 indoor games?
Ten indoor sibling activities that work well with 3D printing: spinning top racing, race car tracks, print-in-place puzzle solving, custom board game nights, animal figurine storytelling, building block construction, gear mechanism testing, creation kit building sessions, sibling art challenge (same model, different decoration), and mystery build (one sibling chooses the model without telling the other — both decorate without seeing the other's result).
How can siblings work together on 3D printing projects?
The most effective structure is role division before the printer starts. Older sibling: manages the technical decisions, monitors the print, explains the mechanism. Younger sibling: chooses creative elements, announces milestones, tests the finished object. These roles can rotate with each session. After three or four sessions, siblings typically develop their own project rhythm without needing parent assignment.
Sources
- Crafty Kids at Home — Sibling Projects Category (collaborative crafts), Sibling Projects Category, 2026.
- Inspiration Laboratories — Activities for Siblings to Play Together, Activities for Siblings to Play Together, 2026.
- KidKraft Blog — 6 Activities for National Sibling Day, 6 Activities for National Sibling Day, 2025.
- Printables — Toys and Games STL Models (curated, frequently updated), Toys and Games STL Models, 2026.
Spring Break Screen-Free 3D Printing Projects for Kids
Spring break arrives with the best intentions. More time outside, more time together, more time away from screens. By Tuesday morning, the intentions have usually met reality. Everyone is awake early, the older children have already asked three times what they are supposed to do, and the path of least resistance is exactly the same as every other morning.
3D printing is one of the few activities that genuinely holds a child's attention across a full break week without a single screen being involved in the play itself. The printer does the technical work. The child makes the creative decisions. And every day of spring break ends with something new on the table that was not there in the morning.
At AOSEED, spring break is one of the highest-use periods in the year for family printers. Parents return to the Toy Library every day looking for the next project. The six categories in this guide are organized around what actually gets printed during break weeks — fast enough to hold attention, satisfying enough to make the next session the first thing children ask about the following morning.
|
6 Project categories |
5 days Full break week covered |
0 Screens required for play |
Ages 4+ Full age range |
Why 3D Printing Is a Great Screen-Free Activity for Kids During Spring Break

The research case for reducing screen time during school breaks is well established. The practical question is what replaces it. 3D printing solves this better than most alternatives because the activity is active, the output is physical, and the engagement cycle repeats naturally without parent prompting.
|
📱 Typical Spring Break Screen Day |
🖨 3D Printing Spring Break Day |
|
|
Activity type |
Passive — consuming content |
Active — designing, printing, playing |
|
Skill developed |
None measurable by end of week |
Spatial reasoning, design thinking, patience |
|
Social component |
Individual — everyone on own device |
Collaborative — family makes decisions together |
|
Physical output |
Nothing tangible |
Printed toys and objects to play with all week |
|
After spring break |
Kids remember the shows they watched |
Kids show their friends what they made |
Hands-On Creativity and Learning
|
✋ Touch and Create |
🧠 Design Thinking |
🎯 Immediate Result |
|
3D printing puts the creative decision-making with the child from the first tap in the app to the moment they hold the finished object. Every choice — what to print, what color, what size — is a creative act that belongs to them. |
Choosing a model, watching it build layer by layer, and asking why certain shapes take longer than others is the beginning of engineering curiosity. Children do this naturally without being prompted. The questions are the learning. |
Unlike painting or building projects that take days, a 3D print finishes in 20 to 60 minutes. The child has a completed object before lunch. That immediate result builds the confidence to try a longer project the next day. |
Fostering Problem-Solving Skills
When a spinning top does not spin as well as the child hoped, they ask why. When a puzzle piece does not fit exactly right, they want to understand the tolerance. These are not frustrations — they are the natural entry points into problem-solving that spring break usually has no space for. The screen-free activities for kids guide from Parent Cue notes that creative problem-solving activities during breaks produce measurably stronger focus and engagement when children return to school. 3D printing delivers exactly this type of challenge — low-stakes, iterative, and self-directed.
A Screen-Free Alternative to Traditional Play
The common concern about screen-free spring break is that children will be bored. 3D printing solves this differently from most craft activities because the waiting time is active rather than passive. While the printer runs, children plan their next project, decorate the previous print, or assemble creation kit components. There is always something to do during a session — the printer fills the activity rather than creating a gap in it.
Best 3D Printed Games for Kids to Enjoy on Spring Break
|
🌱 Spring Break Maker Plan Use the 5-day planner later in this article to match one project category to each day of break. Sessions run 30 to 90 minutes. The rest of the afternoon uses the morning's print for play, decoration, or competition. A single printer, one family, five days, five different objects. |
Mini Race Cars and Tracks

|
🚗 Mini Race Cars and Tracks · Ages 5+ · ⏱ 30–60 min |
|
Race cars with functional rolling wheels are one of the most played-with prints across all age groups during spring break. Print one per child in a chosen color, set up a course on the kitchen floor, and the activity sustains itself. Add a ramp section the next morning and the circuit grows. Children who print their own race cars are significantly more invested in the race than children using store-bought ones. Find a model: Kids and Toys 3D Print Models Skills built: Motion, competition, iterative design (improving the car for better performance) |
3D Printed Puzzles and Brain Games

|
🧩 Puzzles and Brain Games · Ages 6+ · ⏱ 20–40 min |
|
Print-in-place puzzles come off the build plate already assembled — the child solves them immediately. Tangrams, sliding tile puzzles, and geometric brain teasers all work well on spring break because they reset. One print, infinite play sessions. The puzzle is never 'done' in the same way a racing car eventually gets set aside. Find a model: Beginner 3D Design Projects Skills built: Spatial reasoning, logical thinking, patient independent play |
Board Games and Interactive Toys

|
🎲 Board Games and Interactive Toys · Ages 6+ · ⏱ 15–45 min per piece |
|
Print custom dice, tokens, and game pieces for the board games the family already owns. A set of custom character tokens for an existing game takes one spring break morning. Custom dice with family inside jokes take 15 minutes each. These prints extend existing play rather than replacing it — spring break becomes the week the family upgraded their game collection. Find a model: Kids and Toys 3D Print Models Skills built: Family cooperation, creative play extension, personalization of shared games |
Animal Figurines and Action Figures

|
🦊 Animal Figurines and Action Figures · Ages 4+ · ⏱ 30–60 min |
|
Articulated flexi animals print in one piece with joints already working. Spring break is the natural time to print an entire animal collection — a different species each morning, decorated each afternoon. Children name them, build habitats, and develop the kind of extended imaginative play that screen time tends to interrupt. A spring break animal collection becomes a permanent part of the toy shelf. Find a model: Kids and Toys 3D Print Models Skills built: Imaginative storytelling, tactile engagement, creative ownership of a growing collection |
Educational STEM Models

|
⚙️ Educational STEM Models · Ages 8+ · ⏱ 30–60 min |
|
Gear sets, lever mechanisms, and simple machine models turn spring break into a low-pressure STEM experience. The child builds the model and the questions emerge naturally — why does this gear make the other one spin? What happens if the lever arm is shorter? These are engineering questions that a school lesson plan would frame as homework and that a spring break print frames as play. Find a model: Beginner 3D Design Projects Skills built: Engineering principles, cause and effect, mechanical curiosity |
Building Blocks and Construction Sets

|
🏗️ Building Blocks and Construction Sets · Ages 5+ · ⏱ 25–45 min per piece |
|
A spring break building block collection starts on day one and grows through the week. Print five blocks on Monday in different colors. Print five more on Wednesday in complementary shapes. By Friday, the child has a custom construction set that mixes with their existing collection. The incremental nature of this project makes it particularly well-suited to a week-long break. Find a model: Kids and Toys 3D Print Models Skills built: Spatial reasoning, creative construction, open-ended play that grows over multiple sessions |
The AOSEED Toy Library includes curated models across all six categories with weekly additions — spring break sessions on day one have different options available from sessions on day five, which keeps the week feeling fresh without any adult effort.
Spring Break 5-Day Maker Plan
|
Day |
Morning Session |
Afternoon Extension |
|
Day 1 |
Spinning top race — print 2 in different colors |
Hold a kitchen-floor spinning competition |
|
Day 2 |
Mini race car — one per child, chosen color |
Design a ramp from cardboard, race the cars |
|
Day 3 |
Print-in-place puzzle — one per child |
Decorate puzzles with paint markers, swap and solve |
|
Day 4 |
Animal figurine — child picks species |
Build a habitat from materials around the house |
|
Day 5 |
Board game token set for family game night |
Play a full family board game with custom pieces |
How to Choose the Right 3D Printing Projects for Your Kids

Spring break usually involves children of different ages. The right project for a 5-year-old and the right project for an 11-year-old running at the same time requires a printer that the older child uses independently while the younger one works with the parent on a shorter session.
|
Age Group |
Best Project Type |
Ideal Print Time |
How to Start |
|
Ages 4–6 |
One-piece figurines, chunky cars, spinning tops |
Under 20 minutes |
Let them choose color — press start together |
|
Ages 7–9 |
Race cars, puzzles, board game pieces, animals |
20 to 45 minutes |
Child browses library, chooses model, manages print |
|
Ages 10–12 |
STEM models, creation kit parts, custom builds |
30 to 60 minutes |
Child modifies or designs a model before printing |
|
Ages 13+ |
Full STEM builds, engineering projects, custom CAD |
45 to 90 minutes |
Independent session — adult available for guidance |
Ages 4 to 6: Chunky Shapes and Easy Assembly
For the youngest spring break makers, the goal is a finished object in hand before the attention window closes. Under-20-minute prints with simple bold shapes work best. A chunky animal in bright PLA, a spinning top they can race immediately, or a large building block in their favorite color. Let them choose. Let them press start. The object appearing is the event — the print time is the anticipation.
Ages 7 to 9: More Intricate Models with Moving Parts
Children in this range have the patience for a 45-minute print and the fine motor skills to interact with mechanisms. A race car with rolling wheels, an articulated animal whose tail bends, or a puzzle that requires solving immediately after it prints all work well. Spring break is also a good time to introduce the concept of printing a set — race car on day one, ramp on day two, second car on day three. Each session builds on the last.
Ages 10 and Up: Customizable and Complex Designs
Older children are ready to move from choosing a model to modifying one. Guided design apps let them change a size, add a name, or adjust a feature before printing. The AOSEED X-MAKER creation kits are particularly well-suited for spring break — multi-session builds where printed chassis combine with motors and electronics to produce working RC cars or robots. The creation kit becomes the project for the whole break week rather than a single afternoon session.
Tailoring Projects to Kids' Interests
|
🏎️ Loves Speed |
🦖 Loves Animals |
🧩 Loves Puzzles |
⚙️ Loves STEM |
|
Race cars + kitchen track + ramp. Print one car per child per morning, improve the ramp design each afternoon. |
One articulated animal per break day. Decorate each one in the afternoon and build a habitat from cardboard. |
Print-in-place puzzle or tangram set — calm and replayable, good for quieter afternoon sessions. |
Gear set + creation kit components. Spread across multiple days for a week-long engineering build. |
Safety Considerations for 3D Printed Toys and Games for Kids

Three things determine whether a 3D printed toy is safe for spring break use. The material, the finished print inspection, and the printer design.
|
✓ |
PLA — the right default for all ages: Plant-based, non-toxic, biodegradable, low odor at standard temperatures. Available in bright spring colors. The correct material for every project in this guide. |
|
✓ |
PETG — better for active or outdoor use: More durable and impact-resistant than PLA. Safe for home use. Good for toys that will be used outside during spring break. |
|
⚠ |
Inspect every print before play: Run a finger along all surfaces. Check support removal points. Sand any rough edges before giving to a child under 7. Verify no part under 25mm for children under 3. |
|
✗ |
Avoid resin and ABS for spring break sessions: Resin requires PPE and chemical handling. ABS requires ventilation. Neither is appropriate for family use indoors with children present. |
What Materials Are Best for Kids' 3D Printed Toys?
PLA is the right starting point for all children at all ages. It is derived from renewable plant materials, non-toxic, and produces minimal odor at standard printing temperatures. Verywell Family's review of benefits of limiting screen time and encouraging hands-on creative activities aligns directly with what 3D printing provides — and the material safety of PLA means the creative session can happen anywhere in a family home without ventilation concerns.
Inspecting Toys for Sharp Edges and Small Parts
A 60-second safety check after every print: run a finger along all surfaces, check where support material was removed, sand any rough spots before handing the object to a young child. For children under 3, every part of the finished print must be larger than 25mm in any dimension. This check takes less time than explaining why the print needs to cool before touching it.
Why an Enclosed 3D Printer Is Safer for Kids
An enclosed printer keeps the nozzle, heated bed, and moving belts inside a sealed chamber. Children observe through the window. For spring break — where the printer may be running for multiple sessions across the week in a shared living area — this design is the practical choice. The AOSEED X-MAKER JOY includes a door sensor that pauses the print automatically if the chamber is opened mid-session, which is particularly useful during spring break when younger siblings may approach the printer during an older child's session.
How to Make 3D Printing Fun and Easy for Kids

A spring break 3D printing habit is easiest to establish with a clear daily structure. These five steps take ten minutes before the first session and make every day that follows run without friction.
|
1 |
Choose the day's project the evening before Browse the Toy Library with the child after dinner. Decision made, filament loaded, project ready before breakfast. No morning friction. |
|
2 |
Let the child choose the filament color This is the highest-engagement decision a child makes in a print session. The color choice creates ownership before the printer starts. |
|
3 |
Keep decoration supplies set up and accessible Markers, acrylic paint pens, and sticker sheets ready on the table beside the printer. When the print cools, the decorating session starts without delay. |
|
4 |
Plan a way to use the print in the afternoon A race for the cars. A habitat build for the animals. A family game using the custom tokens. The morning's print becomes the afternoon's activity without any additional planning. |
|
5 |
Have the next day's project chosen before bed The child goes to sleep thinking about what they are printing tomorrow. This is the detail that makes spring break feel like a maker week rather than a series of separate sessions. |
Start with Simple, Easy-to-Assemble Projects
For a first-time spring break printing experience, choose a project that finishes in under 30 minutes. A spinning top, a simple figurine, or a custom game token — something the child can hold before lunch. Each successful short print builds the confidence that makes the longer afternoon sessions feel manageable.
Encourage Creativity with Customization
After the print cools, the creativity continues. Non-toxic acrylic paint markers on a white or light-colored PLA print take the spring break activity from 30 minutes to a full afternoon. A child who prints an animal in the morning and paints it after lunch has created a genuinely unique object — no two spring break collections will ever look the same.
Set Up a Dedicated Printing Area
A spring break creation station means the printer has a permanent place at a height where children can see the observation window, filament spools are labeled and visible, and supplies are organized. When everything is ready and accessible, the session starts without hunting for equipment — which is exactly what keeps the daily habit going for five consecutive break days.
Conclusion
The goal for spring break is not zero screens. It is enough alternative activity that screens are not the default for every hour of every day. One morning printing session, one afternoon using what was printed — that is a full day of creative engagement that happens to be screen-free.
Start on day one with a quick win. A spinning top, a small car, a custom game token. By day three, the child is planning each session before the printer has finished the current one. By day five, the kitchen shelf has five new objects that were not there on Monday morning.
That is spring break with a 3D printer. Five days. Five projects. Five different objects that the child made themselves and will play with long after the break ends.
For families starting their first spring break maker week, AOSEED 3D printers for kids shows both current models with age guidance and pricing — useful when deciding whether the X-MAKER JOY or X-MAKER is the right fit for the ages in your family.
FAQs
Can kids play with 3D printed toys?
Yes. 3D printed toys made with PLA filament and inspected for smooth edges are safe for play from age 4 upwards. PLA is non-toxic, biodegradable, and the standard material for every family-oriented printer on the market. Inspect finished prints for rough support-removal points before handing to young children, and verify no part is small enough to present a choking hazard for the youngest members of the family.
How do you keep kids entertained on a rainy spring break day?
3D printing is one of the most effective rainy-day spring break activities because it structures the time around a result. The print session takes 20 to 60 minutes. The decoration session takes another 30 minutes. The play session with the finished object fills the afternoon. A single project covers most of a rainy day without any screen time in the play itself.
Is a 3D printer suitable for a 7-year-old?
Yes. A 7-year-old can safely browse a model library, choose a design, select a filament color, and start a print with a family-oriented app-led printer. Adult involvement is most useful for loading filament before the session and removing the cooled print at the end. Most 7-year-olds manage the full workflow independently after two or three guided sessions — well within the first two days of spring break.
What is the 10-10-10 rule for kids?
The 10-10-10 framework suggests structuring children's indoor time across three activity types: physical activity, creative engagement, and social interaction, cycling between all three rather than extending any one category. A spring break 3D printing session contributes naturally to the creative and social categories — the child makes something and shows it, races it with a sibling, or gives it as a gift to a grandparent.
What is a 3D family tree?
A 3D family tree is a project where families design and print a physical tree structure with removable ornament pieces representing different family members. Spring break is a natural time for this project because multiple sessions are available — design the structure on day one, print the member ornaments across the week, and assemble the complete family tree as the final break-week activity.
Why is screen-free time important for kids?
Research consistently links extended passive screen time in children to reduced attention span, lower creative engagement, and less physical activity. Spring break is one of the periods where screen time is most likely to increase significantly without a planned alternative. Active creative activities like 3D printing replace the screen habit with something that produces tangible results — objects the child made, skills they developed, and memories of a break week that involved genuine making.
Sources
- Parent Cue — 10 Screen-Free Things to Do With Kids Over Spring Break, 10 Screen-Free Things to Do With Kids Over Spring Break, 2026.
- ParentMap — How to Keep Kids Busy When Stuck at Home, How to Keep Kids Busy When Stuck at Home, 2025.
- KidKraft Blog — Activities to Embrace Screen-Free Week, Activities to Embrace Screen-Free Week, 2025.
Rainy Day 3D Printing Ideas for Kids at Home
 It starts before breakfast. The window is grey. The child checks outside, sees the rain, and turns around with that expression — the one that says a long indoor day just began and someone needs to find something to do.
Most parents reach for screens at this point. There is nothing wrong with that. But a rainy day with a 3D printer is a different experience entirely. The child helps decide what to make. The printer runs for 20 to 60 minutes. Something real appears. And for the rest of the afternoon, they play with the thing they made while it is still raining outside.
At AOSEED, the projects that get printed most on weekends with bad weather are the ones that finish before the child's attention moves on. This guide covers six project categories designed exactly for those days — fast enough to hold a child's attention, satisfying enough to make the rain irrelevant.
|
6 Project categories covered |
<60 min Every project finish time |
Ages 4+ No minimum age |
0 Screens required |
Why 3D Printing Is Perfect for Rainy Day Activities for Kids
 3D printing solves the specific problem that rainy days create for parents: a child who wants to do something, not just watch something. The print time doubles as creative anticipation. The finished object is proof that the afternoon was well spent.
|
|
Screens on a Rainy Day |
3D Printing on a Rainy Day |
|
What gets made |
Nothing — consumption only |
A physical object the child chose and made |
|
Attention span needed |
None — content is continuous |
Short bursts of creative decision-making |
|
Collaborative? |
Usually not — each child has their own screen |
Naturally collaborative around one printer |
|
Screen time outcome |
More screen time tomorrow |
Child asks when the next print session is |
|
Something to show |
Nothing tangible |
A toy on the table when the rain stops |
The Hands-On Nature of 3D Printing
|
Touch and Build |
Observe and Learn |
Play Immediately |
|
Children do not just watch the printer — they make the decisions that shape what comes out. They choose the model, the color, the size. Every decision is a creative act, and the result is an object they helped create. |
Watching a layer-by-layer build is naturally educational. Children ask why the layers go from bottom to top, why some shapes need more time, and why the wheel spins freely when it comes off the plate. These questions are the beginning of engineering thinking. |
The best rainy day 3D prints are ready for immediate play. A spinning top, a race car, a puzzle piece — the moment the print cools, the afternoon activity begins. There is no assembly kit to lose and no instruction manual to read. |
Encouraging Creativity and Imagination
A rainy day is the right environment for slower, more imaginative play. The child is inside. There is no hurry. 3D printing fits this rhythm because the wait between pressing start and holding the finished object is an active waiting — the child watches, narrates, predicts, and plans the next session.
Most children who print their first toy on a rainy day have already decided what to print next before the printer finishes the first one. That creative pipeline is what makes 3D printing different from passive indoor activities.
How 3D Printing Turns a Rainy Day into an Opportunity for Learning
The AOSEED X-MAKER JOY's app-led workflow means the child browses, selects, and customizes a model independently. They are making technological decisions without realizing it — choosing between object sizes, deciding which material color to use, watching the design translate into physical layers. PBS Parents notes that hands-on creative activities on rainy days produce higher engagement and better focus than passive alternatives.
Best 3D Printed Games for Kids to Play on Rainy Days
These six categories are organized by play type rather than just print time. The AOSEED Toy Library includes models across all six categories with weekly updates — so a rainy Saturday next month will have new options that were not available last time.
|
How to Read These Project Cards Each card shows the project category, recommended age range, and print time estimate on the left. The description and model link are on the right. Choose one project per rainy day session, or two back-to-back quick projects for a full afternoon. |
Mini Race Cars and Tracks

|
⏱ 30–60 min |
Mini Race Cars and Tracks · Ages 5+ |
|
Motion and competition |
Rolling cars with functional wheels print in 30 to 60 minutes and are ready to race on the kitchen floor before dinner. Print two in different colors during a single rainy afternoon and have an immediate sibling competition. Add a ramp section the following session and the racing circuit grows each time it rains. Find it: Kids Toys and Games STL Files |
3D Printed Puzzles and Brain Games

|
⏱ 20–40 min |
Puzzles and Brain Games · Ages 6+ |
|
Calm focused play |
Print-in-place puzzles come off the build plate already assembled — the child simply solves them. Tangrams, sliding tile puzzles, and shape sorters all work in 20 to 40 minutes. These are particularly useful on long rainy afternoons because the puzzle resets every time it is solved. One print, infinite replays. Find it: 3D Design Projects for Beginners |
Board Games and Interactive Toys

|
⏱ 15–45 min |
Board Games and Interactive Toys · Ages 6+ |
|
Family game night prep |
Print custom dice, game tokens, or entire game piece sets for the board games the family already owns. A set of six custom dice takes about 25 minutes per die. Custom tokens for a family board game night turn a standard game evening into something the children helped build. These prints extend existing play rather than replacing it. Find it: 3D Design Projects for Beginners |
Animal Figurines and Action Figures

|
⏱ 30–60 min |
Animal Figurines and Action Figures · Ages 4+ |
|
Imaginative play and storytelling |
Articulated flexi animals print in 30 to 60 minutes and come off the build plate already moving. The rainy day session includes picking the species, choosing the color, watching the print, and immediately posing the animal in the first story the child invents. Figurines work well as gifts for younger siblings — the older child prints while the younger one waits. Find it: Kids Toys and Games STL Files |
Educational STEM Models

|
⏱ 30–60 min |
Educational STEM Models · Ages 8+ |
|
STEM exploration |
Gear systems, simple machines, and scale models make rainy days into low-pressure STEM sessions. A printed gear set with three interlocking gears takes about 40 minutes and generates genuine questions about how mechanical advantage works. Bridge cross-section models, lever demonstrations, and planetary scale sets all work without any lesson plan — the questions emerge from the hands-on interaction. Find it: 3D Design Projects for Beginners |
Building Blocks and Construction Sets

|
️ ⏱ 25–45 min per piece |
Building Blocks and Construction Sets · Ages 5+ |
|
Open-ended building play |
Interlocking blocks printed in multiple colors across a single rainy afternoon produce a construction set that expands session by session. Print five blocks this Saturday, five more next rainy day. The child's custom building set grows over time and mixes with existing brick collections. The creative constraints — shapes and connection points — spark more imaginative construction than a pre-designed kit. Find it: Kids Toys and Games STL Files |
How to Choose the Best 3D Printing Projects for Kids
 Matching the right rainy day project to the right child makes the difference between a successful session and one that ends in frustration before the print finishes.
|
Age |
Best Project Type |
Print Time Sweet Spot |
First Project to Try |
|
Ages 4–6 |
One-piece chunky toys, spinning tops, figurines |
Under 20 minutes |
Spinning top — done before the rain changes their mind |
|
Ages 7–9 |
Puzzles, vehicles, board game pieces, animals |
20 to 45 minutes |
Mini race car — races begin immediately after cooling |
|
Ages 10–12 |
STEM models, creation kits, multi-part builds |
30 to 60 minutes |
Simple gear set or interlocking puzzle — hands-on building |
|
Ages 13+ |
Custom designs, engineering builds, CAD projects |
45 to 90 minutes |
Ball maze or creation kit component — own design + print |
Ages 4 to 6: Simple Designs with Large Pieces
For the youngest makers, the project window is short. Choose a print that finishes in under 20 minutes. A spinning top or a chunky animal figurine in their favorite color fits this window perfectly. The child makes one decision — the color — and the printer handles everything else. The object in their hand before lunch is the win.
Ages 7 to 9: Models with Moving Parts
Children in this range have the patience for 30 to 45-minute prints and the fine motor skills to interact with mechanisms. A print-in-place puzzle, a car with rolling wheels, or a simple fidget mechanism all work well. This age group tends to ask the most questions during the print — why are those lines visible? Why does the wheel already spin? These questions are the beginning of design thinking.
Ages 10 and Up: Customizable and Complex Designs
Older children are ready to move from choosing a library model to modifying one. Guided design apps let them change the size, add a name, or adjust a detail before printing. The AOSEED X-MAKER creation kits are particularly good for this age — printed chassis with motors and electronics that produce working RC cars or robots across multiple sessions. A longer rainy day becomes a multi-session building project rather than a single print.
Tailoring Projects to Kids' Interests
|
️Loves Speed |
Loves Animals |
Loves Puzzles |
Loves STEM |
|
Race car + kitchen floor track. Print two cars in different colors and race them before the rain stops. |
Flexi articulated animal in their current favorite species — immediate tactile play. |
Print-in-place puzzle or tangram set — calm, focused, replayable independent play. |
Gear set or lever model — rainy day turns into a physics experiment without anyone using the word 'lesson'. |
Safety Considerations for 3D Printed Toys and Games for Kids

The safety questions around 3D printing are genuine and straightforward to address. Three things cover everything parents need to know.
|
✓ |
Best material for kids — PLA: Plant-based, non-toxic, biodegradable, and produces minimal odor at standard printing temperatures. The right default for every project in this guide. Available in bright colors children can choose from. |
|
✓ |
Good step up — PETG: More durable and impact-resistant than PLA. Safe for home use. Good for toys that will be dropped or used outdoors. Requires a slightly higher temperature and heated bed. |
|
⚠ |
Inspect before handing to young children: Run a finger along all surfaces after printing. Sand any rough edges from support material removal. For children under 3, verify no part is smaller than 25mm in any dimension. |
|
✗ |
Avoid ABS and resin for family sessions: ABS requires ventilation for safe indoor use. Resin requires chemical handling, gloves, and UV curing equipment. Neither is appropriate for a rainy day session with children present. |
Inspecting Toys for Sharp Edges and Small Parts
A 60-second safety check is the right habit after every print intended for a young child. Support material removal points are the most common source of sharp edges. Use fine sandpaper on any rough spots before handing the object to a child under 7. For children under 3, the 25mm rule applies to every single part of the finished object — no exceptions.
Why an Enclosed 3D Printer Is Safer for Kids
An enclosed printer means a child can stand next to the machine and watch the entire print without any risk of touching the hot nozzle or moving belts. The chamber keeps all high-temperature components inside. Children observe through the window. The printer runs safely in a shared family space — living room, kitchen, study — rather than needing to be locked away in a separate room.
For rainy days specifically, an enclosed printer is also the practical choice because the printing session happens in whatever room the family is using that afternoon. No moving the printer to a special location, no clearing a dedicated workspace.
How to Make 3D Printing Fun and Easy for Kids
 The setup for a successful rainy day 3D printing session takes about five minutes. These four steps make every session smoother than the last.
|
1 |
Choose the project before the rain starts Browse the Toy Library with the child after school or the night before. The decision being made in advance removes the 'I don't know what to print' paralysis that delays a rainy morning session. |
|
2 |
Let the child choose the filament color This single choice creates creative ownership before the printer starts. The object is already theirs — it just hasn't appeared yet. |
|
3 |
Keep the printer visible during the session The print should be somewhere the family can see the observation window from wherever they are spending the rainy afternoon. The print-in-progress is part of the entertainment. |
|
4 |
Prepare decoration supplies for after the print Markers and non-toxic paint ready on the table. When the print cools, the decoration phase begins immediately without hunting for supplies. |
Start with Simple, Easy-to-Assemble Projects
First-time rainy day sessions should produce a successful object in under 30 minutes. A spinning top, a simple figurine, or a small puzzle — something the child can hold before the afternoon changes mood. Each successful first print builds the confidence that makes longer future sessions feel manageable rather than daunting.
Encourage Creativity with Customization
After the print cools, the creative session continues at the table. Non-toxic acrylic markers turn a white or light-colored PLA print into a painted object. This extends the activity time and makes the finished toy look like nothing available in a shop. A painted flexi animal printed on a rainy Tuesday becomes the child's specific animal with a name and a story.
Set Up a Dedicated Printing Area
A dedicated 'rainy day creation station' means the printer lives somewhere accessible at the child's eye level, filament spools are labeled and visible, and the decoration supplies have a known location. When the tools are organized, the session starts without the friction of finding equipment. Good Housekeeping's indoor activities for kids guide consistently identifies organized creative spaces as a key factor in sustained indoor engagement for children.
Conclusion
The rain is not a problem. It is a permission slip. An afternoon with nowhere to go and no plan is the best possible context for a 3D printing session.
Start with a spinning top. Print it in 4 minutes. Race it while the next project prints. By the time the rain stops, there will be three or four objects on the kitchen table that were not there this morning — and a child who is already asking about next Saturday's session.
Every rainy afternoon is a Maker Night that arrived during the day. The printer is ready. The Toy Library has something for every age and interest. The only thing left to decide is which color.
Browse the full family printer range at AOSEED 3D printers for kids for age guidance and current pricing on both models.
FAQs
Can kids play with 3D printed toys?
Yes. 3D printed toys made with PLA filament and inspected for smooth edges are safe for play from age 4 upwards. PLA is non-toxic, biodegradable, and the standard material for every family printer on the market. Always check finished prints for rough support-removal points before handing to a young child, and verify no part is small enough to be a choking hazard for children under 3.
How do you keep kids entertained on a rainy day?
3D printing works particularly well as a rainy day activity because it combines three things that hold children's attention: anticipation during the print, a reveal moment when the object appears, and immediate play with the finished toy. The combination of waiting, watching, and playing creates an engagement cycle that can fill 45 to 90 minutes without any screen time involved.
Is a 3D printer suitable for a 7-year-old?
Yes. A 7-year-old can safely browse a model library, choose a design, select a filament color, and start a print with an app-led family printer. Adult involvement is most useful for loading filament before the session and removing the cooled print at the end. Most 7-year-olds manage the full printing workflow independently after two or three guided sessions.
What is the 10-10-10 rule for kids?
The 10-10-10 framework is a practical structure for varied indoor play: 10 minutes of physical activity, 10 minutes of creative play, and 10 minutes of social interaction, rotating across the day. A 3D printing session contributes naturally to the creative and social portions — the child makes something and shows it, tells a story about it, or races it against a sibling's print.
What is a 3D family tree?
A 3D family tree is a creative family project where members design and print a physical tree structure with removable 'leaf' ornaments that each represent a family member. Children can print, label, and arrange the pieces to show family relationships going back to grandparents and great-grandparents. It works well as a rainy day session spread across two or three afternoons.
What activities can be done on a rainy day?
3D printing fits into the same category as crafts, baking, board games, and building projects — indoor activities that produce something. The specific advantage of 3D printing is that the print time is built-in waiting time that generates anticipation rather than boredom. A rainy afternoon that includes a 45-minute print session plus decoration time plus play time fills a full indoor afternoon with a single project.
What are some good 3D printed games for kids?
The highest-play-value options for rainy days: pull-back race cars for sibling competition, print-in-place puzzles for calm independent play, custom board game tokens for family game evenings, spinning top pairs for racing contests, and interlocking building block sets that expand session by session. All six are available in the AOSEED Toy Library with options across the full age range.
Sources
- Good Housekeeping — 50+ Indoor Activities for Kids (updated regularly), 50+ Indoor Activities for Kids, 2026.
- Houston Mom Collective — Rainy Day Activities for Toddlers and Preschoolers, Rainy Day Activities for Toddlers and Preschoolers, 2025.
- Printables — Kids Toys and Games STL Files (curated models), Kids Toys and Games STL Files, 2026.
- Reddit r/Parenting — Indoor Activities That Don't Involve Screens, Indoor Activities That Don't Involve Screens, 2023.
Family Maker Night: 6 Projects Under 60 Minutes

Most weeknight evenings follow the same pattern. Someone wants to watch something. Someone else wants to play a game. The youngest wants someone to play with them, and the adults want to sit down.
Family Maker Night breaks that pattern in about an hour. Everyone sits around the same table. The printer starts. Something gets made. The evening has a result.
3D printing is the right technology for this because it produces visible, immediate results that hold children's attention through the wait and reward them with something real at the end. The six projects below are specifically chosen because they all finish in under 60 minutes — fast enough for a weeknight, satisfying enough that everyone wants to do it again.
At AOSEED, the Toy Library is organized specifically around family use cases — quick prints, longer projects, seasonal builds, and creation kits that turn printed parts into working toys. Every project in this guide comes from the same principle: if it can be printed before bedtime and played with immediately, it belongs on the list.
|
6 Projects to choose from |
<60 min Every project finish time |
Ages 4+ No minimum age needed |
1 printer Whole family, one machine |
Why Family Maker Nights Are Perfect for 3D Printing Projects

There is a qualitative difference between an evening spent on screens and an evening spent making something. The object on the table at the end is evidence of time well spent — and children know it.
|
Typical Screen Night |
amily Maker Night |
|
Everyone watches something different |
Everyone contributes to the same project |
|
Passive — content is consumed not created |
Active — something real gets made |
|
Nothing to show for the evening |
A printed toy on the table at the end |
|
Kids' ideas stay digital |
Kids' ideas become physical objects |
|
Interest resets tomorrow morning |
Each session builds on the last one |
The Benefits of Family Involvement in Creative Projects
When families work together on a maker project, the process does more than produce a physical object. Children who participate in the design and printing decisions develop a sense of ownership over the outcome. They also practice the communication skills involved in collaborating on a shared goal — explaining what they want, negotiating which color to use, and deciding together what to print next session.
For parents, maker sessions are one of the most efficient ways to spend meaningful time with children on a weeknight. The printer does most of the work. The conversation around the table is the real product.
How 3D Printing Enhances Family Fun
The unique quality of 3D printing for a family evening is the 'reveal' moment. Watching a toy appear layer by layer through the observation window of an enclosed printer like the AOSEED X-MAKER JOY turns the wait into part of the entertainment. Children narrate what they think is being built. They check on it. They call grandparents over to see the progress. The print time is not dead time — it is the buildup to the reveal.
Modern family-oriented printers also remove the adult technical burden that used to make this kind of evening feel like a project rather than a relaxed activity. App-led workflows let a child browse, choose, customize, and start a print without parental involvement in every step. The parent's job is to be present, not to operate the machine.
Best Easy 3D Printed Toys for Family Maker Night

These six projects are ordered loosely by print time — from the quickest wins to the slightly longer sessions that benefit from older children's patience. All six finish in under 60 minutes.
|
How to Read These Project Cards Each card shows the print time and difficulty level alongside a description and a specific model link. Choose one project per evening, or let the child choose two quick ones and race the printer. |
Project 1: Spinning Top

|
⏱ 2–5 min · ⭐ Beginner |
|
The spinning top is the single fastest meaningful print in family 3D printing. Two to five minutes of print time, and the child is spinning it on the kitchen table before anyone has finished tidying away the dinner things. Race two tops printed in different colors. Time them. Declare a winner. Print a rematch. Model to use: 2min 3D Printed Spinning Top What it teaches: Physics observation (spin time, balance) — motor skills — immediate satisfaction |
Project 2: Ring Whistle

|
⏱ 20 min · ⭐ Beginner |
|
A ring that produces a real whistle sound when blown through. Print it, put it on a finger, and the child now has a wearable musical instrument they made in 20 minutes. It proves to children very quickly that 3D printing is not just about display objects — it can make things that work. Model to use: Ring Whistle What it teaches: Functional thinking (why does this produce sound?) — wearable craft — gifting |
Project 3: Personalized Keychain

|
🔑 ⏱ <20 min · ⭐ Beginner |
|
A custom keychain printed in the child's name or with their room number. Each one takes less than 20 minutes and uses under 4 grams of filament. Print one for every family member in their chosen color during the same evening. This is also the most gifted 3D print in family-making contexts — children hand them out at school, to grandparents, and to their friends. Model to use: Simple Keychain for Every Room What it teaches: Personalization — gifting thinking — pride of making something useful for others |
Project 4: IC Puzzle

|
⏱ ~30 min · ⭐⭐ Intermediate |
|
A print-in-place puzzle that comes off the build plate already in puzzle form. No assembly, no lost pieces. The challenge is solving the puzzle after it prints — which gives the second half of the evening a focused, quiet activity after the excitement of watching the print. Good for children who enjoy working through a problem independently. Model to use: IC Puzzle What it teaches: Spatial reasoning — independent problem-solving — calm play after an active print session |
Project 5: Mini Race Car

|
⏱ 45–60 min · ⭐⭐ Intermediate |
|
A small rolling race car sized to race on a smooth floor. Print one per child and race them across the kitchen in under an hour. The print time becomes the anticipation phase — children design a course, find a start line, and argue agreeably about whose color will win. When the print finishes, the game starts immediately. Model to use: Spinning Top Up to 1min Spinning Time What it teaches: Motion and physics — sibling competition — understanding that printed objects can be functional |
Project 6: STEM Ball Maze

|
⏱ 30–50 min · ⭐⭐ Intermediate |
|
A printed maze where a small ball is guided through internal channels. When the print comes off the bed, the child has a puzzle they designed together — tilt it one way, the ball rolls left; tilt the other way, it rolls right. This is the most educational project on the list, and also the one children demonstrate most enthusiastically to anyone who walks into the room. Model to use: Optimized Dual Chamber Whistle What it teaches: Engineering thinking — gravity and balance — cause and effect — collaborative play |
Maker Night Menu — Quick Reference
|
Project |
Print Time |
Best For |
Difficulty |
|
1. Spinning Top |
2–5 min |
Quick win, any age, races |
⭐ Beginner |
|
2. Ring Whistle |
~20 min |
Functional toy, gifting |
⭐ Beginner |
|
3. Personalized Keychain |
<20 min |
Personalizing, gifting to others |
⭐ Beginner |
|
4. IC Puzzle |
~30 min |
Calm play, older children |
⭐⭐ Intermediate |
|
5. Mini Race Car |
45–60 min |
Sibling competition, floor play |
⭐⭐ Intermediate |
|
6. STEM Ball Maze |
30–50 min |
Educational, older children |
⭐⭐ Intermediate |
The AOSEED Toy Library holds over 1,500 additional models organized by print time and age group. When the six projects above feel familiar, browse the vehicles, animals, and seasonal builds section to find the next family Maker Night project without needing to search the wider internet.
How to Choose the Right 3D Printing Projects for Your Family

The right project for a 4-year-old and the right project for an 11-year-old are not the same. Use this table to match the evening's project to the children at the table.
|
Age |
Best Project Type |
One Session Goal |
Next Step After |
|
Ages 4–6 |
One-piece prints, spinning tops, chunky cars, simple keychains |
Finish one project before bedtime — hold the object before sleep |
Decorate the print with markers the following evening |
|
Ages 7–9 |
Puzzles, cars with rolling parts, ring whistles, race sets |
Solve the puzzle or race the car before the evening ends |
Print a second model to race against the first one |
|
Ages 10–12 |
Ball mazes, STEM models, creation kit components, custom designs |
Design or modify a model and see it print successfully |
Build a creation kit RC car or robot over two Maker Nights |
|
Ages 13+ |
Full STEM builds, creation kit electronics, custom CAD designs |
Print and assemble a multi-part mechanism in one evening |
Independent project: design, print, test, improve |
Ages 4 to 6: Chunky Shapes, Big Parts, and Easy Assembly
For the youngest makers, the goal for Maker Night is simple: have a finished object in hand before they go to bed. Stick to prints under 20 minutes for this age group. The spinning top at 2 to 5 minutes is perfect — it prints before they finish their dessert, and they are spinning it at the table before the machine cools down.
Let them choose the filament color and press the start button. Those two things — the choice and the activation — are where the creative ownership lives for a 4-year-old. The rest is the printer's job.
Ages 7 to 9: More Complex Models with Moving Parts
Children in this range have patience for 30 to 45-minute prints and the fine motor skills to interact with mechanisms and puzzles. The IC Puzzle and the ball maze are both excellent choices. This is also the prime age for the race car — the child who waits 45 minutes for a car to print is strongly motivated to race it the moment it cools. The anticipation is part of the experience.
Ages 10 and Up: Customizable, STEM-Focused Builds
For older children, the most engaging projects are the ones where they made a decision that changed the output. Guided design apps let children modify an existing model before printing — adjusting a name, a size, or a detail. The AOSEED X-MAKER creation kits are particularly good for this age: printed parts combined with motors and electronic components that turn a Maker Night project into a working RC car or robot. These sessions usually run across two evenings and produce objects that stay in regular use for months.
Tailoring Projects to Kids' Interests
|
Loves Speed |
Loves Puzzles |
Loves Making |
Loves Science |
|
Mini race cars and spinning top competitions — let them design a course and time each other's tops |
IC Puzzle and ball maze — calm, focused, independent play after the print excitement settles |
Keychain with name — quick to print, immediately decorated, and given to someone they love |
STEM ball maze and creation kit builds — tilt mechanics, gear ratios, and cause-and-effect experiments |
Safety Considerations for 3D Printed Toys for Kids

A well-designed family printer removes most of the safety concerns parents have before their first session. Here is the complete picture.
|
✓ |
PLA filament — safest choice for all ages: Plant-based, non-toxic, biodegradable, minimal odor at standard printing temperatures. The correct default material for every family Maker Night project in this guide. |
|
✓ |
PETG for more durable toys: Strong, impact-resistant, safe for home use. A good step up for toys that need to survive repeated dropping or outdoor play. Requires a slightly higher print temperature and a heated bed. |
|
⚠ |
ABS — for ventilated spaces only: Tougher than PLA, but emits more fumes during printing. Use in a well-ventilated space. Not the right choice for a kitchen or shared living room during a family evening. |
|
✗ |
Resin — not for family Maker Night: Photosensitive chemicals require gloves, eye protection, and a dedicated wash-and-cure station. Safe only for adults with proper PPE. Never the right choice for a session involving children under 16. |
Inspecting Toys for Safety
Before handing a finished print to a child, spend about 60 seconds on a safety check. Run a finger along all surfaces. Check where support material was removed — this is where sharp edges most commonly appear. Use fine-grit sandpaper on any rough spots before handing the toy to a child under 7. For children under 3, verify that no printed part is smaller than 25mm in any dimension.
Why an Enclosed 3D Printer Is Safer for Kids
The nozzle on any 3D printer reaches above 200°C during printing. An enclosed design keeps all hot components inside a sealed chamber. Children observe through a clear window. Their hands stay outside. The CDC / NIOSH safe 3D printing guide and the Washington State Department of Health's 3D printers in schools guidance both recommend enclosed printers with PLA as the standard setup for environments where children are present. The same recommendation applies to a family kitchen or living room.
An enclosed printer also produces more consistent print quality for Maker Night projects — the stable internal temperature means the spinning top prints round, the puzzle pieces fit together, and the car base stays flat. Safety and quality benefits point in the same direction.
How to Make 3D Printing Fun and Easy for Kids

A good Maker Night runs on preparation, not improvisation. These five setup steps take about 10 minutes before the first session and make every session after that smoother.
|
1 |
Choose the project before the evening starts Browse the Toy Library or model sites with your child after school. Having the model chosen before dinner removes the decision paralysis that turns an excited child into a frustrated one. |
|
2 |
Prepare the filament color in advance Letting the child choose the color is an act of creative ownership. Do this step before dinner — the color decision is made and loaded before anyone sits down at the table. |
|
3 |
Set the printer at eye level in a visible spot The printer should be somewhere the family can see the observation window from the table. The printing process is part of the entertainment — do not hide it in a corner. |
|
4 |
Have the decoration supplies ready Non-toxic acrylic paint markers, regular markers, and small sticker sheets. Set these out before the print finishes so the decoration phase begins immediately when the object cools. |
|
5 |
Have the next project identified before the current one finishes The gap between 'this one is done' and 'what do we print next' is where interest drops. The next project should be chosen and ready to start by the time the current print cools. |
Start with Easy-to-Assemble Projects
For first-time Maker Nights, choose from projects one, two, or three in this guide. All three finish in under 20 minutes. The child holds something real before their usual bedtime routine starts. That first successful print is the foundation of everything that follows — it is the memory that makes the child ask 'can we do Maker Night again this week?'
Encourage Creativity with Customization
After the print comes off the build plate, the creative session continues at the table with decoration supplies. A white or light-colored PLA print is the ideal canvas — children can paint it, draw on it, add stickers. This turns a 20-minute print session into a 45-minute creative evening, and the child takes away an object that looks like nothing you could buy.
Set Up a Dedicated Printing Area
Give the printer a permanent place at a height where the child can see the observation window without needing to be lifted. Keep a small labeled box of filament spools nearby. Keep the decoration supplies in a nearby drawer. This removes the logistical friction that can make an evening feel like work rather than play.
Conclusion
Family Maker Night is not a significant commitment. It is one evening, one project, and one object on the table at the end. The spinning top that printed in four minutes. The keychain with the child's name that went into their backpack the next morning. The race car that lost every race but got printed again the following Thursday in a different color.
The value of these evenings is not the individual objects. It is the habit of making something together. A family with a functioning Maker Night tradition is a family that regularly sits around the same table, talks about what to build next, and has a shelf of things they made themselves.
Start with one of the six projects in this guide. Have the project chosen before dinner. Let the child press start. Browse the full range of family printer options at AOSEED 3D printers for kids to find the printer that fits how your family makes.
FAQs
Can kids play with 3D printed toys?
Yes. 3D printed toys made with PLA filament and inspected for smooth edges are safe for play. PLA is non-toxic, biodegradable, and the standard material for every family-oriented printer on the market. Inspect finished prints for any rough support-removal marks before handing to a young child, and verify no part is smaller than 25mm for children under 3.
What are some simple family project ideas?
For a Maker Night in under 60 minutes: a spinning top in 2 to 5 minutes, a personalized keychain in under 20 minutes, a ring whistle in 20 minutes, or an IC puzzle in 30 minutes. These four projects print quickly, produce something immediately usable, and require no assembly. All four can be found in the sources section of this guide with direct model links.
What is the best material for 3D printed toys?
PLA is the right default for all children's toy projects. It is non-toxic, made from renewable plant materials, produces minimal odor at standard printing temperatures, and is available in a wide range of bright colors. For toys that need extra durability — outdoor play, active floor toys, repeated dropping — PETG is a safe and effective step up.
Is a 3D printer suitable for a 7-year-old?
Yes. A 7-year-old can safely browse a model library, choose a design, select a filament color, and start a print with an app-led printer. Adult involvement is most useful for loading filament before a session and removing the cooled print at the end. Most 7-year-olds manage the full printing workflow independently after two or three guided sessions.
How long do 3D printed toys last?
PLA toys used for normal indoor play last for years. The material can become brittle if stored in direct sunlight for extended periods, and it softens slightly above 60°C — so it should not be left in a hot car. For toys that will be used outdoors or handled roughly, PETG holds up better to environmental stress and repeated impact.
What is a 3D family tree?
A 3D family tree is a creative project where families design and print a tree structure with removable 'leaf' charms that each represent a family member or ancestor. The printed pieces can be arranged and rearranged, similar to a physical felt board. It is a hands-on way to make family history tangible for children who are learning about their grandparents and great-grandparents.
How do you create a family fun day?
Start with a theme the whole family agrees on — racing, building, animals, or making gifts for someone they love. Use 3D printing as the backbone of the day: print something in the morning, decorate it after lunch, and use it in a game or competition in the afternoon. The printed objects become the artifacts of the day — something the family made together and can point to the following week.
Sources
- Printables — Optimized Dual Chamber Whistle (2 min, 1.15g filament), Optimized Dual Chamber Whistle, 2024.
- Printables — Simple Keychain for Every Room, Customizable (under 20 min, <4g), Simple Keychain for Every Room, 2024.
- Printables — IC Puzzle (~30 min print, great for puzzle play), IC Puzzle, 2024.
- Thingiverse — Spinning Top, Up to 1 Minute Spinning Time, Spinning Top Up to 1min Spinning Time, 2022.
- MakerWorld — Ring Whistle (4g filament, 20 min print), Ring Whistle, 2024.
- MakerWorld — 2min 3D Printed Spinning Top (quick family project), 2min 3D Printed Spinning Top, 2024.
- CDC / NIOSH — Approaches to Safe 3D Printing (schools, homes, libraries), Approaches to Safe 3D Printing, 2023.
- TeachEngineering — Creative Engineering Design Tinkercad 3D Design EV Concept Car Workshop, Creative Engineering Design EV Concept Car Workshop, 2024.
Easy 3D Printed Toys Kids Can Build and Play With
There is a specific expression children make when they pick up something they made themselves. It is not the same as unboxing a store-bought toy. It is quieter, more careful, more proud. The object means something different because they were part of making it.
3D printed toys for kids have that effect built into every project. The child chose the model. They picked the color. They watched it appear. When they hold the finished toy, it is already theirs in a way no shop shelf toy ever quite is.
This guide covers the best easy 3D printing ideas for kids — organized by play value and ease of assembly — with practical guidance on age, materials, and safety. At AOSEED, every project in the Toy Library is tested against one question: will a child still want this next week? Every project in this guide passes the same test.
|
5 Toy categoriesby play value |
Ages 3–12 Age rangefully covered |
20–90 min Typical first-toyprint time |
Why 3D Printed Toys Are Perfect for Kids

3D printing gives children something unusual: a direct line from imagination to physical object. Here is why that changes the quality of play.
|
|
Store-Bought Toy |
3D Printed Toy |
|
Customization |
Fixed color and design — what the factory chose |
Child picks color, size, character — the toy is already theirs |
|
Personalization |
Name cannot be added without a second purchase |
Child's name, favorite animal, or school number is part of the print |
|
Repair |
Part breaks — bin the whole toy or order replacement |
Part breaks — reprint that piece in 20 minutes |
|
Expansion |
Buy the whole set or go without |
Print one piece at a time — the set grows one session per week |
|
Design input |
Zero — the child opens the box and plays |
Child chooses every visual and dimensional detail |
The Creative Potential of 3D Printed Toys for Kids

|
A toy a child helped design is a toy they take better care of, play with longer, and show to everyone they know. |
|
When a child selects a model from a library, chooses the filament color, and types in a name or number to add to the surface, the object that comes out of the printer already has a character. It is not just 'a car.' It is the blue car with the number seven on the hood that they designed on Tuesday afternoon.
That emotional investment changes how children play. They are more careful with objects they made themselves. They are more likely to incorporate them into ongoing imaginative play rather than setting them on a shelf. And they are more likely to come back to the printer asking what else they can make.
The Educational Value of 3D Printing

|
Spatial Reasoning |
Engineering Thinking |
Creative Ownership |
|
Choosing a model size and seeing it appear in physical space builds the same mental skills assessed in STEM aptitude tests. Children who print regularly develop a stronger intuition for three-dimensional space. |
When a snap-fit puzzle piece doesn't click together, children ask why. The process of printing, testing, and understanding why something did or didn't work is design thinking in practice. |
Selecting, modifying, and personalizing a digital model develops creative confidence. A child who has printed thirty objects starts approaching other creative challenges with the same 'I can make this' mindset. |
Why 3D Printing Fosters Interactive Play

A 3D printed toy is not a static object. The AOSEED X-MAKER JOY's app turns the printing process itself into the first play session — the child browses, selects, and watches the printer build their toy layer by layer through the observation window. By the time the print finishes, the child already has plans for how to use it.
That first interaction — designing, printing, playing — becomes a habit. Each toy leads to another. The printer becomes a tool the child returns to independently, not something that requires adult involvement every session.
Best Easy 3D Printed Toys for Kids to Build and Play With
These five categories produce the highest play value and the most consistent requests for repeat sessions. Each uses a different play style to suit different children and ages.
Mini Race Cars and Push-Along Vehicles

|
|
Mini Race Cars — Built for Immediate Play |
|
⏱ 60–120 min |
Pull-back race cars and push-along vehicles are among the most reliably satisfying first toy prints. They print in one to two hours, need no assembly if designed well, and are ready to race the moment the build plate cools. Children naturally organize competitions, want to print a second car to race against the first, and start asking about printing a ramp to launch from. Model ideas: Pull-Back Race Cars (Printables), simple rolling car designs, push-along truck models |
The Pull-Back Race Cars on Printables are a specific model set designed for this kind of immediate floor-play. Kids wind the mechanism and release — the physics element makes it more satisfying than a simple push toy.
Building Blocks and Puzzles

|
|
Building Blocks and Puzzles — Open-Ended Play |
|
⏱ 30–90 min per set |
Snap-together building sets and 3D puzzles have high replay value because the toy resets. Every time the child disassembles the puzzle, it is ready to be solved again. Interlocking puzzle blocks let children build structures, knock them down, and build something different next session. Compatible-brick designs can expand an existing building collection with custom pieces. Model ideas: Interlocking Puzzle Blocks (Printables), dinosaur stacking toys, tangram sets |
The Interlocking Puzzle Blocks on Printables are specifically designed for open-ended building — pieces snap together reliably, and the set is large enough to keep a 7-year-old occupied. The Dinosaur Stackable Toys add a themed stacking game to the same play category.
Action Figures and Animal Figurines

|
|
Action Figures and Animal Figurines — Character Play |
|
⏱ 30–75 min per figure |
Customizable figures are the foundation of imaginative play for children aged 5 to 10. Blank figurines printed in PLA invite the child to decorate with markers or acrylic paint — turning the printer session into two activities rather than one. Articulated animal models that move add the same immediate tactile satisfaction as the best-loved toys in any store. Model ideas: Action Figures 4 Toy Characters (Printables), articulated fox models, animal figurine sets |
The Action Figures 4 Toy Characters set is specifically designed for part-swapping — children mix and match components between characters. This interchangeability adds a creative dimension that extends well beyond a single print session.
Dollhouses and Miniature Furniture

|
|
Dollhouses and Miniature Furniture — World Building |
|
⏱ 15–35 min per piece |
For children who love narrative play, the best 3D printing projects are ones that expand the world they already inhabit. Miniature furniture, small household items, and accessory sets turn a cardboard box into a furnished home. Each print adds a room, a garden, a garage, or a kitchen — the project never runs out of next steps. Model ideas: Tiny chairs and tables, dollhouse windows, miniature kitchen accessories, garden fence sections |
The AOSEED Toy Library includes an updated collection of home, garden, and character accessory models — printable in matched color sets so a child's miniature world looks cohesive rather than random. Weekly updates mean there is always a new room's worth of furniture to add to the collection.
Educational Models and STEM Toys

|
|
Educational Models and STEM Toys — Learning Through Making |
|
⏱ 25–60 min per model |
Solar system models, gear systems, bridge-load demonstrators, and anatomy models turn 3D printing into a classroom tool. These projects are particularly effective because the child builds the model and therefore understands it in a way that looking at a diagram never produces. Model ideas: Solar system scale models, simple gear fidgets, spinning tops, linkable train cars |
The AOSEED X-MAKER creation kits extend this category into working mechanical builds — printed chassis with motors, gears, and electronics that produce functional objects rather than display models. A gear mechanism the child printed and assembled is a gear mechanism they genuinely understand. The Linkable Train Cars on MakerWorld are a simpler example of the same principle — modular cars that connect and expand over multiple sessions.
How to Choose the Right 3D Printed Toy Projects for Kids

Matching the project complexity to the child's age and attention span is the difference between a successful first session and one that ends in frustration. Use this table as a starting filter.
|
Age Group |
Best Toy Types |
What They Develop |
|
Ages 3–6 |
Single-piece chunky toys, large building blocks, simple figurines, large animal prints |
Fine motor development, color recognition, imaginative play, cause and effect |
|
Ages 7–9 |
Snap-fit puzzles, pull-back vehicles, articulated animals, fidget toys, train sets |
Spatial reasoning, problem-solving, mechanical curiosity, perseverance |
|
Ages 10–12 |
Multi-part builds, STEM mechanism toys, creation kit components, custom designs |
Design thinking, engineering principles, iterative improvement, digital literacy |
|
Ages 13+ |
Full creation kits, custom CAD-designed objects, complex STEM builds, modular systems |
Advanced engineering, material science, independent project management |
Ages 4 to 6: Simple, Chunky Toys with Large Parts
The goal for this age group is a successful print in under 45 minutes that produces an object the child can immediately hold and play with. One-piece figurines, chunky vehicles, and stackable animals all work well. Let the child choose the filament color before the session starts — that single decision creates ownership before the printer even begins.
Ages 7 to 9: More Complex Models Like Puzzles and Interactive Vehicles
Children in this range have developed patience for multi-step projects and the fine motor skills to snap axles or connect puzzle pieces. Pull-back car mechanisms, interlocking block sets, and articulated animals are natural choices. This age group also responds particularly well to sets — print all four animal figurines, all the train car types, or the complete puzzle series across multiple sessions.
Ages 10 and Above: Customizable and STEM-Oriented Projects
Older children are ready to move from choosing from a library to modifying what they choose. Guided design apps that let them add their name, adjust a size, or change a feature take them into genuine creative work. STEM builds — gear systems, creation kit RC cars, bridge-load models for school projects — give these children the depth that keeps them engaged beyond the first month.
Picking by Interest: Racing Cars, Animals, Building Sets, or Educational Models
|
Child's Current Interest |
First Project to Print |
What It Leads to Next |
|
Cars and speed |
Pull-back race car in their favorite color |
Ramp, second car for racing, custom track sections |
|
Animals and nature |
Articulated fox or flexi dragon |
Animal bookmark, skeleton model, habitat diorama |
|
Building and designing |
Interlocking puzzle block set |
Custom compatible bricks, architectural models |
|
Science and STEM |
Spinning top set for speed comparisons |
Gear mechanism, simple machine model, creation kit build |
|
Pretend play and stories |
Simple figurine in their story's main character |
Miniature furniture, props, character accessories |
Safety Considerations for 3D Printed Toys for Kids

Three things determine whether a 3D printed toy is safe for a child: the material it is printed in, the design choices made before printing, and the printer design used to make it. Get these three right and the rest of the experience is straightforward.
What Materials Are Best for Kids' 3D Printed Toys?
|
|
PLA |
PETG |
ABS |
Resin (SLA) |
|
Safe for kids under 8 |
Yes — first choice |
Yes — good step up |
Needs ventilation |
Not for home use |
|
Toxic fumes |
Minimal at normal temps |
Low — well-ventilated space |
Requires ventilation |
Toxic before curing |
|
Durability |
Good for normal play |
Strong, impact-resistant |
Tough, heat-resistant |
High detail, fragile |
|
Ease of printing |
Easiest — best for beginners |
Moderate — needs heated bed |
Difficult — warps easily |
Requires wash and cure station |
|
Recommended for |
All ages, all project types |
Ages 8+ durable toys |
Ages 14+ with ventilation |
Adults only |
The CPSC's toy safety standards specify that toys for children under 8 must not have hazardous edges or detachable small parts. These requirements apply directly to 3D printed toys: design choices matter as much as material choice. Always inspect finished prints for sharp support-removal points and sand any rough edges before handing a toy to a young child.
Ensuring Toys Are Free from Sharp Edges or Small Parts
A safety check takes about two minutes and should happen after every print intended for children under 8. Run a finger along every surface. Check where support material was removed. Use fine-grit sandpaper on any rough spots. For children under 3, verify that every part of the finished print is larger than 25mm in diameter — this is the CPSC's small-parts guidance threshold for choking hazard assessment.
|
✓ Quick Post-Print Safety Check 1. Run finger along all surfaces — check for sharp layer edges or support removal points. 2. Check any snap-fit or moving joint areas for thin plastic that could break. 3. For children under 3 — verify no part is smaller than 25mm in any dimension. 4. For paint or decoration — use non-toxic acrylic or poster paint only. 5. For mechanical toys — verify no part can detach with normal play force. |
Why an Enclosed 3D Printer Is Safer for Kids
The Washington State Department of Health's guidance on safe 3D printing in schools specifically recommends enclosed printers for any environment where children are present — citing protection from heat hazards, particulate matter, and chemical emissions. The same logic applies at home: an enclosed printer keeps the nozzle, heated bed, and moving belts inside a sealed chamber. The child watches through a window. Their hands stay outside. The printer can live in a shared family space rather than a locked room.
Enclosed printers also produce better toy prints. The stable internal temperature prevents the warping that causes puzzle pieces to not fit, wheels to print slightly oval, or figurine bases to curl. The physical safety benefit and the print quality benefit work in the same direction.
How to Make 3D Printing Fun and Easy for Kids

The habits established in the first three sessions determine whether 3D printing becomes a regular part of family life or an occasional novelty. These three approaches make the difference.
|
Start with Easy Wins |
Encourage Customization |
Set Up a Creation Station |
|
Choose models under 60 minutes, no supports, flat bottom for the first session. The child's confidence on day one determines whether they come back on day two. A complex failed print on session one is the most common reason a printer moves to the garage. |
Let children decorate their prints with non-toxic acrylic paint or markers after printing. This extends the creative session beyond the print time and makes every toy uniquely theirs. A white or light-colored print in PLA is the ideal canvas. |
Give the printer a permanent place at a height where the child can see through the observation window. Keep a small box of filament spools nearby. Label it. Make 3D printing feel like a legitimate part of the household rather than an adult's machine the child is allowed to use occasionally. |
Real Starter Ideas Families Can Print First
Here are specific models organized by what the family is looking for that afternoon. Each row links directly to the verified model file.
Best First Prints for Imaginative Play
|
Project |
Age |
Time |
Why It Works |
|
5+ |
90 min |
Wind mechanism creates immediate racing competition — no track required |
|
|
6+ |
30 min each |
Part-swap feature means one print session produces infinite character combinations |
|
|
4+ |
20 min each |
Multiple textures and shapes — different fidgets for different sensory preferences |
|
|
5+ |
15–20 min |
Print two tops and race them — who spins longest is a reliable sibling contest |
Best First Prints for Sibling or Family Play
|
Project |
Age |
Time |
Why It Works |
|
5+ |
45 min set |
Print two sets in different colors — each child has their own color to build with |
|
|
4+ |
30–45 min each |
Each child prints a car type — connect all together for a collaborative train |
|
|
4+ |
45–60 min |
Who can stack the highest? Balance competition works for all ages at once |
|
|
Custom game tokens (print and paint) |
6+ |
20 min each |
Print a personalized character token for every family member before game night |
Best First Prints for Rainy Afternoons and Indoor Activities
|
Project |
Age |
Time |
Why It Works |
|
6+ |
Session of 2–3 hours |
Print multiple pieces throughout the afternoon — collection grows while they play |
|
|
4+ |
30–45 min per car |
Each print adds a car to the fleet — a full afternoon produces 3–4 cars |
|
|
5+ |
90 min for pair |
Two cars in different colors — race them while the third prints |
|
|
Miniature furniture pieces |
5+ |
15–30 min each |
Print tables, chairs, and beds throughout the afternoon — build a whole room |
Best First Prints for Gifts or Rewards
|
Project |
Age |
Time |
Why It Works |
|
Personalized name tag — child's name printed |
4+ |
15–20 min |
Fastest personal gift — name spelled out in their chosen color |
|
5+ |
15–20 min |
Quick, satisfying, immediately playable — perfect classroom or party favor |
|
|
6+ |
30 min |
Printed and painted for a specific friend — genuinely personal gift |
|
|
Trophy top — recipient's name on base |
5+ |
20–25 min |
Award for a real achievement — printed the day it happens, given that night |
Conclusion
The best 3D printed toys for kids are the ones that create the expression — the quiet, careful, proud one — that comes when a child holds something they made themselves. Not unboxed. Made.
Start with one project that matches what the child cares about most. A car for the car-obsessed. An animal for the nature-lover. A puzzle for the puzzle-solver. Print it together. Have the second project chosen before the first one finishes.
The printer stays active when there is always a next project waiting. A Toy Library that updates weekly, a design app a child can use independently, and a content ecosystem that grows with their curiosity — these are the things that turn a single print into a lifelong creative habit.
For families just getting started, AOSEED 3D printers for kids shows both current models with age guidance and pricing — useful when deciding between a first printer for a younger child and a more capable model for a growing maker.
FAQs
Can kids play with 3D printed toys?
Yes. 3D printed toys made with PLA filament and designed with appropriate part sizes are safe to play with. Inspect every finished print for sharp edges before handing it to a child, and verify that no part is small enough to present a choking hazard for the child's age. PLA is non-toxic, biodegradable, and the standard material for all family-oriented 3D printing.
Is it legal to sell 3D printed toys?
Yes, you can sell 3D printed toys. Two requirements apply. First, ensure you have the right to use the digital design file commercially — some licenses are restricted to personal use. Second, ensure the finished product meets local toy safety regulations, which in most jurisdictions include requirements around small parts, hazardous edges, and material safety for children's products.
Is a 3D printer suitable for a 7-year-old?
Seven is an excellent age for independent 3D printing with a well-designed family printer. Children at this age can navigate an app-based model library, choose designs, select filament colors, and start print jobs without adult technical help. Adult supervision is most useful for loading filament and removing finished prints from the build plate. Most 7-year-olds can manage the full workflow independently after two or three guided sessions.
What are 3D printed toys?
3D printed toys are physical objects created layer by layer by a desktop 3D printer from a digital design file. The printer reads the file and deposits material in thin horizontal layers until the finished object appears. For children's toys, FDM printing — which melts and deposits plastic filament — is the standard method because it is safe, affordable, and produces durable results with non-toxic PLA material.
What is the best material for 3D printed toys?
PLA is the best starting material for children's toys at any age. It is derived from renewable plant materials like corn starch, non-toxic, biodegradable, easy to print, and available in a wide range of bright colors. For toys that need to be more durable — outdoor toys, active-play items, objects that need to survive drops repeatedly — PETG is the natural step up. Avoid ABS for young children without dedicated ventilation, and avoid resin for any child use.
How long do 3D printed toys last?
PLA toys used for normal indoor play last for years with typical child handling. They can become brittle if stored in direct sunlight for extended periods, which is why storing toys indoors is the standard recommendation. PLA's main limitation is heat — it begins to soften above around 60°C, which means it should not be left in a hot car or near a heat source. For outdoor or especially rough-use toys, PETG holds up better to environmental stress.
Is 3D printing safe for a 3-year-old?
With strict adult supervision and age-appropriate models, a 3-year-old can participate in 3D printing as a watching and choosing experience. Print only single-piece models with no detachable parts and no geometry smaller than 25mm in any dimension. The child chooses the color, presses the final button with help, and watches through the enclosed printer's window. Keep them away from the printer during operation and during cool-down after printing.
What is the 20 toy rule for kids?
The 20 toy rule is a parenting philosophy that suggests limiting a child's accessible toys to around 20 items at any one time to encourage deeper focus and more creative play with fewer things. 3D printing fits this philosophy well — a child can 'retire' a print they have finished with and replace it with a new one, keeping the collection intentional rather than accumulated. The printer makes each addition deliberate and meaningful rather than passive.
What are easy 3D printing ideas for kids just getting started?
The best first ideas are single-piece models that print in under an hour and require no assembly. A simple figurine in the child's favorite color. A spinning top. An animal bookmark. A push-along car. These print reliably, produce an immediately usable object, and demonstrate the full cycle from tapping a button to holding something real. From there, the second project is the child's choice — which is where the habit begins.
Sources
- Printables — Dinosaur Stackable Toys (PLA, multicolor, great for balance play), Dinosaur Stackable Toys, 2021.
- Printables — Action Figures 4 Toy Characters (customizable, part-swap), Action Figures 4 Toy Characters, 2023.
- Printables — Interlocking Puzzle Blocks (snap-together, open-ended), Interlocking Puzzle Blocks, 2022.
- Printables — Pull-Back Race Cars (wind and race, immediate play), Pull-Back Race Cars, 2022.
- Thingiverse — Simple Fidget Toy Set (tactile play items for kids), Simple Fidget Toy Set, 2019.
- MakerWorld — Linkable Train Cars (modular, connect-and-rearrange), Linkable Train Cars, 2022.
- Reddit r/3Dprinting — What Toys Have You Printed for Your Kids?, What Toys Have You Printed for Your Kids, 2023.
- CDC / NIOSH — Approaches to Safe 3D Printing (ventilation, emissions guidance), Approaches to Safe 3D Printing, 2023.
Cool Things to 3D Print for Kids Who Love Animals
Some children go through a dinosaur phase that never really ends. Others have an entire bedroom dedicated to ocean creatures, or a stuffed animal collection that runs across three shelves. For parents of children like these, a 3D printer is not just a gadget. It is a species factory.
The best part of 3D printing for animal-obsessed kids is not the novelty of watching something appear on a build plate. It is that the animal that appears is the one they asked for, in the color they picked, printed at the size that feels right to them. That ownership changes how they play with it.
At AOSEED, the most consistently printed models are animals — because children keep coming back to them. This guide covers the best cool things to 3D print for kids who love animals, organized by type, with material guidance, safety notes, and project ideas families can start this weekend.
Why Animal-Themed 3D Prints Are Perfect for Kids

Most parents find that animal-themed prints stay off the shelf longer than any other category. Here is why.
The Connection Between Animal Play and Creativity
A child who loves foxes does not print an articulated fox and put it down. They give it a name. They build it a home from a cardboard box. They bring it to the dinner table to show their grandparents. The emotional hook of animal-themed prints is different from abstract toys because the child already has a relationship with the species before the printer starts.
That emotional investment is what turns a 20-minute print into a months-long play companion. It is also what keeps children coming back to the printer asking for the next animal in their collection.
Animals Help Teach Empathy and Responsibility
When a child names a 3D-printed fox and decides it needs a den, they are practicing the same imaginative thinking behind empathy. What does it need? Where does it sleep? Is it safe? These questions do not need prompting. They come from the same instinct children show toward real animals and plush toys. A 3D-printed animal that the child made themselves occupies a particularly powerful position in that imaginative space — because they created it, they care for it.
For children who are not ready for a real pet, a growing collection of printed animals provides a gentler version of the same lesson. They learn to care for something beyond themselves, through the medium of creative making.
Interactive, Movable Designs Make Playtime Engaging
A static animal figurine gets picked up once and placed on a shelf. An articulated fox whose tail bends gets picked up every day. The difference is movement. Print-in-place articulated models — where the joints come off the build plate already working — create an immediate surprise that children find genuinely magical. The creature flexes, the shark swims, the panda poses. That movement is the hook.
|
Print Type |
How It Moves |
Best Animal Examples |
Play Value |
|
Print-in-place articulated |
Joints move freely off the build plate — no assembly |
Fox, panda, shark, whale shark, elephant, hippo |
Very high — immediate tactile movement on first pickup |
|
Poseable figurine |
Rigid but with stable standing pose — display-friendly |
Dinosaurs, cats, bears, dogs |
Medium — display + storytelling play |
|
Puzzle / snap-fit |
Pieces connect and separate for repeated assembly |
Animal puzzles, skeleton models |
High for older children — satisfying 'solved it' feedback |
|
Functional animal prop |
Does something practical — bookmark, stamp, holder |
Animal bookmarks, playdough stamps |
High — daily use maintains connection to the print |
Top Animal-Themed 3D Printing Projects for Kids
These four categories cover the animal types children ask for most. Each category includes specific model examples with direct links to verified files.
Articulated Animals for Hands-On Fun

|
�� Articulated Animals — The Print That Moves |
|
Articulated flexi animals are the most played-with category in kids' 3D printing. They come off the build plate already moving — no glue, no screws, no assembly. The fox's tail bends. The elephant's trunk sways. The panda poses in ten different positions. Children who receive these as first prints are almost always immediately asking for the next one in the collection. |
|
Example models: Articulated Fox (Printables), Flexi Elephant (MakerWorld), Articulated Panda with 10 joints (Printables), Articulated Hippo (MakerWorld) Print time: 45–90 min depending on size Best age: Ages 5+ — no small parts to lose |
The Articulated Panda on Printables features 10 joints and prints as a single piece — no assembly required. The Flexi Elephant on MakerWorld is described as support-free and easy to print, making it a reliable starting point for families new to articulated models.
Fun with Prehistoric Creatures

|
Prehistoric Creatures — Bringing Dinosaurs Back |
|
Dinosaur prints rank among the most searched models for children on every platform. The range goes from simple single-piece standing dinosaurs for younger children to multi-part skeleton assemblies and articulated T-rex models for older kids. The skeleton assembly models particularly reward STEM-curious children — they print individual bones and reconstruct the animal, like a real paleontologist. |
|
Example models: T-rex skull assembly (Thingiverse), standing stegosaurus figurines, articulated dino skeleton kits, poseable velociraptor Print time: 20–180 min depending on complexity Best age: Ages 5+ for figurines; ages 9+ for skeleton assemblies |
Dinosaur prints work especially well as part of a larger play world. A child who prints a T-rex this week will want a triceratops next week, then a pterodactyl, then a swamp habitat to put them in. Each print extends the session the week before. This is the project pipeline that keeps 3D printing active in a family home for months rather than weeks.
Marine Animal Models for Undersea Adventures

|
Marine Animals — The Ocean in Your Hands |
|
Sea creatures are among the most visually striking animal prints because of the movement inherent in their design. An articulated shark that 'swims' through the air when a child holds it. A whale shark divided into seven movable segments. A betta fish with a flowing tail designed to mimic real movement. These prints are particularly popular with children aged 7 to 11 who are in an ocean or marine biology phase. |
|
Example models: Articulated Shark — 4 versions (Printables), Articulated Whale Shark — 7 segments (Printables), Articulated Betta Fish (MakerWorld), Cute Orange Crab Flexi Print time: 60–120 min for articulated sea creatures Best age: Ages 6+ — check shark model for sharp teeth note |
One important note: the Articulated Shark on Printables offers four versions — the description specifically notes that non-movable versions are recommended for younger children because the articulated version's teeth can be sharp. This is exactly the kind of model-specific safety guidance parents should look for before printing for children under 8.
Cute Animal Figures for Role-Play Games

|
Cute Animal Figures — Characters for Every Story |
|
Not every child wants movement from their animal prints. Some want characters — specific creatures that fit into the game they are already playing. A walking penguin for a polar expedition. A poseable cat for a dollhouse. A small rabbit that fits in the same collection as their existing toys. These figurines are typically faster to print, simpler in design, and work well as gifts or classroom show-and-tell objects. |
|
Example models: Animal Bookmark Collection (MakerWorld), standing cat/rabbit/dog figurines, walking penguin models, Children Animal Puzzle (MakerWorld) Print time: 15–45 min for single figurines and bookmarks Best age: Ages 4+ — choose models without small parts for young children |
The Animal Bookmark Collection on MakerWorld is one of the most practical animal prints for children — the animal sits on top of the page and the child uses it every time they read. Each bookmark takes under 20 minutes. The full Animal Bookmarks set on Printables prints as a set of three in about 41 minutes total.
How to Choose the Right 3D Printing Materials for Animal Projects

The choice of filament affects how the animal feels, how durable it is, and whether it is safe for the age of the child handling it. Here is the practical breakdown.
|
Material |
Made From |
Safety |
Best For |
Flexibility |
|
PLA |
Corn starch / sugarcane — renewable |
Non-toxic, biodegradable — safest option |
Most animal prints, figurines, bookmarks |
Rigid — holds shape well |
|
PETG |
Polyethylene terephthalate glycol |
Low fumes, safe for home use |
Outdoor animal toys, durable parts |
Slightly flexible |
|
TPU |
Thermoplastic polyurethane |
Non-toxic at standard temps |
Articulated animals needing movement |
Very flexible — bends and bounces |
|
ABS |
Petroleum-based plastic |
Requires ventilation — not for young kids |
Advanced builds, heat-exposed parts |
Rigid — slightly impact-resistant |
Is PLA Safe for Kids' Animal Toys?
PLA (polylactic acid) is made from renewable plant materials — typically corn starch. According to the PLA safety data sheet published by NatureWorks, a leading PLA producer, the material does not contain heavy metals or known carcinogens and is classified as non-hazardous under normal conditions. It does not emit significant fumes at standard printing temperatures. For animal toys that children carry around, bend, and handle repeatedly, PLA is the correct default choice.
One practical note: PLA prints can have sharp layer lines if supports are not removed cleanly. Run a finger along the finished model before giving it to a child under 5. A quick pass with light sandpaper smooths any rough edges from support removal. For young children, choose models specifically designed as 'no support' — these print with clean edges and require no post-processing.
Choosing Flexible Filaments for Movable Parts
Most articulated animal models are designed for standard PLA and work well with it. The print-in-place joint gaps are calibrated for PLA's rigidity. TPU (thermoplastic polyurethane) adds flexibility — useful for animals whose limbs need to genuinely bend and hold a pose rather than snap back to position. TPU is slightly harder to print and usually requires a direct-drive extruder, so check your printer's compatibility before buying a spool.
For most families, especially at the start, PLA handles the full range of articulated animal prints in this guide. TPU becomes interesting when a child wants to create custom soft toys or squeezable animals — which is a project for after a few months of successful PLA prints.
How to Ensure Safety with 3D Printing Materials
The U.S. Consumer Product Safety Commission's toy safety guidelines specify that toys intended for children under 3 must not contain small parts. This applies directly to 3D prints: any animal model with legs or appendages smaller than about 25mm in diameter is a potential choking hazard for children under 3. Choose thick-bodied animal designs for very young children, and use the models marked as 'no sharp edges' or 'child-safe' in their descriptions.
|
Age Group |
Material Recommendation |
Size Requirement |
What to Avoid |
|
Under 3 |
PLA only — avoid TPU for this age |
All parts larger than 25mm diameter |
Articulated models with thin moving parts |
|
Ages 3 to 6 |
PLA primary — good surface finish |
No small parts that can detach |
Resin prints — require chemical handling |
|
Ages 6 to 12 |
PLA and PETG — durable for active play |
Standard sizing is fine |
ABS without ventilation |
|
Ages 12+ |
PLA, PETG, or TPU for advanced builds |
No restriction |
Resin without adult supervision and PPE |
Making the 3D Printing Process Easy and Fun for Kids

The best animal print is the one that comes out right the first time. Choosing the right printer setup is as important as choosing the right model.
Why Enclosed Designs Matter for Family Use
A 3D printer nozzle reaches above 200°C during printing. On an open-frame printer — which covers most budget models — that nozzle and the moving parts are fully accessible. For a home with children, an enclosed printer puts everything behind a sealed chamber. Children watch through the window. Their fingers stay outside. The AOSEED X-MAKER JOY uses this design specifically for family use — fully enclosed with a door sensor that pauses the print automatically if the chamber opens mid-session.
An enclosed design also helps print quality for animal models. Temperature consistency inside the chamber reduces warping on longer prints — which means that 90-minute articulated whale shark has a better chance of coming out clean and ready to play with.
Is PLA Filament Safe for Kids?
Yes. PLA is non-toxic, biodegradable, and the standard filament for every family-oriented printer on the market. It does not require ventilation beyond what is normal in a bedroom or living room. The finished prints are safe to handle, carry around, and play with. PLA is the material behind every model in the AOSEED Toy Library, and it handles the full range of animal prints in this guide.
The one thing to do before handing any print to a young child: check the model for rough edges from support material. If the animal was printed with supports, inspect the area where they were removed. A gentle sand with fine-grit sandpaper takes 60 seconds and makes the toy completely smooth for small hands.
How Noisy Is a 3D Printer in a Home Setting?
This is the question parents ask most often, and the honest answer is: quieter than most expect. Modern family-oriented printers with silent motor drivers operate at 45 to 50 decibels — roughly equivalent to a running refrigerator or a quiet background fan. Running a print while kids do homework or watch a film is not disruptive.
|
Sound Level |
Equivalent |
3D Printer Context |
|
35–40 dB |
Quiet library, soft whisper |
Silent mode on well-designed family printers |
|
45–50 dB |
Refrigerator hum, background fan |
Typical family printer during a standard 2-hour print |
|
55–60 dB |
Normal conversation in a room |
Some older or budget open-frame models at standard settings |
The Educational Value of 3D Printing Animal Models for Kids

Animal projects are one of the most effective ways to embed learning into making. The child thinks they are getting a toy. They are also learning biology, engineering, and creative thinking.
Teach About Animal Anatomy Through 3D Prints
When a child holds an articulated animal and bends its spine, they feel immediately how vertebrates move. An articulated fox has a spine made of printed segments — the child can count them, feel how they connect, and understand why a real fox can twist to catch prey. The AOSEED Toy Library includes anatomically considered animal models that translate real animal movement into playable prints. Combined with a quick conversation about why that particular animal moves that way, a 20-minute print session becomes a biology lesson that sticks.
For older children, printed skeleton models go further — individual bones that assemble into a complete dinosaur or animal structure teach the same concepts paleontologists use when reconstructing fossil findings. These are particularly effective for school reports or science fair projects.
Incorporating STEM Learning Through Creative Play
The AOSEED X-MAKER supports creation kits that pair printed parts with mechanical components — a useful extension once a child has mastered animal figurines and wants to build animals that move under their own power. A motorized bird that flaps, a rolling turtle with a printed shell chassis — these builds introduce gear ratios, motor mechanics, and iterative design in a context the child already cares about.
Even without creation kits, the basic act of printing an articulated animal introduces mechanical thinking. Why do the joints work? Why does the whale shark's tail move more freely than the shark's body? These questions, which children ask naturally, are engineering questions with real answers.
Animal-Themed Prints as Part of a Larger Learning Project
A 3D-printed animal collection becomes a classroom resource when the child is studying habitats, ecosystems, or food chains. Print a predator and its prey for a science project. Print an endangered species and research why it is threatened. Print a set of ocean creatures and build a diorama around them. The printer becomes a research tool rather than just a toy source — which changes how a child talks about what they make.
For homeschool families, animal prints are among the most versatile learning props available. Every subject from biology to history to geography can be anchored by a printed model that the child touched every step of the way.
How to Start 3D Printing with Kids Safely at Home

The setup for a first animal-printing session does not need to be complicated. Three things done right from the start make everything that follows much smoother.
Why Enclosed Designs Matter for Family Use
An enclosed printer in a shared family space is the right setup for animal printing with children of any age. The chamber keeps hot components away from curious hands, maintains temperature for longer prints, and contains any fumes from the filament. For families where the printer will live on a kitchen counter, in the living room, or anywhere younger siblings might approach, an enclosed design is not optional.
Is PLA Filament Safe for Kids' Toys?
Yes, with consistent use of quality PLA from reputable brands. The material itself is safe. The safety check is about the finished print — inspect for sharp support removal marks before giving the animal to a young child, and confirm all parts are sized appropriately for the child's age. For children under 3, avoid models with thin appendages. For everyone else, PLA animal prints are safe for regular handled play.
How to Keep First Projects Calm, Simple, and Low-Frustration
For a first animal print, choose a single-piece no-support model under 60 minutes. Something the child already cares about — the animal that has been requested most often or the one that matches the species on their bedroom wall. Have the filament color chosen before the session starts. Let the child press the start button. Stay nearby but let the print run without intervention.
• Start with a model marked 'no supports required' — these print cleanly without post-processing.
• Choose a print time under 60 minutes for the first session — long enough to feel significant, short enough to hold attention.
• Let the child choose the filament color — that decision creates ownership before the print starts.
• Have the second project chosen before the first one finishes — the gap between prints is when enthusiasm can drop.
• If the model has any rough edges, sand them together as a short post-print activity rather than doing it out of sight.
Real Project Ideas Families Can Start With First

Here are practical starting directions organized by what the family is looking for on a given afternoon.
Best First Prints for Imaginative Play
|
Animal Project |
Print Time |
Ages |
Why It Starts a Collection |
|
Articulated Fox — print-in-place, scalable |
45–60 min |
5+ |
Bends and poses — becomes the character in every game that follows |
|
Cute standing rabbit figurine |
20–30 min |
4+ |
Simple, sturdy, and immediately part of a pretend-play world |
|
Articulated Hippo — single piece, no assembly |
45–60 min |
5+ |
MakerWorld notes it is 'easy to print and results in a good toy' |
|
Mini animal family set (3 species) |
20–35 min each |
4+ |
Prints in a session — the family plays with the set together |
Best First Prints for Calm, Screen-Light Creative Time
|
Animal Project |
Print Time |
Ages |
Why It Works for Quiet Time |
|
Animal Bookmark set — 3 bookmarks total |
41 min total |
5+ |
Each bookmark goes into the book they are reading right now |
|
Children Animal Puzzle — flat, no supports |
30–45 min |
5+ |
Quiet sorting and matching play — designed for children |
|
Poseable cat or small dog figurine |
20–30 min |
4+ |
Sits on the desk as a companion — low-energy, continuous presence |
|
Geometric sea turtle — decorative but sturdy |
25–40 min |
6+ |
Bridges nature and geometric thinking — both calm and beautiful |
Best First Prints for Sibling Play or Family Game Time
|
Animal Project |
Print Time |
Ages |
How Siblings Play With It |
|
Articulated Shark — 4 versions for different ages |
60–90 min |
5+ |
Each sibling picks a different version — they race their sharks |
|
Articulated Whale Shark — 7 segments |
75–100 min |
6+ |
Pass it around the table — the segments make it fun to hold |
|
Mini animal battle set — predator and prey |
20–35 min each |
6+ |
The children invent rules — the game comes from what they made |
|
Animal puzzle race — who assembles fastest |
30–45 min total |
5+ |
Print one puzzle each — sibling competition with a family print session |
Best First Prints for Gifts, Classrooms, or Rainy Afternoons
|
Animal Project |
Print Time |
Ages |
Why It Works as a Gift or Classroom Piece |
|
Animal Bookmark — personalized species for recipient |
15–20 min each |
5+ |
Quick to print in recipient's favorite animal — genuinely personal gift |
|
Dinosaur skeleton assembly — science fair prop |
90–120 min total |
8+ |
Brings to class for biology or history report — impressive and tactile |
|
Mini endangered species figurine with fact card |
20–35 min |
7+ |
Child researches the species and writes the card — learning embedded |
|
Flexi animal collection — one per child in class |
45–75 min each |
5+ |
A teacher can print a set across a week — one per student |
Conclusion
The coolest things to 3D print for kids who love animals are the ones that survive from the build plate into regular daily play. An articulated fox that gets picked up every morning. An ocean creature collection that grows one species per weekend. A bookmark collection that turns a child's reading shelf into a safari.
Animal-themed prints combine the novelty of 3D printing with something children already love. That combination produces a longer engagement cycle than almost any other project category — because there is always a new species to print, a new habitat to build, and a new story to tell around the animals already on the shelf.
For families looking for a printer built around this kind of sustained family use, AOSEED 3D printers for kids shows both models side by side with age guidance. The Toy Library behind each printer updates every week — which means there is always a new animal waiting to be printed next Saturday morning.
FAQs
Can 3D printing be safe for kids?
Yes, with the right printer and the right filament. A fully enclosed printer keeps all hot components away from children during a print session. PLA filament is non-toxic and biodegradable. For families using an enclosed printer with PLA and adult supervision during filament loading and print removal, 3D printing is a safe and enjoyable activity from around age 4 upwards.
Is PLA safe for kids?
Yes. PLA is made from renewable plant materials like corn starch, is non-toxic, and does not produce significant fumes at standard printing temperatures. It is the most widely used filament for children's toys and animal models. The finished prints are safe to handle for all ages — just inspect prints for any rough edges from support material before handing them to very young children.
What animal-themed models are easiest to print for kids?
Print-in-place flexible animals are the easiest category. They print as a single piece with no support removal and no assembly. The articulated fox, flexi elephant, articulated hippo, and articulated panda models all meet this standard — they come off the build plate already moving, with no post-processing required. For very young children aged 4 to 5, choose simple single-piece standing figurines with thick bodies and no small parts.
How do I pick the right animal project for my child?
Follow the child's current obsession. If they are in a dinosaur phase, start with a standing T-rex figurine and build toward a skeleton assembly model as they develop confidence. If they love ocean animals, the articulated shark series provides a natural progression from simpler to more complex. The key is matching the first print to something they already care about — ownership of the subject drives engagement with the process.
Can a 7-year-old use a 3D printer?
Yes, with a well-designed printer and basic safety habits. A 7-year-old can browse a model library, choose the animal they want, select a filament color, and tap print. Adult supervision is most useful for loading the filament at the start and removing the finished print at the end. Most 7-year-olds can manage the full printing workflow independently after two or three guided sessions.
What can a 3D printer make for kids?
For animal lovers: articulated flexi creatures, dinosaur models and skeleton assemblies, marine life figurines, wildlife figurines, animal bookmarks, and animal puzzle sets. Beyond animals: working RC cars and robots via creation kits, personalized name tags and gifts, seasonal decorations, and STEM project models. The range is determined by the content library and the child's growing design confidence.
Should a 12-year-old have a 3D printer?
Absolutely. By 12, most children are ready to move from printing library models to modifying and eventually designing their own animals. A 12-year-old who prints an articulated shark can start adjusting the joint spacing. One who prints a dinosaur skeleton can research accurate proportions and resize the bones. These design skills — spatial reasoning, iterative thinking, tolerance understanding — are exactly what STEM education is trying to build.
How noisy is a 3D printer?
Modern family-oriented printers with silent motor drivers typically operate at 45 to 50 decibels. This is comparable to a running refrigerator or a quiet background fan. You can print a 90-minute articulated animal model in the corner of a living room during homework or reading time without it being disruptive. Cheaper open-frame printers can be louder — enclosed designs generally also buffer sound more effectively.
How do I choose age-appropriate 3D printing projects for kids?
Use three filters. Does the finished model have any parts smaller than 25mm? If yes, avoid for children under 3. Does the model require post-processing support removal with sharp tools? If yes, do that step yourself for children under 7. Does the assembly require fine motor skills beyond the child's level? Start simpler. For ages 4 to 6, choose single-piece no-support models. For ages 7 to 9, add articulated prints. For ages 10 to 12, introduce puzzle assemblies and multi-part skeleton builds.
Sources
- Printables — Animal Bookmarks (set of 3, full set 41 min), Animal Bookmarks, 2022.
- Printables — Articulated Fox (print-in-place, no support, scalable), Articulated Fox, 2024.
- Printables — Articulated Panda Print-in-Place (10 joints), Articulated Panda Print-in-Place, 2024.
- Printables — Articulated Shark (4 versions, non-movable for children), Articulated Shark, 2024.
- MakerWorld — Flexi Elephant Articulated (support-free, easy print), Flexi Elephant Articulated, 2024.
- MakerWorld — Children Animal Puzzle (PLA or ABS, 10–25% infill), Children Animal Puzzle, 2024.
- CPSC — Toy Safety FAQ (small parts requirements for children under 3), Toy Safety FAQ, 2024.
3D Printing Projects for Kids That Turn Into Real Playtime

Most families go through what I call the junk-drawer phase of 3D printing. A shelf fills up with tiny plastic animals, a few name tags, a test cube from the first print session. Cute. But nobody touches them.
The novelty of watching an object appear layer by layer is real. It lasts about a week. What lasts longer is having a printer that makes things kids actually use, play with, and ask to print again.
This guide is about that second category. Not the coolest-looking prints. The ones that survive the trip from the build plate to the toy box and stay there.
At AOSEED, the question behind every model in the Toy Library is the same one we use to filter this list: will a child still want this next Tuesday? If the answer is yes, it belongs here.
Why 3D Printing Projects for Kids Work Best When They Lead to Real Play

This article is not a list of cute prints. It is a guide to projects that stay useful after the printer stops. The difference matters more than most parents expect when they buy their first printer.
The difference between a quick print and a repeat-play project
A quick print is usually a static model — a small animal, a figurine, a keychain tag. Fun to watch appear. Less fun the next day. A repeat-play project has what toy designers call 'play value.' The object does something. It bends, stacks, rolls, solves, or invites another person in.
An articulated dragon whose tail bends when you hold it. A set of stackable bricks that expands what the child already owns. A spinning top the child can race against their sibling. These objects get picked up again. The static animal on the shelf does not.
|
Type |
What It Is |
What Happens After the First Day |
|
Quick print |
Static model — animal, figurine, keychain |
Usually forgotten within a week |
|
Repeat-play print |
Moving, stacking, solving, or sparking imaginative play |
Gets picked up repeatedly, improved, gifted, or reprinted |
|
Functional print |
Something the child uses in daily life — holder, tool, tag |
Stays in use as long as the function is needed |
Why parents care about safety, setup, and boredom
Three things stop parents from using a 3D printer after the first month. Safety concerns, usually because the setup involved an open-frame machine with an exposed nozzle near younger children. Complexity, because the software requires a laptop and adult involvement every single session. And boredom, because the child ran out of ideas.
All three problems have the same solution: the right ecosystem. A fully enclosed printer in a shared family space. A guided app a child can operate independently. A content library that refreshes before the child exhausts it.
How hands-on play makes 3D printing more meaningful for kids
When a child realizes they can print a replacement part for a broken toy, a prop for a game they invented, or a custom token for the board game they play every weekend — 3D printing stops being a machine and starts being a tool they own. That shift from passive observer to active creator is the whole point.
It also transfers to other thinking. A child who iterates on a design — printing it, testing it, noticing what's wrong, reprinting it — is practicing the same cycle that engineers use professionally. The learning is in the making, not in a lesson.
What Makes a Good 3D Printing Project for Kids?

Before the ideas list, here is the four-question filter parents can use. Every project in this guide passes all four.
|
Criterion |
What to Look For |
Why It Matters |
|
Age-appropriate size and shape |
Chunky geometries for young children — no small parts that could break off |
Matches fine motor development and meets safety requirements for the age group |
|
Easy printing, low-frustration assembly |
Print-in-place models or single-piece designs — no glue or tiny parts |
Eliminates the assembly frustration that discourages children after a first attempt |
|
Motion, stacking, solving, or play |
Objects that bend, roll, stack, or fit together |
Play value sustains interest beyond the novelty of the first print |
|
Personalization potential |
The child chose the color, added their name, or picked the design themselves |
Ownership of the creation increases the chance it stays out of the junk drawer |
Age-appropriate size, shape, and complexity
For children aged 4 to 7, the rule is simple: chunky and smooth. Models with thick walls, rounded edges, and no pieces smaller than a marble. As children grow, they can handle finer details and multi-part builds. But for a first print, the goal is success — something that comes off the build plate looking like the picture and survives being dropped on a playroom floor.
Easy printing with low-frustration assembly
Print-in-place designs are the gold standard for kid-friendly printing. The model comes off the build plate already working — a dragon whose tail bends, a ring whose inner band spins, a jointed caterpillar that moves. No assembly, no frustration, no 'can you help me glue this.' The child picks it up and starts playing.
Projects that move, stack, solve, or spark pretend play
Objects with play value fall into five categories. They move. They stack or connect to something else. They solve a puzzle or challenge. They serve as a prop in a game or story the child already plays. Or they are genuinely useful in daily life. Any one of these is enough. A print that does none of them is a display piece, and display pieces collect dust.
Designs kids can personalize and feel proud to keep
A bookmark with the child's name on it. A keychain in their favorite color. A game piece designed for their specific character. When a child has a say in the design — even just the color selection — they feel ownership of the result. That ownership is the difference between a print that goes into a box and a print that goes into a pocket.
Best Types of 3D Printing Projects for Kids That Turn Into Real Playtime

Instead of a long random list, here are the five categories that consistently produce the highest play value across age groups.
Articulated Animals and Moving Creatures

|
Articulated Animals — The Print-in-Place Favorite |
|
Articulated models — flexi dragons, segmented sharks, jointed axolotls, caterpillars with working legs — are the most consistently played-with 3D prints for children aged 5 to 12. They come off the build plate already moving, no assembly required. The first time a child picks one up and the tail bends in their hand is the moment that convinces most families that 3D printing is genuinely worth it. These toys are durable, tactilely satisfying, and genuinely surprising every time. |
|
Examples: Flexi rex, articulated dragon, jointed snake, caterpillar, shark, axolotl, fidget slug Play value: Immediate movement and surprise — the toy works before the child puts it down the first time |
Puzzles, Matching Games, and Brain-Play Prints

|
Puzzles and Games — Play That Comes Back |
|
3D-printed puzzles get played with repeatedly because the challenge never disappears. A tangram set, a sliding tile puzzle, or a set of custom shape-sorting blocks invites the child to engage again and again. Educational models like fraction blocks — where a child stacks halves and quarters to see that they are equal — also belong here. These prints work as standalone toys and as tools for learning at home or in class. |
|
Examples: Tangrams, sliding puzzles, fraction blocks, shape sorters, matching games, brain teasers Play value: Repeatable challenge — the puzzle resets every time, so the toy never runs out of value |
Pretend-Play Accessories and Role-Play Sets

|
Pretend-Play Props — Building the Story Around the Print |
|
Toy kitchen sets, miniature furniture, treasure coins, magic wands, custom play food — these prints extend the imaginative worlds children already live in. A child who loves pirates prints the coins. A child who loves cooking prints the plates. The object does not have to do anything mechanical. Its job is to exist inside the story, and it does that very well. Print in matching colors to make sets that feel cohesive. |
|
Examples: Play food, treasure coins, fairy doors, wands, dollhouse furniture, miniature kitchen sets Play value: Deepens existing imaginative play — the child writes the story around what they made |
Cars, Ramps, and Other Motion-Based Toys

|
Motion Toys — If It Rolls, It Gets Played With |
|
Wheeled vehicles, gravity ramps, spinning tops, and balloon-powered cars all generate the same response from children: they want to race them, improve them, and race again. Simple cars with snap-on wheels are a natural starting point. Spinning tops open up a physics experiment without anyone calling it one. A child who prints two tops with different proportions and races them is doing design iteration without realizing it. |
|
Examples: Rolling cars, spinning tops, gravity ramps, balloon-powered vehicles, wheeled animals Play value: Motion creates competition — the child naturally wants to improve and repeat |
Small Useful Prints Kids Enjoy Using Every Day

|
Functional Prints — When Practicality Becomes Pride |
|
The most underrated category. When a child uses something they made every day — a bookmark with their name, a hook for their school bag, a holder for their favorite pencil — they are reminded of what they can make. This category builds the habit of thinking 'I could print that' rather than 'I need to buy that.' Practical items stay in daily use far longer than decorative ones. |
|
Examples: Name bookmarks, backpack hooks, pencil holders, desk organizers, plant pot labels, keychains Play value: Daily use means daily reminder — the printer becomes part of how the child sees the world |
How to Choose Projects by Age and Interest

The right project for a 5-year-old is different from the right project for a 10-year-old. Here is the practical breakdown, with the most important distinction being complexity and assembly.
|
Ages 4–6 |
Best Project Types |
Skills Built |
Approach |
|
Chunky animals, simple coins, playdough stamps, basic shapes |
Fine motor, color recognition, sensory play, cause and effect |
Adult selects model — child picks color and taps print — adult removes print |
|
Ages 7–9 |
Best Project Types |
Skills Built |
Approach |
|
Flexi animals, spinning tops, puzzles, pretend-play sets, vehicles |
Mechanical curiosity, problem-solving, imaginative play |
Child browses library, selects model, and taps print independently |
|
Ages 10–12 |
Best Project Types |
Skills Built |
Approach |
|
Custom designs, gear sets, multi-part builds, creation kits |
Design thinking, engineering principles, iterative improvement |
Child designs or modifies models, manages print settings with guidance |
Ages 4 to 6: Simple Shapes, Snap-Together Fun, and Guided Play
For this age group, instant gratification is the goal. Choose models with thick walls, no small parts, and no assembly. A chunky dinosaur figurine in bright red PLA takes 25 minutes. The child holds a warm object they watched appear out of nothing. That is enough for day one. Build on it from there.
Let them choose the color. Let them press the final button. Let them carry the finished print around the house for the rest of the afternoon. These three things are more important than which specific model you print.
Ages 7 to 9: Moving Toys, Puzzles, and Themed Characters
Children in this range have the patience for prints up to 90 minutes and the fine motor skills to interact with more complex moving parts. This is the prime age for articulated flexi toys, print-in-place mechanisms, and themed sets they can expand over multiple sessions. A child who printed a flexi dragon this week wants to add a castle wall next week. Keep the next project chosen and ready.
Ages 10 to 12: More Customization, Design Input, and STEM-Style Builds
Older children are ready to move from 'choosing from a library' to 'tweaking the design.' Guided apps that let them adjust the size of a name tag or add a custom detail are the natural next step. For children who want to go further, free tools like Tinkercad introduce basic CAD modeling in a browser window. The AOSEED X-MAKER is designed for exactly this transition — supporting the creation kits and precision needed for STEM builds that actually work mechanically.
Picking Projects by Interest: Animals, Vehicles, Gifts, Games, or Classroom Fun
Always follow the child's current obsession. If they are into space, print a modular rocket. If they love horses, print a poseable horse figurine. If they are working on a school project, print a model that supports it. The fastest way to lose a child's interest in 3D printing is to decide what they should print rather than asking what they want to make.
|
Child's Interest |
Starting Project |
Why It Works |
|
Animals |
Flexi articulated animal in favorite species |
Immediate movement and personalization by species choice |
|
Vehicles |
Rolling car or gravity ramp |
Motion creates racing, competition, and iteration naturally |
|
Giving gifts |
Name bookmark or personalized keychain |
Child experiences the pride of giving something they made |
|
Puzzles / games |
Tangram set or spinning top pair |
Replayable challenge — the toy doesn't run out |
|
Classroom use |
Fraction blocks or planet scale model |
Connects to learning without feeling like homework |
How to Start 3D Printing with Kids Safely at Home

Safety is the first question most parents ask, and the good news is that modern family printers have already solved the main issues. Here is what to look for and what to know.
Why Enclosed Designs Matter for Family Use
The nozzle on a 3D printer reaches above 200°C during printing. An open-frame printer leaves that nozzle and the moving build plate fully accessible. In a home with young children, this is a real hazard. A fully enclosed printer puts all hot components behind a closed chamber — children watch through the window, not through open air. The U.S. Consumer Product Safety Commission's toy safety guidelines are a useful reference when evaluating whether any product, printed or purchased, is appropriate for the age group in your home.
The AOSEED X-MAKER JOY is specifically designed for family home use — fully enclosed with a door sensor that pauses the print if the chamber is opened mid-session. This means a curious younger sibling wandering in during a print does not create a safety incident.
|
Safety Feature |
What It Does |
Who Benefits |
|
Fully enclosed build area |
All hot parts sealed inside — children cannot reach the nozzle |
Essential for any home with children under 12 |
|
Door-open sensor |
Print pauses automatically if the chamber opens mid-print |
Prevents accidents when younger children approach |
|
Non-toxic PLA filament |
Plant-based, biodegradable, low odor at normal temperatures |
Safe as the primary material for all children's projects |
|
Silent mode |
Reduced operating noise during long print sessions |
Comfortable in shared bedrooms and living rooms |
|
Child-lock screen |
Prevents accidental changes to settings mid-print |
Useful in households with younger children |
Is PLA a Practical Choice for Kid-Friendly Projects?
PLA (polylactic acid) is made from renewable plant materials — typically corn starch. It is non-toxic, biodegradable, and does not produce significant chemical fumes at standard printing temperatures. NatureWorks, the primary global PLA producer, publishes full safety data sheets confirming these properties. For children's toy-quality prints that get handled regularly, PLA is the correct default choice. It handles the full range of projects in this guide and is the standard filament for every family-oriented printer on the market.
How Noisy Is a 3D Printer in a Home Setting?
This question comes up a lot, and the honest answer is: quieter than you probably expect. A 2022 NIST study on desktop 3D printers found average sound pressure levels around 12 decibels above background when multiple printers were running simultaneously. A single family printer in a bedroom or living room typically operates at under 50 decibels — similar to a refrigerator hum or a quiet conversation.
|
Decibel Level |
Equivalent Sound |
3D Printer Context |
|
30–40 dB |
Quiet library, soft whisper |
Silent mode on family-oriented printers |
|
45–50 dB |
Quiet conversation, background fan |
Typical family printer during a standard print |
|
55–60 dB |
Normal conversation in a room |
Some older or open-frame machines at standard settings |
|
65+ dB |
Vacuum cleaner, busy office |
Not typical for modern family printers |
Most parents find that after the first week they stop noticing the printer is running. The printing sound blends into background household noise. Running a print during homework time or before bed is rarely an issue.
How to Keep First Projects Calm, Simple, and Low-Frustration
The single best thing you can do for a first session is choose the project before the session starts. Do not leave the child browsing for 20 minutes feeling overwhelmed by choice. Pick one print — something under 45 minutes — and have it ready.
- Let the child choose the filament color. That small decision creates ownership.
- Let the child press the final button to start the print. 'I started this' matters.
- Stay nearby but do not hover. Let the child watch, walk away, check on it. This is normal printing behavior.
- Have the next project decided before the first one finishes. The gap between prints is when enthusiasm can drop.
- If the first print fails, treat it as information rather than a problem. 'What do you think happened?' is the most useful question.
Why Some Kids Keep Using 3D Printing After Week One

The difference between a printer that collects dust and one that stays on a child's desk is not the hardware. It is what comes after the first successful print.
A Toy Library Gives Kids a Next Project to Look Forward To
The most common reason a 3D printer stops being used is blank-page boredom. The child has printed the obvious first-tier projects and does not know what comes next. A regularly updated Toy Library solves this. The AOSEED Toy Library holds thousands of models and adds new ones every week — animals, vehicles, seasonal builds, puzzles, gift ideas, and game pieces. A child who browses it on a Saturday morning finds three things they want to print. That question — 'what should I make next?' — is what keeps 3D printing part of family life rather than a holiday novelty.
App-Led Workflows Help Kids Do More with Less Adult Help
Children stay engaged with tools they can operate independently. An app that handles the technical steps — model selection, slicing, file transfer — allows a child to go from 'I want to make this' to 'it is printing' without a parent's laptop. The more independently a child can run a session, the more sessions they run. The educational research around 3D printing in K–12 settings consistently finds that student ownership of the design-and-print process is the most significant predictor of sustained engagement.
Creation Kits Turn Printed Parts Into Toys Kids Can Actually Use
Some of the most engaging 3D printing projects for kids combine printed components with physical kits — motors, gears, winding mechanisms — that turn the object into something functional. Print the body of an RC car, add the motor and electronics, and drive it around the kitchen. Print the casing of a music box mechanism, assemble it, and hear what it plays. These creation kit builds are what convert 'I made a thing' into 'I made a thing that works,' which is a genuinely different experience.
Why Repeatable Projects Matter More Than Flashy One-Off Prints
A print that can be improved is a print that gets printed again. If a spinning top loses a race, the child already understands how to print a better one. If a friend wants the same animal bookmark, another session happens naturally. The repeatability of good projects — and the ecosystem of fresh ideas around them — is what makes a 3D printer a lasting creative tool rather than a single-use appliance.
Real Project Ideas Families Can Start With First

Here are practical starting directions organized by what the family is actually looking for on a given afternoon.
Best First Prints for Imaginative Play
|
Project |
Age |
Print Time |
Why It Works |
|
Articulated flexi dragon |
5+ |
60–90 min |
Moves immediately — no assembly, instant play value |
|
Finger puppets (set of 4) |
4+ |
20–30 min each |
Storytelling props — the child writes the play |
|
Custom play food set |
4+ |
15–25 min each |
Extends pretend kitchen — new pieces = new play scenarios |
|
Miniature treasure chest with lid |
6+ |
30–45 min |
Opens and closes — becomes the prop for many games |
|
Poseable animal figurine |
5+ |
20–45 min |
Child picks the species — personalization creates ownership |
Best First Prints for Calm, Screen-Light Creative Time
|
Project |
Age |
Print Time |
Why It Works |
|
Geometric tangram set (7 pieces) |
6+ |
30–45 min |
Quiet spatial challenge — rearranges into hundreds of shapes |
|
Watercolor palette holder |
7+ |
25–35 min |
Practical creative tool — the child painted something they use |
|
3D coloring blank animal figure |
5+ |
20–40 min |
Printed white, painted with markers — creative second layer |
|
Fidget ring (print-in-place) |
6+ |
20–30 min |
Immediate sensory satisfaction — carries well in a pocket |
|
Personalized bookmark with character |
5+ |
15–25 min |
Goes straight into the book they are reading this week |
Best First Prints for Sibling Play or Family Game Time
|
Project |
Age |
Print Time |
Why It Works |
|
Spinning top pair — race format |
6+ |
15–25 min each |
Sibling competition built in — print one per player |
|
Tic-tac-toe set with carrying case |
6+ |
45–60 min total |
Classic game, custom made — travel-sized and personal |
|
Mini bowling pins and ball |
5+ |
60–90 min total |
Hallway bowling tournament — everyone plays |
|
Custom board game tokens |
7+ |
20–30 min per set |
Replaces the generic pieces with characters the family chose |
|
Marble run sections |
7+ |
30–60 min per section |
Build it together — then race marbles through it |
Best First Prints for Gifts, Classrooms, or Rainy Afternoons
|
Project |
Age |
Print Time |
Why It Works |
|
Name keychain in recipient's favorite color |
5+ |
15–25 min |
Low cost, high personal value — the gift is the personalization |
|
Seasonal decoration or ornament |
5+ |
30–60 min |
Goes somewhere specific — the print has an immediate home |
|
Photo frame sized for a family photo |
6+ |
45–75 min |
Works as a gift for grandparents — personal and practical |
|
Classroom shape-sorting set |
6+ |
20–30 min per piece |
Made by the student, used in class — STEM without a lesson |
|
Custom pencil topper |
6+ |
15–20 min |
Used every school day — the child shows it to their friends |
Conclusion
The best 3D printing projects for kids are not the most impressive ones. They are the ones that survive the trip from the build plate to the toy box and stay there.
Focus on play value over novelty. Articulated animals, motion toys, puzzles, pretend-play accessories, and functional daily items all pass the test. Static display models almost never do.
Choose the first project based on the child, not the printer's capabilities. A 5-year-old who holds a warm flexi dragon 20 minutes after pressing start is more invested in 3D printing than a 5-year-old who waited 6 hours for a complex model that failed.
When the first session goes well, the questions that follow — what can I make next? can I design my own? can I make one for my friend? — are the ones that matter. Start with those in mind, and the AOSEED 3D printers for kids range shows the options that support that journey from first print to confident creator.
FAQs
Can a 7-year-old use a 3D printer?
Yes, with adult supervision and the right printer. A 7-year-old can browse a model library, select something they want, and tap print — the complete experience is achievable with a fully enclosed, app-led printer. The adult handles filament loading and print removal for the first few sessions. By session three or four, most 7-year-olds can manage the full browsing and printing process independently. The key is a printer designed for children, not one designed for adult hobbyists.
What can a 3D printer make for kids?
A wider range than most parents expect. Moving toys like articulated animals and fidget mechanisms. Educational tools like tangram sets, fraction blocks, and planet models. Pretend-play props like treasure coins, play food, and miniature furniture. Practical daily items like bookmarks, pencil toppers, and bag hooks. With creation kits: working RC cars, robots, and music box mechanisms. The right library and a bit of direction keep the ideas coming for years.
Should a 12-year-old have a 3D printer?
Absolutely. By 12, most children are ready for the full creative potential of a 3D printer — designing their own models, working through multi-part builds, and using the printer for school STEM projects. The jump from browsing a library to modifying a design is natural at this age, and tools like guided design apps and simple browser-based CAD software make the transition accessible. A 12-year-old who has used a family printer for a year is often ready to take on creation kit builds that require real engineering thinking.
Is PLA safe for kids' toys?
Yes. PLA (polylactic acid) is derived from renewable plant materials, is non-toxic, biodegradable, and does not produce significant chemical fumes at standard printing temperatures. It is the default filament for every family-oriented 3D printer on the market. For children's toys, the practical rule is to print with good-quality PLA, ensure all pieces are large enough not to present a choking hazard for very young children, and sand any sharp layer edges smooth before handing the print to a child under 4.
How noisy is a 3D printer?
Much quieter than most people expect. Modern family-oriented printers typically operate at 45 to 50 decibels — roughly the level of a quiet conversation or a running refrigerator. NIST research on desktop 3D printer noise found average levels around 12 decibels above background when multiple printers ran simultaneously. A single family printer in silent mode is unlikely to be disruptive in a bedroom or living room during normal household activity.
What is a good first 3D printing project for kids?
An articulated flexi animal — a dragon, axolotl, or caterpillar — is the most consistently recommended first project for children aged 5 to 10. It is a print-in-place design that comes off the build plate already moving, with no assembly required. The child picks it up and it works. That immediate interaction creates the strongest possible positive first impression of 3D printing. For children aged 4 to 5, a chunky animal figurine or a simple playdough stamp is a better starting point — faster to print and no small moving parts.
How do I choose age-appropriate 3D printing projects for kids?
Use four filters. Does the model have small parts that could break off? Is the print time under an hour for a first session? Does the finished object do something or serve a purpose? And can the child have some input in the design or color? For ages 4 to 6, choose single-piece models with thick geometry and no parts smaller than a marble. For ages 7 to 9, add articulated mechanisms and simple multi-piece sets. For ages 10 to 12, introduce designs the child can modify or expand over multiple sessions.
Sources
- Printables — Toys and Games 3D Models, Toys and Games 3D Models, 2026.
- Reddit — Fun Quick Print Maybe for Kids, Fun Quick Print for Kids — Community Suggestions, 2026.
- CPSC — Toy Safety Business Guidance, Toy Safety Business Guidance, 2026.
- ASTM — F963 Standard Consumer Safety Specification for Toy Safety, F963 Consumer Safety Specification for Toys, 2023.
- NatureWorks — PLA Regulatory Affairs and Safety Data Sheets, Ingeo PLA Regulatory Affairs — Safety Data Sheets, 2026.
- NIST — Occupational Exposure from Operating Multiple Desktop 3D Printers, Indoor Environmental Quality Evaluation from Desktop 3D Printers, 2022.
- TeachEngineering — A Little Bit of Everything About 3D Printing, A Little Bit of Everything About 3D Printing, 2023.
- NIH 3D — 3D Printable Human Heart Model for K–12 Education, 3D Printable Human Heart Model for K–12, 2025.
Best 3D Printer for Teens Who Want More Than a Toy

My nephew is fifteen. He spent two months watching YouTube videos about 3D printing before he told his parents. When he finally did, he was very specific: he didn't want a kids' printer. He wanted something he could actually learn on — something that would let him design his own parts, not just print things from someone else's library.
His parents panicked slightly. They'd heard about open-frame printers, exposed nozzles, and hot build plates. They asked me what to get him.
That conversation is the reason this guide exists. There's a real difference between a printer designed for young children and a printer designed for teenagers. Too basic, and a creative 15-year-old loses interest within weeks. Too complicated, and parents spend every weekend troubleshooting.
At AOSEED, the AOSEED X-MAKER was designed for ages 9 to 16 — genuinely built for teens, not just marketed at them. This guide covers five printers that come up consistently for this age group, what each one actually does, and which teen it is right for.
|
5 Printers compared |
9–16+ Age ranges covered |
$269–$399 Price range covered |
30 min Avg. setup time |
💡 Three Types of Teen 3D Printer UsersType 1 — The Designer: wants to model their own objects and learn CAD. Needs the best design tools and highest precision. Type 2 — The Maker: wants to build functional things like RC vehicles, robots, and mechanical builds. Needs creation kit compatibility and reliable precision. Type 3 — The Collector: wants to print figures, props, and gifts. Needs a large library and reliable quality. Most teenagers are a mix of two or all three — which is why the design ecosystem matters as much as the hardware. |
What Makes a 3D Printer Good for Teens?

Most buying guides evaluate printers on specs that don't map to how a teenager actually uses one. These five factors are what actually determine whether a printer stays on a desk or migrates to a shelf.
Performance and Precision
A teen designing their own objects needs a printer that can execute what they designed. Layer resolution around 0.05 to 0.1mm means parts designed to fit together will actually fit together. This separates a STEM tool from a toy factory. A printer with 0.2mm resolution is fine for display models. It will frustrate a teenager trying to build a working gear mechanism.
|
Resolution |
What It Means |
Best For |
|
0.05 mm |
Parts designed to fit together do fit together |
Engineering builds, creation kits, functional objects |
|
0.1 mm |
Good surface quality, reliable for most projects |
Design projects, school builds, modifications |
|
0.2 mm |
Acceptable for display models and simple objects |
Library downloads, figures, gift items |
|
0.3mm+ |
Visible layer lines, less precision |
Basic toys and quick prints only |
Build Volume and Capability
Teenagers build larger things than younger children. A 76mm cube limits every meaningful project. A 150mm cube handles most teen builds. Above 180mm, the teen has enough space for cosplay prop sections, large mechanical assemblies, and full-size functional objects.
|
Build Volume |
What Fits |
Who It Suits |
|
76 × 76 mm |
Small toys, keychains, basic objects |
Ages 5–9 — too small for teen projects |
|
120 × 120 mm |
Most teen builds — RC car parts, robots, props |
Ages 9–14 — plenty for most projects |
|
150 × 150 mm |
Larger assemblies, cosplay sections, functional builds |
Ages 10–16 — good for ambitious projects |
|
180 mm+ |
Full-size props, structural models, large assemblies |
Teens 14+ wanting maximum size flexibility |
|
220 mm+ |
Professional-scale builds, full-size components |
Advanced teens and adult hobbyists |
Advanced Features Teens Will Appreciate
Automatic bed leveling removes the single most common frustration in 3D printing. WiFi control means the teen sets up and monitors prints from their phone without needing a parent to manage the computer. A touchscreen on the printer itself gives them direct machine control — they're not entirely dependent on an app for every decision.
|
Feature |
Why It Matters for Teens |
|
Auto bed leveling |
Removes the most common first-print failure — teen calibrates nothing |
|
WiFi + app control |
Teen manages everything from their phone — true independence |
|
Touchscreen on machine |
Direct printer control without a computer or app for quick adjustments |
|
Compatible slicing software |
Teens ready for more control can use Cura, PrusaSlicer, or Bambu Studio |
|
Multicolor capability |
Unlocks painted figures and color-layered builds — popular for older teens |
Room to Grow
The best teen printers grow with the teenager. Upgradeable hotends for different materials, compatibility with third-party filaments without voiding warranties, and a design ecosystem that introduces new concepts as the teen's skills develop. A printer that hits its ceiling in month three will be replaced within the year.
STEM and Creative Learning Potential
The question that separates a STEM tool from a toy is whether the teen can design their own things. Guided design apps, creation kit pathways, AI tools that generate printable models from photos or prompts, and compatibility with beginner-friendly CAD tools like Tinkercad are all meaningful here. The kids and teens printer guide from Tom's Hardware identifies design ecosystem depth as one of the key differentiators for educational value at this age.
Best 3D Printers for Teens: Top Picks in 2026
Five printers come up most consistently in teen-focused 3D printing discussions. Each suits a different type of teen user and a different family situation.
Creality Ender 3 S1 Pro

The Creality Ender 3 S1 Pro is the most common entry point for teenagers who want to learn 3D printing from the technical side up. It is affordable, has a strong community behind it, and the dual-gear direct-drive extruder handles a wider range of filaments than most printers in this price range.
The trade-offs are real. It is an open-frame printer — the nozzle and build plate are exposed during printing, which is a safety consideration for any shared family space. There is also no dedicated teen design app or creation kit ecosystem. A teenager using this printer will need to learn basic slicing concepts using Creality Print or a third-party slicer, which is part of the learning curve for a technically curious teen.
For a 14 or 15-year-old with their own desk who wants to understand how printers work from the inside out, and who has a parent willing to work through the initial setup together, this is a strong affordable starting point.
|
Specification |
Details |
|
Target Age |
14+ years — own room recommended |
|
Build Volume |
220 × 220 × 270 mm — generous working space |
|
Layer Resolution |
0.05 – 0.35 mm — good precision for design projects |
|
Print Speed |
Up to 150 mm/s |
|
Filament |
PLA / PETG / ABS / TPU — standard 1.75mm |
|
Enclosure |
Open frame — no enclosure |
|
Interface |
4.3-inch color touchscreen + Creality Print software |
|
Connectivity |
USB + optional WiFi via add-on |
|
Auto Bed Leveling |
Yes — CR-Touch probe |
|
Community |
Largest mod and tutorial community of any printer |
|
Price (approx.) |
~$239 – $299 |
|
✓ Reasons to Buy |
✗ Reasons to Avoid |
|
Excellent value — good performance at a genuinely affordable price |
Open frame — exposed nozzle and build plate, not safe for shared family spaces |
|
Largest online community — tutorials and mods for almost every situation |
No dedicated teen design ecosystem or creation kit pathway |
|
Dual-gear feeder handles flexible and specialty filaments well |
Requires a computer for slicing — more setup friction than app-led alternatives |
|
Good auto bed leveling — reliable first layers without manual calibration |
Adult guidance recommended for first setup and initial configuration |
|
Highly upgradeable — hot end, fans, and components can all be improved |
Open-source community means support quality varies — not one-stop help desk |
|
✓ Best For Technically curious teens aged 14+ with their own dedicated workspace who want to learn how printers work from the ground up. Adult involvement recommended for initial setup. |
AOSEED X-MAKER

The X-MAKER is the printer that bridges the gap between a beginner family printer and a serious maker tool. It is the only enclosed option in this comparison with a full design ecosystem built specifically for teenagers — not adapted from adult software or a simplified kids' toy.
The 3.5-inch touchscreen gives the teen direct machine control without always needing a phone. AI design tools like AI MiniMe and AI Doodle generate printable models from photos or typed prompts, which is a powerful creative starting point for a teenager who wants to make personal objects rather than just download from a library.
The creation kit pathway is what genuinely sets it apart for STEM learning. RC cars, robots, music boxes, and articulated arms all require the teenager to understand tolerances, gear ratios, and assembly sequences. These are the projects that make a teenager feel like an inventor rather than a consumer.
|
Why It Works for Teens |
What It Means in Practice |
|
Fully enclosed with door sensor — safe in bedrooms and shared spaces |
No safety compromise even in a family home |
|
3.5-inch touchscreen — direct control without app dependency |
Teen operates independently from day one |
|
AI design tools — generate models from photos or text |
Creative starting point without prior CAD experience |
|
Creation kits — printed parts become working RC cars and robots |
Real engineering challenges, not just printing |
|
0.05mm precision — designed parts actually fit together |
STEM builds work as intended, not just display pieces |
|
Weekly Toy Library updates — thousands of models to browse |
Always a next project — engagement lasts years |
|
Specification |
Details |
|
Target Age |
9 – 16 years |
|
Build Volume |
150 × 150 × 150 mm |
|
Layer Resolution |
0.05 – 0.4 mm — best precision in this comparison |
|
Print Speed |
Up to 300 mm/s |
|
Filament |
PLA / PETG / ABS — standard 1.75mm spools |
|
Enclosure |
Fully enclosed with door safety sensor |
|
Interface |
3.5-inch touchscreen + companion app |
|
AI Features |
AI MiniMe / AI Doodle / MiniMakie |
|
Creation Kits |
RC cars, robots, music boxes, articulated arms, more |
|
One-Press Print |
Yes — from tablet, phone, or touchscreen |
|
Connectivity |
WiFi + USB |
|
Price (approx.) |
$369 (was $509) |
|
✓ Reasons to Buy |
✗ Reasons to Avoid |
|
Only enclosed teen printer in this comparison with a built-in design ecosystem |
150mm build volume requires splitting very large single-part prints |
|
AI design tools generate personal models without prior design experience |
Higher price reflects the design ecosystem depth |
|
Creation kits provide real engineering challenges — STEM, not just printing |
Native design app — transitioning to professional CAD is a separate step |
|
0.05mm precision — multi-part builds and mechanism designs actually work |
|
|
Door-open sensor, fully enclosed — safe for bedrooms and shared family spaces |
|
|
Supports PETG and ABS for functional builds as teen skills develop |
|
|
Weekly Toy Library updates — sustained engagement over years of use |
|
✓ Best For Teens aged 9 to 16 who are new to 3D printing and want a safe enclosed printer with a design ecosystem that grows with their skills. The best choice for a shared family space. |
Bambu Lab A1 Mini

The Bambu Lab A1 Mini consistently earns top marks in hardware reviews, and the performance is genuinely excellent. It is the fastest printer in this comparison, print quality is near-professional, and the MakerWorld content library is one of the largest free model resources available to any printer owner.
The open frame is the reason it sits at number three rather than number one for most family buyers. There is no enclosure. The nozzle operates above 200°C and is fully accessible during printing. For a mature 14 or 15-year-old in their own room, this is manageable with basic safety awareness. For a printer in a shared space with younger siblings present, it is the wrong choice.
The software — Bambu Studio — is adult-oriented but genuinely beginner-friendly compared to professional slicing tools. A teen with technical curiosity will find the learning rewarding. For a teen who wants to print things without configuration friction, the setup barrier is higher than with app-led alternatives.
|
Specification |
Details |
|
Target Age |
14+ years — own room required |
|
Build Volume |
180 × 180 × 180 mm |
|
Layer Resolution |
0.05 – 0.35 mm |
|
Max Print Speed |
500 mm/s — fastest in this comparison |
|
Filament |
PLA / PETG / ABS + specialty filaments |
|
Enclosure |
Open frame — NO enclosure |
|
Interface |
Touchscreen + Bambu Studio app |
|
Library |
MakerWorld — very large, free, growing |
|
Multicolor |
Optional with AMS Lite add-on |
|
Teen Design App |
No — adult software only |
|
Price (approx.) |
~$299 (~$459 with AMS Lite) |
|
✓ Reasons to Buy |
✗ Reasons to Avoid |
|
Best pure print quality in this comparison — near-professional output |
Open frame — hot components exposed, not safe for shared spaces or under-12 proximity |
|
Fastest printer here — great for iterative design and impatient teens |
No teen-focused design ecosystem or creation kit pathway |
|
MakerWorld library has hundreds of thousands of free models |
Adult-oriented software — steeper learning curve for first-time teen users |
|
Optional multicolor printing at this price — unique capability |
Best experience requires Bambu Studio on a computer — not fully app-led |
|
Active community and reliable hardware with strong resale value |
|
✓ Best For Teenagers 14+ with their own room and desk, interested in the technical side of printing, and willing to learn Bambu Studio. Not for shared family spaces. |
Prusa Mini+

The Prusa Mini+ has a particular appeal for STEM-passionate teenagers: it is trusted by professionals and makers worldwide, the hardware quality is exceptional, and Prusa's 24/7 support is the most responsive in the category. For a teenager building a portfolio of engineering projects or preparing for a STEM program, this machine carries real credibility.
The kit version of the Prusa is itself a STEM project — assembling the printer from components teaches how 3D printers work at a mechanical level. This is a meaningful experience for a mechanically curious teenager who wants to understand the technology, not just operate it.
The trade-off is setup complexity and price. PrusaSlicer is powerful but has a learning curve, and there is no dedicated teen design app or creation kit ecosystem. This is a printer for a teenager who is ready to engage with 3D printing as a serious technical skill, not a first printer for someone just getting started.
|
Specification |
Details |
|
Target Age |
14+ years — serious hobby or school use |
|
Build Volume |
180 × 180 × 180 mm |
|
Layer Resolution |
0.05 – 0.25 mm — professional-level precision |
|
Max Print Speed |
Up to 200 mm/s |
|
Filament |
PLA / PETG / ASA / Flex + more |
|
Enclosure |
Open frame — NO enclosure |
|
Interface |
LCD touchscreen + PrusaSlicer software |
|
Assembly |
Semi-assembled or full DIY kit option |
|
Support |
24/7 support — best customer service in category |
|
Community |
Large open-source community and documentation |
|
Price (approx.) |
~$429 – $549 |
|
✓ Reasons to Buy |
✗ Reasons to Avoid |
|
Kit assembly teaches printer mechanics — genuine educational experience |
Open frame — not safe for shared family spaces or proximity to under-12s |
|
Excellent print quality and long-term hardware durability |
Complex assembly requires significant adult involvement for initial setup |
|
Outstanding 24/7 support — fastest resolution when things go wrong |
PrusaSlicer has a steep learning curve for first-time users |
|
Large open-source community — solutions for almost every challenge |
Most expensive option in this comparison |
|
Professional-grade output — builds a credible portfolio for STEM applications |
No dedicated teen design ecosystem or creation kit pathway |
|
✓ Best For STEM-passionate teenagers 14+ who want to learn printer mechanics and build a serious project portfolio. Not for first-time printers or shared family spaces. |
MakerBot Method / Replicator+
 MakerBot machines have a long history in school and library maker programs for a reason: they are designed to be used out of the box by someone with no 3D printing background. The guided print workflow, curated material profiles, and reliable hardware make them the default choice for classroom deployments where the teacher cannot be a 3D printing expert.
For a home setting, the value proposition is harder to justify. MakerBot printers are among the most expensive in this comparison, and the ecosystem is more limited than alternatives at similar price points. Teens who want design depth will find the software less capable than Bambu Studio or PrusaSlicer.
The best use case for a MakerBot in a teen context is a home school setting where a parent wants absolute simplicity and is willing to pay for it, or where the teen already uses one at school and wants to continue the same workflow at home.
|
Specification |
Details |
|
Target Age |
13+ years — school or structured home use |
|
Build Volume |
Large — varies by model (up to 375 × 325 × 400 mm on Method) |
|
Layer Resolution |
0.1 – 0.4 mm — standard quality |
|
Filament |
MakerBot PLA and specialty materials |
|
Enclosure |
Partially enclosed — front partially open on some models |
|
Interface |
Touchscreen + WiFi + MakerBot Print software |
|
School Features |
Fleet management, classroom profiles, USB and WiFi |
|
Support |
Dedicated school and enterprise support tiers |
|
Price (approx.) |
$549 – $799+ depending on model |
|
✓ Reasons to Buy |
✗ Reasons to Avoid |
|
Extremely straightforward plug-and-play workflow — minimal learning curve |
Highest price point in this comparison — premium for simplicity |
|
Built for school environments — fleet management and classroom features |
Limited design ecosystem compared to alternatives at similar price |
|
Reliable hardware with dedicated support options |
Proprietary materials on some models — higher ongoing cost |
|
Good for students who already use MakerBot in school settings |
Less community and modification support than open-source alternatives |
|
WiFi and USB connectivity — flexible classroom deployment |
Design tools are less capable than Bambu Studio or PrusaSlicer for advanced teens |
|
✓ Best For School environments, home schooling setups where simplicity is the priority, and teens already familiar with MakerBot from classroom use. |
Side-by-Side: All 5 Printers at a Glance
|
Ender 3 S1 |
X-MAKER |
Bambu Mini |
Prusa Mini+ |
MakerBot |
|
|
Best Age |
14+ |
9–16 ✓ |
14+ |
14+ |
13+ |
|
Enclosure |
Open ✗ |
Full ✓ |
Open ✗ |
Open ✗ |
Partial |
|
Teen Design App |
No |
AI tools ✓ |
No |
No |
Basic |
|
Creation Kits |
No |
Yes ✓ |
No |
No |
No |
|
STEM Growth |
Good |
Strong ✓ |
Good |
Excellent |
Basic |
|
Shared Space |
No ✗ |
Yes ✓ |
No ✗ |
No ✗ |
Partial |
|
Price |
~$269 |
$369 |
~$299 |
~$479 |
$549+ |
How to Choose the Right 3D Printer for a Teen

Once you have looked at the options, four practical questions narrow the choice down quickly.
Compare Build Volume vs. Project Needs
Ask the teen what they actually want to make. A teenager who wants to print figures and desk accessories does not need a 256mm build volume. A teen who wants to print RC car frames and cosplay prop sections does. Build volume is not about bigger is always better — it is about whether the printer fits the project, and whether the teen would rather make more small prints or fewer large ones.
Evaluate Software Compatibility and Skill Growth
An app-led printer with guided design tools is the right starting point for most teens. As skills develop, compatibility with Cura, PrusaSlicer, or Bambu Studio opens up more control. The best 3D printers guide from All3DP covers the software ecosystems around each major printer category in useful detail for families thinking about long-term skill development.
Budget vs. Long-Term Value
A $200 printer that frustrates a teenager into giving up after month two is not cheaper than a $350 printer they use for three years. The key investment is not the hardware alone — it is the hardware plus the design ecosystem plus the content. A printer with no content ecosystem needs the teen to source, evaluate, and configure every model independently. An enclosed printer with a guided app and a weekly content library significantly reduces the barrier to regular use.
|
Budget Level |
What to Expect |
Best Option |
|
Under $250 |
Entry hardware, open frame, minimal ecosystem, requires technical engagement |
Ender 3 S1 — for tech-curious teens 14+ with own room |
|
$250 – $350 |
Good hardware, mix of open and enclosed, larger libraries |
Bambu A1 Mini — for performance-focused teens 14+ |
|
$350 – $450 |
Full ecosystem, enclosed, AI design tools, creation kits |
AOSEED X-MAKER — for guided, safe, multi-age teen use |
|
$450 – $600 |
Professional-grade hardware, open frame, advanced software |
Prusa Mini+ — for serious teen makers building a portfolio |
|
$600+ |
School-grade hardware, curated workflow, premium support |
MakerBot — for school/homeschool structured settings |
Materials Teens Might Want to Use
Most teen projects are fine with PLA. It is non-toxic, easy to print, and available in a wide range of colors. As teenagers develop their skills, PETG is a natural step up — stronger and more heat-resistant, good for functional parts that need to handle stress or outdoor use. ABS is harder to print and requires ventilation, but adds heat resistance for parts near motors or electronics.
|
Material |
Properties |
Best Teen Projects |
Safety Notes |
|
PLA |
Easy to print, non-toxic, biodegradable, wide color range |
Figures, props, gifts, desk accessories, school models |
Safe for all ages — low odor at normal temps |
|
PETG |
Stronger than PLA, moisture resistant, flexible under stress |
RC car parts, outdoor objects, functional components |
Safe — slightly higher temp, minimal odor |
|
ABS |
Heat resistant, durable, sandable, good for mechanical parts |
Motor mounts, heat-exposed parts, engineering builds |
Needs ventilation — print in a well-aired space |
|
TPU |
Flexible and durable — returns to shape after deforming |
Phone cases, grips, shock-absorbing parts, wearables |
Safe — slow print speed, requires tuning |
Teens' Favorite Projects to Make With a 3D Printer

Teen projects cover a much wider range than most parents expect. Here is what the actual progression looks like across skill levels.
|
Level |
Project Type |
What the Teen Learns |
|
Starter |
Custom phone stands, desk organizers, personalized name tags, keychains, game pieces |
File management, print settings, understanding layer resolution and print time trade-offs |
|
Building |
Cosplay props and accessories, model engineering components, precision gears for science fair, custom robotics chassis |
Tolerance and fit, material selection, multi-part assembly, basic CAD modification |
|
Advanced |
Working RC cars and robots from creation kits, functional STEM project builds, original designs from scratch, cosplay armor sections |
Full design cycle: concept, CAD, print, test, iterate. Engineering principles applied to real functional objects |
The AOSEED Toy Library continues to be useful at every stage — not just as the source of finished prints, but as a starting point for modification. A teen who needs a specific gear system for a school project can find a close starting point and adapt it rather than designing every component from scratch.
|
Favorite Teen Projects |
Skill Used |
Printer Requirement |
|
Custom phone stand or desk organizer |
Basic design modification |
Any — simple geometry |
|
Model engineering parts for science fair |
Precision and tolerance |
0.1mm resolution minimum |
|
Cosplay prop sections |
Large-format design |
180mm+ build volume ideal |
|
Robotics chassis for competition |
Engineering and precision |
0.05mm resolution, PETG |
|
Small furniture fittings or replacement parts |
Practical measurement |
Standard precision + PETG |
|
Precision gears for STEM demonstrations |
Mechanical design + tolerancing |
0.05mm resolution required |
|
RC car frame from creation kit |
Assembly and electronics |
Creation kit compatible printer |
Conclusion

The right 3D printer for a teenager is the one that grows with their curiosity rather than capping it. That means good precision, room to design their own objects, and a content ecosystem that keeps generating reasons to print past the first month.
|
Teen Profile |
Top Recommendation |
Why |
|
First-time teen in a shared family space |
AOSEED X-MAKER |
Enclosed, guided, AI tools, creation kits — grows with skill |
|
Tech-curious teen 14+ with their own room |
Creality Ender 3 S1 Pro |
Best value for hands-on technical learning |
|
Performance-focused teen 14+ wanting max quality |
Bambu Lab A1 Mini |
Best hardware and library for print-focused teens |
|
Serious teen maker building a project portfolio |
Prusa Mini+ |
Professional-grade quality, best support, open-source |
|
School or homeschool structured environment |
MakerBot Replicator+ |
Plug-and-play simplicity, school-grade support |
If you are still deciding between a first teen printer and a more advanced option, AOSEED 3D printers for kids shows current pricing and age guidance for both AOSEED models side by side — useful if your teen is between the X-MAKER JOY and X-MAKER in terms of experience and age.
FAQs
What is a good 3D printer for a teen?
For most teens starting out — especially in a shared family home — the AOSEED X-MAKER strikes the right balance. It is fully enclosed for safety, has a 3.5-inch touchscreen for independent control, AI design tools and creation kits to sustain creative engagement, and targets ages 9 to 16 with room to grow. For older teens aged 14+ with their own space who want maximum hardware performance, the Bambu Lab A1 Mini or Creality Ender 3 S1 are strong alternatives based on their specific priorities.
Can a teen use a 3D printer safely?
Yes — with the right printer and basic safety habits. A fully enclosed printer puts all hot components behind a closed chamber, making it safe in any family setting. For open-frame printers, the practical rule is: if the printer lives only in the teen's own room and no child under 12 has unsupervised access to that room, an open frame is manageable. If the printer might be anywhere else in the house, an enclosed design is the right call. PLA filament — the default for most printers — is non-toxic and produces minimal odor at normal printing temperatures.
Do teens need an expensive 3D printer?
Not necessarily — but cheap printers have real limitations that can frustrate a teenager into giving up. The most important investment is not the hardware price alone; it is the hardware plus the ecosystem plus the content library. A $200 bare-bones printer that requires adult involvement every session and runs out of project ideas in month two is effectively more expensive than a $350 printer the teen uses for three years. Mid-range options between $250 and $400 hit the sweet spot for most families.
What filaments are best for teen projects?
PLA is the right starting material for most teen projects — easy to print, non-toxic, biodegradable, and available in a wide range of colors. As skills develop, PETG is the natural step up for parts that need to be stronger or more heat-resistant, such as RC car components or outdoor accessories. ABS handles heat and mechanical stress well but requires ventilation during printing. For flexible parts like phone cases or grips, TPU is the right choice — it just prints more slowly and requires some tuning.
Is it worth buying a 3D printer for a teen?
For a teenager who is interested in making, designing, coding, or engineering, absolutely. A good printer with the right ecosystem becomes a long-term creative and educational tool. The design cycle — concept, CAD, print, test, iterate — is the same process engineers use professionally, and a teenager who works through it repeatedly is building skills that translate directly to STEM education and careers. The key is choosing a printer with a design ecosystem, not just hardware. A bare printer with no content support goes unused within months.
Can a teen design their own 3D models?
Yes, and this is where 3D printing gets genuinely exciting. AI design tools generate printable models from photos or text prompts with no prior experience required. Guided design apps in the AOSEED ecosystem introduce 3D modeling concepts through structured challenges. For teens ready to go further, free browser-based tools like Tinkercad offer a solid introduction to proper CAD. A teenager with a few months of printing experience is typically designing at least some of their own objects.
What age is appropriate for a 3D printer?
With a fully enclosed printer and a guided app workflow, children can start independently from around age 8 to 10. The AOSEED X-MAKER JOY is designed for ages 4 to 12. Teenagers can handle the full feature set of any printer, and some are ready for professional-grade tools. The real limiting factor is not age — it is the safety design of the printer and whether it matches the environment it will live in.
How long does it take to 3D print things?
Small objects like custom keychains, game pieces, or desk accessories take 20 to 45 minutes. Medium builds — action figures, phone stands, mechanical components — take 1 to 3 hours. Large builds like cosplay prop sections or full structural models can take 6 or more hours. The upside for teenagers: most printers can run unsupervised overnight, so a teen can start a large print before bed and find it finished in the morning.
Sources
- Reddit — Teen Friendly Beginner Printer Discussion, Teen Friendly Beginner Printer, 2025.
- Parents.com — Best 3D Printers for Kids and Teens, Best 3D Printers for Kids and Teens, 2025.
- STL Motherhood — Six 3D Printers Perfect for Kids, Six 3D Printers Perfect for Kids, 2025.
- Best3DPrinter.co.uk — Best 3D Printers for Kids UK Tested, Best 3D Printers for Kids UK Tested, 2026.
- Flashforge Blog — Best 3D Printers for Kids 2025, Best 3D Printers for Kids 2025, 2025.
- Busy Mommy Media — Best 3D Printers for Kids Beginner-Friendly, Best 3D Printers for Kids Beginner-Friendly, 2025.
Best 3D Printer for an 8-Year-Old Beginner
My son turned eight in January. He had been asking about 3D printing since he saw a robot figure at a science fair. I spent about two weeks going down a research rabbit hole trying to figure out what was actually suitable for a child versus what just happened to show up when I searched 'kids 3D printer'.
The results were all over the place. Some articles recommended open-frame hobbyist printers. Others suggested machines costing as much as a family holiday. This guide is what I wish I had found when I started.
It covers the five printers that genuinely come up in parent discussions — what each one actually does, real limitations, and who it is right for. I will also cover materials, 3D pens, and the questions parents most often ask before buying.
All of the printers from AOSEED and the other brands below are evaluated against three criteria: Is it safe in a family home? Will my child use it independently? And will it still be interesting in six months?
|
8+ Recommended age |
$269–$399 Price range covered |
5 Printers reviewed |
30 min Avg. setup time |
Best 3D Printer Options for an 8-Year-Old Beginner
Five printers come up most consistently when parents research this category. Each has a different strength, a real limitation, and a specific child it is right for.
AOSEED X-MAKER JOY

The AOSEED X-MAKER JOY is the only printer in this comparison built specifically for young children in family settings — not a hobbyist machine adapted for kids, not a simplified adult product. It was designed from the start for an 8-year-old to use independently in a shared home.
The app does most of the work. Children browse thousands of models, personalize using AI design tools, and tap print. The printer handles the rest wirelessly. A built-in timelapse camera lets the child watch their toy being made layer by layer. The door safety sensor pauses the print automatically if the enclosure is opened mid-session.
What makes it stand out is the creation kit ecosystem — printed parts that combine with mechanical components to build RC cars, robots, and music boxes. The object the child prints becomes something that works, not just something that sits on a shelf.
|
Why It Works for an 8-Year-Old |
Parent Benefit |
|
Fully enclosed — door sensor pauses print if opened |
Child is safe without constant supervision |
|
App-led one-press printing from tablet or phone |
Child prints independently after first session |
|
AI MiniMe turns a photo into a printable toy |
Child personalizes models without design experience |
|
Weekly Toy Library updates — thousands of models |
Always a next project — no blank-page boredom |
|
Creation kits: RC cars, robots, music boxes |
Printed objects become working toys, not display pieces |
|
Specification |
Details |
|
Target Age |
4 – 12 years |
|
Build Volume |
120 × 120 × 120 mm |
|
Layer Resolution |
0.1 – 0.4 mm |
|
Print Speed |
Up to 300 mm/s |
|
Filament |
PLA (standard) / PETG / ABS |
|
Enclosure |
Fully enclosed with door safety sensor |
|
Camera |
Built-in (timelapse + remote monitoring) |
|
Connectivity |
WiFi + USB |
|
AI Features |
AI MiniMe / AI Doodle / MiniMakie |
|
One-Press Print |
Yes — from tablet or phone app |
|
Price (approx.) |
$249 (was $339) |
|
✓ Reasons to Buy |
✗ Reasons to Avoid |
|
Only printer in this class built specifically for young children |
120mm build volume limits larger single-part prints |
|
Fully enclosed with door sensor — safest for an 8-year-old at home |
No touchscreen on the printer — controlled entirely through app |
|
Built-in camera — child watches their toy appear layer by layer |
Primarily optimized for PLA — advanced materials suit the X-MAKER |
|
AI design tools let children personalize without design experience |
|
|
Creation kits turn prints into working RC cars, robots, music boxes |
|
|
Toy Library with weekly updates — sustained engagement over months |
|
|
One-press printing — child operates independently from day one |
|
✓ Best For First-time families, gift buyers, and children aged 4 to 12 who want to print and play from day one. The safest and most child-independent option in this comparison. |
ToyBox Alpha Two

ToyBox has been in this category longer than most competitors, and the simplicity is genuine. The app is extremely basic by design — select a design, tap print, done. For a 6-year-old who wants to print a simple vehicle or character figure, this works as advertised.
The limitations that come up most often in parent discussions are the build volume — just a 76mm cube, very small — and the proprietary filament. You are tied to their 'Printer Food' rolls, which cost more per gram than standard PLA and void the warranty if you use third-party filament.
The design is also semi-open rather than fully enclosed. Hot components are partially covered but not in a sealed chamber, which means more supervision is needed than the marketing suggests for a home with an 8-year-old.
|
Specification |
Details |
|
Target Age |
5 – 9 years |
|
Build Volume |
76 × 76 × 76 mm — small |
|
Layer Resolution |
~0.2 mm |
|
Print Speed |
~60 mm/s |
|
Filament |
Proprietary PLA only (Printer Food rolls) |
|
Enclosure |
Semi-open — partial cover only |
|
App Library |
~500 models — includes licensed characters |
|
Connectivity |
WiFi |
|
One-Press Print |
Yes |
|
Price (approx.) |
~$169 |
|
✓ Reasons to Buy |
✗ Reasons to Avoid |
|
Genuinely the simplest setup — unbox, connect, print |
Smallest build volume in this comparison — 76mm cube |
|
Licensed characters appeal to younger children (5–7) |
Proprietary filament only — higher cost, no third-party options |
|
Lightweight and compact — easy to move around the home |
Semi-open design requires more supervision than fully enclosed models |
|
No slicing knowledge required |
Content library updates infrequently — engagement drops quickly |
|
No growth path when the child outgrows it |
|
✓ Best For Very young children (ages 5 to 7) who want immediate one-click toy printing. Likely to be outgrown within a year or two. |
Flashforge Adventurer 3 Lite

The Flashforge Adventurer 3 is a classroom and family staple. It is fully enclosed, compact enough for a bedroom desk, and has solid build quality. A removable nozzle system makes maintenance straightforward for parents who want to stay involved in the printing process.
The limitation for an 8-year-old is the interface. The companion app and slicing workflow require more adult involvement than the X-MAKER JOY's app-first approach. Most children aged 8 will need a parent to help set up each print rather than running sessions independently.
It is a better fit for a family where a parent wants to be part of the hobby, or for a classroom setting where a teacher manages the print workflow and children focus on the design and output side.
|
Specification |
Details |
|
Target Age |
8+ years — with adult guidance |
|
Build Volume |
150 × 150 × 150 mm |
|
Layer Resolution |
0.1 – 0.4 mm |
|
Print Speed |
Up to 180 mm/s |
|
Filament |
PLA / ABS |
|
Enclosure |
Fully enclosed |
|
Interface |
Color touchscreen + companion app |
|
Camera |
Not included |
|
Connectivity |
WiFi + USB |
|
Price (approx.) |
~$250 – $300 |
|
✓ Reasons to Buy |
✗ Reasons to Avoid |
|
Fully enclosed — appropriate for family home use |
Not designed for children — interface requires adult involvement |
|
Removable nozzle makes maintenance easier for parents |
No dedicated kids app or guided Toy Library |
|
Compact footprint — fits on a bedroom desk or bookshelf |
More setup involvement than app-led alternatives |
|
Solid print quality — good surface finish |
No creation kit ecosystem — prints are static display models only |
|
Good classroom track record — reliable hardware |
No AI design tools |
|
✓ Best For Families where a parent will be actively involved in the printing process. Or older children aged 10 and up who want a more traditional printer feel. |
Bambu Lab A1 Mini
Tom's Hardware rates the Bambu Lab A1 Mini as its top recommendation for kids, and the hardware earns that spot. It is fast and reliable, print quality is excellent, and the MakerWorld content library is large and free. The kids 3D printer guide from Tom's Hardware covers this model in detail if you want an independent second opinion.
The significant limitation for this comparison is the open frame. There is no full enclosure. The build plate and nozzle are exposed during printing. For a home with younger siblings or pets nearby, this is a real concern that Tom's Hardware acknowledges in their own review.
For a 12-year-old with their own room and genuine technical interest, the A1 Mini is excellent value. For an 8-year-old in a shared family home, it is simply the wrong category of printer.
|
Specification |
Details |
|
Target Age |
12+ years — dedicated workspace required |
|
Build Volume |
180 × 180 × 180 mm |
|
Layer Resolution |
0.05 – 0.35 mm |
|
Max Print Speed |
500 mm/s |
|
Filament |
PLA / PETG / ABS + more |
|
Enclosure |
Open frame — no full enclosure |
|
App / Library |
MakerWorld + Bambu Handy app |
|
Multicolor |
Yes — with optional AMS Lite add-on |
|
Connectivity |
WiFi + app |
|
Price (approx.) |
~$299 (~$459 with AMS Lite) |
|
✓ Reasons to Buy |
✗ Reasons to Avoid |
|
Excellent print quality — professional-level output |
Open frame — hot nozzle and build plate fully exposed during printing |
|
Fastest printer in this comparison |
Not recommended for 8-year-olds or shared family spaces |
|
Large MakerWorld library with pre-sliced files |
No dedicated kids app or child-focused content |
|
Optional multicolor printing at this price point |
Adult-oriented software — steeper learning curve |
|
Active community and strong support resources |
No creation kit ecosystem |
|
✓ Best For Children aged 12 and over with their own workspace. Not recommended for 8-year-olds or shared family settings. |
Prusa Mini+

The Prusa Mini+ is a robust and respected printer in the maker community. It is reliable, produces consistently high-quality results, and has strong support through Prusa's documentation and active community forums. For a 14 or 15-year-old with genuine interest in 3D printing as a long-term hobby, it is an excellent investment.
For a first-time 8-year-old, it is the wrong starting point. The open frame, required maintenance, absence of a kids' app, and steep learning curve combine to make this a printer that only an involved adult will end up using in a family setting.
|
Specification |
Details |
|
Target Age |
12+ years — advanced hobby use |
|
Build Volume |
180 × 180 × 180 mm |
|
Layer Resolution |
0.05 – 0.25 mm |
|
Print Speed |
Up to 200 mm/s |
|
Filament |
PLA / PETG / ASA / Flex + more |
|
Enclosure |
Open frame — no enclosure |
|
Interface |
LCD touchscreen |
|
Bed Leveling |
Automatic (SuperPINDA probe) |
|
Connectivity |
USB + optional WiFi (Prusa Connect) |
|
Price (approx.) |
~$399 |
|
✓ Reasons to Buy |
✗ Reasons to Avoid |
|
High-quality reliable print results long-term |
Open frame — not suitable for younger children |
|
Strong community and documentation |
Most expensive option in this comparison |
|
Magnetic removable build surface — easy print removal |
Regular maintenance required — not plug-and-play |
|
Ideal for teens wanting serious projects or engineering study |
No kids app, no guided library, no creation kits |
|
Open-source with huge third-party support |
Steep learning curve — needs adult involvement for younger users |
|
✓ Best For Older teens aged 13 and up with genuine long-term interest in 3D printing as a technical hobby. Not appropriate for 8-year-olds. |
Side-by-Side Comparison: All 5 Printers
|
X-MAKER JOY |
ToyBox |
Flashforge |
Bambu Mini |
Prusa Mini+ |
|
|
Best Age |
4–12 ✓ |
5–9 |
8+ (adult) |
12+ |
12+ |
|
Enclosure |
Full ✓ |
Semi |
Full ✓ |
Open ✗ |
Open ✗ |
|
Kids App+Lib |
Yes ✓ |
Basic |
No |
No |
No |
|
One-Press |
Yes ✓ |
Yes |
Partial |
App |
No |
|
Creation Kits |
Yes ✓ |
No |
No |
No |
No |
|
AI Design |
Yes ✓ |
No |
No |
No |
No |
|
8-Yr-Old Ready |
Yes ✓ |
With sup. |
Adult help |
No ✗ |
No ✗ |
|
Price |
$249 |
~$169 |
~$275 |
~$299 |
~$399 |
Best 3D Printing Pens for 8-Year-Olds
A 3D printing pen is worth knowing about if you are not ready to commit to a full printer. It works like a hot glue gun — heated filament pushed through a small nozzle, cools and hardens quickly as you draw. Children create in three dimensions freehand, with no screen or software needed.
The appeal is low cost and zero setup. The limitation is that everything is freehand — no model library, no app, no repeat printing. A fun tool for a creative child, not a replacement for a printer when they want to make specific things.
1. 3Doodler Start+ Essentials 3D Pen

|
Specification |
Details |
|
Target Age |
6+ years |
|
Material |
Non-toxic low-temp plastic strands |
|
Temperature |
Low-temp — no burn risk on skin contact |
|
Safety |
No exposed hot tip — tip is insulated |
|
Charging |
USB |
|
Price (approx.) |
~$29 – $39 |
|
✓ Reasons to Buy |
✗ Reasons to Avoid |
|
Designed specifically for children — no burn risk |
Freehand only — no model library or repeat printing |
|
Very low price — good starter before committing to a printer |
Limited creative scope compared to a full printer |
|
No setup required — out of the box and creating immediately |
Strands provided are finite — refills add ongoing cost |
|
Non-toxic materials included |
Output quality depends entirely on child's manual skill |
2. MYNT3D Junior 3D Pen

|
Specification |
Details |
|
Target Age |
8+ years |
|
Material |
PLA and ABS filament compatible |
|
Temperature |
Adjustable — variable speed control |
|
Safety |
Auto-sleep feature after 5 minutes idle |
|
Connectivity |
USB charging |
|
Price (approx.) |
~$35 – $50 |
|
✓ Reasons to Buy |
✗ Reasons to Avoid |
|
Variable speed control — good for children building confidence |
Hot nozzle tip — adult supervision recommended |
|
Compatible with standard PLA filament — lower ongoing cost |
Higher learning curve than the 3Doodler Start+ |
|
Auto-sleep reduces risk if left unattended |
Output looks rougher than printer results — lower satisfaction for detail-focused children |
|
Better for ages 8 and up than entry-level pens |
No library or guided content — entirely freehand |
What Material Is Best for 3D Printing Toys for Kids?

Material choice affects safety, durability, and what the child can make. Two materials cover almost every family use case.
|
Material |
What It Is |
Safety |
Best For |
Watch Out For |
|
PLA Filament |
Plant-based plastic, derived from cornstarch |
Non-toxic, low odor, safe for ages 6+ |
First prints, toys, animals, gifts, everyday projects |
Softens above ~60°C — not for parts near heat |
|
PETG Filament |
Polyethylene terephthalate glycol — tougher than PLA |
Low fumes, safe for home use |
Active play objects, outdoor use, parts needing strength |
Slightly harder to print — better for older children 10+ |
⚠ Always Avoid Resin for KidsResin printers use photosensitive chemicals that are skin and eye irritants. They require gloves, eye protection, and a chemical wash-and-cure station. Resin printing is not appropriate for home use around children under 16. Every printer in this guide uses FDM filament — the correct and safe choice for family settings. |
What an 8-Year-Old Can Actually Make

This is the question parents forget to ask. A printer with a great app and a weak content library runs out of ideas within weeks. A printer with a content ecosystem keeps children creating for years.
|
Stage |
When |
What the Child Is Making |
|
1 |
First week |
Quick wins: keychains, small animals, figurines, name tags. Customize with a name or color. Print in 20 to 40 minutes. Hold the object before lunch. |
|
2 |
Month one |
Animals by interest, seasonal builds, game pieces, personalized gifts for siblings and grandparents. The Toy Library is what keeps the ideas flowing. |
|
3 |
Month three+ |
Creation kits: a motor turns a printed frame into an RC car. A music mechanism turns a box into something that plays a tune. AI tools generate custom models from a photo or typed word. |
The AOSEED Toy Library adds new models weekly. A child who printed a T-rex last weekend finds a new spaceship or robot this week. That cycle of fresh ideas is what distinguishes a printer that lasts from one that collects dust after month one.
💡 The Content Library Is as Important as the HardwareThe single biggest reason 3D printers get shelved after a few months is blank-page boredom. The child runs out of things to print. Before you buy, check not just how many models are available but how often new ones arrive. A library that updates weekly keeps a child printing. One that updated six months ago will be exhausted in weeks. |
Getting Started in Under 30 Minutes

Parents often worry that setup will be a weekend project. For a well-designed family printer, it really is not.
|
Step |
Action |
Time Needed |
|
1 |
Unbox the printer and place on a stable desk or table with WiFi access |
2 min |
|
2 |
Download the companion app on your tablet or phone |
1 min |
|
3 |
Connect the printer to your home WiFi using the in-app guide |
3 min |
|
4 |
Load the included PLA filament spool — app walks you through step by step |
5 min |
|
5 |
Run the included test print to verify everything works correctly |
15–20 min |
|
6 |
Hand the tablet to your child — let them browse the library for their first real project |
Their time |
The most common first-print issue is a failed first layer — the model does not adhere properly to the build plate. If this happens, check that the plate is clean and level. Both are quick fixes, and working through them together with your child is a useful first lesson in troubleshooting.
Key Considerations When Choosing a 3D Printer for an 8-Year-Old

Most spec comparisons are aimed at adults. Layer height and extrusion multipliers tell you nothing about whether a printer will work in a family home. These four criteria tell you everything you need to know.
Safety Features
The nozzle on a standard 3D printer runs above 200°C during printing. On an open-frame printer — which covers most budget models — that nozzle is fully accessible. For an 8-year-old, the minimum requirement is a fully enclosed design. Tom's Hardware's kids 3D printer guide consistently rates enclosure as the first safety filter for family buyers.
|
Safety Feature |
What to Look For |
Why It Matters |
|
Fully enclosed design |
All hot parts sealed inside a chamber |
Child cannot touch nozzle or moving parts during printing |
|
Door sensor |
Print pauses automatically if enclosure opens |
Prevents accidents when younger siblings approach |
|
Non-toxic PLA filament |
Plant-based, biodegradable, low odor |
No harmful fumes at normal home use temperatures |
|
Auto shut-off |
Printer stops if an error or jam is detected |
Prevents overheating if left unattended |
|
Silent mode |
Reduced noise during print sessions |
Comfortable in shared bedrooms and living rooms |
|
⚠ Open-Frame Printers: Check Before You Buy Many well-reviewed printers on Amazon and general electronics sites are open-frame models designed for adult hobbyists. The nozzle and build plate are fully exposed during printing. This is not appropriate for a shared family space with an 8-year-old nearby. Always verify the enclosure design before purchasing. |
Ease of Use
For an 8-year-old, the app is the real product. The printer hardware gets the attention, but if the software requires a laptop and adult slicing knowledge, only adults will end up using it.
|
What to Look For |
Why It Matters |
|
App runs on tablet or smartphone |
Child can browse and print without needing a laptop |
|
One-press printing — tap and go |
Child operates independently without adult help every session |
|
Built-in model library |
Removes the blank-page problem — always something to print |
|
Auto bed leveling |
Single most common failure point — automation prevents frustration |
|
WiFi connectivity |
No cables, no USB setup, no adult needed to transfer files |
Durability
A kids' 3D printer is going to be opened, closed, loaded, and used repeatedly over months. The build quality needs to hold up. Check for all-metal frames rather than plastic chassis where possible, removable build plates that can be flexed to pop prints off cleanly, and a replaceable nozzle system that parents can service without sending the printer away.
Customer support matters more for kids' printers than for adult models. A responsive support team and clear video tutorials make the difference between a problem that takes 10 minutes to fix and one that shelves the printer for a week.
Educational Potential
The best kids' printers come with structured learning resources — creation kits, guided project libraries, and design tools that grow with the child. 3D printers for classrooms from LearnByLayers gives a clear picture of how 3D printing integrates into structured STEM learning, which is useful context whether you are buying for home or school use.
For an 8-year-old, educational value looks like this: printing a gear mechanism teaches how engines work. Scaling planet models teaches proportion. Assembling a creation kit teaches mechanical thinking. The learning is embedded in the making, not added on top of it.
Conclusion
For an 8-year-old in a family home, the X-MAKER JOY is the right call. It is the only printer in this comparison built specifically for this situation — enclosed, app-led, child-independent, and backed by a content system that keeps going past month one.
If your child is closer to 5 or 6 and you want minimum complexity, Toybox works well for that age, but expect to outgrow it quickly. If you have a 10 or 11-year-old who wants a more traditional printer feel and you will be involved in the printing process, the Flashforge Adventurer 3 is solid. For teenagers and dedicated setups, the Bambu A1 Mini is excellent hardware.
Involve your child in the decision. Ask them what they want to make. A child who had input in choosing the printer is more invested in using it. Start with one project from the library, have the second one chosen before the first one finishes, and the printer becomes a fixture in family life rather than a seasonal novelty. Compare current pricing and models at AOSEED 3D printers for kids for a side-by-side overview before you decide.
FAQs
Can an 8-year-old use a 3D printer?
Yes. Age 8 is a good entry point for independent use with a well-designed kids' printer. Children at this age can navigate tablet apps, follow step-by-step guides, and understand basic safety rules. With a fully enclosed printer and an app-led workflow, most 8-year-olds are running their own print sessions after two or three guided attempts. Adult supervision is still recommended for loading filament and removing prints until they are comfortable with those steps.
Should a 12-year-old have a 3D printer?
Absolutely. By 12, most children are ready for more creative control — designing their own models, experimenting with settings, and working on STEM projects. The AOSEED X-MAKER is designed for ages 9 to 16 and offers a larger build volume, a 3.5-inch touchscreen, and expanded material options. A 12-year-old who has used the X-MAKER JOY at a younger age will step up to that level naturally.
Is the Bambu A1 Mini good for kids?
For teenagers with their own dedicated workspace, yes. For 8-year-olds in a shared family home, no. The open frame design leaves the nozzle and build plate exposed during printing. Tom's Hardware recommends it for elementary-aged children with light supervision, but that review context assumes a dedicated maker space. In a shared living room or bedroom with younger siblings nearby, an enclosed printer is the safer choice.
Is Flashforge kid-friendly?
The Adventurer series is fully enclosed, which is a real safety advantage over open-frame hobbyist printers. It is a classroom favorite for that reason. The limitation is the software — it requires more adult involvement than app-led printers, and most 8-year-olds will need a parent to manage the print setup. It is a good choice for families where the parent wants to be involved, less suitable for a child who wants to print independently.
What is the best 3D printer for an 8-year-old for STEM projects?
For an 8-year-old, the X-MAKER JOY creation kits and guided design apps give a strong STEM foundation — the child designs something, prints it, and assembles it into a working object. For older children aged 10 and up wanting more depth, the X-MAKER adds a larger build volume and more advanced materials. For teens ready to learn slicing software, the Bambu A1 Mini delivers professional-level output.
What size filament does an 8-year-old's printer use?
Standard 1.75mm PLA filament. Most family-oriented printers use this as their primary material. PLA is plant-based, non-toxic, and biodegradable — the correct choice for children. You are not locked into proprietary filament with most family printers, which keeps the ongoing cost of printing reasonable.
How long does a print take?
Small models like rings, keychains, and simple animals take 20 to 40 minutes. Medium models such as action figures or small vehicles take 1 to 3 hours. Larger educational models can take longer. For a first session with an 8-year-old, always choose something under an hour — the immediate reward of holding the finished object is what builds enthusiasm for longer future projects.
What can kids make with a 3D printer?
Far more than most parents expect. Simple models like keychains, animals, and game pieces are the starting point. From there, children move to customized gifts — personalized nameplates, small boxes, jewelry. With creation kits, they build working objects: RC cars, robots, music boxes, and carousels. For STEM projects: gear systems, bridge models, articulated mechanisms, and scaled planet sets. The content library and the child's growing skills are the only real limits.
Sources
- Tom's Hardware — Best 3D Printers for Kids and Teens, Best 3D Printers for Kids and Teens, 2026.
- Reddit r/3dprinter — Best 3D Printer for Kids, Best 3D Printer for Kids Discussion, 2026.
- Flashforge Blog — 2025 Best 3D Printers for Kids, 2025 Best 3D Printers for Kids, 2025.
- AOSEED Blog — How to Choose the Best 3D Printer for Kids, How to Choose the Best 3D Printer for Kids, 2026.
- PCMag — Best 3D Printers 2026, Best 3D Printers 2026, 2026.
- Busy Mommy Media — Best 3D Printers for Kids, Best 3D Printers for Kids, 2025.
- STLDenise3D — Best 3D Printers for Kids, Best 3D Printers for Kids 2025, 2025.
Best 3D Printer for Kids: What Parents Should Actually Compare

A few months ago, a parent in our school WhatsApp group sent a message at 10 pm. She had bought a 3D printer as a birthday surprise for her 9-year-old. Cheap open-frame model that looked impressive in the photos. The nozzle was exposed and hot. The software was built for adult hobbyists. Her son gave up after one failed print. The printer was in the garage.
She asked: 'Did I just waste £150?'
Kind of. Not because 3D printers are bad for kids — they can be genuinely brilliant for the right family. The problem is that most people compare the wrong things. Speed, build volume, filament types — useful specs if you are an engineer. Not useful if you are buying for a 10-year-old.
What actually matters is safety, ease of use, and whether it stays interesting past week one. AOSEED builds printers specifically around those three questions. If you want to browse the full range before reading, AOSEED 3D printers for kids show all current models with age guidance side by side. But read this first — it helps you understand what you are actually comparing.
Three criteria filter out most of the noise. Is it safe to have young children at home? Can a child use it without needing adult help every five minutes? And will it still be interesting in six months? Hold those in mind as you read the options below.
Best 3D Printer Options for Kids (Aged 4 to 12)
Five printers come up most often when parents research this category. Below is an honest look at each one — specifications, reasons to buy, and reasons to avoid — based on real family use rather than benchmark tests.
1. ToyBox 3D Printer

|
Specifications |
Details |
|
Technology |
FDM (Fused Deposition Modeling) |
|
Build Volume |
76 × 76 × 76 mm — small |
|
Build Platform |
Pre-loaded designs — no external files needed |
|
Interface |
Simple touchscreen — child-friendly |
|
Bed Leveling |
Automatic |
|
Connectivity |
USB, WiFi |
|
Best Age |
6 to 9 years — beginner / younger children |
|
Approx. Price |
~$169 |
|
✓ Reasons to Buy |
✗ Reasons to Avoid |
|
Extremely easy setup — working in minutes |
Very small build volume — limits what can be printed |
|
Pre-loaded models — zero friction for a first print |
Library updates are infrequent — blank-page problem sets in early |
|
Kid-friendly interface — no assembly required |
No guided design app or AI tools |
|
Partial enclosure — no exposed hot nozzle |
Engagement tends to drop after the first few weeks |
|
Good price point for a first purchase |
Not designed to grow with a child past age 9 |
The ToyBox 3D Printer is designed specifically for younger kids, with a focus on simplicity and speed to first print. Pre-loaded designs mean a child can start printing in minutes. The intuitive interface and partial enclosure make it one of the safer budget options.
The main limitation is scale — the 76mm build volume is quite small, and the content library does not refresh with the regularity that keeps children engaged week after week. A solid starter. Not designed to last past the first year.
2. AOSEED X-MAKER JOY

|
Specifications |
Details |
|
Technology |
FDM (Fused Deposition Modeling) |
|
Build Volume |
120 × 120 × 120 mm — medium, family-sized |
|
Build Platform |
Heated bed, PEI surface — strong first-layer adhesion |
|
Interface |
App-controlled — iOS and Android, WiFi connected |
|
Bed Leveling |
Automatic |
|
Connectivity |
WiFi, App control — no laptop required |
|
Best Age |
4 to 12 years — guided, beginner-friendly |
|
✓ Reasons to Buy |
✗ Reasons to Avoid |
|
Fully enclosed — safe for ages 4 and up |
App-only control — no physical touchscreen on printer |
|
App-led workflow — child prints independently |
Higher price than basic beginner models |
|
AI design tools: AI MiniMe, AI Doodle, MiniMakie |
120mm build volume — smaller than X-MAKER |
|
1,500+ models with weekly library updates |
Requires WiFi connection to operate fully |
|
Built-in timelapse camera — child watches toy being made |
|
|
Creation kits — printed parts become working toys |
|
|
Silent mode — comfortable in shared living spaces |
The AOSEED X-MAKER JOY is built around one goal: keeping a child engaged from first print to hundredth print. Setup is fast. The app does most of the work. The fully enclosed design means a 4-year-old can stand next to it safely.
AI-assisted features let younger children personalize models without any design experience. And a model library that updates every week means there is always a reason to come back to the printer rather than set it aside. Best fit for first-time families, younger children, and gift buyers who want something that works out of the box.
3. AOSEED X-MAKER

|
Specifications |
Details |
|
Technology |
FDM (Fused Deposition Modeling) |
|
Build Volume |
150 × 150 × 150 mm — larger for bigger builds |
|
Build Platform |
Heated bed, PEI surface — strong adhesion for PETG |
|
Interface |
3.5-inch LCD touchscreen + App control |
|
Bed Leveling |
Auto-leveling |
|
Connectivity |
USB, WiFi, App control |
|
Best Age |
9 to 16 years — STEM, creation kits, advanced projects |
|
✓ Reasons to Buy |
✗ Reasons to Avoid |
|
Fully enclosed — same safety design as X-MAKER JOY |
Higher price — a bigger investment upfront |
|
3.5-inch touchscreen for direct hands-on printer control |
More capability than a young child under 9 needs |
|
Larger 150mm build volume — handles complex builds |
Setup takes slightly more time than the JOY |
|
PETG support alongside PLA for more durable parts |
Requires more engagement to use to its full potential |
|
Same weekly Toy Library and AI design tools |
|
|
Creation kits for robots, RC cars, and more |
The AOSEED X-MAKER is the step-up for children aged 9 to 16 who want more creative control — bigger builds, more complex models, STEM project work, and creation kit assemblies that produce working mechanical toys. The 3.5-inch touchscreen gives older children hands-on control of the printer directly, and the 150mm build volume handles projects that would be impossible on the JOY.
It supports the same guided app and weekly Toy Library, so the content ecosystem stays rich at every level. Ideal for school projects, STEM learning, and families who want a printer that stays relevant over multiple years.
4. Bambu Lab A1 Mini

|
Specifications |
Details |
|
Technology |
FDM (Fused Deposition Modeling) |
|
Build Volume |
180 × 180 × 180 mm — medium-large |
|
Build Platform |
Heated bed — multi-surface compatible |
|
Interface |
Touchscreen with app support |
|
Bed Leveling |
Auto-leveling |
|
Connectivity |
USB, WiFi, App control |
|
Best Age |
10+ years — older children and adults |
|
Approx. Price |
~$299 |
|
✓ Reasons to Buy |
✗ Reasons to Avoid |
|
Fast print speeds — good for impatient older children |
Open-frame design — nozzle exposed during printing |
|
Solid print quality and precision |
No dedicated kids' app or model library |
|
App control for remote operation and monitoring |
Software has a learning curve for new users |
|
Large build volume for bigger projects |
Not designed for children who want guided creation |
|
Good for teens and adults with some experience |
Requires more adult involvement to set up and manage |
The Bambu Lab A1 Mini is fast, accurate, and genuinely impressive hardware. It is popular with adult makers and older teens who already understand the basics of 3D printing. For a parent buying for a younger child, the open-frame design is the main concern — the heated nozzle is exposed during prints. There is no dedicated kids' app, no model library, and the software expects the user to know what they are doing. A strong printer for the right user. Not the right starting point for a child who wants to browse, tap, and print independently.
5. Prusa Mini+

|
Specifications |
Details |
|
Technology |
FDM (Fused Deposition Modeling) |
|
Build Volume |
180 × 180 × 180 mm — medium-large |
|
Build Platform |
Heated bed, magnetic removable surface |
|
Interface |
LCD touchscreen |
|
Bed Leveling |
Automatic (SuperPINDA probe) |
|
Connectivity |
USB, WiFi (optional add-on) |
|
Best Age |
12+ years — older children, teens, advanced projects |
|
Approx. Price |
~$399 |
|
✓ Reasons to Buy |
✗ Reasons to Avoid |
|
High-quality build — reliable for long-term use |
Open-frame design — not suitable for younger children |
|
Excellent print quality for school projects |
More expensive than most beginner options |
|
Strong customer service and active community |
Requires regular maintenance — not plug-and-play |
|
Magnetic removable print surface — easy print removal |
No kids' app or guided model library |
|
Ideal for children aged 12 and up wanting serious projects |
Steep learning curve for first-time users |
The Prusa Mini+ is a robust and well-respected printer in the maker community. It is reliable, produces consistently good results, and has strong support through Prusa's documentation and community forums. For an older teen interested in 3D printing as a serious hobby or for school engineering projects, it is an excellent long-term investment.
For a first-time family with younger children, the open-frame design, required maintenance, and steep learning curve make it the wrong starting point. It earns its price over time. It does not earn it on week one.
Quick Side-by-Side Comparison
|
ToyBox |
X-MAKER JOY |
X-MAKER |
Bambu A1 Mini |
Prusa Mini+ |
|
|
Target Age |
6–9 |
4–12 ✓ |
9–16 ✓ |
10+ |
12+ |
|
Enclosure |
Partial |
Fully enclosed ✓ |
Fully enclosed ✓ |
Open frame |
Open frame |
|
Kids App |
Basic |
AI-assisted ✓ |
AI-assisted ✓ |
3rd-party |
None |
|
Model Lib. |
~500 |
1,500+ weekly ✓ |
1,500+ weekly ✓ |
None |
None |
|
Build Vol. |
76³ mm |
120³ mm |
150³ mm |
180³ mm |
180³ mm |
|
Price |
~$169 |
$249 |
$369 |
~$299 |
~$399 |
Why 3D Printing is Perfect for Kids

A 3D printer is not a passive toy. It is a creative tool that asks something of the child every time they use it. That asking — that active involvement — is why it works as a learning and development activity in a way that most screens don't.
Fostering Creativity
3D printing lets children take something they imagined and make it real. That is a genuinely different experience from drawing or playing with existing toys. The child designs a name tag, sees it print, holds it, and knows that object would not exist without them. That ownership of a created object is a strong motivator to create again.
The AOSEED Toy Library supports this by keeping the idea pipeline full — new models every week across animals, vehicles, seasonal builds, puzzles, and gift ideas. A child who always has a next project to make keeps coming back to the printer rather than setting it aside after the first month.
Hands-On STEM Learning

Every printed object is a small lesson in physics, engineering, or design. A child who prints a gear mechanism understands transmission. A child who prints fraction blocks understands equivalence by testing it rather than reading about it. A child who troubleshoots a failed print practices the scientific method without a lesson plan.
The learning is embedded in the making process. It does not need to be explained. It happens because the child is doing something real and paying attention to whether it works.
Building Skills
3D printing builds spatial thinking — the ability to visualize objects in three dimensions and understand how changes to a design affect the final result. It builds patience, because a print takes time and the child has to wait. It builds persistence, because a first failed print teaches that trying again is part of the process.
These skills carry into school projects, STEM subjects, and creative confidence that lasts well beyond the first few prints.
Key Factors to Consider When Choosing a 3D Printer for Kids

Once you have looked at the options, five factors determine whether a printer will work in a real family home rather than just in a product review.
Safety Features
The single most important physical feature is whether the printer is fully enclosed. An open-frame printer leaves the heated nozzle — which reaches above 200°C during printing — and all moving parts fully exposed. In a home with young children, that is a real hazard. Tom's Hardware's kids 3D printer guide consistently flags enclosure as the first safety consideration for family buyers.
|
Safety Feature |
What to Look For |
Why It Matters |
|
Enclosure |
Fully enclosed — all hot parts inside a sealed chamber |
Children cannot touch the nozzle or moving parts during a print |
|
Auto-pause |
Print stops when enclosure door opens mid-print |
Prevents accidents if a younger child opens the door |
|
Filament material |
PLA as the default — plant-based, non-toxic, low odor |
No harmful fumes at normal home use temperatures |
|
Silent mode |
Reduced operating noise during print sessions |
More comfortable in shared living spaces and bedrooms |
|
Certifications |
CE, FCC, or equivalent product safety marks |
Independently verified product safety standards |
Ease of Use
For a child to use a printer independently, three things need to be true. The setup needs to be simple enough that a parent is not required every session. The app or interface needs to be designed for a child, not an adult hobbyist. And the printing process itself needs to be guided — the child selects a model, taps print, and the printer handles the rest.
One-press printing is the clearest signal of a genuinely child-friendly workflow. If the child has to configure settings, adjust sliders, or manage a slicing software interface before each print, the printer will be used a few times and then avoided. If they tap one button and wait, they will keep coming back.
Size and Space Considerations
A kids' 3D printer needs to live somewhere accessible — a desk in the child's room, a kitchen counter, a study table. Most family-oriented models are compact enough for this. The build volume is the more relevant size consideration: a 76mm cube limits what can be printed, while a 120 to 150mm cube handles the full range of typical kids' projects from keychains and figurines to small mechanical assemblies.
Weight is also worth checking. A printer that can be moved easily between rooms is more likely to be used regularly than one that needs to stay in one fixed spot.
Durability and Reliability
A kids' 3D printer is going to be opened, closed, loaded, and unloaded repeatedly by a child. It needs to handle that without becoming temperamental. The best indicator of durability is not the spec sheet — it is real-world parent reviews from people who have used the printer for six months or more, not just the first few weeks.
Customer support matters more for kids' printers than for adult models. When something goes wrong — a clogged nozzle, a failed first layer, a WiFi connection issue — a parent needs to be able to resolve it without deep technical knowledge. Clear video tutorials and responsive support make a genuine difference to the family experience.
Educational Value
A printer that comes with structured learning resources — lessons, project guides, curriculum integration — provides more long-term value than one that ships with hardware alone. 3D printers for classrooms from LearnByLayers gives a useful perspective on how 3D printing integrates into structured learning, which is worth reading if you are buying for a school or homeschool context.
For home use, the educational value is more organic — it comes from the projects the child chooses and the questions those projects raise. The printer's role is to make good projects consistently accessible, which comes back to the content library and app quality.
Conclusion: Choose the Best 3D Printer for Your Kids

The right 3D printer for a child is not the one with the best specs. It is the one that gets used after month one. That means an enclosed design the parent trusts, an app the child can use without adult help, and a content system that keeps generating reasons to come back.
For families with children aged 4 to 12, start with the X-MAKER JOY — guided, safe, and built around the family use case from the ground up. For older children aged 9 to 16 who want STEM projects and creation kit builds, the X-MAKER gives them the room and the tools to grow.
For parents buying their first printer: involve your child in the decision. Ask them what they want to make. A child who had input in choosing the printer is more invested in using it. Start with a short first session, pick one project from the library, and have the second one chosen before the first one finishes. That pipeline — always a next project ready — is the single most effective way to make a 3D printer a fixture in family life rather than a seasonal novelty.
FAQs
What are the best 3D printing projects for beginners?
For the easiest starting projects: a personalized name tag or keychain, a small animal figurine from a curated library, or a simple spinning top. These print in 15 to 45 minutes, require no supports, produce a single piece with no assembly, and give the child something immediately usable. For a printer with a built-in library, browse the animals and vehicles section first — models there are tested to print cleanly on the first attempt.
How do I set up my 3D printer for the first time?
For most modern kids' printers, setup takes 20 to 30 minutes. Unbox the printer, connect to your home WiFi network, download the companion app on a phone or tablet, and follow the app's guided setup for a test print. AOSEED uses one-press printing — once the printer is connected and filament is loaded, the child selects a model in the app and taps print. If anything goes wrong during first setup, the Learning Center has step-by-step video tutorials for every common issue.
Can my child create 3D prints without adult supervision?
Yes — with the right printer and the right age. For children aged 6 and up with an app-led, enclosed printer, the full experience of browsing, selecting, and printing is achievable independently after two or three guided sessions. The adult role is loading the filament and removing the finished print from the build plate for younger children. By ages 8 to 9, most children can handle both steps themselves. The key is that the printer's interface is designed for a child, not an adult hobbyist.
What is the best material for 3D printing toys for kids?
PLA is the safest and most widely used choice for children. It is plant-based, non-toxic, and biodegradable. Most kids' printers use PLA as the standard filament. Avoid printers that require resin — those materials involve photosensitive chemicals that are not safe for home use around kids.
How do kids' 3D printers work?
They use FDM — fused deposition modeling. Thin plastic filament is heated and pushed through a small nozzle, building up the shape layer by layer from the bottom. The child picks or designs a model in the companion app, taps print, and the printer builds it automatically. No understanding of the mechanics required.
What are the different types of 3D printers?
The three main types are FDM, resin, and SLS. For children at home, FDM is the only appropriate option. Resin printers use photosensitive chemicals that are unsafe around kids. SLS printers are industrial equipment. Every kids' printer mentioned in this article uses FDM.
What is the best 3D printer app for kids?
The best apps give children a model library to browse independently, beginner-level guided design tools, and a direct WiFi connection to the printer — all without needing a laptop. AOSEED's app includes AI-assisted features that let younger children personalize models without prior design experience. It works on iOS and Android.
Sources
- Tom's Hardware — Best 3D Printers for Kids and Teens, Best 3D Printers for Kids and Teens, 2026.
- STLDenise3D — Best 3D Printers for Kids, Best 3D Printers for Kids, 2025.
- SelfCAD — 6 Best 3D Printers for Kids, 6 Best 3D Printers for Kids, 2024.
- AOSEED — 3D Printing Safety and Materials for Kids, 3D Printing Safety & Materials for Kids' Toys, 2025.
- Sovol3D — Complete Guide to Safe 3D Printed Toys, Fun & Safe 3D Printed Toys Guide, 2025.
- Reddit — Best 3D Printer for Kids Discussion, Best 3D Printer for Kids Community Discussion, 2024.
- Parents.com — Best 3D Printers for Kids, Best 3D Printers for Kids, 2025.
- BusyMommyMedia — Bambu Lab A1 Mini for Beginners and Kids, A1 Mini for Kids and Beginners, 2025
10 First Projects Kids Can Finish Without Getting Overwhelmed

The first failed print is the moment most children lose interest in 3D printing. Not because the technology is hard. Because someone chose the wrong starting project.
I watched it happen with my nephew. His parents bought a printer for Christmas. First project: a complex dragon with seventeen parts, nine-hour print time. The print failed at hour seven. He stood there looking at a pile of plastic spaghetti and said 'This is boring' and walked away. The printer went into a closet. Nobody touched it for four months.
The printer was not the problem. The project choice was. This article is specifically about avoiding that scenario. Every project here was chosen because it has a high first-attempt success rate, finishes in a single session, and produces something a child can immediately hold and use.
At AOSEED, that exact problem — the first-session failure — shaped how the whole product was built. The AOSEED X-MAKER JOY comes with a pre-verified model library and an app that guides children from browsing to printing without adult management. But the principles below apply to any family printer.
Why First Prints Go Wrong
Most first-print failures come from one of four causes. Knowing them makes choosing a starting project straightforward.
|
Failure Cause |
What Happens |
How to Avoid |
|
Print too long |
Child loses interest or print fails mid-way through a 6-hour session |
Choose projects under 60 minutes |
|
Supports required |
Support removal damages the print — very frustrating for a child |
Choose 'no support' models only |
|
Multi-part assembly |
Parts don't fit or need glue — feels like the print was wasted |
Choose single-piece or print-in-place |
|
Poor bed adhesion |
First layer lifts mid-print — produces spaghetti or partial failure |
Use pre-verified models on a well-set-up printer |
None of these failures are about the printer. They are about the project. Change the project, change the outcome.
The 4-Criteria Test for a First-Timer Project

Before choosing any project for a child's first session, run it through these four questions. All four should be yes.
|
# |
Criteria |
Target |
Why It Matters |
|
1 |
Prints in under 60 minutes |
15–60 min ideal |
Keeps the child engaged through the whole session |
|
2 |
No supports required |
Self-supporting model |
No post-processing frustration after printing |
|
3 |
Single piece or print-in-place |
No assembly needed |
Child holds a complete object immediately |
|
4 |
Functional or personalized |
Used worn given or played with |
Gives the print real-world value and reason to return |
Every project on the list below passes all four tests. That is the only selection rule used here.
Quick Wins — Under 30 Minutes

These four projects are the fastest route to a successful first print. Each one finishes before a child loses patience, requires no supports, and produces something with immediate use or play value.
01. Personalized Name Tag or Keychain

The child types their name, adjusts the size, taps print. Fifteen minutes later they hold something with their own name on it. That is a strong first-success moment — the combination of personalization and speed is hard to beat.
Flat geometry, zero supports, immediate result. This is the project that makes a child say 'what can I make next?' — which is exactly the question you want them asking after session one.
|
Ages |
Print Time |
Skill Learned |
|
5+ |
15–25 min |
Basic design, personalization, immediate reward |
02. Playdough Stamp

A handle with a raised shape on the base — star, heart, animal footprint, initial letter. Press into playdough and pull up. Instant impression. Print time is 15 to 20 minutes. The child can use it the same afternoon.
This is particularly popular with ages 4 to 7, who combine it with playdough immediately and do not need any explanation of what 3D printing is to find it satisfying. The combination of making the stamp and using the stamp is a complete creative loop in one afternoon.
|
Ages |
Print Time |
Skill Learned |
|
4+ |
15–20 min |
Immediate tactile use, creative play, fine motor |
03. Spinning Top

One of the cleanest quick-win projects available. Symmetrical, no supports, prints in 15 to 25 minutes, works immediately. The child taps it and it spins. That is all the explanation needed.
Bonus: print two tops with different proportions and let the child run the experiment of which one spins longer. No lesson plan required. The question — why does this one win? — comes from the child, not the parent.
|
Ages |
Print Time |
Skill Learned |
|
6+ |
15–25 min |
Physics, simple experimentation, kinetics |
04. Bookmark with Character

Flat, no supports, 15 to 25 minutes. A small character or design along the top edge — a dinosaur, a cat, a geometric shape. For a child who reads, this goes straight into a book and serves a real function. For a child who doesn't, it is still a personalized object they made and can give away.
The gift angle matters. A 6-year-old who gives their teacher a bookmark they printed themselves has done something genuine and creative. This is the project that first opens the idea of 3D printing as a way to make gifts.
|
Ages |
Print Time |
Skill Learned |
|
5+ |
15–25 min |
Practical object making, gift-giving, immediate use |
Creative Play — 20 to 45 Minutes
These four projects take slightly longer but produce objects with stronger play value. They work well as second or third session projects once a child has one quick win behind them.
05. Small Animal Figurine

A pre-optimized standing cat, dinosaur, or dog from a curated library. These have been tested to print without supports on default settings. The child didn't design it, but they made it — and that distinction feels important to them at this age.
The model matters more than most people think. A random animal from an unverified platform can fail on the first layer or have poor detail. Models from a tested library print predictably and look finished. The difference between a child who feels proud and a child who feels disappointed is often just the model source.
|
Ages |
Print Time |
Skill Learned |
|
4+ |
20–45 min |
Appreciation of 3D printing, creative ownership |
06. Wobble Toy or Rocking Animal

A small figure with a curved base that rocks when tapped. No supports, no assembly, 20 to 35 minutes. The rocking motion surprises children every time — they expected a static object and got a moving toy. That surprise is worth more than the complexity of the project.
This works particularly well as a second session project after a name tag or stamp. The child now knows what printing looks like and is ready for an object that does something. The wobble is the payoff.
|
Ages |
Print Time |
Skill Learned |
|
4+ |
20–35 min |
Cause and effect, satisfaction with motion |
07. Fidget Ring (Print-in-Place)

The inner band rotates freely around the outer frame straight off the build plate — no assembly. Most children have never seen anything that works like this and are genuinely baffled and delighted in equal measure. Under 30 minutes, zero assembly, and the first interaction with the finished object is immediate play.
This is the first print-in-place project most children encounter. The concept — that moving parts can come off the printer already assembled — is genuinely surprising. It shifts how a child understands what 3D printing is capable of. That shift happens in the moment they pick it up and spin it.
|
Ages |
Print Time |
Skill Learned |
|
6+ |
20–30 min |
Mechanical curiosity, print-in-place concept |
08. Mini Coin Tray or Ring Dish

A simple shallow tray — octagonal, round, or shaped like a leaf. No supports, one piece, 25 to 40 minutes. Immediately useful: coins, small toys, jewelry, keys. This is the project that shifts a child's understanding of what the printer is for.
Before this, the printer makes toys. After this, the printer makes useful things. That shift matters for long-term engagement. A child who sees the printer as a source of both toys and household objects has twice as many reasons to keep using it.
|
Ages |
Print Time |
Skill Learned |
|
7+ |
25–40 min |
Functional design, spatial thinking, practical use |
Step-Up Projects — 60 to 90 Minutes
These two projects take longer and have a higher payoff. They are best as third or fourth session prints, once a child has a few successful quick wins behind them and is ready for something with more visual impact.
09. Flexi Articulated Animal (Print-in-Place)

A dragon, axolotl, or caterpillar with print-in-place joints — comes off the build plate already flexible and moving. Unlike the simple figurine in project 5, this one bends and poses. The jump in complexity is small. The payoff is significantly higher.
Children carry these around for weeks. The flexibility is genuinely surprising to anyone who has not seen it before. For a child who has already printed a fidget ring, this feels like the next logical step — the same print-in-place concept, scaled up into a full creature. You can find a wide range of these designs among
You can find a wide range of these designs among creative prints for kids on Cults3D — a useful source for newer and more creative toy designs beyond the standard platforms.
|
Ages |
Print Time |
Skill Learned |
|
6+ |
60–90 min |
Advanced print appreciation, tactile play, imaginative play |
10. Personalized Bag Tag or Gift Label

A tag with the child's name and a small decorative design — for a school bag, bedroom door, or as a gift to a sibling or grandparent. The gift angle is the most powerful part of this project. A 7-year-old who gives their grandparent a 3D-printed tag they made themselves has done something genuinely creative and thoughtful.
This project closes the loop on what 3D printing is for. It started with a name tag for themselves. It ends with a personalized gift for someone else. That progression — from 'I made this for me' to 'I made this for you' — is what converts a child from a one-session experimenter to a habitual maker.
|
Ages |
Print Time |
Skill Learned |
|
5+ |
20–30 min |
Gift-making, personalization, creative pride |
All 10 Projects at a Glance
|
# |
Project |
Age |
Print Time |
Category |
Supports? |
Assembly? |
|
01 |
Personalized Name Tag / Keychain |
5+ |
15–25 min |
Quick Win |
None |
None |
|
02 |
Playdough Stamp |
4+ |
15–20 min |
Quick Win |
None |
None |
|
03 |
Spinning Top |
6+ |
15–25 min |
Quick Win |
None |
None |
|
04 |
Bookmark with Character |
5+ |
15–25 min |
Quick Win |
None |
None |
|
05 |
Small Animal Figurine |
4+ |
20–45 min |
Creative Play |
None |
None |
|
06 |
Wobble Toy / Rocking Animal |
4+ |
20–35 min |
Creative Play |
None |
None |
|
07 |
Fidget Ring (Print-in-Place) |
6+ |
20–30 min |
Creative Play |
None |
Print-in-place |
|
08 |
Mini Coin Tray / Ring Dish |
7+ |
25–40 min |
Creative Play |
None |
None |
|
09 |
Flexi Articulated Animal |
6+ |
60–90 min |
Step-Up |
None |
Print-in-place |
|
10 |
Personalized Bag Tag / Gift Label |
5+ |
20–30 min |
Step-Up |
None |
None |
What Makes a Curated Library Different

The projects above are chosen for high success rates. But 'high success rate' is partly a property of the model and partly a property of how well it has been tested on your specific printer.
A model downloaded from a random platform may have been designed for a completely different printer with different settings. The first layer might not stick. The print time estimate might be wrong. Overhangs that need no supports on one machine fail on another.
The AOSEED Toy Library exists specifically to solve this. Every model in the library has been verified on the printer it is designed for — default settings, standard PLA, accurate print time. A child who browses and taps print gets a successful first print, not a troubleshooting session. This is especially important for the quick-win projects above, all of which are represented in the weekly-updated library.
For first-time projects, the library reduces risk significantly. Once a child has five to ten successful prints behind them, they are ready for external platforms — Printables, Thingiverse, Cults3D — with the confidence to know what a good model looks like and the resilience to handle the occasional failed print without giving up.
Setting Up the First Session for Success
Even with the right project, the session context matters. Here is the setup that gives a first-time child the best possible experience.
- Choose the project before the session starts. Do not leave the child browsing for 20 minutes feeling paralyzed by choice. Pick one project and have it ready.
- Check the filament before you begin. Load a fresh spool. Running out mid-print is one of the most common causes of first-session disappointment.
- The child presses the final button. Whatever else you set up, make sure the child is the one who taps go. That moment of 'I started this' matters for ownership of the result.
- Stay nearby but do not hover. Let the child watch the printer, walk away, check on it. This is normal printing behavior and models healthy engagement with the machine.
- Have the next project ready before the current one finishes. While the print runs, browse the library together and pick what comes next. This prevents the gap that can end a session early.
⚠ The Project That Looks Perfect But Isn'tArticulated dragons and multi-part robots look spectacular in photos and seem like the ideal first print. In practice they have long print times, often require supports, and need careful post-processing to function. These are great projects for a child with ten successful prints behind them. For print number one, they are the fastest route to a discouraged child and a printer going into a closet. Save the dragons for month two. |
What Comes After These 10

Once a child has worked through five or six of the projects above, the dynamic shifts. They understand the printer. They know what a good print looks and feels like. They have built enough resilience to handle an occasional unexpected result without losing interest.
This is when the more complex projects become worth attempting: multi-part mechanical builds, longer articulated creatures, functional STEM models like gear sets or planetary systems. Creation kits — where printed parts combine with motors and mechanisms to make working objects — are the natural next step for children who enjoy both making and engineering.
For older children ready for that level of complexity, the AOSEED X-MAKER supports PETG alongside PLA and has a 3.5-inch touchscreen for more hands-on control. It handles larger mechanical builds than the X-MAKER JOY and is designed for children aged 9 to 16 who want STEM projects and creation kit builds.
For a first print with a young child, start with the quick wins above. The step-up projects are still ahead of them. The goal of session one is a single held object and the question 'what do I make next?'
FAQs
What are the best first 3D printer projects for kids?
The best first projects share four properties: they print under 60 minutes, require no supports, produce a single piece with no assembly, and result in something functional or personalized. From this list: a name tag, a playdough stamp, or a spinning top. All three produce an immediate result the child can hold in a single session.
What is 3D printing for kids, and why do children enjoy it?
3D printing for kids is the process of turning a digital model into a physical plastic object — selecting a design, tapping print, and watching it build layer by layer. Children enjoy it because it converts imagination into a tangible result that they made themselves. The tactile satisfaction of holding something you created is genuinely different from other creative activities. The iterative nature — print it, improve it, print again — also builds persistence naturally.
How do I stop my child from getting frustrated with 3D printing?
Project selection is the most effective strategy. Avoid long prints, models requiring supports, and multi-part assemblies for first sessions. Stick to flat or simple geometry that prints under an hour and produces something immediately usable. Have the next project chosen before the current one finishes. Treat a failed print as a learning moment — ask the child what they think went wrong before stepping in.
For a step-by-step guide to getting started, step-by-step print tutorials on Instructables are a reliable starting point for parents setting up their first session.
Can a 5-year-old do 3D printer projects?
Yes, with the right printer and project selection. A 5-year-old can browse a library, select a model, and tap print — the full experience is achievable with an app-led family printer. The adult handles filament loading and print removal for the first few sessions. By session three or four, most 5 to 6-year-olds can run the browsing and printing steps independently. Projects 1, 2, 4, 5, and 6 from this list are all appropriate for ages 4 to 6.
What is 3D printing for kids near me?
Many public libraries and community makerspaces offer access to 3D printing and workshops for children. Search 'makerspace near me' or check your local library's website for maker programming. These are good places to try 3D printing before buying a printer. Schools are also increasingly offering printers through STEM programs. A first session at a makerspace is a low-risk way to confirm a child's interest before investing in a home setup.
Where can I find 3D printer models for kids?
For first-time projects with verified reliability, a curated library tested for your printer's default settings is the best starting point. For broader free models: Printables.com has an excellent kids' category with download counts; Thingiverse has the largest library; Cults3D has strong creative and toy sections. When choosing from any external platform, look for models marked 'no supports needed' and check the comments for real-world print results.
What is a print-in-place model, and why is it good for beginners?
A print-in-place model has moving parts that are already assembled — the joints come off the build plate as a single unit, with no glue or assembly steps. A fidget ring whose inner band already spins, or a dragon whose tail already flexes. These are excellent beginner projects because the child's first interaction with the finished object is one of genuine surprise — it works immediately, which is the strongest possible positive first impression.
Do I need design skills to do 3D printer projects with my child?
No. Every project on this list can be printed from a pre-made library model with zero design involvement. The child browses, chooses, and prints. Design skills become relevant later when a child wants to create something specific or solve a particular problem — and even then, tools like Tinkercad make basic design accessible from around age 7 to 8. For first sessions, design is not required and should not be introduced as a requirement.
What 3D printing toys for kids are most popular to make at home?
Articulated flexi animals — dragons, sharks, axolotls — are consistently the most-downloaded kids' 3D printing models. Their print-in-place movement impresses children and adults equally. After those, personalized name tags and keychains, spinning tops, and small animal figurines are the most requested first projects. For older children, creation kits build — where printed parts combine with mechanical components to make working toys — are increasingly popular because they combine making with engineering.
Sources
- MatterHackers — Easy 3D Printing Projects for Beginners, Explore easy 3D printing projects for beginners on MatterHackers, 2025.
- YouMagine — Easy 3D Printing Projects for Kids, Check out YouMagine's collection of easy 3D printing projects for kids, 2025.
- Thingiverse — Kids 3D Print Projects, Find kids 3D print projects on Thingiverse, 2025.
- MyMiniFactory — Kids and Classroom 3D Printing Projects, Browse classroom and kids 3D printing projects on MyMiniFactory, 2025.
- Tinkercad — Beginner 3D Printing Projects, Explore beginner-friendly 3D printing projects with Tinkercad, 2025.
8 Print-and-Play Interactive 3D Printed Games for Kids Aged 4–12

There is a specific kind of pride that comes from winning at a game you made yourself.
I watched my 9-year-old figure this out the first time we played his printed stacking tower on a Sunday evening. He had spent Saturday printing the blocks, counted them out carefully, stacked them up, and then spent the next 45 minutes beating everyone at the kitchen table. The game got a name that night. Not its model name. His name. 'Can we play Daniel's tower game?' No store-bought game in our house gets called that.
This is what 3D printed games offer that toy buying doesn't: a game night built from something the child created. The making and the playing are the same project. Eight games follow — each age-appropriate for 4 to 12, printable in a single session, and genuinely fun for the whole family.
At AOSEED, this exact idea — print it, play it the same day — shaped how the X-MAKER product line was built. The AOSEED X-MAKER JOY lets a child browse game models in the app, choose colors, and start printing with minimal adult help — which means the game night can genuinely belong to them from start to finish.
Why 3D Printed Games Hit Different

Most families have a stack of board games somewhere in a cupboard. Some get played regularly. Most do not. The ones that do tend to have a story attached — found on a trip, received as a meaningful gift, or made by someone at the table.
A 3D printed game always has the last kind of story. The child chose the colors. They decided how many tokens to print. They placed the pieces on the build plate themselves. When they play it with their family, they are playing something that exists partly because of decisions they made — and that makes them far more invested in the outcome.
There is a practical benefit too: 3D printed games are repairable. Lose a token? Print another. Break a piece? Replace it in 15 minutes. The game never becomes unplayable because of a missing component — which, for games that get genuinely played, matters more than it sounds.
What Makes a Good Print-and-Play Game for Kids
Not every 3D printable game is right for the 4–12 age range. The best ones share these five characteristics.

|
Characteristic |
Why It Matters for Kids |
|
Rules explained in under 2 minutes |
Children invest in a game only when they understand it. Simple rules = faster first game = more fun |
|
Printable in one afternoon |
Making and playing should happen the same day — the wait between print and play is part of the excitement |
|
2 to 4 players minimum |
Family games need at least a parent-child match. Games for 2 to 4 work for most family sizes |
|
Safe for all ages at the table |
Mixed-age play works best when the youngest player can follow along. No reading required for the youngest group |
|
Physically satisfying to handle |
Flicking, stacking, rolling, sliding — tactile interaction is what makes a physical game better than a screen game |
Every game on this list meets all five. That is the only selection rule used here.
The 8 Games — Print Saturday, Play Saturday Night
01. Mini Puck Flicker Game

A small tabletop launcher that flicks a disc across a smooth surface toward a printed goal at the other end. Load the disc, pull back the spring plate, release. The skill is in calibrating how hard to flick — too hard and it flies off the table, too soft and it falls short. Two players take turns flicking five discs each, scoring by landing inside the goal.
This works particularly well for siblings with a big age gap. Skill and randomness are both factors, which means a 5-year-old and a 9-year-old are roughly competitive. That balance is rare in physical games and worth choosing for.
|
Ages |
Players |
Print Time |
Skill Developed |
|
4+ |
2–4 |
45–90 min |
Aim, turn-taking, gentle competition |
02. Stacking Tower (Jenga-Style Blocks)

54 identical rectangular blocks stacked into an 18-tier tower. Players take turns removing blocks one at a time and placing them on top. Eventually the tower falls. The player who causes the collapse loses.
Printing 54 blocks in batches of 6 to 8 per print means this takes 3 to 4 hours total — good to start in the morning for an evening game. The experience of playing a tower that was printed and stacked by a child, then toppled by a parent, is satisfying for everyone at the table. This is the most replayable game on this list. Setup is simple, each game takes 10 to 20 minutes, and it never plays the same way twice.
|
Ages |
Players |
Print Time |
Skill Developed |
|
5+ |
2–4 |
3–4 hours total |
Patience, steady hands, risk assessment |
03. Custom Dice Tower + Personalized Dice Set

A printed ramp that tumbles dice through an internal staircase and drops them onto a catching tray — ensuring genuinely random rolls. The child can print dice in different colors, one per player, so everyone has their own die. The tower itself takes 60 to 90 minutes and becomes a permanent fixture for any game that uses dice.
Print extra dice in each player's favorite color and they have a set that belongs to them. A wide range of tower designs and dice styles are available among printed game pieces for kids on Pinshape — a good source for game accessories alongside the major platforms.
|
Ages |
Players |
Print Time |
Skill Developed |
|
5+ |
1–6 |
60–90 min (tower) + 15–25 min per die |
Creative personalization, randomness in games |
04. Spinning Top Battle Arena

A shallow printed ring — the arena — and 2 to 4 spinning tops, each in a different player's color. Players spin their tops into the ring simultaneously. The last top spinning wins the round. First to win five rounds wins the match.
This game generates the most noise in our house. A 7-year-old and a parent are equally matched because spinning a top consistently is a skill that does not scale with age in the way most dexterity games do. The arena takes 30 to 40 minutes to print. Each top takes 15 to 20 minutes. The full set for four players is ready in an afternoon.
|
Ages |
Players |
Print Time |
Skill Developed |
|
5+ |
2–4 |
~90 min total |
Coordination, competitive play, physics |
05. Ring Toss Set

Three to five printed posts of graduated heights in a weighted base, and 10 to 12 printed rings in two player colors. Players take turns tossing rings onto posts — higher posts score more points. First to 20 wins. This works indoors on a kitchen table or outdoors on a flat surface.
The physical act of tossing a ring you printed yourself onto a post you designed and made is different from a plastic ring toss from a toy shop. You can find printable game models for kids on Cults3D at printable game models for kids on Cults3D — including several ring toss variations with different post configurations and ring sizes.
|
Ages |
Players |
Print Time |
Skill Developed |
|
4+ |
2–4 |
90–120 min total |
Aim, distance judgment, simple scoring |
06. Sliding Tile Puzzle (15-Puzzle)

The classic 4x4 grid with 15 numbered tiles and one empty space. Slide tiles around to order the numbers 1 to 15 in sequence. One player completes it as fast as possible while another times them. The competition is against your own best time, which eliminates the age gap entirely.
Printing the frame and tiles takes 2 to 3 hours for the full set. The puzzle works best with a slight tolerance between tiles and frame so they slide smoothly without falling out. This is a project where the child discovers print tolerance as a real engineering concept through making — they learn it by testing, not by reading about it.
|
Ages |
Players |
Print Time |
Skill Developed |
|
6+ |
1 (timed) |
2–3 hours |
Spatial reasoning, patience, logic |
07. Maze Tilt Board

A shallow tray with printed wall channels forming a maze, and a small ball that navigates through by tilting. Hold the board level, then tilt gently to roll the ball from start to finish without dropping into the holes at the dead ends. For younger children this is a patience game. For older children it becomes competitive — two boards, two players, first to complete the maze wins.
The maze layout is one of the best creative design opportunities on this list. An older child who wants to design their own maze can start with a simple straight-path layout and add dead ends and deceptive turns across multiple printing sessions. The game literally grows in complexity as the child's design skills do.
|
Ages |
Players |
Print Time |
Skill Developed |
|
5+ |
1–2 |
2–3 hours |
Spatial awareness, patience, balance, design thinking |
08. Custom Tic-Tac-Toe Tokens

A classic 3x3 grid board with five tokens per player in contrasting colors. The game is Tic-Tac-Toe, which every child knows immediately. The value is in the personalization: the child can shape the tokens however they like — star vs. circle, dinosaur vs. spaceship, their initial vs. their sibling's initial. The tokens become a permanent named set.
Extend the game by printing a 4x4 or 5x5 board for 'four in a row' rules as children grow into it. The same set gets reprinted in slightly different configurations across multiple sessions. The game grows with the family.
|
Ages |
Players |
Print Time |
Skill Developed |
|
4+ |
2 |
50–75 min total |
Strategy, pattern recognition, turns |
All 8 Games — Quick Reference
|
# |
Game |
Ages |
Players |
Print Time |
Best For |
|
01 |
Mini Puck Flicker |
4+ |
2–4 |
45–90 min |
Fast competitive play across age gaps |
|
02 |
Stacking Tower (Jenga-Style) |
5+ |
2–4 |
3–4 hours |
Classic game night — most replayable on this list |
|
03 |
Dice Tower + Custom Dice |
5+ |
1–6 |
60–90 min |
Permanent accessory for any dice-based game |
|
04 |
Spinning Top Battle Arena |
5+ |
2–4 |
~90 min |
Skill-balanced, genuinely equal across ages |
|
05 |
Ring Toss Set |
4+ |
2–4 |
90–120 min |
Indoor and outdoor, youngest-child-friendly |
|
06 |
Sliding Tile Puzzle (15) |
6+ |
1 (timed) |
2–3 hours |
Solo timed challenge, self-improvement, logic |
|
07 |
Maze Tilt Board |
5+ |
1–2 |
2–3 hours |
Patience and design — can be self-designed |
|
08 |
Custom Tic-Tac-Toe Tokens |
4+ |
2 |
50–75 min |
Immediate playability, grows with age |
How to Host a Print-and-Play Game Night
The format that works best in our family is a Print Saturday, Play Saturday Night structure. Here is how it runs.
|
Time |
What Happens |
|
Saturday morning |
Child prints two or three games. Chooses models, selects colors, loads filament, starts each print. Games build up throughout the day. |
|
Saturday afternoon |
While the final print runs, they write the rules on a card. For known games the rules are already there. For new games, they invent their own scoring. This is genuinely creative work and children take it seriously. |
|
Saturday evening |
Family sits down, the child introduces their game, explains the rules, and the game starts. This runs differently from a bought game — the child has ownership, which changes the entire evening. |
🏆 The Game Tournament FormatIf you want to run a full family game night, print 3 to 4 games and run a simple tournament. Each game is played twice, with each person going first once. Keep a running score on paper. Award the child who designed and made the games a host bonus of 1 point regardless of how they play. This structures the evening, involves everyone, and gives the child-maker a moment of recognition that is separate from winning or losing. |
Where to Find These Game Files
All eight games above are available as free models on open platforms. You do not need to design anything from scratch to get started.
For AOSEED printer owners, the AOSEED Toy Library is the first place to look — game pieces, tokens, dice, and interactive builds are updated weekly alongside the standard models. Components in the library are optimized for default printer settings, which means reliable first prints without adjusting anything.For broader game model search, these platforms have the strongest collections for kids' games.
|
Platform |
Best For |
Notable Strength |
|
Thingiverse |
Largest library — search 'print and play' or 'kids game' |
Full stacking tower sets, ring toss designs, dice towers |
|
Cults3D |
Tabletop game accessories and token designs |
Strong maze and strategy game section |
|
MyMiniFactory |
Complete printable board game sets for children |
Good children's board game section |
|
Printables |
Newer platform — detailed tags including print time |
Difficulty rating per model, useful for first-time downloads |
|
Pinshape |
Game piece variety — dice, tokens, custom rings |
Good for game accessories and component sets |
When downloading from any platform, filter for models tagged 'no supports' and check the comments for notes on the required print gap size between moving parts — this matters for puzzles and maze boards where tolerance affects how smoothly pieces interact.
For Older Kids: Design Your Own Game

Children aged 9 and up who have been printing for a few months often reach a natural point of interest in designing rather than just printing. Designing a game is one of the most complete creative challenges at this age: the child has to think about rules, fairness, physical mechanics, aesthetics, and player experience all at once.
A good starting brief for a child who wants to design their own: pick one of the eight games above as a foundation, then change one rule and design one new piece. A stacking tower with a twist rule. A ring toss with different ring sizes for different point values. A maze with a double-level board.
The AOSEED X-MAKER handles the precise tolerances needed for game pieces that interact mechanically — maze walls that are exactly the right height, puzzle tiles that slide but do not fall out, tokens that stack without slipping. Pair it with Tinkercad for basic design work and a child who enjoys making can build an original, playable game in a weekend.
Tips for Printing Game Models Well

Most of the games above are straightforward to print. A few specifics make a meaningful difference to the finished result.
|
Tip |
Detail |
|
Use PLA for all game pieces |
PLA is plant-based, non-toxic, and robust under normal play. It handles the repeated physical interaction of games well without special settings. |
|
Print no-supports models only |
Game pieces with overhangs that need supports produce rough surfaces on the underside — this affects how pieces slide, stack, or interact. No-supports models give cleaner results. |
|
Raise infill to 30–40% |
Default infill of 15–20% is fine for display objects. For game pieces that get handled repeatedly, 30–40% infill significantly improves durability without much extra material. |
|
Test tolerances before printing full sets |
For puzzles and maze boards, print one tile first and check the fit. The tolerance — the gap between pieces — varies by printer. A 0.3mm gap may slide too easily on one machine and too stiffly on another. |
|
Batch print small pieces |
Dice, tokens, and ring-toss rings can all be batched in one print job. Arrange multiples on the build plate and print them together — this reduces total print time significantly. |
|
Label pieces by player color |
Print each player's pieces in a specific filament color. It removes any ambiguity during gameplay and gives each player a sense of ownership over their pieces. |
The Game That Stays on the Shelf

Most store-bought games go into a cupboard. Games a child made tend to stay on the shelf where they can be seen — and where they get brought out. The dice tower for cousins visiting. The ring toss for outdoor afternoons. The stacking tower for quiet Sunday evenings.
This is what 3D printing as a creativity tool actually looks like in a family home. Not a collection of objects on a windowsill, but things that get used, played with, replaced when pieces break, and improved when the child has a new idea. Games are the clearest example of this in the world of home 3D printing.
If you are choosing a printer and want one designed specifically for family-home use for ages 4 to 12, both the AOSEED X-MAKER JOY and X-MAKER are shown side by side at AOSEED 3D printers for kids with current pricing, age guidance, and features — a useful comparison if your children are different ages or you are buying for more than one child.
FAQs
What 3D printed games can kids aged 4 to 6 actually play?
For the youngest age group: ring toss, tic-tac-toe with custom tokens, and spinning top battle. These three require no reading, have rules explainable in one sentence, and do not penalize younger children for slower reaction times. The puck flicker game also works from around age 5 since the aiming component makes skill roughly equal across ages.
How long does it take to print a game for family game night?
Most games in this guide can be fully printed in one afternoon — 3 to 5 hours. The quickest options: the tic-tac-toe set takes about 75 minutes total, the spinning top arena and four tops takes about 2 hours. The longest is the stacking tower at 3 to 4 hours for 54 blocks. Start printing in the morning and most games will be ready by evening. Batch printing small pieces together — dice, tokens, rings — reduces total print time significantly.
Are 3D printed game pieces safe for young children?
With PLA filament, yes. PLA is plant-based, non-toxic, and safe to handle. For very young children under 3, avoid very small pieces that could be mouthed. For children aged 4 and up, standard PLA game pieces are safe for regular play. Use a fully enclosed printer to ensure the printing process itself is safe regardless of who is in the room. Finished PLA pieces can be cleaned with a damp cloth.
Can kids design their own 3D printed board game?
Yes, from around age 8 to 9 with basic Tinkercad experience. The best approach is to start with an existing game from this list and modify one element — custom token shapes, a different maze layout, or a modified board size. Full original game design is possible but benefits from first printing and playing several existing games, so the child understands how pieces need to interact mechanically. This is a genuinely enriching creative and engineering challenge for older children.
What is the most family-friendly 3D printed game to start with?
The stacking tower is the single most universally playable option. It requires no explanation beyond 'remove a block and put it on top', works for ages 5 to adult, scales naturally from 2 to 4 players, and produces a real climactic moment — the tower falling — that everyone at the table reacts to equally. It is also the most replayable game here. Setup is simple, each game takes 10 to 20 minutes, and it never plays the same way twice.
How do 3D printed games fit into family screen-light time?
3D printed games are one of the most effective screen-light activities available because they provide the same kind of engagement — competition, interaction, strategy — without a screen. The making process adds a second layer: the child has already invested time and creative decisions in the game before the first player takes a turn. That investment changes how they engage with the game and with each other. For families looking for calmer, more structured play together, printing and playing a game is a complete afternoon activity with no screen required.
Where can I find free 3D game models to print?
Thingiverse and Printables are the two largest free model platforms. For kids' games specifically, search 'stacking blocks', 'dice tower', 'ring toss', 'maze board', 'spinning top arena', or 'print-in-place puzzle'. Cults3D has a strong section for game accessories. MyMiniFactory has complete printable board game sets. When choosing any model, check the comments for real-world print results — particularly for models with moving parts where tolerance between pieces matters.
Do 3D printed games hold up under regular play?
PLA game pieces are robust for regular family use. Standard stacking tower blocks survive hundreds of games without deformation. Dice towers, ring toss sets, and spinning top arenas are all durable under normal play conditions. The main failure mode is impact stress — a dice tower dropped repeatedly on a hard floor will eventually crack. The advantage of a printed game is that any broken piece can be reprinted in minutes. Pieces can also be printed at 30 to 40% infill rather than the default 15 to 20% for better durability in high-use games.
Can 3D printed games be used in a classroom?
Yes — several games on this list work well in classroom settings. The sliding tile puzzle is a good individual challenge activity. The maze tilt board works for pair activities. Custom token games work for small groups. The most useful classroom application is the game design project itself: students design and print a game, write the rules, and run a class tournament. This covers design thinking, engineering constraints, technical writing, and cooperative play in one project.
Sources
- YouMagine — 3D Print Game Pieces and Toy Games, Find interactive 3D printed games for kids on YouMagine, 2025.
- All3DP — Best 3D Printable Board Game Pieces, Explore the best 3D printable board game pieces on All3DP, 2025.
- MatterHackers — Easy 3D Print Projects with Game Pieces, Discover easy 3D print projects with game pieces on MatterHackers, 2025.
- ForwardEDU — 20 3D Printer Classroom Projects and Games, Check out 20 classroom projects with 3D printed games from ForwardEDU, 2025.
How Much Does It Cost to 3D Print at Home for Kids' Projects?

Before we bought our 3D printer I sat down and tried to work out what it would actually cost per year. The hardware price was clear. The filament cost was less obvious. The ongoing bits — subscriptions, accessories, replacement parts — were almost invisible until you went looking for them.
Most people buying a family 3D printer underestimate how low the ongoing costs are — and some specific products are priced in ways that make the running costs significantly higher than they need to be. This guide gives you the real numbers so you can budget accurately.
The short version: for a family printer using standard PLA filament, printing a few toys per week costs roughly the same per month as a single Lego set per year. The electricity cost is negligible. The subscription question is where some products differ significantly.
The Two Types of Cost to Understand

There are only two categories of cost in home 3D printing: what you pay once (upfront), and what you pay to keep printing (ongoing). Getting clear on both before buying makes the total picture much less confusing.
|
Cost Type |
What It Includes |
Frequency |
|
Upfront (Hardware) |
The printer itself, or any starter kit |
Once |
|
Ongoing (Filament) |
PLA spool replacements |
~Every 2-4 months for active use |
|
Ongoing (Electricity) |
Power consumption while printing |
Per print session — very small |
|
Ongoing (Subscriptions) |
Optional platform subscriptions — varies by printer |
Monthly — check before buying |
|
Occasional (Maintenance) |
Replacement nozzles, build plates |
Rarely — typically $5-15/year |
Upfront Cost: What You Pay for the Printer

Family and kids' 3D printers range from around $150 at the budget end to $400 for well-equipped family models. Unlike adult hobbyist printers, which can run $800 to $2,000+, the kids' printer category is significantly more accessible.
|
Printer Tier |
Price Range |
Who It's For |
Example Models |
|
Entry-level kids' printer |
$150 – $230 |
Ages 5-8, simplest use |
Toybox (~$169-229) |
|
Mid-range family printer |
$249 – $369 |
Ages 4-12, full ecosystem |
X-MAKER JOY ($249), X-MAKER ($369) |
|
Adult/hobbyist printer |
$200 – $400+ |
Ages 12+, adult workflow |
Bambu A1 Mini ($299) |
|
Professional home printer |
$800 – $2,000+ |
Advanced makers/professionals |
Bambu X1C, Prusa MK4 |
For a family buying their first printer, the realistic upfront cost is $169 to $369, depending on the model and features. The AOSEED X-MAKER JOY sits at $249 (reduced from $339), which is the mid-range family price for a fully enclosed, app-led printer with a weekly-updated content library.
Filament Cost: What You Actually Pay Per Print

Filament is the material the printer uses. It comes on a spool — usually 1 kilogram of plastic wound onto a reel. This is where the real cost conversation lives, and where there's a significant difference between printer types.
Standard PLA Spool — The Family Printer Default
A standard 1kg spool of PLA filament from a reputable brand costs roughly $20-$25. That's 1,000 grams of material. A typical small kids' toy — an animal figurine, a keychain, a small vehicle — uses between 5 and 20 grams of filament.
Running the math: at $22 per kg, each gram costs $0.022. A 10-gram toy costs $0.22 in filament. A 20-gram model costs $0.44. A larger build using 50 grams costs just over $1.
|
Object Type |
Filament Used |
Material Cost |
+ Electricity |
Total Per Print |
|
Small ring/keychain |
3 – 8g |
$0.07 – $0.18 |
~$0.03 |
$0.10 – $0.21 |
|
Small animal figurine |
10 – 20g |
$0.22 – $0.44 |
~$0.05 |
$0.27 – $0.49 |
|
Medium toy/model |
25 – 50g |
$0.55 – $1.10 |
~$0.10 |
$0.65 – $1.20 |
|
Large build/creation kit part |
80 – 150g |
$1.76 – $3.30 |
~$0.20 |
$1.96 – $3.50 |
|
Full creation kit assembly |
150 – 250g |
$3.30 – $5.50 |
~$0.30 |
$3.60 – $5.80 |
How Long Does One Spool Last?
For a family with one child printing a couple of toys per week, a 1kg spool typically lasts 2 to 4 months. Active printing families — where children print daily or work on creation kit builds — might go through a spool per month. Either way, filament at $22-25/kg is genuinely not a significant expense.
A useful comparison: the cost of a year's filament for an active printing family (6-8 spools at $22 each = $132-$176) is roughly the same as two to three mid-range Lego sets. For a tool that provides a different creative project every week of the year, that's very good value.
⚠ THE PROPRIETARY FILAMENT TRAP — WHAT DOES THE TOYBOX COST TO RUN |
|
Some kids' printers use proprietary filament rolls rather than standard 1kg spools. Toybox calls its filament 'Printer Food'. These small rolls are significantly more expensive per gram than standard PLA from any third-party brand. Toybox says third-party filament can be used, but it technically voids the printer's warranty, which deters many families from doing so. Over a year of regular use, a family using Toybox's proprietary rolls at ~$20 per small roll spends materially more on filament than a family using a printer that accepts standard 1kg spools. If you're buying on upfront price and the ongoing filament cost is higher, the cheaper printer may not be cheaper over 12 months. Always check filament compatibility before buying. |
Electricity Cost: Smaller Than You'd Think

Consumer 3D printers typically draw 60 to 120 watts during a print session. At US average electricity rates of around 13 cents per kWh, that works out to roughly $0.05 to $0.15 per hour of printing.
A 45-minute print of a small toy costs about $0.07 in electricity. A 3-hour creation kit build costs about $0.25. For a family running the printer a few times per week, the total electricity cost over a year is typically $10-$20 — genuinely negligible in any household budget.
|
Print Session |
Duration |
Electricity Cost |
Notes |
|
Small toy (keychain, ring) |
20 – 40 min |
~$0.03 – $0.07 |
Barely measurable |
|
Medium figurine |
45 – 90 min |
~$0.07 – $0.15 |
Less than a coffee |
|
Large model/kit |
2 – 4 hours |
~$0.20 – $0.40 |
Still under $0.50 |
|
Full day print (8h) |
8 hours |
~$0.80 – $1.20 |
Worst case: ~$1/day |
Data aligned with 3D printer electricity use figures — $0.05 to $0.15/hour for most consumer printers.
Subscription Costs: Where to Watch Carefully

Most family printers don't require a subscription to use. The core printing workflow — browse, select, print — works without any monthly payment. This is true for both AOSEED models and most family printers.
Toybox is the notable exception in the kids' category. The base experience is free, but the 'Pro' subscription at $18 per month unlocks AI tools for generating models from photos or text. If a family subscribes for a full year, that's $216 on top of the hardware cost, which meaningfully changes the total cost of ownership versus a printer with no subscription required.
The content library question also matters here. A printer with a small or static content library eventually pushes a parent to spend time finding external models, which is a time cost, if not a money cost. A printer with a library that updates weekly removes this need entirely.
The AOSEED Toy Library adds new models every week at no additional charge. Thousands of models are available free to all users — animals, vehicles, seasonal builds, STEM models, and creation kit projects. No subscription is needed to access this content. The AI design tools (AI MiniMe, AI Doodle) are included with the printer rather than gated behind a monthly fee.
What a Year of Home 3D Printing Actually Costs

Here's what a full year of regular family 3D printing looks like across different printer types and usage levels. This assumes a child printing 2-3 times per week on average.
|
Cost Category |
Standard PLA Printer(active user) |
Toybox — No Sub.(active user) |
Toybox + Pro Sub. |
Notes |
|
Hardware (amortized yr 1) |
$249 – $369 |
$169 – $229 |
$169 – $229 |
One-time |
|
Filament/year |
$88 – $176 |
$120 – $240+ |
$120 – $240+ |
Proprietary rolls cost more/g |
|
Electricity/year |
$10 – $20 |
$8 – $15 |
$8 – $15 |
Negligible |
|
Subscription/year |
$0 |
$0 |
$216 |
Toybox Pro = $18/mo |
|
Maintenance/year |
$5 – $15 |
$5 – $15 |
$5 – $15 |
Nozzle, plate |
|
TOTAL YEAR 1 |
$352 – $580 |
$302 – $499 |
$518 – $715 |
|
|
TOTAL YEAR 2+ |
$103 – $211 |
$133 – $270 |
$349 – $486 |
Hardware excluded |
All figures approximate. Filament cost based on $22/kg standard PLA or $20 per small Toybox proprietary roll. Active = ~2-3 prints per week.
The table tells a clear story. In year one, hardware costs dominate, and the differences between printers narrow. From year two onwards, a printer with no subscription and standard filament costs roughly $100-$200/year to run. A printer with a monthly subscription and proprietary filament can run $350-$490/year, even without any hardware costs, and is more expensive long-term than a more capable printer bought at a higher upfront price.
Practical Ways to Keep Running Costs Low

Buy Standard Spools in Multipacks
A single 1kg spool of standard PLA runs $20-25. Buying a multipack of 5-6 spools in different colors typically drops this to $15-18 per spool. For a family who knows they'll print regularly, buying a small stock upfront makes sense and means you never run out mid-project.
Choose a Printer That Accepts Any Filament
This is the single most important cost decision. A printer compatible with any standard 1.75mm PLA spool gives you access to hundreds of brands at competitive pricing. A printer that pushes proprietary filament — even if it technically allows third-party filaments — creates ongoing cost exposure that compounds over months and years.
Print at Infill Settings Appropriate to the Object
Most slicer software and printer apps let you set how solid the interior of a printed object is. A decorative toy doesn't need to be fully solid throughout — a 15-20% infill setting produces a strong enough print while using significantly less filament than 100% infill. For an app-led family printer that handles this automatically, the settings are already optimized — you don't need to think about it.
Use the Free Content Library Before Buying Models
Many platforms have substantial free model libraries. The AOSEED Toy Library — accessible without a subscription — updates weekly with new models across all categories. Before spending time or money finding external models, always check what the native library has first. For most families, this covers everything needed for weeks or months of regular printing.
The Real Question: Is 3D Printing Affordable for a Family?

The honest answer is yes, for most families — if you choose a printer with standard filament compatibility and no mandatory subscription. The ongoing cost of printing for a child who uses the printer regularly is modest: roughly $100- $200 per year for filament and electricity. That's less than most screen-based subscription services and produces physical objects that the child has made themselves.
The cases where 3D printing becomes expensive are specific: proprietary filament systems, monthly subscriptions for content that should be included, and adult hobbyist printers that create a steep setup learning curve and generate wasted prints while learning.
Both the AOSEED X-MAKER and X-MAKER JOY accept standard PLA from any brand, include a free content library with weekly updates, and require no subscription to access the full printing experience. To compare current pricing for both models, AOSEED 3D printers side by side.
FAQs
How expensive is it to 3D print at home?
For a family using standard PLA filament, the ongoing cost is very low — typically $100 to $200 per year in filament and electricity combined for regular use. The upfront hardware cost for a family-appropriate printer is $169 to $369. The main cost variable is the filament system the printer uses: standard spool printers run $20-25 per kg, while printers with proprietary filament rolls cost significantly more per gram.
How much does filament cost for kids' 3D printing?
A standard 1kg spool of PLA filament costs $20 to $25. Most small children's toys use 10-20 grams of filament, putting the material cost per print at $0.22 to $0.44. A multicolored keychain or small animal figure costs under $0.50 to print. For regular family use, one spool lasts 2 to 4 months, making the annual filament cost roughly $75 to $150.
How much does it cost to run a 3D printer for 24 hours?
A typical consumer 3D printer draws 60-120 watts. At the US average electricity rates, running a printer continuously for 24 hours costs approximately $0.19 to $1.50, depending on the printer's power draw and local electricity rates. For reference, most children's toy prints take 30 minutes to 2 hours — the electricity cost per typical print is under $0.20, usually closer to $0.05-$0.10.
How much does the Toybox 3D printer cost to run?
The Toybox Alpha Two retails for approximately $169- $ 229. The main ongoing cost consideration is the proprietary 'Printer Food' filament, which comes on small rolls and costs more per gram than standard 1.75mm PLA spools. Toybox also offers a Pro subscription for $18/month that includes AI model generation tools.
A family with an active Toybox user and a Pro subscription may spend $350-490 per year after the initial hardware purchase, compared to $100-200 for a printer using standard PLA with no subscription.
Can I legally sell 3D prints?
Generally, yes, if you're selling original designs or prints of models you have the rights to. Selling prints of commercially licensed characters — cartoon characters, brand logos, patented product designs — without authorization is not permitted.
Most consumer printers are used for personal and family projects where this isn't relevant, but it's worth checking the license terms of any third-party model before selling prints made from it.
Is 3D printing cheaper than buying toys?
For most individual items, yes — a small figurine that costs $0.30-$0.50 to print would cost several dollars if purchased. For complex articulated toys, the cost comparison is closer. The value is less about direct cost comparison and more about what you get that a purchased toy doesn't provide: the child made it, it can be personalized, and the creative process itself is part of the value.
A year of regular printing at $100-200 in running costs produces hundreds of objects and the entire creative ecosystem around making them.
What are the hidden costs of home 3D printing?
The main hidden costs to watch for are proprietary filament systems (higher cost per gram and locked into one supplier), platform subscriptions (monthly fees for content that some printers include for free), and the time cost of finding and preparing models for printers without a built-in content library.
Maintenance costs — replacement nozzles, spare build plates — are typically $5- $ 15 per year and are genuinely minor. Failed prints waste a small amount of filament but are infrequent with well-designed family printers.
Do I need to buy extra things when I buy a kids' 3D printer?
Most family printers include the starter filament needed for first prints, and everything required to begin printing in the box. Standard items include a fully assembled printer, a starter filament spool, and any necessary setup accessories.
Items you may want to buy separately after the first spool runs out: additional PLA spools in different colors ($20- $ 25 each). Optional items: extra build plates, spare nozzles. You don't need a computer — family printers typically work from a tablet or phone app.
SOURCES
1. eufyMake — How Much 3D Prints Cost in 2026 (Aug 2025)
2. JLC3DP — How Much Does 3D Printing Cost? (Dec 2025)
3. Snapmaker — How Much Electricity Does a 3D Printer Use? (Oct 2025)
5. Sovol3D — Filament and Electricity Cost Calculation Guide (Accessed Apr 2026)
6. Toybox Official — Toybox 3D Printer — Subscription and Cost Info (Accessed Apr 2026)
7. Tom's Hardware — Toybox 3D Printer Review and Price Estimate (Accessed Apr 2026)
8. Elecrow Blog — The Ultimate Guide to Toybox 3D Printer — Cost Info (Jun 2023)
10. Amazon — Toybox 3D Printer — Retail Product Listings (Accessed Apr 2026)
11. Popular Science — Toybox 3D Printer Review — Print Ease and Cost Factors (Jul 2023)
12. Prusa Blog — Prusa 3D Printing Price Calculator Guide (Accessed Apr 2026)
How Much Adult Help Does a Child Need to Start 3D Printing?

Before we bought our 3D printer, I asked around in a few parent groups. The most common answer was something like: 'It's not that hard once you figure it out.' That phrase, said with genuine good intentions, was not particularly helpful. What I needed to know was who was doing the figuring out — me, or my 8-year-old.
The honest answer is: it depends almost entirely on the printer. A well-designed family 3D printer shifts most of the work to the child. A hobbyist machine designed for adults shifts it back to the parent, often permanently. Understanding this upfront saves a lot of frustration.
This guide breaks down what adult involvement actually looks like at different ages and stages, what the printer's design determines versus what the child's age determines, and how to build toward a point where your child runs the whole thing themselves.
The Printer Decides More Than You'd Expect

Most parents assume the child's age is the main factor in how much help is needed. It's actually the second factor. The first is whether the printer was designed for a child to use or for an adult who wants to involve their child.
A printer designed for families does several things automatically: it levels the build plate before every print, it handles the 'slicing' (the technical conversion from digital model to print instructions) in the background, and it connects to a child-facing app where the whole experience starts from browsing a library rather than configuring software. When these things are handled automatically, a child aged 7 or 8 can run the full printing process from browsing to print-complete with no adult in the loop.
A printer designed for adult hobbyists — even one marketed with phrases like 'easy to use' or 'beginner-friendly' — typically requires manual bed leveling, desktop slicing software, and a workflow that involves preparing files on a computer before the print can start. Every one of those steps is an adult job until the child is old enough and technically confident enough to own it.
The AOSEED X-MAKER JOY, for example, was designed with explicit child-independence as the goal. The app handles slicing automatically. The build plate is factory-level. A child selects a model, customizes it if they want, and taps print — and the AOSEED X-MAKER JOY does the rest. A machine designed this way requires a different level of parental involvement than one that wasn't.
💡 THE QUESTION TO ASK BEFORE YOU BUY |
|
Can my child go from 'I want to print something' to a print run — without my involvement — after two or three guided sessions? If the answer is yes, it's a family printer. If it requires a parent to open slicing software, prepare a file, and transfer it to the machine every time, it's an adult printer that accommodates children. Both exist in the market. Neither label tells you which is which. |
What Adult Help Actually Looks Like at Different Ages

Ages 5 to 7 — Present but Not Doing
A 5-year-old using a well-designed family printer is directing, not operating. They browse models in an app, pick something they like, maybe change a color or add their name, and tap print. An adult needs to be nearby and should load the filament before the session begins. At this age, removing the finished print from the build plate is usually still a parent's job unless the printer has a flexible magnetic plate that bends the print off without force.
What a parent does at this age: initial setup, filament loading, print removal, and general presence. Print sessions are short enough that proximity is natural. What the child does: everything visible. They find the model, they tap go, they watch it happen.
Ages 8 to 10 — Learning the Full Loop
This is where most children can begin taking ownership of the whole process with a suitable printer. They can confidently navigate an app, understand what 'print time remaining' means, and learn to remove prints from a flexible build plate themselves. Loading filament usually takes a guided session or two and then becomes independent.
The remaining parent moments are mainly: helping with troubleshooting when something doesn't work right (usually a first-layer adhesion issue), and being available for the first few filament changes until the child is confident.
Most parents who say their 9-year-old 'uses the printer totally alone' mean exactly this — the child runs the whole printing workflow, the parent helped with initial setup a few months ago, and now steps in occasionally when something unexpected happens.
Ages 10 to 12 — Creative Ownership
By this stage, a child using a family printer for a year or more is typically running every aspect of the printing process, including filament loading, model selection or design, print settings if applicable, and maintenance like cleaning the build plate.
The adult role shifts here from helper to creative collaborator. A parent might sit with a child to help them figure out why a gear mechanism didn't quite fit together correctly. Or help them find a reference for a school project they want to model. The technical help largely disappears; the creative conversation stays.
Children in this age bracket often start to want more design freedom — moving from the pre-made library to designing their own models. The AOSEED X-MAKER supports this transition with a 3.5-inch touchscreen for direct machine control and a precision of 0.05mm for multi-part builds that need to fit together accurately.
Ages 12 and Up — Full Independence
Teenagers using a family printer typically need no adult involvement in routine printing sessions. The occasions when an adult gets involved are genuinely exceptional — a new filament they haven't used before, a print that keeps failing for an unexplained reason, or a new feature they're exploring.
At this stage, the question parents often ask is whether to upgrade to a more capable machine. An enclosed, app-led printer remains perfectly valid for a 14-year-old who wants to keep designing and printing creatively. A teenager who specifically wants to learn the technical side of 3D printing — slicing software, speed and temperature optimization, multi-material printing — may be ready for a more technically open machine.
The Three Stages of 3D Printing Independence

Regardless of age, most children move through the same three stages when they start 3D printing. Understanding where your child is helps you calibrate how involved you need to be.
Stage 1 — Director (Child Chooses, Adult Operates)
This is where most children start, typically in the first one to three sessions. The child decides what to print and what color they want it in. The adult handles all the technical steps. This stage can last a few weeks with a complex printer, or just one or two sessions with an app-led family printer.
The goal isn't to rush past this stage — it's valuable for the child to understand what's happening before they take ownership of the process. Show them each step as you do it. Narrate what you're doing. 'Now I'm loading the filament,' and 'now the printer is leveling the build plate automatically.'
Stage 2 — Operator (Child Runs the App, Adult Stays Nearby)
The child handles the full printing workflow — selecting the model, customizing it, and sending it to print. The adult is in the room or nearby but not actively involved unless something goes wrong. This usually develops within the first month in younger children and more quickly in older ones.
Most failed prints happen during this stage, and that's actually the most educational part. A print that doesn't stick to the build plate, or a model that comes out slightly squashed, gives the child a problem to investigate. Encourage them to describe what happened before jumping in to fix it.
Stage 3 — Maker (Child Runs Everything, Parent Is Occasional Consultant)
The child loads filament, runs print sessions, removes finished objects, and starts designing their own models rather than only choosing from a library. The adult is a resource but not a participant. Most children reach this stage within three to six months of consistent use with a suitable printer.
The speed of transition depends on two things: the child's enthusiasm (more printing = faster independence) and the printer's design (a machine that handles the technical steps automatically removes the main barriers to progress).
Why the Content Library Affects How Much Help You Give

There's a supervision pattern that most 3D printing guides don't mention. A child who always has something interesting to print runs the printer independently and confidently. A child who has exhausted their library and doesn't know what to print next comes to the parent with 'Can you find me something?'
That's a soft form of adult involvement — not safety-related, not technical, but still a dependency. A printer with a content library that updates regularly removes it. The child browses, finds something new this week, and starts a print.
The AOSEED Toy Library adds new models weekly — seasonal builds, themed collections, new animals and vehicles, and creation kit projects. This is specifically what allows a family printer to remain actively used over months and years rather than cycling through novelty and then neglect.
When children eventually move from using pre-made models to designing their own, that independence deepens further. AI design tools like AI MiniMe (generates a 3D toy from a photo) and AI Doodle (builds a model from typed words) let children start creating personal objects without adult involvement in the design process.
How Safety Design Affects Supervision

A 3D printer nozzle reaches over 200°C during a print. On an open-frame machine — common among budget hobbyist options — the nozzle and build plate are fully accessible while the printer runs. A parent physically cannot leave an 8-year-old alone with this kind of machine operating.
An enclosed printer with a door-open sensor changes this completely. Hot components stay inside a sealed chamber. If the door is opened mid-print, the machine automatically pauses and moves the nozzle away from the build area. The child watches through the viewing window. Their hands stay outside.
The practical effect on adult involvement is significant. With an enclosed, sensor-equipped printer, a parent can be in another room during a two-hour print session, and that's fine. With an open-frame printer, being in another room creates a genuine burn risk.
This is worth stating plainly: for children aged 4 to 12 in a shared family home, the enclosure question is a supervision question, not just a safety feature on a checklist.
⚠ THE SUPERVISION SHORTCUT MOST PARENTS TAKE |
|
Many parents buy a hobbyist printer, find the setup complex, and become the de facto operator while letting their child 'help'. The child watches, sometimes presses a button, and is occasionally involved in model selection. This can work, but it's not child-led 3D printing — it's adult-operated 3D printing with a child nearby. If the goal is creative independence for the child, the printer design needs to match that goal from the start. |
First Session: What to Do Together

The first time a child uses a 3D printer, the adult's role is to show, not do. Walk through each step narrating what happens and why, then hand it over.
1. Unbox and set up together — let the child help physically, even if it's just holding parts
2. Connect to WiFi together — let the child type the password if they can
3. Open the app and browse the library together — let the child choose the first model
4. Load the filament while explaining what filament is and where it goes
5. Start the print together — child taps the final button
6. Watch the first few layers appear — explain what's happening at each stage
7. Leave the room briefly while the print runs — come back before it finishes
8. Show them how to remove the finished print from the build plate
By the second session, the child should be doing steps 3 through 8 alone. By the fifth or sixth session, they should be doing all of them, including filament loading with minimal guidance.
The Right Printer Reduces Help Automatically

The honest summary of this guide is that most adult help questions answer themselves when the printer is designed correctly for family use. An app-led printer that handles calibration automatically, has a content library that updates, keeps hot components inside a closed chamber, and lets a child go from browsing to printing in three taps — that printer teaches independence by design.
A printer that requires adult involvement at every stage doesn't foster a child's independence; it creates a dependency on the parent that can last the entire life of the machine.
If you're still deciding which direction to go, see all AOSEED 3D printers show both the X-MAKER JOY (for younger children from age 4) and the X-MAKER (for older children from age 9) with current pricing so you can compare based on your child's age and what level of creative depth you're looking for.
FAQs
How much adult help does a child need to start 3D printing?
For the first session, a parent should walk through the setup, app connection, filament loading, and first print together. After two or three supervised sessions with a well-designed family printer, most children aged 8 and above can run the full printing process independently.
The main factor is the printer's design — one built for child-independence requires far less ongoing parental involvement than a hobbyist machine adapted for family use.
Can a 7-year-old use a 3D printer alone?
A 7-year-old can run the digital side of printing — selecting models, customizing, starting a print — independently with a family printer from about the second or third session. They should not be entirely unsupervised, primarily because a parent should be reachable if something unexpected happens.
But 'supervising' a 7-year-old's print session doesn't mean watching every minute — it means being in the house and checking in periodically. With a fully enclosed printer and a door-open sensor, the safety case for this is solid.
At what age can a child start 3D printing?
Children as young as 4 or 5 can participate meaningfully in 3D printing with the right printer — browsing a model library, choosing what to make, watching the time-lapse, and presenting the finished toy.
Independent operation (running the full process without adult involvement) is generally realistic from around age 8 to 9 with a well-designed family printer, or later with a machine that requires more technical involvement.
Do I need to be present the whole time during a print?
No — especially not with an enclosed printer. A 2-3-hour print session doesn't require a parent to sit next to the machine; what requires adult availability is the start of the session (loading filament if needed) and being reachable if something goes wrong mid-print.
The door-open sensor on enclosed printers provides the physical safety layer that makes brief absences from the room reasonable, even for younger children.
What is the hardest part of 3D printing for kids to learn?
Filament loading is often the last skill children fully master — it involves feeding a new spool into the extruder mechanism and monitoring it until the new color appears. It usually takes three or four guided attempts before a child is comfortable doing it alone.
Everything else — browsing, customizing, starting a print, removing the finished object from a flexible build plate — children pick up quickly, often in a single session.
How do I teach my child to use a 3D printer independently?
The most effective approach is 'show, don't tell'. Walk through each step while narrating what you're doing and why, then hand the process over immediately. Let the child make small errors and recover from them — a first print that doesn't stick perfectly is more educational than a perfect print the parent managed to make.
Resist the urge to take over when something doesn't work. Ask What do you think went wrong?' before intervening.
Is 3D printing safe for children at home?
With a fully enclosed family printer using PLA filament, yes. PLA is plant-based, non-toxic, and produces minimal odour at printing temperatures. An enclosed design keeps the 200°C+ nozzle behind a sealed chamber, with a door sensor that pauses printing if the door is opened.
The safety profile of a well-designed enclosed printer in a family home is comparable to other kitchen appliances — meaningful precautions exist, but routine use doesn't require constant vigilance.
What if my child gets frustrated with 3D printing?
The most common point of frustration is a failed first print — the model doesn't stick, comes out wrong, or partially detaches. This is almost always a build plate issue (adhesion) or a leveling issue on machines without factory-leveled plates. With a family printer that auto-levels, first-print failure rates are much lower, which matters enormously for a child's early experience.
If frustration does arise, treat it as a troubleshooting session rather than a failure — finding the reason is part of the learning.
How long until my child can design their own 3D models?
Most children start exploring simple design tools within the first month of printing, typically starting with personalization — adding their name to a model, changing sizes, mixing existing design elements. Moving to building original models from scratch usually takes three to six months of consistent use.
AI design tools that generate printable models from photos or typed prompts significantly lower this threshold — a child can start making genuinely personal objects in their first few sessions, before they develop full design skills.
What role does a parent play once a child becomes independent?
Creative collaborator is the most accurate description. You're no longer operating the printer or solving technical problems — you're asking 'what are you going to make next?' and occasionally sitting with them when they're trying to figure out why a design didn't work the way they expected.
The conversation shifts from 'let me show you how' to 'what did you think of how that turned out?' This is genuinely a more interesting parenting role.
SOURCES
1. Tom's Hardware — Best 3D Printers for Beginners 2026 (Jan 2026)
2. Flashforge Blog — 2025 Best 3D Printers for Kids (Sept 2025)
3. Style3D — Safe and Kid-Friendly 3D Printer Guide (Nov 2025)
4. Creality Store — Top 12 Kid-Friendly 3D Printers & Buying Tips (Dec 2024)
5. STL Denise — Best 3D Printers for Kids in 2025 (Oct 2025)
6. JLC3DP — Best 3D Printers for Kids (2026) (Jan 2026)
7. Puzzle Shift Create — 3D Printer for Kids — Advice and Starting Points (Dec 2022)
8. Tidewater 3D — Beginner's Guide to 3D Printing for Parents and Kids (Jan 2025)
10. Tinkercad (Official) — Tinkercad 3D Printing Curriculum for Teachers (Accessed Apr 2026)
11. All3DP — Toybox 3D Printer — Child-Focused Overview (Jan 2026)
12. Meshy.ai — Top Best 3D Printers for Kids and Beginners (Mar 2025)
Beginner Best 3D Printer for Kids: What “Easy to Use” Really Means

A few years ago, a parent in our local school Facebook group posted a photo of an unboxed 3D printer. The box said 'easy setup, beginner-friendly'. She'd been trying to level the print bed for two hours while her 7-year-old waited at the kitchen table. A third adult had come over to help. They'd watched four YouTube videos.
This is the gap between what 'easy to use' means on a product page and what it means at 9 pm on a Wednesday when a child is still waiting for their first print.
If you're looking for a beginner 3D printer for kids that your child can actually use independently — not a machine that needs a parent's engineering degree to set up — this guide is for you. We'll cover what 'easy to use' genuinely means in practice, and which printers actually deliver it. The AOSEED X-MAKER JOY is our main recommendation, and we'll explain exactly why. But we'll also be honest about the alternatives.
What 'Easy to Use' Doesn't Mean

Before getting into products, it's worth being specific about what 'beginner-friendly' and 'easy to use' do not mean on a product label.
|
What the label says |
What it often means in practice |
|
Easy assembly |
15-minute adult assembly + calibration |
|
Beginner-friendly software |
Beginner mode exists — but the software is adult-oriented |
|
Plug and play |
Hardware is pre-assembled, but printing still needs setup |
|
Simple controls |
Simpler than professional models — still technical for a 7-year-old |
|
Kid-friendly design |
Colorful casing on an adult-oriented printer |
None of these is exactly a dishonest claim. But they're written with adult hobbyists in mind, not a 9-year-old who wants to print a dinosaur before dinner. A printer that is truly easy for a child to use has a different set of requirements.
The 5 Things That Actually Make a Printer Easy for Kids

These are the factors that determine whether a child runs the printer independently or whether a parent ends up doing it for them.
Auto Bed Leveling — Non-Negotiable
Manual bed leveling is the single most common reason for first prints to fail and for parents to give up. It requires adjusting four screws while sliding a piece of paper under the nozzle until the resistance is uniform across the entire plate. It's fiddly for adults. It's impossible to explain to a child.
A true beginner printer for kids does this automatically before every print. The child presses print. The machine levels itself. Done.
App-Led Workflow — Not Just WiFi
WiFi connectivity is now standard and means nothing on its own. What matters is whether the printing workflow starts from a child-facing app with a visual library of models — tap to browse, tap to customize, tap to print — or from a desktop slicing program on a computer that requires the parent to prepare the file first.
For a child to print independently, the app is the whole experience. The slicing needs to happen automatically in the background. If a parent needs to open software, prepare a file, and transfer it to the printer, the child isn't running the printer. The parent is.
A Content Library That Updates
Blank-page problem: a child sits down to print something, and the question 'what should I make?' is the hardest one to answer. Printers with a weekly-updated library of age-appropriate models remove this problem. The child browses, picks something that looks fun, and the creative session starts immediately.
Printers without a dedicated library — or with a library that stopped updating — put this burden on the parent: find a model online, download it, check it for appropriateness, format it, transfer it. That's a weeknight project, not a Tuesday afternoon activity.
High Print Success Rate from Day One
The first print experience shapes a child's relationship with the printer. A print that comes out messy, partially failed, or just wrong on the first attempt is genuinely discouraging for a child. They're not yet equipped to troubleshoot why it went wrong.
Printers designed for beginners pre-calibrate at the factory, use factory-leveled build plates, and optimize their default settings for reliable first prints. This isn't just convenience — it's what determines whether the printer gets used again or collects dust.
Flexible Build Plate — Child Can Remove Prints Alone
Once the print finishes, someone needs to remove it from the build plate. On a rigid plate with poor adhesion properties, this often requires a scraper and adult force. On a flexible magnetic plate, the whole surface bends, pops the print off, and the child handles it themselves. This is a small thing that makes a significant difference to how independent the experience feels.
💡 THE REAL TEST: CAN YOUR CHILD START A PRINT WITHOUT ASKING FOR HELP? |
|
Run this mental test on any printer you're considering: without your involvement, can your child open an app, find a model they like, customize it with their name or a color, and send it to print — all from a tablet or phone? If the answer is yes, it's a genuine beginner printer for kids. If any step requires a parent with a computer, it's a beginner printer for adults who want to involve their child in the hobby. |
Best Beginner 3D Printers for Kids

Here are the four printers that come up most when parents research this category. Evaluated against the five criteria above — not marketing copy.
1. AOSEED X-MAKER JOY — Best Overall Beginner Printer (Ages 4-12)

The X-MAKER JOY was designed around the specific constraints of a young child using a printer in a family home. Every decision traces back to removing the need for parent involvement: the app handles slicing automatically, the factory-leveled build plate eliminates manual calibration, the content library removes blank-page boredom, and the flexible magnetic plate means a 7-year-old can pop their finished print off without a scraper.
The Toy Library is updated weekly — not once at launch. This is the feature that keeps the printer part of regular family life rather than a one-month novelty. Animals, vehicles, seasonal builds, personalized gifts, puzzles, robots. There's always something new to find. The AI design tools — AI MiniMe (turns a photo into a 3D toy) and AI Doodle (generates a model from typed words) — mean children can start making truly personal objects without any design experience.
The fully enclosed design with a door-open sensor means a parent doesn't need to supervise every moment of a print session. The enclosure is closed, the hot components are inside, and the child watches through the window. This is the only printer in this comparison that meets all five of our 'truly easy' criteria.
Specifications
|
Target Age |
4 – 12 years |
|
Build Volume |
120 x 120 x 120 mm |
|
Layer Resolution |
0.1 – 0.4 mm |
|
Print Speed |
Up to 300 mm/s |
|
Filament |
PLA (optimized) / PETG / ABS |
|
Enclosure |
Fully enclosed — door safety sensor |
|
Camera |
Built-in timelapse + remote monitoring |
|
Interface |
App only (tablet/phone) — no buttons on the machine |
|
Auto Bed Level |
Factory set — no manual calibration |
|
Build Plate |
Flexible magnetic — child removes prints alone |
|
Content Library |
Thousands of models — weekly updates |
|
Price (approx.) |
$249 (was $339) |
✓ Pros
- Passes all 5 'truly easy' criteria — the only printer here that does
- App-led workflow — child selects, customizes, and prints without adult involvement
- Factory-leveled build plate — no manual calibration ever
- Fully enclosed with a door sensor — safe in any family setting
- Built-in camera — child watches time-lapse, parent monitors remotely
- AI design tools let children create personal models without design experience
- Weekly Toy Library updates — sustained engagement over years, not weeks
✗ Cons
- 120mm build volume limits very large single-part prints
- Entirely app-led — no touchscreen on the machine itself
- Primarily optimized for PLA for the youngest age range
Best for: First-time families with children aged 4-12 who want a printer that a child can genuinely run without adult help from day one.
2. Toybox Alpha Two — Simplest One-Click Option (Ages 5-9)

Toybox has genuine simplicity going for it. The app is minimal by design — select a toy, tap print, done. For a child aged 5 to 7 who wants to print licensed characters from DC or Cartoon Network, the experience is straightforward and immediate.
The limitations become apparent quickly. The build volume is 76mm cube — which means many models need to be downsized significantly, and multi-part builds aren't really possible. The proprietary filament system means you're locked into buying 'Printer Food' rolls, which cost more per gram than standard PLA spools. And the design is semi-open rather than fully enclosed — hot components have some cover but aren't in a sealed chamber, so closer supervision is needed than the marketing suggests.
The deeper issue for long-term use is the closed ecosystem. Models can't be exported to other printers. Once a child outgrows Toybox, everything they created in the system is stuck there. For a family that wants a starter printer and plans to upgrade in 18 months, this is a real consideration.
Specifications
|
Target Age |
5 – 9 years |
|
Build Volume |
76 x 76 x 76 mm — very small |
|
Layer Resolution |
~200 microns (0.2 mm) |
|
Print Speed |
~60 mm/s |
|
Filament |
Proprietary PLA only (Printer Food) |
|
Enclosure |
Semi-open — partial cover only |
|
Auto Bed Level |
Factory set — limited |
|
Build Plate |
Easy-peel magnetic |
|
Content Library |
~500 models — licensed characters |
|
Price (approx.) |
~$169 |
✓ Pros
- Genuinely the simplest app interface — if a child can use a phone, they can use Toybox
- Licensed characters (DC, Cartoon Network) appeal strongly to younger children
- Lowest price in this comparison
- Pre-assembled — no setup at all
✗ Cons
- 76mm build volume — very limiting, many models require significant downsizing
- Proprietary filament only — expensive per gram, third-party use voids warranty
- Models locked to Toybox ecosystem — can't export or use on another printer
- Semi-open design — requires more supervision than fully enclosed alternatives
- Content library updates slower than competing ecosystems
Full current spec and FAQ on Toybox 3D Printer — worth checking Alpha Two pricing against older Alpha One if budget matters.
Best for: Ages 5-7 who want immediate one-click character printing. Likely to be outgrown within 18 months as creative curiosity grows.
3. Flashforge Adventurer 3 Lite — Classroom-Proven Enclosed Option

The Adventurer 3 is a well-built enclosed printer that has been in classrooms and family homes for several years. Its safety credentials are solid — it's fully enclosed, quiet enough for a bedroom, and the removable nozzle makes maintenance straightforward for parents. The built-in camera lets the child watch print progress from another room, which children genuinely enjoy.
The limitation for the 'beginner printer for kids' category is the workflow. The companion app exists, but the printing experience still runs through software that requires more adult involvement than the X-MAKER JOY's app-led system. For a child aged 8 to 10 who has a parent willing to help set up each print session, it works well. For a 6-year-old who wants to print independently, it needs too much adult bridge-building.
It's a better choice for families where 3D printing is a parent-and-child project rather than something the child runs alone.
Specifications
|
Target Age |
8+ years (with adult involvement) |
|
Build Volume |
150 x 150 x 150 mm |
|
Layer Resolution |
0.1 – 0.4 mm |
|
Print Speed |
Up to 180 mm/s |
|
Filament |
PLA / ABS |
|
Enclosure |
Fully enclosed |
|
Camera |
Built-in — remote monitoring |
|
Auto Bed Level |
Assisted auto-leveling |
|
Kids App |
Limited — requires more adult workflow |
|
Content Library |
Third-party required |
|
Price (approx.) |
~$250 – $300 |
✓ Pros
- Fully enclosed — appropriate for all family home settings
- The removable nozzle makes maintenance easy for parents
- Built-in camera — child watches print from phone, adds excitement
- Compact and quiet — good classroom track record
- Solid print quality for the price
✗ Cons
- Workflow requires adult involvement — not truly child-independent
- No dedicated kids design app or Toy Library
- No creation kit ecosystem — prints are static objects only
- More friction than app-led alternatives for first-time families
Flashforge's 2025 printers for kids page covers the Adventurer series safety features and age guidance in detail.
Best for: Families in which a parent will be an active participant in the printing process. Not the most independent-use option for young children.
4. Bambu Lab A1 Mini — NOT a Beginner Printer for Young Kids

The Bambu Lab A1 Mini appears at the top of almost every 'best 3D printer for kids' list published in 2025 and 2026. The hardware genuinely earns those reviews — fast, reliable, excellent print quality, large MakerWorld content library. For an older teenager with technical interests, it's a strong recommendation.
For a young beginner, it fails the easy-use test in two important ways. First, the open frame: there is no enclosure. The nozzle and build plate are fully exposed during printing. For a shared family space with children under 10, this is a safety concern that no amount of 'supervise carefully' fully resolves.
Second, the software: Bambu Studio is an adult-oriented slicing application. There's a mobile app (Bambu Handy) that simplifies some steps, but the core workflow is not designed for a child to navigate independently. A 9-year-old cannot go from 'I want to print something' to a print starting without a parent managing the software step.
It's an excellent printer that is frequently misclassified as a kids' printer. Worth knowing about. Just not for this category.
Specifications
|
Target Age |
12+ years (own room recommended) |
|
Build Volume |
180 x 180 x 180 mm |
|
Max Print Speed |
500 mm/s |
|
Filament |
PLA / PETG / ABS + specialty |
|
Enclosure |
Open frame — NO enclosure |
|
Kids App |
No — adult-oriented Bambu Studio |
|
Content Library |
MakerWorld — large, adult-oriented |
|
Multicolour |
Optional with AMS Lite |
|
Price (approx.) |
~$299 ($459 with AMS Lite) |
✓ Pros
- Best hardware performance in this comparison — excellent print quality
- Very fast — great for older, impatient users
- Largest content library — MakerWorld has hundreds of thousands of free models
- Optional mul.ticolor printing — unique at this price
✗ Cons
- Open frame — exposed nozzle and build plate during printing
- No dedicated kids app or child-independent workflow
- Adult-oriented software — parent must manage print setup
- Not appropriate for shared family spaces with children under 12
- No creation kit ecosystem or structured creative pathway
Tom's Hardware's kids-and-teensprinters guide rates the A1 Mini highly for kids in general — worth reading their full context on the level of supervision they assume.
Best for: Teenagers 12+ with their own space and technical interest. Listed here for comparison — not a true beginner printer for young children.
How Each Printer Scores on the 5 Criteria

|
Criteria |
X-MAKER JOY |
Toybox Alpha Two |
Flashforge Adv 3 |
Bambu A1 Mini |
|
Auto Bed Leveling |
✓ |
Partial |
✓ |
✓ |
|
App-Led Workflow |
✓ |
✓ |
Partial |
✗ |
|
Updated Content Library |
✓ |
Partial |
✗ |
✓ |
|
High First-Print Success |
✓ |
✓ |
✓ |
Partial |
|
Child Removes Print Alone |
✓ |
✓ |
✓ |
Partial |
|
Fully Enclosed |
✓ |
✗ |
✓ |
✗ |
|
No Parent Setup Required |
✓ |
Partial |
✗ |
✗ |
Scoring: ✓ = Yes Partial = With some limitations ✗ = No
What a Beginner Child Actually Makes

The first week is about quick wins. The second month is about sustaining the habit. Here's how the X-MAKER JOY supports both.
First Week
- Download the AOSEED app on a tablet or phone
- Browse the Toy Library — dinosaurs, cars, animals, keychains, seasonal builds
- Pick a model, customize it (name, size, details) using the AI tools if they want
- Tap print — the app handles everything automatically
- Watch the timelapse playback — first prints always feel magical
First Month — Building Creative Habits
New models arrive in the AOSEED Toy Library every week. A child who printed a cat last Saturday finds a new robot, spaceship, or seasonal decoration this week. That rhythm — there's always something new to find — is what distinguishes a printer that lasts from one that stops being opened after the novelty fades.
- Personalized gifts for siblings and grandparents — keychains with names, small decorations
- Seasonal builds — holiday ornaments, Easter figures, birthday cake toppers
- STEM projects with creation kits — the child designs, prints, and assembles working objects
- AI MiniMe — turn a family photo into a 3D toy, which children find genuinely surprising
Months 2-3 and Beyond
Children who stay engaged past the first month almost always do so because the printer became theirs, not a family device they get supervised access to, but something they own and operate. The app-led, independent workflow is what makes this possible.
For older children (9+) who want more creative control and a larger build volume, the AOSEED X-MAKER steps up with a 3.5-inch touchscreen, 150mm build volume, and expanded material options, including PETG. Same ecosystem, same app, more capability.
THE BOREDOM PROBLEM MOST BUYERS DON'T ANTICIPATE |
|
The most common reason 3D printers end up unused isn't safety or setup — it's boredom. A child exhausts the pre-loaded models in week one, asks 'what can I print now?', and the parent either spends an hour finding and transferring models or the printer starts collecting dust. A printer with a content library that actively updates with new, age-appropriate, fun models solves this problem at the source. Check before you buy: when was the library last updated, and how often does it happen? |
Which Beginner 3D Printer Is Right for Your Child?

The answer is simpler than most buying guides suggest. If your child is between 4 and 12, and you want a printer they can actually use independently from day one, the X-MAKER JOY passes every test. It's the only option here where a child can go from 'I want to print something' to a print running without any adult involvement in the workflow. It's also the only option with a content ecosystem that genuinely updates to prevent boredom.
If simplicity is the absolute priority and your child is 5 to 7, Toybox works well for that age — accept the limitations on build volume, proprietary filament, and long-term ecosystem lock-in.
If you're specifically looking for a parent-and-child project printer rather than a child-independent one, the Flashforge Adventurer 3 is solid. If your child is a teenager with their own room, the Bambu A1 Mini is worth looking at — but that's a different article.
To compare both AOSEED models side by side, AOSEED 3D printers have current pricing and the full spec comparison in one place.
FAQs
What is the best beginner 3D printer for kids?
For true beginner independence — where the child runs the printer themselves — the AOSEED X-MAKER JOY is the strongest option in this category. It passes all five criteria: auto-leveled build plate, a fully app-led workflow with no parent computer involvement, a weekly-updated Toy Library, factory-set calibration for reliable first prints, and a flexible build plate that the child removes alone.
For very young children (5-7) who just want one-click toy printing, Toybox is simpler but has significant limitations on build volume and ecosystem lock-in.
What does 'beginner-friendly' actually mean for a kids' 3D printer?
In practical terms it means: the child can start a print from a tablet app without a parent managing software on a computer; the build plate doesn't require manual levelling before every print; there's a content library with age-appropriate models the child can browse and choose from; and the first print has a high success rate so the child's first experience is positive rather than frustrating. Most printers claim to be 'beginner-friendly,' but only a few genuinely deliver all of these.
At what age can a child use a 3D printer independently?
With a well-designed app-led printer like the X-MAKER JOY, children from around age 5 can select models and start prints from a tablet with minimal adult involvement. Independent use — including loading filament and removing prints — is usually reliable from around age 8 to 9.
The key variable isn't age so much as the printer's workflow: a child-first app makes independence possible years earlier than an adult-oriented slicing workflow.
What should I look for in a beginner 3D printer for kids?
In order of importance: automatic bed leveling (so prints don't fail due to calibration), a fully enclosed design (safety first for family settings), a dedicated kids app with a content library (child-independent workflow), compatibility with non-toxic PLA filament, and a flexible build plate for easy print removal. If a printer doesn't have all of these, one of them will become the point of frustration that reduces how often it's used.
Are 3D printers safe for young children?
With a fully enclosed printer, yes. The nozzle reaches over 200°C, but enclosed printers keep it behind a sealed chamber with a door-open sensor that pauses the print if the door is opened. PLA filament is plant-based, non-toxic, and odorless.
The risk profile of a well-designed enclosed printer in a family home is comparable to that of other kitchen appliances — the heat and process are contained, and sensible supervision keeps the experience safe.
How long does a beginner print take?
Small models like rings, keychains, and simple animals: 20-40 minutes. Medium models, such as action figures or small vehicles: 1 to 2 hours. Larger educational models or multi-part builds: 3 to 5 hours. For a first-time child, keep the first print session to models under an hour.
The satisfaction of watching a complete print appear within one afternoon builds enthusiasm and patience for longer future projects.
Does a beginner printer need to be fully enclosed?
For a shared family home with children under 12, yes. An open-frame printer has the nozzle and build plate fully exposed during printing — anyone who reaches in during a print can be burned. For a teenager with their own room, open-frame options become more manageable with proper safety habits, but for a family living room, kitchen, or a child's bedroom shared with younger siblings, enclosed is non-negotiable.
What are the best first projects for a child with a 3D printer?
Projects that take 30-60 minutes to complete and produce something the child can immediately use or give away. A keychain with their name. A small animal they chose from the library. A fidget ring. A miniature of their favorite animal.
These quick wins build confidence and establish the habit of using the printer. After a few sessions, creation kits that produce working mechanical toys (RC cars, robots, music boxes) provide the depth needed to keep older children engaged.
Do kids need design skills to use a beginner 3D printer?
No — and this is important. The best beginner experience starts with choosing from a pre-made library and personalizing it slightly (changing a name or color). AI tools like AI MiniMe and AI Doodle let children generate printable models from a photo or a typed word without any design knowledge. Design skills grow naturally as the child experiments.
A good beginner printer removes the requirement for design skills on day one while making it easy to develop them over time.
How much should I spend on a beginner 3D printer for kids?
A genuine family-appropriate beginner printer costs between $169 and $369. The lower end (Toybox at ~$169) offers the simplest experience but comes with the most limitations. The mid-range ($249 for the X-MAKER JOY) gives you the best balance of simplicity, safety, and long-term engagement.
The $369 X-MAKER is for older children seeking greater creative depth. Spending under $200 on a no-name open-frame printer to 'see if they like it' usually results in a frustrating experience that puts a child off 3D printing rather than introducing them to it.
SOURCES
- Tom's Hardware — Best 3D Printers for Kids and Teens (Jan 2026)
- Reddit r/3dprinter — 3D Printer for 12 Year Old — Beginner Help (Accessed Apr 2026)
- Flashforge Blog — 2025 Best 3D Printers for Kids (Sept 2025)
- AOSEED Blog — How to Choose the Best 3D Printer for Kids (Accessed Apr 2026)
- All3DP — Best 3D Printers — Ultimate Buyer's Guide (Jan 2026)
- PCMag — Best 3D Printers 2025 (2025)
- Creality Store — Top 12 Kid-Friendly 3D Printers & Tips (Updated regularly)
- Busy Mommy Media — Best 3D Printers for Kids — Beginner-Friendly (Nov 2025)
- 3DSourced — Best 3D Printers for Kids 2024 (Jan 2024)
- Parents.com — Best 3D Printers of 2025 for Home and Kids (2025)
X-MAKER JOY vs X-MAKER: Which AOSEED Printer Fits Your Child Best?
A parent in our local Facebook group posted a simple question last month: 'We have a 7-year-old and a 12-year-old. Which AOSEED should we get?' Within an hour, there were 23 replies, roughly split down the middle.
That split tells you something useful. Both printers are good. They're just good for different children at different stages. And choosing the wrong one — giving the X-MAKER to a 6-year-old who gets frustrated with complexity, or giving the JOY to a 14-year-old who wants real creative control — is how a perfectly decent printer ends up on a shelf.
This comparison covers what actually matters: age fit, how the apps work day-to-day, what each printer can make, and which choice makes more sense for your specific child. The AOSEED X-MAKER JOY and the AOSEED X-MAKER share a lot of DNA — same safety philosophy, same ecosystem — but they're built for genuinely different users.
Key Differences Between X-MAKER JOY and X-MAKER

Age Range and Who Each Printer Is Actually Built For
The age ranges on the box are a real guide here, not marketing padding. The X-MAKER JOY lists ages 4-12. That's a wide span, but what it really means is: this printer is optimized for children who want to pick a toy, press print, and watch it appear. The workflow is stripped down on purpose. A 6-year-old can browse pre-loaded models in the app and start a print without asking a parent for help. The simplicity is the feature.
The X-MAKER lists ages 9-16. That range tells you something different. A 9-year-old using the X-MAKER will get more out of it than a 9-year-old using the JOY, provided they want to do more—custom designs, bigger builds, STEM projects. The X-MAKER's added screen and tools aren't complexity for its own sake. They're what make the printer relevant as a child's skills grow.
Design and Build: What's Actually Different
Both models are fully enclosed — that's non-negotiable for AOSEED across the whole range. The hot end, moving parts, and build plate are all inside a closed chamber. Neither printer has exposed components that children can accidentally touch during a print.
Beyond that shared baseline, the builds diverge. The JOY is compact and lightweight, making it easy to move — a child can set it up on a kitchen table for a project and put it away afterward. It includes a built-in camera so children can watch their print via the app and save time-lapse videos of the process. Younger children absolutely love this feature.
The X-MAKER has a 3.5-inch touchscreen on the machine itself. This means a child can interact directly with the printer rather than going through the app for everything. It has a slightly larger footprint to accommodate the bigger 150x150x150mm build volume. The extra size means bigger single-part prints and multi-component builds that simply won't fit on the JOY's 120x120x120mm bed.
Comparing Features: X-MAKER JOY vs X-MAKER

Full Specification Comparison
|
Feature |
X-MAKER JOY |
X-MAKER |
|
Target Age Range |
4 – 12 |
9 – 16 |
|
Build Volume |
120 x 120 x 120 mm |
150 x 150 x 150 mm |
|
Touchscreen on Printer |
No — app only |
Yes — 3.5-inch |
|
Built-in Camera |
Yes — timelapse |
— |
|
Standard Filament |
PLA (optimized) |
PLA, PETG, ABS |
|
Max Print Speed |
300 mm/s |
300 mm/s |
|
Layer Resolution |
0.1 – 0.4 mm |
0.05 – 0.4 mm |
|
Connectivity |
WiFi + USB |
WiFi + USB |
|
AI Design Tools |
AI MiniMe, AI Doodle |
AI-assisted tools |
|
One-Press Printing |
Yes |
Yes |
|
Fully Enclosed |
Yes |
Yes |
|
Door Safety Sensor |
Yes |
Yes |
|
Toy Library Access |
Yes — thousands |
Yes — thousands |
|
Creation Kits Support |
Yes |
Yes |
|
Passcode Lock |
Yes |
Yes |
|
Price (approx.) |
$249 (was $339) |
$369 (was $509) |
Print Quality and Material Options
Both printers deliver clean, consistent results right out of the box. For toy printing — figures, vehicles, puzzles, keychains — the JOY's output is excellent. You won't notice a quality gap on these kinds of projects.
Where the X-MAKER pulls ahead is precision and material range. Its minimum layer resolution of 0.05mm is professional-grade, which matters when a child is printing parts that need to fit together accurately — gears in a mechanism, pieces in a building kit, components for a science fair project. On those builds, the extra precision is genuinely noticeable.
The difference in material compatibility is also real for older users. PLA is the right choice for most family use — eco-friendly, non-toxic, easy to work with. But PETG is significantly stronger and handles heat better, which is useful for outdoor or load-bearing applications. ABS goes further still. The X-MAKER supports all three. The JOY is optimized for PLA, which is the right call for its target age range.
The App Experience: Where Kids Spend Most of Their Time
Both printers use the same AOSEED app. Same library, same design tools, same one-press printing workflow. The experience is genuinely good on both models.
The difference is what the X-MAKER adds on top. Its 3.5-inch touchscreen lets a child browse the library, adjust settings, and start or pause a print directly on the machine without picking up a phone. For an older child who wants to feel more in control of the process — who's printing for school and doesn't want to keep asking for the family tablet — that independence matters.
On the JOY, the app is the entire interface. This is actually a positive for younger children. It means the printer itself has no buttons to accidentally press. A parent hands over the tablet, the child browses and taps print, and that's it. The simplicity is very deliberate.
The AOSEED Toy Library — accessible through both models — holds thousands of models, with new additions weekly. This is the feature that keeps the printer part of regular family life rather than a one-month novelty. Animals, vehicles, seasonal builds, puzzles, robots, and custom gifts. There's always something new to find.
Which Printer Is Better for STEM Learning?

Both models deliver genuine STEM value, but in different ways and at different levels of depth.
Educational Tools and What Kids Actually Do
On the JOY, STEM learning happens through doing. A 7-year-old designing their first whistle or a working ring mechanism is learning about tolerances, materials, and cause-and-effect — they just don't know they're learning those things. The themed mini apps in the AOSEED ecosystem guide children through design challenges in a game-style format. It's structured enough to be productive and playful enough not to feel like schoolwork.
The X-MAKER adds layers. Older children can move from using pre-loaded templates to importing their own STL files designed in free CAD software. They can experiment with different layer heights to see how it affects print time and surface quality. They can try PETG for a part that needs to survive outdoor conditions. These aren't just printer settings — they're practical material science, experimentation, and problem-solving.
For a child preparing for a science fair, a STEM club project, or just someone whose questions are getting more sophisticated, the X-MAKER stays relevant in ways the JOY doesn't.
Customization and Creative Freedom
This is where the two printers diverge most clearly in terms of long-term value.
On the JOY, customization means personalizing existing models. Adding your name to a keychain, changing colors, adjusting sizes, mixing design elements. That's the right level of creative freedom for ages 4 to 12 — enough to feel ownership of the outcome, not so much that it becomes overwhelming.
On the X-MAKER, the ceiling is much higher. A child can design a multi-part build — a robot assembled from printed components, a working music box, a customized car chassis — and the 150mm build volume gives them the physical space to do it. Creation kits extend this further: printed parts combine with mechanical components (motors, gears, winding mechanisms) to produce objects that actually move and function. This moves the printer from craft tool to engineering workshop.
💡 CREATION KITS — THE FEATURE THAT CHANGES EVERYTHING |
|
Both printers support creation kits. These are add-on sets that combine printed parts with working mechanisms — motors for RC cars, winding systems for music boxes, robotics components. The child designs and prints the parts, then assembles a toy that actually works. It's a meaningfully different experience from printing static display models, and it's one of the clearest reasons AOSEED is built as a creativity ecosystem rather than just a hardware product. |
Safety Features in X-MAKER JOY and X-MAKER

Safety is where both printers are most alike — and deliberately so. AOSEED's whole design philosophy starts with the assumption that the printer lives in a family home, not a dedicated workshop.
Fully Enclosed Design — the Non-Negotiable
The hot end of a 3D printer can reach over 200°C. The build plate can be nearly as hot. On an open-frame printer — common on cheaper hobbyist models — these components are exposed during printing. That's fine for a careful adult in a dedicated space. It's not fine for a shared family room with young children nearby.
Both the JOY and the X-MAKER use a fully enclosed structure. Hot parts stay inside the closed chamber. Children can watch through the viewing window. Their hands stay outside. A magnetic door keeps the enclosure closed during printing — it requires deliberate effort to open, so younger children can't open it accidentally.
Door Sensors, Passcode Lock, and Smart Pausing
Both models include a door-open sensor. If the enclosure is opened mid-print, the printer automatically pauses and moves the nozzle away from the build plate. This isn't just for safety — it also saves the print if a child opens the door out of curiosity halfway through a two-hour job.
Both models also include a passcode-protected touchscreen. Parents can lock the interface so children can browse and start prints, but can't change settings that affect safety or quality. For younger children, this is a useful guardrail. For older children using the X-MAKER with greater independence, it can be left unlocked.
⚠ ONE THING TO KNOW ABOUT OPEN-FRAME ALTERNATIVES |
|
When parents compare AOSEED printers to budget alternatives on Amazon or other general electronics sites, they often find cheaper printers with larger build volumes. Most of these are open-frame machines designed for adult hobbyists. The nozzle and build plate are exposed. This isn't a minor safety consideration — it's a fundamental design difference. If a printer doesn't have a full enclosure, it belongs in a dedicated adult workspace, not a shared family setting with children under 12. |
How Both AOSEED Models Compare to Alternatives

Since this article is about choosing the best fit for your child, it's worth showing how the AOSEED models sit alongside the other options parents regularly consider.
|
Toybox Alpha Two |
Bambu Lab A1 Mini |
X-MAKER JOY |
X-MAKER |
|
|
Best Age |
5 – 9 |
12+ (maker) |
4 – 12 |
9 – 16 |
|
Enclosure |
Partial open |
Open frame |
Fully enclosed |
Fully enclosed |
|
Kids App + Library |
Yes — basic, ~500 models |
MakerWorld (no kids focus) |
Yes — thousands + weekly updates |
Yes — thousands + weekly updates |
|
AI Design Tools |
No |
Limited AI tools |
AI MiniMe, AI Doodle |
AI-assisted tools |
|
Creation Kits |
No |
No |
Robots, RC cars, music boxes |
Robots, RC cars, music boxes |
|
Build Volume |
76 x 76 x 76 mm |
180 x 180 x 180 mm |
120 x 120 x 120 mm |
150 x 150 x 150 mm |
|
Price (approx.) |
~$169 |
~$299 |
$249 (was $339) |
$369 (was $509) |
Toybox is the simplest entry point, and the price is attractive. The limitations are the tiny build volume and a content library that doesn't refresh often enough. For children under 7, it works well; older children outgrow it quickly. 3D Printer site has the current spec and pricing if you want to compare directly.
The Bambu Lab A1 Mini is genuinely impressive hardware — fast, reliable, and large build volume. Its limitations for this comparison are the open frame and the software, which are aimed at adult makers rather than children. kids 3D printer guide from Tom's Hardware rates it highly for teens with their own maker space, while noting it's not the right choice for younger children in a shared family setting.
For a detailed independent comparison of the two AOSEED models specifically, JOY vs X-Maker review at 3D Printed Decor is worth reading — a parent tested both with their children and wrote up the practical differences.
Which Should You Actually Get?

The answer is simpler than most comparison articles make it. If your child is under 10, or if they're new to 3D printing regardless of age, start with the JOY. It's faster to set up, simpler to use, and designed for independent use from day one. A 5-year-old and a 10-year-old can both get genuine value from it. It grows with them in ways the JOY doesn't.
The only genuinely wrong choice is buying the X-MAKER for a 5-year-old who wants to print toys and getting frustrated when the complexity doesn't match the use case, or buying the JOY for a 14-year-old who outgrows it within a month.
If you're still weighing options, see all AOSEED 3D printers give you the full current range with pricing, which makes the comparison easier to see side by side.
FAQs
What is the main difference between X-MAKER JOY and X-MAKER?
Build volume and control depth. The JOY has a 120x120x120mm build area and is entirely app-operated — perfect for younger children and first-time families. The X-MAKER has a 150x150x150mm build volume, a 3.5-inch touchscreen on the printer, finer print resolution at 0.05mm, and supports more materials, including PETG and ABS. It's designed for children ready for more creative control and larger projects.
How fast is the AOSEED X-MAKER?
Both the X-MAKER JOY and X-MAKER support print speeds of up to 300 mm/s. In practice, print times vary by model complexity and layer height settings. A small toy might complete in 20 to 40 minutes; a larger multi-part build can take several hours. The X-MAKER's wider material range allows for settings adjustments that balance speed and quality depending on the project.
Is AOSEED a Chinese company?
AOSEED is part of IME3D, a company founded in 2011 with roots in 3D printing R&D and educational products. Their printers are sold in over 30 countries. The brand's educational products are used in more than 5,000 schools and institutions. AOSEED positions itself as a family creativity platform rather than a general-purpose printer brand.
What is the most trusted 3D printer brand for kids?
AOSEED consistently scores among the highest for the combination of safety design, content ecosystem, and ease of use that family buying decisions are based on. Toybox is well regarded for very young children because of its simplicity. Bambu Lab has strong hardware credibility for older users. The distinction is that AOSEED is the only brand in this category that combines full enclosure design with a dedicated kids app, a weekly-updated Toy Library, and creation kits that turn printed parts into working toys.
Do slower 3D prints look better?
Generally, yes, up to a point. Slower print speeds allow the filament to cool and adhere more precisely, reducing layer lines and improving surface finish. Both AOSEED models let you adjust print speed through the app. For display-quality models or parts that need to fit together accurately, reducing speed from the default improves results noticeably. For quick fun prints where finish quality matters less, full speed is fine.
Can I sell 3D prints made with AOSEED printers?
Selling physical printed objects is generally permitted, provided the design you're using allows commercial use. Models from AOSEED's Toy Library have their own licensing terms — check the specific model before selling. If your child designs original models using the AOSEED app, they own those designs. Many families find that children naturally start creating custom gifts and small, sellable items as their skills develop. AOSEED's creation of original designs through the app is fully compatible with this.
Which printer is better for a classroom setting?
The X-MAKER JOY is the more practical classroom option. Its compact size, faster setup, and fully app-led workflow mean a teacher can manage print sessions without needing to supervise individual printer controls. The passcode lock allows the teacher to control access. The JOY is specifically mentioned in independent reviews as working well for classroom use due to its quiet operation and contained design.
Can kids use both printers independently?
Yes. AOSEED's app-led workflow is specifically designed so children can run the full printing process — browsing models, customizing, starting a print — without adult input. On the JOY, children as young as 6 typically manage independent print sessions after two or three guided attempts. On the X-MAKER, the touchscreen adds another layer of independent control that older children appreciate. Some parental involvement is still recommended for loading filament and removing prints until children are comfortable with those steps.
Which AOSEED printer is the better long-term investment?
Depends on your child's current age. The JOY is the right call for children under 9 — they'll get years of use from it before outgrowing the build volume or wanting more complexity. For children 9 and above, the X-MAKER is the better long-term investment because its precision, material range, and design tools grow with the child's skills through middle school and beyond. Buying the X-MAKER for a 7-year-old just to 'future-proof' the purchase usually means a year or two of underused features before the child is ready for them.
SOURCES
- 3D Printed Decor — Aoseed X-Maker Joy vs Aoseed X-Maker (Feb 2026)
- Reddit r/3dprinter — Difference Between Aoseed Printers (Accessed Apr 2026)
- Tom's Hardware — Best 3D Printers for Kids and Teens (Jan 2026)
- Flashforge Blog — 2025 Best 3D Printers for Kids (Sep 2025)
- PCMag — Best 3D Printers 2026 (2026)
15 Easy 3D Printing Ideas for Kids to Make This Weekend
My daughter printed a whistle on her third session. Not because I told her to. She found it in the model library herself, tapped print, and spent the next half hour testing it in the kitchen at full volume.
That is the sign of a good 3D printing project. Not something a parent would frame. Something a child actually uses, carries around, and tells their friends about.
This guide covers 15 creative projects organized by age group — from elementary school through college. Each one teaches a real skill, finishes in a single session, and ends with something worth keeping. Whether it is a first geometry set or a college-level prosthetic prototype, there is something here worth starting this weekend.
Families with younger children can start exploring ideas through the AOSEED X-MAKER JOY — a guided printer built for ages 4 to 12, where kids browse, customize, and print mostly on their own through the app.
Why 3D Printing Matters in STEM Education
Most STEM learning lives on paper. You read about gears. You draw a helix. You watch a video of the solar system.
3D printing changes that. When a student holds a printed gear and turns it, they understand mechanical transmission. When they pull apart an Earth puzzle, they understand planetary layers in a way no diagram can match. The physical moment — touching the concept — is what makes it stick.
The American Society for Engineering Education has documented that hands-on fabrication tools improve student retention of engineering concepts compared to demonstration-only methods. The STEM Education Coalition also notes that applied project-based learning is one of the most effective ways to keep students engaged with STEM subjects long term.
The learning in this guide is built into the making. The project is the lesson.
Resin vs Filament: Which Setup Works for Students
Most classroom and home printing uses filament-based printers. That is the right choice for every project in this guide. Resin printing is finer but comes with chemical handling requirements that make it unsuitable below college level.
|
Feature |
Filament (FDM) |
Resin (SLA / MSLA) |
|
Materials |
PLA, PETG, ABS — easy to handle |
UV-curable resin — PPE required |
|
Detail level |
Good for all 15 projects here |
Excellent for fine-detail models |
|
Safety |
Safe for ages 6+ with enclosed printer |
Not recommended under age 16 |
|
Cost |
Low — filament is inexpensive |
Higher material and equipment cost |
|
Classroom use |
Standard in K–12 settings |
College / specialist labs only |
|
Cleanup |
Peel print and go |
Chemical wash and cure station required |
|
This guide |
All 15 projects use FDM |
College fine-detail models only |
Elementary School Projects — Ages 6 to 11

Young children learn by touching and moving things. These three projects connect 3D printing directly to foundational concepts — shapes, geography, and fractions. No design experience needed. The child selects, customizes, and prints.
The AOSEED Toy Library is a reliable first stop for this age range. Every model there prints cleanly on the first attempt, which matters most with young children. Animals, vehicles, shapes, and seasonal builds — all free for AOSEED printer owners.
01. Geometric Solids Collection

A cube, a sphere, a cone, a pyramid, a cylinder, a rectangular prism. Print one of each in different colors and you have a geometry toolkit no worksheet can replicate. Children hold the shapes, count the faces, run their fingers along the edges.
The real learning happens when they start noticing matching shapes around the house. The sphere is the orange on the counter. The rectangular prism is the cereal box. That connection — printed object to everyday object — happens naturally, without prompting. Print times are short enough to run the full set in one afternoon.
|
Ages |
Print Time |
Skill Learned |
|
6+ |
15–30 min per shape |
Geometry, shape recognition, spatial thinking |
02. Interlocking Earth Puzzle

A two-part or four-part Earth model that separates to show the crust, mantle, and core. Children pull the layers apart and push them back together. The first question they ask — almost always — is why the inside is hot. That question does not come from a diagram. It comes from holding the model and wondering.
Print each layer in a different color: brown for the crust, orange for the mantle, red for the core. Free files are on Printables and Thingiverse. Let the child reassemble it several times before explaining what each layer does — the curiosity builds on its own.
|
Ages |
Print Time |
Skill Learned |
|
7+ |
45–90 min total |
Earth science, geography, layered thinking |
03. Fraction Learning Blocks

Circle or bar shapes divided into halves, thirds, quarters, and eighths. Stack them. Rearrange them. Show that two quarters make a half. Most children have been told this in class. Fewer have held it.
The blocks let a child test equivalence themselves, get it wrong, and fix it — which is how the concept actually lands. Print each fraction type in a different color so the visual grouping is immediate. This is one of the most-used classroom 3D printing applications because it turns an abstract rule into something you can touch and test.
|
Ages |
Print Time |
Skill Learned |
|
6+ |
20–40 min per set |
Fractions, math reasoning, hands-on learning |
Middle School Projects — Ages 12 to 14
Middle schoolers are ready for projects that connect printing to real subjects — biology, engineering, earth science. These three builds work as standalone weekend projects or as visual aids for class. Each one produces something worth explaining to another person.
For students aged 12 and up moving into complex multi-part builds, the AOSEED X-MAKER handles creation kit assemblies that produce working mechanical toys — a step up from library models into real STEM engineering.
04. DNA Double Helix Model

A scaled double helix showing the sugar-phosphate backbone and the four base pairs. Students who have touched this model do not forget what it looks like. They trace the spiral with a finger and immediately understand why the helical shape matters for replication. The twist is not decorative — it is functional.
Print the two strands in contrasting colors. Print the base pairs in four more colors to reinforce pairing rules. Free files from the NIH 3D Print Exchange are medically reviewed and accurate enough for academic use. Students who bring these to biology class presentations stand out.
|
Ages |
Print Time |
Skill Learned |
|
12+ |
60–90 min |
Molecular biology, genetics, spatial visualization |
05. Working Mechanical Gears

Two or more interlocking gears that mesh and turn when one is spun. Students print different gear sizes and test how rotation speed changes depending on which gear drives which. Print a small gear and a large gear the same afternoon. Ask which will spin faster when the small one drives the large one — the answer surprises most students.
This is the gateway project for engineering thinking. A student who understands gear ratios from printing one understands the principle behind every engine, clock, and transmission they will ever encounter. The printed version teaches better than any diagram because the student turns it with their own hands.
|
Ages |
Print Time |
Skill Learned |
|
11+ |
45–60 min for a gear pair |
Mechanical engineering, gear ratios, cause and effect |
06. Topographic Map Model


A 3D relief map of a chosen region where elevation is physical, not a set of flat contour lines. Students feel the difference between a ridge and a valley. They trace where rivers would form, why roads would be difficult in certain areas, and why cities built where they did. Real topographic data converts to printable files using free tools — TouchTerrain and terrain2STL are both straightforward.
Choose a region the student has visited or wants to visit. A mountain range they hiked, a coastline from a family trip. The familiarity makes the elevation data meaningful rather than abstract. This also works as a geography class presentation prop that is noticeably better than anything printed on paper.
|
Ages |
Print Time |
Skill Learned |
|
12+ |
90–150 min depending on region |
Geography, elevation reading, spatial reasoning |
High School Projects — Ages 15 to 18
High school students can take on projects that mirror real scientific and engineering work. These four builds each produce something with genuine use — a biology presentation model, a chemistry visualization, a structural engineering experiment, and a working energy prototype.
At this level, students benefit from designing their own variations in Tinkercad or Fusion 360 before printing. The design step teaches as much as the print itself.
07. Human Organ Cross-Sections

Printed cross-sections of the heart, brain, kidney, or lung — each one showing internal structure in a way a flat diagram cannot. Students use these as presentation props, anatomy study aids, or dissection-free lab alternatives. The heart is the most popular starting choice — visually striking and directly relevant to biology coursework at this level.
The NIH 3D Print Exchange provides medically reviewed anatomy files accurate enough for academic use. Print the heart in red PLA and the brain in gray. Students who bring these to class presentations produce better explanations. Teachers say students ask more specific questions when they have something to hold.
|
Ages |
Print Time |
Skill Learned |
|
14+ |
60–120 min |
Anatomy, biology, visual communication |
08. Molecular Models — Caffeine, Water, CO₂

Color-coded molecular structures using sphere-and-stick representation. Caffeine is the best starting choice — enough atoms to be visually interesting, and every student already has a personal reference for what it does. Water and CO₂ are simpler comparisons that show how molecule size and bond angle relate to physical properties.
Print each atom type in a different color and connect them with printed rods or short wooden dowels. Ask students to predict which molecule will be largest before printing. The caffeine result surprises most of them. Follow up by asking why bond angle matters for water — the model makes that conversation far more concrete than a board drawing.
|
Ages |
Print Time |
Skill Learned |
|
14+ |
30–60 min per molecule |
Chemistry, molecular structure, atomic bonding |
09. Leonardo da Vinci Self-Supporting Bridge

A model of da Vinci's interlocking bridge — no fasteners, no glue, no nails. The pieces lock purely through compression. Students assemble and disassemble it to explore how force distributes across an arch structure. A small desk version takes around 90 minutes to print. A larger load-bearing version becomes a multi-session challenge project.
Once assembled, test how much weight it holds. The result almost always exceeds the student's expectation, which leads directly to a discussion of arch mechanics and why Roman bridges are still standing. Free design files are on Printables and MyMiniFactory. This project also works as a physics class demonstration that teachers can pass around the room.
|
Ages |
Print Time |
Skill Learned |
|
15+ |
90–120 min for full set |
Structural engineering, force distribution, problem-solving |
10. Wind Turbine Blade Prototype

Printable wind turbine blades that attach to a small motor axle for a basic energy generation test. Students vary blade pitch, blade count, and length to find which configuration generates the most voltage in front of a fan. The loop — print, test, adjust, reprint — teaches the engineering design process more naturally than any structured lesson.
Print three blade configurations the same afternoon: flat, angled 30 degrees, and angled 45 degrees. Measure output voltage with the same fan at the same distance. Chart the results. The data is real, the difference is measurable, and the student ran the experiment themselves. A strong standalone science fair entry and a natural fit for any energy unit.
|
Ages |
Print Time |
Skill Learned |
|
15+ |
60–90 min for a blade set |
Renewable energy, aerodynamics, engineering design process |
College-Level Projects — Ages 18 and Up
At college level, 3D printing becomes a real design and prototyping tool. These five projects reflect applications in biomedical engineering, architecture, microfluidics, research fabrication, and astronomy. Most college labs have both FDM and resin printers. Resin is appropriate here when fine detail is needed.
11. Prosthetic Hand Prototype

A simplified prosthetic hand using the open-source e-NABLE framework — cable-actuated fingers that close when the wrist flexes. Students design, print, and assemble a functional grip prototype covering biomechanics, user-centered design, and functional prosthetics in a single build. The e-NABLE community provides free peer-reviewed design files and a global maker network.
Document every design decision made during the build: what measurements were taken, what failed in the first fit, what changed before the second print. Those notes become a design rationale, an engineering report, or a portfolio piece. This is one of the few student projects that also has direct humanitarian application beyond the classroom.
|
Ages |
Print Time |
Skill Learned |
|
18+ |
4–8 hours total |
Biomedical engineering, functional design, user-centered thinking |
12. Architectural Scale Model

A printed 1:100 or 1:200 scale model of an original building design or a famous structure. Architecture students use printed models to evaluate proportion, structural logic, and spatial experience in ways digital renders cannot replicate. You can walk your eye around a physical model. You cannot do that on a screen.
For clean corners and thin walls at this scale, resin printing produces better results than FDM. Print the base and the structure as separate pieces for easier transport and presentation. This works as both a coursework submission and a portfolio piece for architecture program applications.
|
Ages |
Print Time |
Skill Learned |
|
18+ |
2–8 hours depending on complexity |
Architecture, spatial design, structural reasoning |
13. Microfluidic Device Chip

A channel-based chip demonstrating fluid movement at micro-scale — the same principle behind lab-on-chip diagnostic devices. High-resolution resin printing is required. Students learn how channel geometry, branching patterns, and inlet placement affect flow behavior. These observations form the basis for real lab analysis.
Design the channel layout in Fusion 360 or AutoCAD. Use a resin printer with 25 to 50 micron layer resolution. Measure channel dimensions carefully before printing — small variations produce measurable differences in flow rate. This project is taught in advanced biomedical and chemical engineering programs.
|
Ages |
Print Time |
Skill Learned |
|
18+ |
2–4 hours (resin required) |
Fluid mechanics, biomedical engineering, microdevice design |
14. Custom Lab Equipment

Students design and print custom components for existing lab setups — brackets, sample holders, tube racks, sensor mounts, custom fixtures. A printed replacement part costs almost nothing and takes hours, not weeks. Students learn to read mechanical drawings, design to fit existing hardware tolerances, and iterate from a failed first fit to a working final part.
That iteration loop — design, measure, print, test, adjust — mirrors professional engineering practice more closely than most coursework. Measure the existing hardware precisely before designing. Most failed first prints are a tolerance issue, not a design issue. The second print is usually right.
|
Ages |
Print Time |
Skill Learned |
|
18+ |
1–3 hours per part |
Mechanical design, dimensional tolerancing, practical engineering |
15. Constellation Viewer

A hollow cylinder or sphere with pinhole patterns representing the real angular positions of stars in a chosen constellation. When held up to a light source, the star pattern projects onto the surrounding surface. Students map actual star coordinates from an astronomy catalog to 3D geometry — converting right ascension and declination values into positions on a curved surface.
Choose a constellation visible from the student's location. Verify the projection against the real sky on a clear night. For coordinate-accurate versions, Python scripts for Blender can automate hole placement from catalog data. The object is both a functional astronomy tool and a demonstration that coordinate systems have physical meaning.
|
Ages |
Print Time |
Skill Learned |
|
16+ |
45–75 min |
Astronomy, coordinate geometry, spatial visualization |
All 15 Projects at a Glance
|
# |
Project |
Age |
Print Time |
Category |
Key Skill |
|
01 |
Geometric Solids Collection |
6+ |
15–30 min/shape |
Elementary |
Shape recognition |
|
02 |
Interlocking Earth Puzzle |
7+ |
45–90 min |
Elementary |
Earth science |
|
03 |
Fraction Learning Blocks |
6+ |
20–40 min |
Elementary |
Fractions / math |
|
04 |
DNA Double Helix |
12+ |
60–90 min |
Middle School |
Molecular biology |
|
05 |
Working Mechanical Gears |
11+ |
45–60 min |
Middle School |
Gear ratios |
|
06 |
Topographic Map |
12+ |
90–150 min |
Middle School |
Geography |
|
07 |
Human Organ Cross-Section |
14+ |
60–120 min |
High School |
Anatomy |
|
08 |
Molecular Models |
14+ |
30–60 min |
High School |
Chemistry |
|
09 |
Da Vinci Bridge |
15+ |
90–120 min |
High School |
Structural engineering |
|
10 |
Wind Turbine Prototype |
15+ |
60–90 min |
High School |
Aerodynamics |
|
11 |
Prosthetic Hand Prototype |
18+ |
4–8 hours |
College |
Biomedical engineering |
|
12 |
Architectural Scale Model |
18+ |
2–8 hours |
College |
Architecture |
|
13 |
Microfluidic Chip |
18+ |
2–4 hours |
College |
Fluid mechanics |
|
14 |
Custom Lab Equipment |
18+ |
1–3 hours |
College |
Mechanical design |
|
15 |
Constellation Viewer |
16+ |
45–75 min |
College |
Astronomy |
Recommended Materials by Project Type
|
Material |
Best For |
Ages |
Key Advantage |
Watch Out For |
|
PLA |
All elementary through high school |
6+ |
Non-toxic, easy, inexpensive |
Softens above ~60°C — not for heat parts |
|
PETG |
High school mechanical builds |
14+ |
Stronger, moisture resistant |
Slightly higher temp — minor tuning |
|
ABS |
Parts near motors or heat |
15+ |
Heat resistant and durable |
Emits fumes — ventilation required |
|
TPU |
Flexible grips, gaskets |
14+ |
Stays flexible after printing |
Slow print speed — allow extra time |
|
Resin |
College fine-detail models |
18+ |
Excellent surface detail |
Chemical handling — PPE mandatory |
Safety Guidelines for Classroom and Home Use

3D printing is safe with a few consistent habits. These apply equally to classrooms and home setups.
- Use an enclosed printer. The enclosure keeps children away from the hot end and moving parts, and it contains fumes during longer sessions.
- Choose PLA for ages under 14. It is plant-based, non-toxic, and produces minimal odor at standard print temperatures.
- Ventilate the space. A window open or a small fan running during longer sessions is a simple and effective habit even with PLA.
- Supervise filament loading and print removal for younger children. Both steps involve the heated nozzle or a spatula — the two moments where adult help matters most.
- Keep hands away from the print head during operation. The nozzle reaches 180 to 220°C. An enclosed printer handles this automatically.
- Resin printing at college level: gloves, eye protection, and a wash-and-cure station are mandatory. Handle resin in ventilated spaces only.
Where to Find Free Models for Each Project

You do not need to design anything from scratch to get started. Each platform below offers free downloads for students and children.
|
Platform |
Best For |
Cost |
|
AOSEED Toy Library |
Quick wins, animals, vehicles, seasonal builds — AOSEED owners |
Free |
|
Printables.com |
Well-organized kids and STEM category with print time estimates |
Free |
|
Thingiverse |
Largest general library — search 'kids' or subject area |
Free |
|
MyMiniFactory |
Strong classroom and educational model section |
Free + premium |
|
NIH 3D Print Exchange |
Anatomy and science models — peer reviewed |
Free |
|
Tinkercad |
A browser-based design tool for students making their own models |
Free |
You can also browse 3D printable toys and projects for kids on Printables — a well-organized starting point with download counts and print time estimates for each model.
Pick One Project and Start This Weekend

Choose something under 60 minutes for a first session. Something the child can hold before the afternoon is over. That first held result — even a small cube or a keychain — is what makes the second project feel natural.
The best thing about 3D printing as a learning tool is that making and thinking are the same activity. A student building the da Vinci bridge is learning structural engineering. A student varying a turbine blade is learning aerodynamics. The lesson is inside the project, not layered on top.
If you are still deciding between models, AOSEED 3D printers for kids shows both the X-MAKER JOY and X-MAKER side by side with age guidance — a useful comparison if your child is between age groups or you are buying for more than one child.
FAQs
What are the best 3D printing projects for beginners?
A personalized keychain, a simple animal figurine, or a set of geometric shapes. These print in 15 to 45 minutes, use minimal filament, and produce something immediately usable. If the printer has a content library, the animals and vehicles section is the most reliable first stop — models there are tested to print cleanly first time.
Is resin printing safe for students?
Not for students under 16, and not in standard classrooms. The resin is a skin and eye irritant and requires gloves, eye protection, and a proper wash-and-cure setup. For K–12 and family use, filament printing with PLA is the correct choice. Resin is appropriate in college labs where chemical handling is already part of the curriculum.
How does 3D printing help STEM students?
It makes abstract concepts physical. A student who builds a working gear mechanism understands transmission. A student who stacks fraction blocks understands equivalence by testing it rather than reading about it. A student who troubleshoots a failed print practices systematic thinking. The learning is in the process.
Can 3D printed parts be used in school robotics competitions?
Yes. Structural components, gear housings, sensor mounts, and custom brackets appear regularly in FIRST Robotics, VEX, and similar programs. PLA works for non-load-bearing parts. PETG or ABS handle mechanical stress better. Dimensional accuracy matters — careful measurement before designing saves multiple reprint cycles.
Why use ABS instead of PLA for engineering projects?
PLA handles everything in this guide. ABS is worth considering when a part will experience temperatures above 60°C or significant mechanical stress — a bracket near a motor, for example. ABS warps more easily and needs ventilation. For typical classroom and home use, PLA is simpler, safer, and easier to work with.
Where can I find free 3D printing models for students?
Printables.com has a well-organized kids and STEM category. Thingiverse is the largest general library — search the subject area. MyMiniFactory has strong classroom model sections. NIH 3D Print Exchange is best for anatomy and science models at high school and college level. Tinkercad is the starting point for students who want to design their own models.
Sources
- Printables — 3D printable toy and learning ideas, Explore more 3D printable toys and projects for kids on Printables, 2026.
- Pinterest — Collection of 3D printing ideas for kids, Find inspiring 3D printing toy ideas on Pinterest, 2026.
- Reddit — Discussion and ideas about 3D printing, Check out this Reddit thread for quick and fun 3D printing suggestions, 2026.
- EufyMake — A blog about practical 3D printing projects, Discover more 3D printing ideas for kids at EufyMake, 2026.
- STEM Education Coalition — Importance of STEM, Learn more about STEM education at the STEM Education Coalition, 2026.
How STEM Toys Help Kids Develop Math and Spatial Skills
It’s no secret that kids learn best when they’re engaged, curious, and having fun. That’s exactly why STEM toys—and especially kids 3D printers—are transforming the way children learn math and problem-solving.
Through hands-on projects, kids 3D printers blend creativity with logic. They help children visualize shapes, understand measurements, and grasp geometric concepts—all while making real objects they can hold and proudly show off.
In this article, we’ll explore how 3D printing for kids strengthens math and spatial reasoning skills, why it’s such an effective learning tool, and how parents and teachers can integrate it into play and education.
Why Math and Spatial Skills Matter

Before diving into how 3D printing helps, it’s important to understand what these skills are.
Math Skills:
Math isn’t just numbers—it’s logic, patterns, and precision. When kids calculate dimensions, angles, or symmetry in their designs, they’re practicing real-world math without even realizing it.
Spatial Reasoning:
Spatial skills help kids imagine and manipulate objects in 3D space. It’s what allows them to picture how a toy looks from different angles or how parts fit together—skills essential for STEM fields like architecture, engineering, and robotics.
Research consistently shows that strong spatial reasoning predicts success in math and science—and 3D printing is a fun, direct way to strengthen both.
How 3D Printing for Kids Builds Math and Spatial Reasoning

Visualizing Geometry in Action
When kids design and print models, they naturally explore shapes, symmetry, and angles. A cube, a bridge, or even a toy car introduces geometric terms like faces, vertices, and edges in real-world context.
For instance, designing a 3D-printed pyramid teaches kids:
- Triangular sides = geometry
- Equal lengths = measurement
- Angles = degrees and slope awareness
It’s geometry class—without the boredom.
Measuring and Scaling Objects
3D printing teaches measurement and proportion intuitively. Children must think about height, width, and depth, converting mental ideas into precise numbers.
Example learning moments:
- Adjusting size from 50mm to 75mm—proportion and scale.
- Doubling print size—understanding multiplication and ratios.
- Estimating filament use—introducing units of mass and volume.
The process naturally integrates math vocabulary: dimensions, millimeters, volume, scaling, and area.
Understanding Fractions and Ratios
When kids change print settings (like reducing infill to 50%), they’re applying fractional thinking. Each adjustment—half size, quarter volume—turns abstract math into something visible.
Printing smaller or larger models teaches them how scaling affects volume and surface area, building real-world intuition for fractions and ratios.
Building 3D Spatial Awareness
A 3D printer for kids lets children turn 2D ideas into 3D reality. This transition from flat to form helps them understand perspective, rotation, and visualization.
They learn to ask questions like:
- “What happens if I rotate this part 90°?”
- “Will this base support the top piece?”
- “How do these shapes connect in space?”
These thought processes mirror the mental rotation exercises used to train engineers, pilots, and designers.
Encouraging Logical and Sequential Thinking
3D printing follows a step-by-step workflow: design → slice → print → test → improve.
Kids quickly learn that skipping a step can lead to a failed print.
This repetition teaches:
- Logic: cause and effect (e.g., what happens when you change layer height).
- Sequencing: understanding order and timing.
- Organization: saving files, labeling designs, tracking progress.
It’s math’s structural side made tangible.
Integrating Math with Creativity
Math often feels abstract—but 3D printing makes it expressive. A child who once struggled with numbers might now calculate precise angles to design a spaceship or figure out dimensions for a toy bridge.
By merging logic and imagination, 3D printing shows that math isn’t just about getting answers—it’s about building something amazing from them.
AOSEED 3D Printers: Designed for Learning Through Play

AOSEED printers are built to make STEM learning accessible and enjoyable for children of all ages.
AOSEED X-MAKER JOY (Ages 4–9)
- Simplified interface and colorful icons for younger users.
- One-touch printing and safe PLA filament for stress-free creativity.
- Encourages early math through shapes and symmetry-based templates.
AOSEED X-MAKER JOY AI+
- AI-powered 3D modeling via AI MiniMe & AI Doodle (turn images or prompts into custom toys).
- Toy editor feature for designing personalized toys.
- Built-in camera automatically generates 15-second timelapse videos of prints for sharing.
- Gamified 3D design apps make learning interactive and fun.
- One-press AI printing for easy operation by young children.
AOSEED X-MAKER (Ages 9–16)
- Adds adjustable settings and print previews for advanced learners.
- Supports PLA and ABS filaments for more complex projects.
- Great for geometry lessons, model design, and STEM competitions.
AOSEED X-MAKER AI+
- Gamified 3D design apps to engage older children in STEM challenges.
- AI-powered single-button printing, lowering technical barriers for kids 9–16.
Both printers connect to the AOSEED App, which includes a library of learning projects and design tutorials—perfect for home or classroom use.
Explore AOSEED’s ecosystem:
Fun 3D Printing Projects That Teach Math and Spatial Skills
Here are some age-appropriate 3D printing projects for kids that strengthen both creativity and numeracy:
1. Build-a-Bridge Challenge
Kids design and print a small bridge, testing how shape affects strength.
- Skills: geometry, proportion, angles, weight distribution.
- Math connection: calculating load-bearing symmetry.
2. Custom Dice or Spinners
Printing dice teaches equal surface distribution and probability.
- Skills: 3D symmetry, edges, fair balance.
- Math connection: understanding statistics and chance.
3. Mini Architecture Models
Children can design and print simple houses or towers.
- Skills: scaling, measurement, visual proportion.
- Math connection: converting 2D blueprints into 3D models.
4. Toy Car or Rocket Design
Kids calculate dimensions to ensure all parts (wheels, body, axles) fit perfectly.
- Skills: geometry, fractions, symmetry.
- Math connection: problem-solving and proportional design.
5. 3D Clock Face or Number Puzzle
Designing clocks and puzzles improves number sequencing and spacing.
- Skills: visual organization, ratio awareness.
- Math connection: arithmetic and geometry combined.
These projects blend math practice with tactile creation, helping children retain concepts longer than through worksheets alone.
Educational Advantages for Teachers and Parents

In Classrooms:
Teachers can integrate 3D printing into math or STEM lessons:
- Geometry: printing pyramids, prisms, and spheres.
- Measurement: comparing printed models to their 2D designs.
- Data collection: calculating print times or material volume.
At Home:
Parents can encourage kids to explore math through creativity—printing family nameplates, puzzles, or themed ornaments. Kids apply measurement, area, and scale concepts naturally.
In STEM Clubs or Competitions:
Group projects promote collaboration and problem-solving, showing how math connects to teamwork and innovation.
Advantages and Disadvantages of 3D Printing for Learning
Advantages
- Makes abstract math visual and hands-on.
- Encourages curiosity and logical reasoning.
- Builds spatial and mechanical understanding.
- Teaches patience, precision, and iteration.
- Inspires long-term interest in STEM.
Disadvantages
- Requires time and supervision for setup.
- Some early prints may fail (valuable for learning!).
- Filament costs can add up for frequent printing.
Even these challenges reinforce real-world problem-solving—kids learn persistence and troubleshooting along the way.
Real-World Application: From Playtime to STEM Careers
Early exposure to 3D printing for kids builds a foundation for future success in STEM. Skills developed through creative projects translate into:
- Engineering: understanding structure and proportion.
- Architecture: designing spatially accurate models.
- Mathematics: mastering measurement and ratio reasoning.
- Design & Innovation: turning abstract ideas into functional solutions.
Today’s playful exploration can become tomorrow’s professional confidence.
Frequently Asked Questions
How does 3D printing teach math to kids?
Through measuring, scaling, and geometry-based design. Each print requires math concepts like volume, area, proportion, and symmetry to succeed.
What age is suitable for 3D printing?
With guided help, children as young as 4 can start using kid-friendly printers like the AOSEED X-MAKER JOY. By age 8–10, most can handle design and setup independently.
Are kids 3D printers safe to use?
Yes. Modern kid-focused printers use enclosed builds, low-heat PLA filament, and intuitive touch screens for a safe, supervised experience.
Can 3D printing improve academic performance?
Yes—by making abstract math concepts concrete and visual. Children learn faster when they see how math applies to real objects.
What are some simple math-based projects to start with?
Try printing dice, cubes, pyramids, or nameplates—projects that involve measuring, symmetry, and spatial planning.
Final Thoughts
Math doesn’t have to be memorized—it can be built, tested, and held. That’s the magic of kids 3D printers. Through creative design and hands-on exploration, children develop not only math fluency but also critical spatial awareness that supports their lifelong learning.
When a child measures, adjusts, and prints their first model, they’re doing more than playing—they’re thinking like an engineer.
The Educational Value of STEM Toys: Why Every Kid Should Have a STEM 3D Printer
STEM education—Science, Technology, Engineering, and Math—isn’t just about classroom lessons anymore. Today, it’s about experiencing how things work through creativity and play. Few tools capture that spirit better than a 3D printer for kids.
While traditional toys entertain, STEM toys like 3D printers teach how ideas become real. They inspire curiosity, build problem-solving skills, and prepare kids for the future of innovation—all while having fun.
In this article, we’ll explore the educational value of STEM toys, why a 3D printer for kids stands out as one of the most powerful learning tools, and how families can use it to make learning fun again.
Why STEM Toys Matter More Than Ever
As technology evolves, so does the need for creative problem-solvers. STEM toys fill the gap between learning and play—helping children explore how science and technology shape the world around them.
Key Benefits of STEM Toys:
- Encourage hands-on experimentation instead of passive screen time.
- Teach critical thinking, logic, and creativity.
- Build confidence through project completion.
- Make abstract STEM subjects tangible and engaging.
A STEM 3D printer takes these advantages further by turning kids into makers—transforming their ideas into real objects.
How a 3D Printer for Kids Reinvents Learning

A kid-friendly 3D printer blends the thrill of technology with real-world skills. Here’s what makes it one of the most effective STEM tools for home and school.
1. It Brings STEM to Life
Children don’t just read about engineering—they build it. With 3D printing, they understand how math, design, and technology work together.
- Science: Learn melting points, materials, and physics.
- Technology: Explore slicing software and print mechanics.
- Engineering: Design durable structures and test ideas.
- Math: Measure, scale, and calculate proportions.
This active approach turns abstract classroom lessons into memorable, hands-on experiences.
2. It Fosters Problem-Solving
When a design doesn’t print perfectly, kids must analyze what went wrong and fix it. This iterative process teaches resilience, critical thinking, and patience—skills essential for both school and life.
3. It Nurtures Creativity
A 3D printer for kids gives them freedom to design anything—from animal figurines to rocket models. They’re not limited to pre-made toys—they become inventors.
4. It Encourages Collaboration
Kids can work in groups to plan, print, and assemble projects. They learn teamwork, communication, and compromise—turning creative play into social learning.
5. It Connects Digital and Physical Worlds
3D printing teaches kids that technology is more than screens. It shows how digital designs can have real-world impact, bridging imagination and engineering.
The Educational Value of 3D Printing for Kids
|
Learning Area |
Skill Developed |
Example Activity |
|
Science |
Understanding materials & heat |
Print and test different shapes for strength |
|
Technology |
Using design software |
Create 3D models with AOSEED’s app |
|
Engineering |
Building stable structures |
Design a bridge that supports weight |
|
Math |
Measuring and scaling |
Adjust a model’s dimensions to fit |
|
Creativity |
Designing unique objects |
Create keychains, figurines, or tools |
|
Teamwork |
Communication & collaboration |
Group print challenges or school projects |
Every print becomes a mini lesson—blending creativity with logic and discovery.
Why the Best 3D Printer for Kids Is More Than a Toy
A 3D printer for kids does more than make cool gadgets—it builds a mindset.
Teaches Design Thinking
Kids learn to think like engineers: define a problem, design a solution, test, and improve. This process develops analytical skills early on.
Builds Persistence
3D printing projects rarely succeed on the first try. By troubleshooting, kids learn that mistakes aren’t failures—they’re part of the learning process.
Inspires Career Curiosity
3D printing introduces children to fields like robotics, architecture, product design, and coding—helping them discover what excites them before high school.
Boosts Confidence Through Creation
Holding something they designed themselves—a toy, bracelet, or robot part—gives children a sense of accomplishment no video game can match.
The AOSEED Approach: Safe, Smart, and Inspiring

AOSEED’s 3D printers are specifically built to make STEM learning safe, intuitive, and fun for children of all ages.
AOSEED X-MAKER JOY (Ages 4–9)
- One-touch operation with preset print modes.
- Uses eco-friendly PLA filament (non-toxic, low-odor).
- Enclosed design for safety and quiet printing.
- Perfect for introducing young learners to 3D creation.
AOSEED X-MAKER JOY AI+
- AI-powered 3D modeling (AI MiniMe & AI Doodle)
- Toy editor for custom toy creation
- Built-in camera automatically generates 15-second time-lapse videos of prints
- One-press printing powered by AI
- Gamified 3D design apps to make learning playful
AOSEED X-MAKER (Ages 9–16)
- Includes advanced settings and print preview screen.
- Supports PLA and ABS filaments for more durable designs.
- Ideal for older kids, classrooms, and STEM clubs.
- Compatible with the AOSEED Learning App, featuring 3D tutorials, challenges, and printable models.
AOSEED X-MAKER AI+
- AI-powered one-press printing for easy 3D printing
- Gamified 3D design apps to engage kids in learning
- Supports advanced modeling for older children
Together, these models create a learning path that grows with your child—from early creativity to advanced design thinking.
Example 3D Printing Projects That Teach While They Play
1. Mini Bridge Engineering Challenge
Kids design bridges of different shapes and test which one supports the most weight—learning structural integrity and geometry.
2. Personalized Keychains or Name Tags
Encourages artistic design and spatial awareness while teaching measurement and customization.
3. Solar System Models
Combine science and art by printing planets, stands, and labels—great for school projects.
4. Puzzle Pieces
Have kids print interlocking parts that must fit together—perfect for teaching tolerance and precision.
5. 3D Printed Toys or Vehicles
Design cars, boats, or rockets to explore motion, balance, and creativity in one project.
These 3D prints for kids turn curiosity into achievement—one layer at a time.
Advantages and Disadvantages
Advantages
- Encourages active, hands-on learning.
- Builds real STEM and life skills.
- Enhances creativity, patience, and problem-solving.
- Safe for home and classroom environments.
- Endless project possibilities keep kids engaged.
Disadvantages
- Initial setup requires adult guidance.
- Prints take time—teaching patience, but testing it too.
- Occasional maintenance (nozzle cleaning, filament refills).
Even these “challenges” reinforce responsibility and self-reliance—skills that last long beyond childhood.
Why Parents and Teachers Love 3D Printing
“My son used to get bored of traditional STEM kits, but his 3D printer keeps him creating. He’s learning without realizing it.”
— Michael B., Parent
“In our STEM club, 3D printing turned shy students into leaders. They take ownership of their designs and proudly show their work.”
— Corina J., Educator
Stories like these show how the best 3D printer for kids doesn’t just entertain—it empowers.
Frequently Asked Questions
Is a 3D printer safe for kids to use?
Yes. Kid-focused models like AOSEED’s include enclosed chambers, low-heat PLA filament, and simple interfaces designed for safety and supervision.
What’s the best 3D printer for kids?
The AOSEED X-MAKER JOY is perfect for beginners (ages 4–9), while the X-MAKER suits older kids (ages 9–16) ready for more advanced creativity.
How do 3D printers support STEM learning?
They blend science, math, and engineering through hands-on design. Kids learn by experimenting, testing, and improving—just like real engineers.
Are 3D printers expensive to maintain?
No. PLA filament is affordable, and one spool can produce dozens of small models. AOSEED printers are designed for easy maintenance.
Can 3D printers replace traditional STEM kits?
They can complement or even enhance them. 3D printers offer endless design possibilities—so kids never outgrow the experience.
Final Thoughts
Every child learns differently—but all kids learn best when they’re engaged, curious, and having fun. That’s what a 3D printer for kids delivers: real learning through play.
By merging creativity and STEM, 3D printing helps children think critically, solve problems, and express themselves—all while preparing them for the technology-driven world ahead.
How to Choose the Best 3D Printer for Your Child: A Parent’s Buying Guide
3D printing is no longer just for engineers or hobbyists—it’s now a fun, educational tool for kids to create, learn, and explore. But if you’re a parent trying to pick the best 3D printer for kids, you might wonder:
- Which models are safe?
- How complicated are they to use?
- Can you find one under $300 that’s reliable and educational?
This guide breaks it all down for you. You’ll learn what to look for in a kid-friendly 3D printer, which features matter most, and why models like AOSEED X-MAKER JOY and X-MAKER are among the top-rated options for families.
Why a 3D Printer Is the Perfect Educational Tool
A 3D printer doesn’t just print toys—it teaches design thinking, patience, creativity, and STEM fundamentals.
Educational Value
- STEM integration: Science (materials), Technology (printing), Engineering (design), Math (measurement).
- Hands-on learning: Kids build real objects from digital ideas.
- Problem-solving: If a print fails, they learn to troubleshoot and improve.
- Creativity unleashed: From keychains to rockets, the possibilities are endless.
A 3D printer is both a toy and a teaching tool—making it one of the best gifts for kids who love to learn by doing.
AI 3D Modeling & Gamification Features
- X-MAKER AI+ and X-MAKER JOY AI+ AI-powered 3D modeling (replace AI voice interaction with AI modeling)
- AI MiniMe – turn a photo/drawing into a 3D toy
- AI Doodle – type a line/word to generate a toy
- Gamified 3D design apps
- One-press printing for simpler operation
Creation Kits / Toy Factory Ecosystem
- X-KIT / Creation Kits (X-Racer, X-Auto, X-Music, X-Fun themes)
- Expands creative play beyond the printer
- “Best mate to 3D printer” concept for long-term engagement
Step 1: Understand What Makes a 3D Printer “Kid-Friendly”
Not every 3D printer is suitable for children. Look for features that make it safe, simple, and engaging.
Safety Features
- Fully enclosed design: Prevents contact with hot components.
- Non-toxic materials: Use PLA filament, a biodegradable and low-odor option.
- Quiet operation: Keeps noise minimal for home or classroom use.
Ease of Use
- Touchscreen or app-based controls.
- Preloaded templates for easy first projects.
- Auto-leveling print beds to reduce manual calibration.
- One-touch start or “plug-and-print” setup.
Educational Integration
A printer that includes an educational app or model library helps guide kids through creative challenges and projects. AOSEED’s printers, for example, pair with the AOSEED Learning App, which includes tutorials, games, and print-ready 3D models.
Step 2: Consider Age and Skill Level
Choosing the right 3D printer depends on your child’s age, patience, and curiosity level.
|
Age |
Recommended Printer Type |
Key Features |
|
4–8 years |
Beginner-friendly, enclosed printer (like AOSEED X-MAKER JOY) |
Simplified app, preset print settings, safety-first design |
|
9–12 years |
Intermediate, customizable printer (like AOSEED X-MAKER) |
Adjustable print speed, print preview, more creative control |
|
13+ years |
Advanced or hobby-grade printer |
Larger build volume, more materials supported |
If your child is new to 3D printing, start with a beginner model. You can always upgrade as their skills grow.
Step 3: Set Your Budget — Great Options Under $300

You don’t have to spend a fortune to give your child a high-quality STEM experience. Several 3D printers under $300 deliver safety, simplicity, and fun without compromise.
Here’s what to expect at different price levels:
|
Price Range |
What You Get |
Example Models |
|
Under $300 |
Compact, kid-safe printers with PLA-only support |
AOSEED X-MAKER JOY, FlashForge Adventurer 3 Lite |
|
$300–$500 |
Larger build area, print preview screen, advanced customization |
AOSEED X-MAKER, Creality Ender 3 V3 KE |
|
$500+ |
Professional-level speed, multi-material options |
Prusa Mini+, Bambu Lab A1 |
For most families, the under $300 range offers the perfect balance of safety, learning, and affordability.
Step 4: Evaluate Key Technical Specs
You don’t need to be an engineer to understand 3D printer specs—just focus on the ones that affect usability for kids.
|
Feature |
What It Means |
Why It Matters for Kids |
|
Build Volume |
Max print size (e.g., 120×120×120 mm) |
Smaller printers are easier and safer for beginners. |
|
Filament Type |
PLA, ABS, PETG, etc. |
PLA is safest for children—low odor and eco-friendly. |
|
Layer Resolution |
Print smoothness (0.1–0.3 mm) |
Finer resolution = smoother models. |
|
Speed |
Printing speed in mm/s |
Medium speed (~50 mm/s) avoids print errors. |
|
Connectivity |
Wi-Fi, USB, SD card |
Wireless options make it simpler for families. |
AOSEED printers check all these boxes while keeping setup simple enough for young learners.
Step 5: Prioritize Safety and Support
When buying a 3D printer for your child, peace of mind matters just as much as print quality.
Choose Models With:
- Enclosed, rounded designs (no exposed hot nozzles).
- Non-toxic PLA filament certification.
- Auto shut-off features after prints complete.
- Clear customer support and warranty options.
AOSEED’s printers include all of the above, plus a 30-day free trial and child-safe PLA guaranteed.

Step 6: Look for Long-Term Learning Potential
A 3D printer shouldn’t just print one or two fun toys—it should grow with your child’s interests.
What to Look For:
- Educational resources: Built-in apps, tutorials, and challenges.
- Community connection: Online sharing spaces for kids’ creations.
- Upgradeable models: As children mature, more advanced settings help them expand creativity.
The AOSEED ecosystem supports this growth perfectly—X-MAKER JOY for younger kids and X-MAKER for pre-teens and teens. Both integrate seamlessly with the same learning app.
AOSEED X-MAKER JOY – Best Beginner 3D Printer for Kids (Under $300)

Why Parents Love It:
- Perfect for ages 4–9.
- Plug-and-print simplicity.
- Fully enclosed for maximum safety.
- Uses eco-friendly PLA filament.
- Comes with AOSEED’s educational app and templates.
Pros:
- Safe, quiet, and beginner-friendly.
- Teaches STEM skills through fun.
- Compact and easy to maintain.
Cons:
- Smaller build size (ideal for toys and trinkets).
- Limited to PLA material.
AI 3D Modeling
- AI-powered 3D modeling tools (replace “AI voice” with AI MiniMe and AI Doodle)
- Gamified 3D design apps
- One-press printing for simpler use
Technical Specs / Key Features (8 Icons)
- 3.5-inch touchscreen
- Super noise control (ultra-quiet operation)
- Leveling-free (automatic leveling system)
- 400mm/s high-speed printing capability
- Power-loss recovery
- Build volume: 150×150×150 mm
AOSEED X-MAKER – Best Educational 3D Printer for Tweens & Teens

Why It Stands Out:
- Designed for ages 9–16.
- Supports PLA and ABS filaments.
- Includes a print preview screen and detailed settings for older learners.
- Combines classroom-level precision with family-friendly usability.
Pros:
- Encourages advanced learning.
- Quiet, safe, and durable.
- Compatible with both kids’ and pro-level projects.
Cons:
- Slightly higher price than entry-level models (still under $400).
AI 3D Modeling & Gamification
- AI MiniMe and AI Doodle support
- Gamified 3D design apps
- One-press printing
- Toy library integration
Technical Specs / Key Features (8 Icons)
- 3.5-inch touchscreen interface
- Noise control (quiet operation)
- Leveling-free (auto-calibration)
- 400mm/s printing speed
- Power-loss recovery
- Build volume: 150×150×150 mm
- Quick-swap nozzle system (QS Nozzle)
- Built-in time-lapse camera
AOSEED vs Competitors
|
Brand |
Safety |
Ease of Use |
Educational App |
Price Range |
Best For |
|
AOSEED X-MAKER JOY |
Fully enclosed |
One-touch print |
Yes |
<$300 |
Ages 4–9 |
|
AOSEED X-MAKER |
Enclosed & quiet |
Guided UI |
Yes |
<$400 |
Ages 9–16 |
|
FlashForge Finder |
Enclosed |
Moderate setup |
No |
$300–$400 |
10+ |
|
Creality Ender 3 |
Open design |
Manual calibration |
No |
$250–$350 |
Teens (supervised) |
AOSEED models consistently score highest for safety, simplicity, and educational value—the three features parents care about most.

Quick Checklist Before You Buy
- Safe for children (enclosed, PLA-only).
- Easy to set up and operate.
- Educational tools or learning app included.
- Compact and quiet.
- Fits your budget (ideally under $300).
- Backed by responsive customer support.
If a printer checks all these boxes, you’ve found a great fit for your family.
Frequently Asked Questions
What’s the best 3D printer for kids overall?
For beginners, the AOSEED X-MAKER JOY offers the best blend of safety, ease, and affordability (under $300). For older kids ready for more complexity, go with the AOSEED X-MAKER.
Are 3D printers safe for children?
Yes—kid-specific models like AOSEED’s are fully enclosed and use non-toxic PLA material, making them safe for supervised use.
How much should I spend on a kids’ 3D printer?
A solid, safe beginner printer typically costs between $250–$400. Spending under $300 is ideal for most families.
What can kids make with a 3D printer?
Everything from toys, animals, and puzzles to keychains, jewelry, and school models. AOSEED’s app library includes hundreds of ready-to-print ideas.
Do kids need special software or coding skills?
No! AOSEED’s app uses visual icons and drag-and-drop design tools, making it intuitive even for first-timers.
Final Thoughts
Choosing the best 3D printer for kids doesn’t have to be intimidating. Focus on safety, simplicity, educational value, and budget—and you’ll find a printer that both delights and teaches.
For families seeking a budget-friendly, STEM-certified option under $300, AOSEED’s X-MAKER JOY is a clear winner. For older creators, the X-MAKER offers more creative freedom while maintaining kid-safe design.
How STEM 3D Printers Can Help Your Kids Improve Teamwork and Problem-Solving Skills
When kids learn to design, build, and create together, they develop more than technical skills—they learn how to think, communicate, and collaborate. Among modern STEM tools, 3D printing projects for kids stand out as one of the most engaging ways to teach teamwork and problem-solving in a fun, hands-on way.
Instead of passive screen time, these projects encourage children to plan, test, and iterate—all while working together toward a shared goal. Whether in classrooms, after-school programs, or at home, a kid-friendly 3D printer can transform how children collaborate and learn.
Why Teamwork and Problem-Solving Matter in Childhood Learning

Kids today grow up surrounded by technology—but often in isolated, individual experiences. Team-based STEM learning brings back collaboration. Through group design projects, children learn to:
- Share ideas respectfully and listen to others.
- Distribute tasks according to strengths.
- Negotiate differences and compromise when needed.
- Solve challenges together rather than give up alone.
3D printing encourages this naturally because every project involves planning, testing, and refining—steps that thrive on cooperation.
AI 3D Modeling & Gamification Features
-
AOSEED’s AI-powered 3D modeling tools (replace AI voice interaction with AI modeling)
- AI MiniMe – turn a drawing/photo into a 3D toy
-
AI Doodle – type a word or line to generate a toy
- Gamified 3D design apps for kids
- One-press printing functionality for easier teamwork projects
Why 3D Printing Is Perfect for Team-Based Learning
Encourages Joint Problem-Solving
When kids design something together, they brainstorm, test, and fix issues collectively. If a part doesn’t fit or a print fails, they must analyze the cause and re-strategize—real-world teamwork in action.
Turns Abstract Ideas Into Shared Projects
Unlike many digital games, 3D printing gives children something tangible to discuss and improve together. It turns teamwork into a physical outcome they can hold, decorate, or showcase.
Builds Critical Thinking Through Collaboration
Each design choice affects the result. Kids learn to debate ideas, predict outcomes, and think critically—skills vital for both academic and real-life challenges.
Fosters Iteration and Adaptability
Group projects rarely work perfectly the first time. Through trial and error, children learn that failure is feedback, and teamwork helps them bounce back faster.
Strengthens Communication
Whether planning shapes or discussing material choices, teamwork in 3D printing requires clear communication and listening, helping kids build emotional intelligence alongside technical ability.
Creation Kits / Toy Factory Ecosystem
- X-KIT / Creation Kits with themed sets: X-Racer, X-Auto, X-Music, X-Fun
- Expands creativity beyond printing
- Emphasize “Best mate to 3D printer” concept
Fun 3D Printing Projects for Kids That Encourage Teamwork

Here are simple, age-appropriate ideas that combine creativity, STEM learning, and collaboration:
Design a Mini City (Team Urban Builders)
Each child designs one element—houses, roads, bridges, cars—and together they assemble a miniature city.
- Skills learned: spatial planning, scale consistency, coordination.
- Bonus: Kids see how individual parts form a whole—an ideal teamwork metaphor.
Create Custom Board Game Pieces
Have one group design the board, another create tokens, and a third handle decorations or packaging.
- Skills learned: creativity, consistency, shared vision.
- Team reflection: How do different contributions make the game fun and balanced?
STEM Bridge-Building Challenge
Teams print bridges or structures, then test which supports the most weight.
- Skills learned: engineering, testing, resilience.
- Encourages: critical thinking and fair competition.
Collaborative Puzzle Project
Each child prints one interlocking puzzle piece that must fit with others.
- Skills learned: geometry, precision, communication.
- Encourages: attention to detail and coordination.
3D-Printed Classroom Mascot or Emblem
Teams vote on a mascot concept, divide parts (base, head, logo), print separately, and combine.
- Skills learned: group creativity, aesthetic design, democratic teamwork.
- Bonus: Permanent symbol of unity for the class or club.
Inside the Learning Process: What Kids Actually Practice
Planning Together
Before printing, groups sketch or digitally model designs, dividing roles like designer, slicer, or printer operator.
Testing Hypotheses
When something fails, the team experiments with size, material, or structure changes, learning real-world scientific testing.
Communicating Feedback
They present ideas, defend design decisions, and learn how to give constructive feedback—a lifelong skill.
Documenting and Reflecting
Many teachers use 3D printing journals so students record challenges and improvements, reinforcing reflective learning.
Educational Benefits of Group 3D Printing Projects
|
Skill Category |
Benefits for Kids |
Real-World Impact |
|
STEM Mastery |
Learn geometry, design, physics |
Builds foundation for engineering & design fields |
|
Communication |
Express ideas, listen actively |
Prepares for teamwork in school & future jobs |
|
Creativity |
Turn ideas into reality |
Encourages innovation & confidence |
|
Leadership |
Assign tasks & guide peers |
Develops responsibility & decision-making |
|
Perseverance |
Solve problems collaboratively |
Builds emotional intelligence & patience |
Why 3D Printing Is Ideal for Schools and Families

Unlike many single-user toys, 3D printing naturally invites collaboration. In classrooms, small groups can work on parts of larger models—robots, maps, ecosystems, or architectural sets.
At home, siblings can divide creative roles: one designs, one manages printing, and another paints the final product. It’s a perfect way to replace competitive play with shared accomplishment.
The AOSEED Advantage: Safe and Educational for Team Learning
AOSEED’s 3D printers are designed with teamwork and child safety in mind.
AOSEED X-MAKER JOY (Ages 4–9)
- Simplified interface with big icons and pre-set modes.
- Ideal for younger children to collaborate safely.
- Uses non-toxic, eco-friendly PLA filament.
AOSEED X-MAKER (Ages 9–16)
- Offers print preview and advanced controls for older creators.
- Supports both PLA and ABS filaments.
- Encourages group design challenges and school projects.
Both integrate with the AOSEED App, a learning hub filled with tutorials, design templates, and creative challenges perfect for classrooms and family makerspaces.
Advantages and Disadvantages of Team 3D Printing Projects

Advantages
- Promotes real collaboration and shared responsibility.
- Strengthens problem-solving through iterative teamwork.
- Combines creative and analytical learning.
- Produces tangible, lasting results.
- Builds social and communication confidence.
Disadvantages
- May require adult or teacher facilitation at first.
- Group disagreements can occur—also part of the learning process!
- Prints take time, so projects require patience and planning.
Even these “drawbacks” help kids practice adaptability and compromise—key teamwork skills.
Practical Tips for Parents and Teachers
- Form small teams: 3–4 kids per project works best.
- Assign rotating roles: Designer, printer operator, quality checker, documenter.
- Celebrate every milestone: Even small wins boost motivation.
- Encourage reflection: Ask “What did we learn?” instead of only “What did we make?”.
- Connect to subjects: Link prints to science, math, or art lessons.
Real Stories: Collaboration in Action
“Our students worked in teams to design bridges and test them. They learned to discuss, redesign, and not give up after failures. The 3D printer made science real.”
— Corina J., STEM Educator
“My kids built a mini town together with the X-MAKER JOY. It’s on our shelf—a reminder that teamwork can be creative fun.”
— Michael B., Parent
Such experiences prove that 3D printing projects for kids teach more than design—they build resilience, empathy, and cooperative problem-solving.
Frequently Asked Questions
How does 3D printing improve teamwork skills?
Each project requires planning, communication, and cooperation. Kids must assign roles, solve problems together, and agree on design decisions, building trust and teamwork naturally.
What age is best for collaborative 3D printing?
Children as young as 4 can participate with guidance using AOSEED X-MAKER JOY, while ages 9+ can independently manage complex group projects with the X-MAKER.
Are group 3D printing projects safe?
Yes. AOSEED printers feature enclosed designs, non-toxic PLA filament, and beginner-friendly apps—safe for homes and classrooms alike.
Can 3D printing fit into school teamwork programs?
Absolutely. Teachers can integrate 3D printing into STEM clubs, science fairs, or collaborative art classes—it aligns perfectly with project-based learning.
What’s a simple group project to start with?
Try a puzzle or keychain series where each child designs one piece. It’s fast, fun, and teaches how collaboration creates something greater than individual effort.
Final Thoughts
A 3D printer for kids is more than a tech gadget—it’s a bridge between creativity and collaboration. Through shared projects, children learn to solve problems, communicate clearly, and work as a team, gaining life skills that go far beyond the classroom.
Whether they’re building a model city or printing a class mascot, teamwork transforms every print into a lesson in unity, patience, and pride.
Personalized Toy Making: How STEM 3D Printers Are Changing the Way Kids Create
In today’s tech-driven world, STEM education is more important than ever, and 3D printing for kids is opening doors to creativity and learning.
STEM 3D printers, like the AOSEED X-MAKER JOY 3D Printer for Kids, allow children to design and produce their own toys, combining fun with practical STEM skills. This technology is not just a plaything—it’s an educational tool that teaches problem-solving, spatial reasoning, and creativity in a hands-on environment.
What is Personalized Toy-Making with 3D Printers?
Personalized toy-making allows kids to bring their imagination to life. Unlike traditional toys, which are mass-produced, 3D printers for toys empower children to customize their creations according to their preferences. From action figures to puzzles, kids can adjust size, color, and design elements to suit their tastes.
Using user-friendly software, kids can learn basic 3D modeling skills. Platforms compatible with AOSEED printers simplify the design process, enabling young creators to visualize and produce tangible results. This approach not only enhances creativity but also builds essential skills for the future.
How 3D Printing Enhances STEM Learning
3D printing for kids isn’t just about making toys—it’s a complete STEM learning experience. It introduces children to:
- Engineering Concepts: Understanding mechanics, stability, and design principles.
- Problem-Solving: Iterating designs to improve functionality and aesthetics.
- Mathematics: Learning measurements, scale, and proportions in real-world applications.
- Technology: Familiarity with CAD software and printing processes.
By merging play with learning, children gain confidence in tackling technical challenges while having fun. AOSEED printers are designed to provide a safe and engaging environment for this kind of hands-on learning.
The Advantages of Using 3D Printers for Toys
Pros:
- Creativity: Kids can design unique toys tailored to their interests.
- Personalization: Toys can reflect individual preferences, from colors to shapes.
- Educational Value: Encourages STEM learning in a practical, fun way.
- Durability: Prints can be made using sturdy, non-toxic filaments safe for children.
- Cost-Effective: Over time, kids can create multiple toys without purchasing them.
Cons:
- Learning Curve: Some younger children may need guidance with software.
- Print Time: Complex toys may take several hours to print.
- Initial Cost: High-quality 3D printers can be expensive, though AOSEED models are budget-friendly compared to industry alternatives.
Top AOSEED 3D Printers for Personalized Toys

AOSEED X-MAKER Joy 3D Printer for Kids
Empowers kids to transform their creativity into reality with gamified 3D design apps and AI-powered one-press printing. The high-speed printing capability (400mm/s) and automatic leveling make 3D printing easier than ever. Designed for children ages 4–12, it features a fully enclosed, safe structure with no sharp edges. Perfect for creating toys, models, and artworks while learning STEM skills.
- Pros: Compact design, safe for home use, user-friendly interface.
- Specifications: Compatible with PLA filaments, quiet printing, pre-installed safety features.
- Best For: Beginners and younger kids starting their 3D printing journey.
AOSEED X-MAKER 3D Printer for Kids
With AI 3D modeling and a built-in toy editor, children can design and print their own toys easily. The built-in camera automatically generates a 15-second time-lapse video of each print, perfect for sharing creations instantly. Gamified 3D design apps and one-press printing enable endless creative possibilities. Safe, beginner-friendly, and suitable for ages 4–12.
- Pros: Advanced features for detailed toy designs, large build volume.
- Specifications: Supports multiple filaments, high-resolution printing, easy assembly.
- Best For: Older kids and teens who want to experiment with more complex models.
Both models focus on safe, guided creativity while introducing children to modern technology and personalized toy creation.
X-MAKER AI+
- Gamification Apps – Fun 3D design apps for kids
- One-Press Printing – AI-powered single-button printing
- 3.5” Touch Screen – Easy-to-use interface
- Super Noise Control – Ultra-quiet operation
- Leveling-Free – Automatic leveling, no manual calibration
- 400MM/S Speed – High-speed printing
- Power-Loss Recovery – Resume printing after power outage
- Build Volume: 150x150x150mm
X-MAKER JOY AI+
- AI 3D Modeling – Smart AI-assisted design
- 400MM/S Speed – Fast printing
- Silent Printing – Low-noise operation
- Appearance DIY – Customize printer look
- One-Press Print – Easy single-button printing
- Toy Library – Built-in toy design library
- QS Nozzle – Quick-swap nozzle system
- Camera – Built-in time-lapse recording
Steps to Create Personalized Toys
- Brainstorm and Sketch: Encourage kids to draw their toy ideas.
- 3D Modeling: Use beginner-friendly CAD software to turn sketches into digital models.
- Choose Filament: AOSEED printers support safe, non-toxic PLA filaments in various colors.
- Printing: Load the printer and monitor the printing process.
- Post-Processing: Remove supports, sand edges, or paint to add extra personalization.
This step-by-step approach combines design thinking with practical STEM applications, helping kids feel accomplished with every toy they create.
Real-World Applications of Personalized Toys

- Learning Aids: Customized puzzles or learning blocks enhance educational engagement.
- Gifts: Personalized toys make unique presents for friends and family.
- Storytelling: Kids can design characters from their favorite stories or games.
- Therapeutic Tools: Specially designed toys can help with motor skills and cognitive development.
Tips for Parents to Encourage Creativity
- Supervise initial software use but allow independent exploration.
- Encourage experimentation with different designs and materials.
- Celebrate completed projects to reinforce confidence and motivation.
- Introduce online communities for kids to share and get feedback on their creations.
By guiding children without limiting them, parents can foster a love for STEM while promoting self-expression.
Conclusion
STEM 3D printers are revolutionizing how children interact with toys. Through personalized toy-making, kids not only enjoy creative play but also build essential skills for the future.
AOSEED 3D printers make this process safe, educational, and exciting, offering an all-in-one solution for parents and educators. The era of passive play is over—3D printing empowers the next generation of inventors, designers, and problem-solvers.
Frequently asked questions
Are 3D printers safe for kids?
Yes, AOSEED 3D printers are designed with safety in mind. They use low-heat printing nozzles, non-toxic PLA filaments, and protective casing to prevent accidents, making them suitable for home and classroom use.
What age is suitable for using a 3D printer for toys?
Most AOSEED printers are recommended for children ages 6 and up, with adult supervision for younger users. Older kids and teens can explore advanced designs with minimal guidance.
Can kids design their own toys from scratch?
Absolutely! With beginner-friendly CAD software, children can create fully customized toys from scratch, adjusting size, shape, and color to match their imagination.
How long does it take to print a toy?
Print time varies depending on complexity. Simple models may take 30–60 minutes, while detailed toys could require several hours. AOSEED printers provide clear progress tracking to manage time efficiently.
What are the benefits of 3D printing for kids?
Benefits include enhancing creativity, learning STEM concepts, improving problem-solving skills, and gaining hands-on experience with modern technology, all while making personalized, tangible toys.
STEM Toys and Education: How Creative Toys Foster Engineering Thinking in Kids
When children build, tinker, or experiment, they’re not just playing—they’re developing engineering thinking. In a world shaped by innovation, STEM toys and 3D printing have become powerful tools to teach kids how things work, why designs matter, and how imagination can lead to invention.
In this article, we’ll explore how 3D printing for kids cultivates problem-solving and engineering skills, and review the best 3D printer for teens—perfect for taking creativity and STEM learning to the next level.
The Connection Between Play and Engineering Thinking
Children are natural engineers. Every time they build a tower, fold paper into shapes, or wonder how a machine works, they’re engaging in engineering-based thinking: asking questions, testing ideas, and improving on results.
STEM toys amplify this instinct. They encourage kids to:
- Break problems into parts.
- Predict outcomes and test hypotheses.
- Learn through trial and error.
- Design, build, and iterate—just like real engineers.
When supported by hands-on technology like 3D printing for kids, playtime becomes a foundation for lifelong curiosity and innovation.
How 3D Printing Builds Engineering Thinking
A 3D printer teaches more than just creativity—it mirrors the engineering design process used by professionals:
|
Engineering Step |
3D Printing Equivalent |
What Kids Learn |
|
Conceptualize |
Brainstorm ideas for models |
Creative thinking & planning |
|
Design |
Use modeling software or apps |
Visualization & spatial awareness |
|
Prototype |
Print first model |
Testing and iteration |
|
Refine |
Adjust settings, reprint |
Problem-solving & persistence |
|
Present |
Share finished design |
Communication & pride in work |
This step-by-step approach transforms children into mini-engineers, teaching them that mistakes are part of progress—and every failed print is just another prototype.
Why STEM Toys Like 3D Printers Stand Out
1. Creativity Meets Logic
3D printing combines art and engineering. Kids design imaginative shapes, then see how structure and material strength influence the outcome.
2. Real-World Application
From building bridges to gears and figurines, 3D printing introduces physics, design constraints, and mechanical problem-solving—all in a fun, visual way.
3. Project Ownership
Every print gives kids a sense of achievement. They’re not following instructions—they’re creating something uniquely theirs.
4. Early Exposure to Technology
3D printing for kids introduces core STEM skills like CAD (Computer-Aided Design), materials science, and digital manufacturing—skills essential for modern engineering fields.
The Best 3D Printer for Teens: AOSEED X-MAKER

When it comes to blending safety, simplicity, and advanced features, the AOSEED X-MAKER stands out as the best 3D printer for teens in 2025. It offers the perfect balance of ease for beginners and depth for young engineers ready to explore design in greater detail.
Key Features
- Age range: Ideal for ages 9–16.
- Design freedom: Supports both beginner-friendly templates and advanced modeling tools.
- Materials: Compatible with PLA and ABS filaments (for stronger prints).
- Print preview screen: Lets users visualize the design before printing.
- Safety first: Enclosed build chamber with low-noise operation.
- Educational app: The AOSEED App includes model libraries, step-by-step lessons, and creative challenges.
Why It’s Perfect for Teens
Teens can design, test, and refine their ideas independently—whether it’s a phone stand, robot part, or art piece. The printer helps them practice precision thinking, a skill at the core of all engineering disciplines.
For Younger Engineers: AOSEED X-MAKER JOY
For children just beginning their STEM journey (ages 4–9), the X-MAKER JOY offers simplified controls, colorful guidance, and preset printing options.
Highlights
- One-click printing for instant results.
- Uses only eco-friendly, child-safe PLA filament.
- App-guided creativity with preloaded models.
- Enclosed, quiet, and classroom-friendly.
It’s the perfect stepping stone before transitioning to the X-MAKER model as kids grow more confident.
How Teens Learn Engineering Principles Through 3D Printing

1. Understanding Design Constraints
Teens quickly learn that not every design works the first time. They adjust wall thickness, supports, and print speed—just like professional engineers refining blueprints.
2. Experimenting with Materials
By testing different filaments (like PLA vs. ABS), they understand material science—how temperature, density, and flexibility affect real-world performance.
3. Precision & Measurement
Printing accurate parts requires calculation and scaling, teaching math in an engaging, applied way.
4. Problem Solving
When a print fails, teens learn to troubleshoot: re-level the bed, adjust nozzle settings, or redesign their model. Each challenge strengthens analytical skills.
5. Iterative Thinking
3D printing rewards patience. Teens discover that improvement comes through small, deliberate tweaks—an essential mindset for engineering success.
The Role of STEM Education in the Future
STEM education isn’t just about careers—it’s about preparing kids for a world that rewards curiosity and innovation.
By integrating 3D printing into learning, children develop both left-brain logic and right-brain creativity, equipping them for diverse fields—from robotics and architecture to medicine and product design.
According to the U.S. Bureau of Labor Statistics, STEM jobs are projected to grow twice as fast as non-STEM roles over the next decade. Helping kids master design and engineering concepts early gives them a real advantage.
Creative STEM Projects That Foster Engineering Thinking
Here are some engaging 3D printing ideas that make learning fun and functional:
- Bridge-Building Challenge – Design and print a bridge that holds the most weight.
- Wind-Powered Car – Combine 3D-printed parts with simple motors or fans.
- Custom Puzzle Set – Teach precision fitting and pattern design.
- Mechanical Gear Set – Explore motion, torque, and interlocking parts.
- Home Tool Organizer – Create practical designs that solve everyday problems.
- Robot Shell or Arm – Design lightweight casings for DIY robotics kits.
Each project reinforces design, testing, and iteration—the same process real engineers follow.
Advantages and Disadvantages of 3D Printing as a STEM Toy

Advantages
- Hands-on STEM experience at home or school.
- Encourages design, planning, and analytical reasoning.
- Turns abstract engineering concepts into visual, tangible lessons.
- Boosts self-confidence through real-world results.
- Safe, eco-friendly models like AOSEED make it accessible to all ages.
Disadvantages
- Prints require patience (1–4 hours depending on size).
- Filament costs add up over time (though low per project).
- Occasional supervision needed for younger users.
Still, these challenges teach responsibility and persistence—both key traits of successful engineers.
Comparing the Best 3D Printers for Teens
|
Feature |
AOSEED X-MAKER |
X-MAKER JOY |
Other Brands |
|
Age Range |
9–16 |
4–9 |
10+ (varies) |
|
Filament Type |
PLA / ABS |
PLA only |
PLA |
|
App Integration |
Full AOSEED App |
Simplified |
Limited |
|
Safety Design |
Enclosed, low-noise |
Enclosed, kid-safe |
Often open-frame |
|
Education Focus |
Engineering & Design |
Creative Exploration |
Basic 3D printing |
|
Ease of Setup |
Plug-and-play |
One-click |
Moderate |
|
Best For |
Teens & young makers |
Early learners |
Hobbyists |
The AOSEED system leads in safety, learning integration, and design growth, making it the ideal ecosystem for families and educators alike.
How Parents and Teachers Can Support Engineering Thinking
- Ask open-ended questions: “What problem are you trying to solve?”
- Celebrate progress, not perfection: Every failed print is an opportunity to learn.
- Encourage iteration: Print version 2.0, 3.0, and beyond—it’s how innovation works.
- Integrate storytelling: Have kids explain their design’s purpose and function.
- Share creations: Upload photos or join online communities for peer feedback.
When adults act as guides—not fixers—children develop ownership and confidence in their problem-solving process.
Frequently Asked Questions
1. What’s the best 3D printer for teens?
The AOSEED X-MAKER is the best choice for teens. It’s powerful enough for serious projects yet safe and simple to use, bridging the gap between kid-friendly fun and real engineering practice.
2. Can younger kids learn 3D printing too?
Absolutely. The X-MAKER JOY was made for ages 4–9, offering one-click printing and safe PLA-only materials—ideal for early STEM learning.
3. How does 3D printing help develop engineering skills?
It teaches design, testing, problem-solving, and precision—the same skills professional engineers use daily.
4. Is 3D printing expensive for families?
Not really. Once you have a printer, filament refills are affordable, and each spool can make dozens of small projects.
5. What if prints fail?
Failure is part of the learning process! Kids learn troubleshooting, patience, and how to improve design—essential elements of engineering thinking.
Final Thoughts
STEM education thrives when learning feels like play. A 3D printer for kids transforms curiosity into creativity—and the best 3D printer for teens, like the AOSEED X-MAKER, helps young minds think like engineers while having fun.
Whether they’re printing bridges, gadgets, or their next invention, every project teaches problem-solving, design thinking, and persistence—the foundation of innovation.
Turn Your Child’s Drawings into Playable Toys with a STEM 3D Printer
Every parent has seen it—a child proudly holding up a crayon drawing of a wild robot, spaceship, or unicorn. What if you could turn that drawing into a real, playable toy?
Thanks to modern technology, that dream is now possible with a 3D printer for toys. Using a kids 3D printer, families can bring imagination to life—creating customized, tangible versions of their child’s designs in just a few hours.
In this guide, we’ll walk you through how the process works, the benefits of turning 2D art into 3D creations, what tools to use, and why this hands-on activity is one of the most powerful ways to inspire creativity and STEM learning at home.
From Imagination to Reality: What a 3D Printer for Toys Can Do
A 3D printer for toys is a small, family-friendly machine that builds objects layer by layer using a safe plastic filament (usually PLA, made from cornstarch).
For kids, it’s magic in motion. They draw a character, scan or recreate it in an app, and watch it come to life in 3D form—right before their eyes.
This process is fun, educational, and empowering. It connects drawing, digital modeling, and engineering in one creative loop that kids never forget.
Why Transforming Drawings into Toys Boosts Creativity
Turnin drawings into toys isn’t just entertaining—it builds essential developmental skills:
-
Creative Confidence: Kids realize their ideas can exist in the real world.
-
Problem-Solving: They learn cause and effect—how design affects structure.
-
Fine Motor & Spatial Skills: Visualizing how flat drawings become 3D objects sharpens understanding.
- STEM Learning: Concepts like geometry, layering, and materials become second nature.
- Emotional Connection: Kids treasure toys they designed themselves far more than store-bought ones.
Step-by-Step: Turning Drawings into 3D Printed Toys

You don’t need to be an engineer or artist to make this work. With the right kid-friendly 3D printer and app, the process is surprisingly simple.
1. Start with a Drawing
Encourage your child to sketch their favorite animal, superhero, robot, or character. Keep lines bold and shapes simple—think coloring-book style.
2. Digitize the Drawing
Use a smartphone or tablet to photograph or scan the picture. Many apps (like AOSEED’s X-MAKER App) allow you to import or trace drawings directly into the 3D workspace.
3. Turn It Into 3D
With guided templates and “extrude” tools, kids can add depth to flat shapes. The app helps smooth edges and adjust height or proportions.
4. Add Color & Details
Choose colors, add textures, or layer parts. This stage teaches kids about material thickness, stability, and aesthetics.
5. Print & Play!
Once your model is ready, connect to your printer and let it build. Watching the design emerge layer by layer is mesmerizing—and deeply rewarding.
In an hour or two, your child’s once-flat doodle becomes a real toy they can hold, decorate, or play with.
Best Practices for Parents
If this is your family’s first foray into 3D printing, a few guidelines will make the experience smoother and more enjoyable.
- Start simple. Choose basic designs first—like animals or vehicles—before moving to multi-part prints.
- Celebrate imperfection. The first few prints may be bumpy or uneven. Treat them as fun “prototypes.”
- Teach design thinking. Ask your child, “Why do you think this leg didn’t print evenly?” or “How could we make the base stronger?”
-
Encourage ownership. Let kids lead the design and color decisions—it strengthens creative independence.
Display success. Create a “design shelf” at home where finished prints live proudly.
Why a Kids 3D Printer Is the Perfect STEM Tool

Beyond creativity, a kids 3D printer teaches practical life skills in the most fun way possible.
Real STEM Learning in Action
Each print introduces children to:
- Science: How materials melt and harden.
- Technology: Understanding machines and software.
- Engineering: Designing structures that function.
- Math: Measuring scale and symmetry.
Encourages Focus and Patience
3D printing isn’t instant—it requires setup, waiting, and iteration. This helps kids practice patience, perseverance, and attention to detail.
Builds Future-Ready Skills
The same design principles learned through 3D printing apply to fields like robotics, architecture, and digital art. Your child gains early exposure to real-world creativity.
AOSEED: The Kid-Friendly Way to Start 3D Printing
AOSEED is one of the few companies building a complete child-safe 3D printing ecosystem—perfect for families and schools.
AOSEED X-MAKER JOY (Ages 4–9)
- Designed for beginners.
- Uses only PLA (non-toxic, biodegradable).
- Simple app with preloaded templates and one-click print.
- Enclosed build for safety and quiet operation.
AOSEED X-MAKER (Ages 9–16)
- Adds more creative control for older kids.
- Supports PLA & ABS filaments.
- Offers print preview and advanced customization.
- Perfect for design projects or STEM classrooms.
Both printers integrate with the AOSEED App, where children can choose models, trace drawings, and follow guided challenges.
Ideas: Turn These Drawings into 3D Toys

Need inspiration? Here are fun ways kids can transform their artwork into physical toys:
- Superhero Characters: Draw and print your child’s own action figure.
- Fantasy Animals: A dragon-cat hybrid? Why not! Let imagination lead.
- Personal Keychains or Badges: Add names, initials, or logos.
- Toy Cars or Robots: Kids can print bodies, wheels, or accessories.
- Holiday Ornaments: Turn seasonal art into family keepsakes.
- Mini Board Game Pieces: Replace pawns with unique 3D versions.
The process builds storytelling too—kids love making backstories for their custom toys.
Advantages and Disadvantages
Advantages
- Encourages creativity, innovation, and STEM learning.
- Provides productive screen time and meaningful play.
- Fosters confidence by turning ideas into real objects.
- Promotes bonding between parent and child.
- Develops patience and focus.
Disadvantages
- Initial prints may fail while learning.
- Supervision required for younger users.
- Prints take time (1–3 hours on average).
- Requires regular filament refills.
Still, most families agree: the joy of seeing a child hold their own invention far outweighs the learning curve.
Safety and Maintenance Tips
When printing with kids:
- Always use PLA filament, which is non-toxic and low odor.
- Keep the printer on a flat, ventilated surface.
- Teach “hot part” awareness—don’t touch during or right after printing.
- Store filaments in a dry box.
- Encourage gentle removal of finished prints.
AOSEED printers are enclosed and quiet—making them ideal for bedrooms, classrooms, and family workspaces.
Comparing AOSEED with Other Kids 3D Printers
|
Feature |
AOSEED X-MAKER JOY |
AOSEED X-MAKER |
Other Brands |
|
Age Group |
4–9 |
9–16 |
10+ (varies) |
|
App Integration |
Guided AOSEED App |
Full AOSEED App |
Often separate software |
|
Safety Design |
Enclosed & child-safe |
Enclosed |
Open frames |
|
Supported Materials |
PLA |
PLA / ABS |
PLA only (usually) |
|
Ease of Use |
One-click |
Advanced settings available |
Mixed |
|
Education Focus |
STEM + Art |
STEM + Engineering |
Varies |
AOSEED’s all-in-one ecosystem makes it easier for kids to learn safely and grow their skills over time, without complicated setup or technical frustration.
Frequently Asked Questions
1. How does a 3D printer turn drawings into toys?
After scanning or tracing a drawing, kids use modeling software (like the AOSEED App) to give it depth and shape. The 3D printer then builds it layer by layer using melted filament—creating a solid toy from their imagination.
2. Is it safe for kids to use 3D printers?
Yes, with child-friendly models like AOSEED JOY and X-MAKER. They’re enclosed, quiet, and use PLA, a non-toxic, biodegradable filament.
3. How long does it take to print a toy?
Small toys may take 45–90 minutes, while larger ones can take up to 3–4 hours. The process teaches patience and planning.
4. What can my child create besides toys?
Kids can make name tags, jewelry, keychains, model cars, animals, board game pieces, and even gifts for family and friends.
5. Do kids need to know 3D design software first?
No. AOSEED’s apps provide easy templates and step-by-step tutorials, so beginners can start printing in minutes.
Final Thoughts
A 3D printer for toys turns your child’s imagination into something tangible—and priceless. It’s a bridge between art and engineering, creativity and STEM learning, fun and focus.
By transforming simple drawings into real toys, you give your child the tools to invent, explore, and express themselves in new ways.
Managing Screen Time: How STEM Toys Can Replace Your Child's Electronic Devices
In today’s world, kids spend more hours on screens than ever—phones, tablets, games, and streaming platforms compete for their attention every day. While technology can teach valuable skills, excessive screen time often comes at the cost of creativity, focus, and real-world interaction.
That’s where kids 3D printers step in—bridging the gap between tech and hands-on learning. Unlike passive scrolling, 3D printing invites children to create instead of consume, turning imagination into tangible, colorful objects they can proudly hold.
This guide explores how STEM toys like 3D printers can meaningfully replace screen time, spark curiosity, and develop your child’s problem-solving and motor skills through play.
Why Screen Time Is a Growing Concern
The American Academy of Pediatrics recommends limiting entertainment screen time to no more than two hours per day, yet most children exceed that easily. Excessive screen exposure can:
- Shorten attention spans.
- Reduce imagination and independent thinking.
- Cause sleep disruption and eye strain.
- Limit social and physical activity.
Parents aren’t wrong to feel conflicted—technology is essential, but balance is key. The goal isn’t to remove tech completely but to replace passive screen time with active, creative engagement—and that’s where kids 3D printers excel.
From Consumers to Creators: What Makes 3D Printing Different

When kids watch videos or play games, they’re mostly consuming someone else’s ideas. A 3D printer for kids flips the equation—they become creators.
Here’s what changes:
- Instead of watching a cartoon, they design their own character.
- Instead of playing with toy cars, they print and assemble one.
- Instead of tapping screens endlessly, they focus on problem-solving.
This shift from passive to active learning builds persistence, curiosity, and real-world skills.
The Psychology Behind Hands-On Play
Hands-on activities stimulate the brain’s creative and logical centers simultaneously, unlike screen-based activities that primarily trigger quick dopamine responses.
When kids design a 3D model, they:
- Visualize an idea.
- Plan the structure.
- Use digital tools responsibly.
- Wait patiently as the printer builds layer by layer.
- Handle, test, and improve the object.
This process promotes executive functioning, spatial reasoning, and self-regulation—skills directly linked to better academic performance and emotional balance.
Why 3D Printing Is a Perfect Screen Alternative
|
Problem with Screen Time |
How 3D Printing Solves It |
|
Short attention span |
Encourages focus during long prints |
|
Passive entertainment |
Active, creative design process |
|
Overreliance on instant rewards |
Builds patience through project completion |
|
Minimal social interaction |
Encourages teamwork and family collaboration |
|
Lack of tangible outcomes |
Produces real toys and creations kids can hold |
By turning ideas into 3D objects, kids experience the joy of seeing their imagination come to life—without addictive apps or endless notifications.
The Role of STEM Toys in Today’s Learning
STEM (Science, Technology, Engineering, Math) education is all about learning through exploration. A kids 3D printer naturally fits this model. It blends:
- Science (melting and cooling PLA filament),
- Technology (using the printer and app),
- Engineering (designing strong shapes), and
- Math (measuring scale and symmetry).
And unlike most “educational” apps, 3D printing connects digital design with physical results—children see, touch, and test their outcomes.
Creative Projects That Replace Screen Time

If your child usually spends time gaming, watching shows, or scrolling, try these 3D printing projects instead—each one teaches STEM principles and rewards patience with real results.
1. Custom Keychain or Name Tag
Kids learn basic 3D modeling, lettering, and proportions.
STEM focus: geometry and measurement.
2. Toy Car or Racer Kit
They print, assemble, and test different car body shapes for speed and balance.
STEM focus: engineering and physics.
3. Animal Figurine Set
Great for storytelling or diorama creation.
STEM focus: biology and creative design.
4. Mini Bridge Challenge
Children design bridges and test how much weight each can hold.
STEM focus: structural design and load distribution.
5. Puzzle or Building Blocks
Encourages spatial reasoning and modular thinking.
STEM focus: logic and pattern recognition.
AOSEED’s built-in X-MAKER App includes guided templates and projects like these—making it easy to start even with zero design experience.
The Best Part: Kids Still Use Technology—But Wisely
Ironically, 3D printing doesn’t eliminate technology; it teaches responsible use. Kids learn to use tablets and apps as creative tools, not distractions.
For example:
- They model in an app for 15–20 minutes.
- Export the design to the printer.
- Watch it come to life over an hour.
Parental Benefits: Peace of Mind and Purposeful Play
Parents often describe 3D printing as a “productive hobby” because it combines fun with learning outcomes. Here’s why many families make the switch:
- Peaceful screen balance: Your child stays engaged without overstimulation.
- Shared activities: Parents can print together with their kids—bonding through creation.
- Skill development: Logical thinking, patience, and self-confidence grow naturally.
- Less guilt, more growth: You’re not “taking away” screens; you’re giving a better alternative.
Choosing a Kid-Friendly 3D Printer
When selecting a 3D printer for kids, look for models designed with families in mind.
Key Features:
- Enclosed build area for safety.
- PLA filament only (non-toxic, low odor).
- Easy app interface with templates and learning modules.
- Quiet printing suitable for home use.
- Auto-leveling and preset settings to minimize frustration.
Advantages and Disadvantages of Switching to 3D Printing

Advantages:
- Turns screen time into hands-on learning.
- Teaches STEM and design thinking.
- Builds patience, coordination, and creativity.
- Provides tangible rewards for effort.
- Safe and eco-friendly for family environments.
Disadvantages:
- Initial learning curve during setup.
- Some supervision required for younger kids.
- Prints take time (not instant like games).
But these “drawbacks” actually reinforce essential life lessons—focus, persistence, and delayed gratification.
Safety and Maintenance Tips for Parents
- Stick to PLA filament only—eco-friendly and child-safe.
- Supervise printing until your child understands hot components.
- Keep the printer on a stable, ventilated surface.
- Store filament away from sunlight and moisture.
- Encourage cleanup and post-print organization—it builds responsibility.
AOSEED printers include auto-shutdown, enclosed designs, and easy filament loading, ensuring both fun and peace of mind.
Frequently Asked Questions
How can 3D printers help reduce screen time?
They give kids a digital tool that creates physical results. Instead of passively watching, they actively design, build, and learn. It’s interactive and creative, not addictive.
What’s the right age to introduce 3D printing?
Children as young as four can use simplified printers like AOSEED X-MAKER JOY, with adult guidance. By age nine, most can handle more advanced projects independently.
Are 3D printers safe for kids?
Yes—when using enclosed, kid-friendly printers and PLA filament. Always supervise early sessions and teach “hot parts” safety.
What can kids print?
Anything from name tags, toys, cars, and jewelry to small inventions. AOSEED’s apps provide hundreds of creative templates.
Do kids need prior tech knowledge?
No. Modern printers use guided apps that simplify design. Kids learn gradually—starting with templates and advancing to full custom creations.
Final Thoughts
Replacing screens doesn’t have to mean taking technology away—it means changing how it’s used.
A kids 3D printer transforms tech time into creative learning, helping children express themselves while developing essential STEM and life skills. It’s not just a toy—it’s a tool for imagination, patience, and purpose.
How STEM 3D Printers Can Improve Your Child’s Hands-On Skills
In a world filled with screens, many parents are looking for ways to help their kids learn by doing. One of the most exciting tools for that is the 3D printer for kids—a device that turns imagination into real, tangible creations.
This guide explores how 3D printing encourages hands-on learning, enhances problem-solving and creative thinking, and supports the development of STEM skills (science, technology, engineering, and math). Whether you’re a parent, teacher, or homeschooler, you’ll learn how a kid-friendly 3D printer can unlock curiosity and confidence in every child.
The Power of Hands-On Learning
Hands-on learning is when kids learn through experience rather than memorization. It’s the difference between reading about a bridge and actually building one.
A 3D printer for kids brings that approach into the home. Instead of only seeing ideas on a screen, children can:
- Design something on a tablet or app.
- Print it layer by layer.
- Touch it, test it, and improve it.
This simple process transforms learning from passive to interactive and multisensory—which research shows leads to stronger understanding and longer memory retention.
What Makes a 3D Printer Kid-Friendly?
Not all 3D printers are suitable for children. A kid-friendly 3D printer simplifies the process, adds safety features, and provides creative support.
Key features include:
- Enclosed or guarded printing areas to protect small hands.
- Eco-friendly PLA filament, which is safe and low-odor.
- User-friendly apps with large icons, templates, and guided lessons.
- Automatic leveling and presets to avoid calibration frustration.
- Quiet operation, so it can run in classrooms or bedrooms without disturbance.
AOSEED’s X-MAKER JOY is designed specifically for early learners, while X-MAKER offers more advanced control for older kids and teens.
From Curiosity to Creation: How Kids Engage with 3D Printing

A child’s first print is often a moment of pure wonder—watching an idea take shape layer by layer. That wonder quickly turns into exploration.
Here’s how the learning cycle works:
- Imagine – Kids dream up an object (a car, badge, or animal).
- Design – They use simple modeling apps to visualize their idea.
- Print – The printer brings it to life with colorful PLA filament.
- Evaluate – They hold, test, and adjust the design.
- Refine – They reprint and see their improvements in action.
Each cycle builds creativity, patience, and logical thinking—all essential 21st-century skills.
Real Skills 3D Printing Builds
1. Problem-Solving & Critical Thinking
When a print doesn’t come out right, kids don’t quit—they troubleshoot. They ask, “What went wrong?” and learn cause-and-effect thinking. Over time, they develop resilience and analytical reasoning.
2. Fine Motor Skills & Spatial Awareness
Designing, measuring, and assembling parts teach hand-eye coordination and spatial visualization—skills often linked to success in engineering and architecture.
3. Creativity & Imagination
3D printing encourages kids to think like inventors. They can build custom toys, replacement parts, or artistic sculptures. Each project is a blend of art and science.
4. STEM Integration
Math (scale, geometry), science (materials, heat), and technology (software, slicing) blend naturally. It’s STEM disguised as play.
5. Communication & Teamwork
When used in classrooms or family projects, 3D printing teaches collaboration—sharing ideas, assigning roles, and celebrating outcomes together.
Example Projects That Build Hands-On Skills
- Toy Car Chassis – Teaches measurement and motion mechanics.
- Personalized Keychain – Combines design and practical use.
- Animal Figurine Series – Encourages pattern, symmetry, and color play.
- Mini Bridge or Tower – Demonstrates structural engineering basics.
- Name Badge or Desk Sign – Teaches lettering, layering, and finishing.
- Holiday Ornament Set – Combines design, math, and seasonal fun.
AOSEED’s X-MAKER App and Learning Center provide many ready-to-print templates and tutorials—perfect for guided exploration.
Advantages of a 3D Printer for Kids

Advantages
- Builds confidence through visible results.
- Merges play with educational value.
- Promotes creative independence.
- Fosters early interest in STEM careers.
- Encourages family or classroom collaboration.
Disadvantages
- Prints take time—patience is part of the learning curve.
- Filament refills add small recurring costs.
- Some troubleshooting requires adult help early on.
Over time, the pros far outweigh the cons as children learn self-reliance and problem-solving.
The STEM Connection: Turning Curiosity Into Future Skills

STEM 3D printing connects multiple disciplines:
- Science: Understanding materials and melting points.
- Technology: Using digital tools and slicing software.
- Engineering: Designing structures that actually work.
- Math: Measuring, scaling, and calculating print time.
This multi-skill overlap gives kids a natural head start on fields like robotics, product design, and digital fabrication—fields growing rapidly worldwide.
Cost, Setup, and Maintenance
Cost:
Kid-friendly printers generally range from $250–$450, depending on features. AOSEED’s lineup fits in this range while offering long-term educational value.
Setup:
Plug in, connect to Wi-Fi or USB, load filament, and open the companion app. Most models (like X-MAKER JOY) offer guided tutorials and pre-calibrated beds.
Maintenance:
Keep the nozzle clean, use quality filament, and store spools in a dry place. AOSEED provides easy access to spare parts and customer support, making upkeep simple even for beginners.
Safety First: How to Keep It Fun and Worry-Free
- Use only PLA filament for home use—non-toxic and low odor.
- Keep an eye on the first few prints to ensure proper adhesion.
- Wait until parts cool before touching them.
- Choose enclosed models to prevent burns or accidents.
- Teach respect for tools: Just like cooking, learning safety is part of growing up.
AOSEED emphasizes child safety with fully enclosed systems, eco-friendly materials, and easy-to-read status displays—ideal for families and schools.
When Is the Right Age to Start?
Kids as young as four or five can begin exploring guided prints (like animals or shapes). Around eight to ten, most children can start designing their own creations. By twelve and up, many can handle advanced modeling and experiment with support structures and precision parts.
Comparing AOSEED X-MAKER and X-MAKER JOY
|
Feature |
X-MAKER JOY |
X-MAKER |
|
Age Range |
4–9 |
9–16 |
|
Interface |
Ultra-simplified |
Advanced design tools |
|
Filament |
PLA only |
PLA & ABS |
|
Screen |
No (app-based) |
Built-in print preview |
|
Print Settings |
Presets |
Adjustable |
|
Learning Level |
Beginner |
Intermediate–Advanced |
Both models emphasize creativity, safety, and learning-by-doing, making them ideal for schools or home learning centers.
Frequently Asked Questions
How does a 3D printer help develop hands-on skills in kids?
By transforming ideas into physical models, kids learn through trial and error—building coordination, spatial awareness, and confidence. Every project teaches them to use their hands and mind together.
What’s the difference between a normal and kid-friendly 3D printer?
Kid-friendly models simplify setup, include safety guards, and use eco-safe PLA. They focus on learning and fun, not complex technical tweaking.
Do I need to supervise my child every time?
Younger kids should always have supervision, especially during printing. As they learn safety habits, older children can operate printers more independently.
How long does it take to print a toy?
Small models can take 30–60 minutes, while detailed or multi-part toys may run 2–4 hours. The process teaches patience and planning.
Are 3D printers expensive to maintain?
Not really. PLA filament is affordable and lasts for many prints. Routine care—like cleaning the nozzle or bed—is simple and rarely time-consuming.
Final Thoughts
A 3D printer for kids isn’t just a gadget—it’s a gateway to hands-on creativity and STEM mastery. It helps children understand that ideas can take shape through effort and curiosity.
By encouraging them to design, print, and problem-solve, you’re equipping them with real-world skills that last a lifetime.
Beginner's Guide to STEM 3D Printers: How Kids Can Design and Print Their Own Toys
If your child loves building, drawing, or asking “how does this work?”, a kids 3D printer can turn curiosity into real-world creativity. This beginner’s guide explains what 3D printing is, how kids design and print their own toys, the setup steps parents should know, and the pros, cons, specifications, and benefits to consider—so you can choose the best 3D printer for kids with confidence.
Throughout, we’ll reference the AOSEED ecosystem—because it’s designed for children and families—while keeping guidance brand-agnostic so you can compare options. If you want to see a child-friendly printer lineup, check out:
What Is 3D Printing—In Kid-Friendly Terms?
3D printing is like drawing with plastic in thin layers. The printer heats a spool of filament—most commonly PLA, a plant-based plastic that’s popular for home and school use—and deposits it layer by layer until the shape is complete. Kids choose a ready-made model or create their own in an app, press Print, and watch a toy appear over minutes to hours (depending on size and quality settings).
Key ideas kids can grasp quickly:
- Layering: The printer builds from the bottom up, one layer at a time.
- Slicing: The app “slices” a 3D shape into printable layers.
- Filament: Think of it like a long, colorful pasta strand the printer melts and redraws as a toy.
- Settings: Quality vs. speed—higher quality takes longer.
Why 3D Printing Fits STEM Learning
A kids 3D printer naturally teaches:
- Design thinking: Imagine → design → test → iterate.
- Geometry & measurement: Scale, symmetry, angles, volume.
- Problem-solving: Why did it fail? How can we fix it?
- Project ownership: “I made this!” boosts confidence and persistence.
When the process is guided by a family-friendly app and safety-first hardware, kids build lasting skills while having fun.
Ages, Readiness, and Supervision
- Ages 4–8: Choose a printer with very simple controls, pictorial interfaces, and curated models. Expect close parental supervision.
- Ages 9–12: Look for more design freedom and mild customization of print settings; supervision is still important.
- Teens: They may explore advanced features like support structures, infill tuning, and multi-part assemblies, with light oversight.
Child-safe printers typically use PLA filament, include enclosed or guarded hot parts, and provide clear on-screen or in-app guidance
Quick Start: From Box to First Toy in 7 Steps

- Unbox & place the printer on a stable, ventilated surface away from tiny hands and pets.
- Load PLA filament following on-screen or printed instructions.
- Connect the app (Wi-Fi or cable) and ensure firmware/software are up to date.
- Pick a model from the built-in library (e.g., a car, animal, or keychain).
- Preview & slice: The app converts the model to printable layers.
- Press Print: Watch the first layer—if it sticks cleanly, you’re on track.
- Remove & celebrate: Once cool, remove the print and do a gentle victory dance.
For a ready-to-go family setup, browse AOSEED X-MAKER JOY for younger kids and AOSEED X-MAKER for older makers.
Designing Toys: Three Child-Friendly Paths

-
Start with Templates
Many kid-oriented apps include pre-designed toys (cars, figures, animals). Kids can tweak colors, scale, or simple add-ons—perfect for early wins. -
Block-Style Builders (Beginner CAD)
Tools with block, shape, and snap-to-grid functions let kids combine cubes, spheres, and wedges into robots, badges, or toy accessories. It’s digital LEGO for 3D printing. -
Guided Challenges & Learning Tracks
Look for an in-app learning center or challenges that teach concepts step-by-step: symmetry today, interlocking parts tomorrow. This is ideal for homeschool or weekend projects.
Tip for parents: keep a folder of “Ready to Print” models your child loves. Save time, grow confidence.
Safety Essentials for Families
- Use PLA filament (low odor, widely recommended for home/education).
- Teach “hot parts” rules: No touching the nozzle/bed when printing or right after.
- Ventilation: Normal room ventilation is usually fine for PLA; avoid tiny, sealed spaces.
- Cable & cord safety: Secure cables to avoid entanglement.
- Supervision: Especially for younger children—treat it like an oven: wonderful results, but respect the heat.
AOSEED’s ecosystem emphasizes child-safe PLA and family-friendly guidance, which is why many parents choose it as a first printer.
Choosing the Best 3D Printer for Kids: What to Look For

- Age-appropriate interface: Big icons, simple steps, curated models for younger kids; more control for older ones.
- Reliable first layer: Auto or assisted bed leveling improves print success.
- Enclosure/guards: Help keep fingers away from hot parts.
- Filament compatibility: PLA required; optional ABS for advanced users/older kids (with proper safety and ventilation).
- App & model library: A growing library nudges kids from “print” to “design.”
- Support & warranty: Clear instructions, responsive support, and easy replacement parts.
- Noise & size: Consider where the printer will live and how loud it is during prints.
Explore AOSEED’s two age-tiered options to see how features scale:
- Younger makers: X-MAKER JOY (simple presets, kid-centric tools).
- Older kids/teens: X-MAKER (more design tools, print preview, fine-tuning).
Pros and Cons of Kids 3D Printers
Pros
- Creativity to reality: Kids see ideas become objects they can hold.
- STEM learning at home: Geometry, design, logic—built into playtime.
- Project-based learning: Great for homeschool and weekend build clubs.
- Personalized toys & gifts: Nameplates, mini figures, keychains, game pieces.
- Long-term engagement: New models and challenges keep interest alive.
Cons
- Learning curve: Early prints may fail; that’s part of the process.
- Time & patience: Quality prints take time (often 30–180 minutes+).
- Consumable costs: Filament and occasional parts (nozzles, bed sheets).
- Supervision needed: Especially for younger ages and first few weeks.
Specifications That Actually Matter (Without the Jargon)
- Build Volume: How big a toy you can print (e.g., ~120–200 mm in each dimension is typical for kids’ models).
- Layer Height: Lower numbers = finer detail (e.g., 0.12–0.28 mm common).
- Nozzle Diameter: 0.4 mm is standard; good balance of detail and speed.
- Filament Type: PLA is the family default; it’s easy, lower odor, widely available.
- Bed Leveling & Adhesion: Auto/assisted leveling and good first-layer adhesion boost success.
- Connectivity & App: Wi-Fi/cloud print from a safe interface simplifies family use.
- Safety Features: Guards/enclosures, filament sensors, runout detection, and clear status displays.
For parents comparing models, AOSEED’s X-MAKER includes a print preview screen and supports PLA/ABS (for older makers), while X-MAKER JOY prioritizes simplified presets and PLA-only safety for younger kids.
Advantages vs. Disadvantages—At a Glance
Advantages
- Inspires creativity and engineering habits early.
- Teaches resilience: test, fail, improve.
- Custom toys feel special—kids design for themselves.
- Scales with your child’s age and skill.
Disadvantages
- Requires setup, occasional calibration, and adult oversight.
- Prints can fail from time to time—expect gentle troubleshooting.
- Larger or finer prints take patience.
- Not all models are equally “kid ready”—curation helps.
Smart Parent Tips for Early Success
- Start small: Choose 30–60 minute prints for the first week.
- Celebrate “failures”: Keep a shelf of “prototypes”—part of the story!
- Make it social: Print gifts for friends or siblings; design name tags for school supplies.
- Set routines: “Design on Saturday, print on Sunday” turns it into a ritual.
- Create a making corner: Keep filament, tools, and a “Ready to Print” folder handy.
- Add themes: Cars, animals, badges, holiday ornaments—kids love series.
Simple Project Ideas Kids Love
- Personal name tag for a backpack or pencil box.
- Keychain creature with initials.
- Mini car or racer body to snap onto toy wheels.
- Chess/checkers set with custom icons.
- Room sign (e.g., “Ava’s Lab”).
- Holiday ornament designed from basic shapes.
When to Move Up a Level
If your child starts asking about stronger parts, moving joints, or finer details, it might be time to:
- Introduce infill patterns (honeycomb, grid).
- Teach supports for overhangs.
- Explore basic CAD (still kid-friendly).
- Consider a printer with more adjustable setting
Cost of Ownership—What to Expect
- Printer: Entry-level kid models are typically a few hundred dollars.
- Filament: One 1-kg spool of PLA can make dozens of small toys.
- Accessories: Replacement nozzles, stick sheets, or bed adhesive over time.
- Time: The most valuable input—prints take time, but that’s where learning happens.
Where AOSEED Fits
AOSEED offers a two-printer, one-ecosystem approach:
- X-MAKER JOY targets very young creators with super simple controls and PLA-only safety.
- X-MAKER grows with your child, adding print preview, PLA/ABS support, and deeper design tools.
Pros, Cons & “Fit Check” Summary
Best for your family if you want:
- Hands-on STEM at home, creative confidence, and a guided path from “print a template” to “design my own.”
Consider carefully if:
- You prefer instant results (3D printing rewards patience), or you cannot supervise younger children during prints.
Frequently Asked Questions
Is a kids 3D printer safe to use at home?
Yes—when you choose a child-friendly model, use PLA filament, and supervise appropriately. Treat it like a kitchen appliance with heat: incredibly useful, but respect the hot nozzle and bed. Child-oriented printers add guards/enclosures and family-friendly instructions to simplify safe use.
How long does it take to print a toy?
Small items like keychains may take 30–60 minutes; larger toys can take 2–4 hours or more. Speed vs. quality is a trade-off—faster prints show more layer lines, slower prints look smoother. Starting with shorter prints helps kids stay engaged.
What’s the best 3D printer for kids—how do I choose?
Look for age-appropriate software, reliable first-layer features, PLA compatibility, and a kid-oriented model library. Younger kids do best with preset-driven printers; older kids benefit from more control and print previews. AOSEED’s JOY (younger) and X-MAKER (older) reflect this split.
How much does filament cost and how long does it last?
A 1-kg spool of PLA typically costs modestly and can produce dozens of small toys. Track usage in your app; when prints start failing mid-job, it might be time for a fresh spool or a filament path check.
Do kids need to learn complex 3D software?
Not at first. Kid-centric apps offer templates and block-style design so children can create quickly. As they gain confidence, they can explore intro CAD and more advanced settings. The goal is to grow skills gradually without overwhelming them.
Final Thoughts
A kids 3D printer brings STEM learning to life. It turns ideas into objects, teaches design and problem-solving, and gives kids a healthy sense of “I made this.”
Start simple with curated models, celebrate the first few “perfectly imperfect” prints, and let your child’s confidence grow. When you’re ready to compare child-friendly options built for family life, explore.
Best STEM Gifts for Creative Kids (7–12)
If you’re shopping for stem gifts for 7–12 or generally hunting for gifts for kids who love to invent, you’re really looking for more than toys—you’re looking for tools that unlock a kid’s ideas. The best choices don’t just entertain; they build confidence, curiosity, and real skills in science, technology, engineering, math (and often art).
This guide breaks down what to look for, how to match gifts to personality, and why certain picks—especially kid-safe 3D printers—can become the centerpiece of a young inventor’s world.
What makes a great STEM gift for ages 7–12?

At this age, kids move from “copying an example” to creating their own versions. The ideal gift nudges them from instruction-following to tinkering, remixing, and iterating. Look for:
- Open-ended play: Reusable parts, modifiable designs, and plenty of “what if…?” moments.
- Visible results: Kids should see and hold their work (not just watch a screen).
- Scaffolding: Gentle guidance at first, but room to grow into more advanced challenges.
- Safe, durable materials: Hands-on shouldn’t mean risky or fragile.
- A content ecosystem: Projects, lessons, and challenges that keep ideas flowing long after unboxing.
The standout “inventor” gift: a kid-safe 3D printer

If you want one hero gift that keeps paying dividends all year, consider a kid-friendly 3D printer. It turns a child’s sketch, word, or photo into a real object—and it never runs out of project ideas because the ideas come from the child.
Two to look at:
-
AOSEED X-MAKER JOY: AI-Powered ToyMaker 3D Printer for Kids – A gentle on-ramp for younger creators. The companion app uses icons, voice prompts, and AI Word/Image Design to turn simple inputs into printable models. It’s built for safety, one-click wireless printing, and “I made this!” wins that fuel confidence.

-
AOSEED X-MAKER: Kid-Friendly AI-Powered 3D Printing Revolution – A step up for older kids ready for deeper design. Curriculum-aligned modules, bigger build volume, multi-user readiness, and support for more advanced projects make it great for home makerspaces and classrooms alike.
Why 3D printers belong on any “gifts for kids who love to invent” list: they move kids from assembling someone else’s parts to designing their own parts. That shift—from user to creator—is the hallmark of real STEM growth.
Matching gifts to inventor “profiles”
Different kids invent in different ways. Use these profiles to narrow choices.
The Builder–Engineer
If your child loves structures, vehicles, and mechanisms, prioritize modular sets and design tools that reward iteration. A 3D printer becomes the “missing parts” machine that solves every design snag: print stronger axles, custom brackets, or snap-fit joints to make fantasy builds work.
The Artist–Designer
Some kids invent through aesthetics—color, form, and storytelling. Pair a 3D printer with paint pens, decals, and a photo lightbox so they can finish, photograph, and “exhibit” their creations. The X-MAKER JOY’s AI tools are especially motivating here: type “dolphin charm,” customize it, print, paint, share.
The Scientist–Tester
Kids who love experiments need repeatable prototypes. 3D printing lets them change one variable at a time (wall thickness, fin angle, gear ratio) and see what happens. Add a small notebook and stopwatch to turn play into proper experiments.
The Coder–Roboticist
For kids fascinated by motion and logic, combine a kid-friendly printer with simple motors, wheels, and sensors. Print mounts and linkages, then prototype robots, rovers, and gadgets. This is where the X-MAKER shines as projects scale up.
Why 3D printing beats “just one more kit”
Traditional building kits are wonderful—but they end when you reach Step 142. A kid-safe 3D printer never truly ends, because the supply of ideas is infinite. Today it’s a personalized keychain. Tomorrow it’s a glider with better wings. Next week it’s a custom board-game piece, a nameplate, a violin shoulder rest, or a replacement hinge for a cardboard fort. Each project reinforces the same creative loop: imagine → design → test → improve.
How to evaluate a kid-friendly 3D printer
When you compare options, focus on learning experience first:
- Ease of creation: Can kids design without prior CAD experience (icons, voice, AI prompts)?
- One-click reliability: How quickly can they go from idea to print without adult rescue?
- Safety & materials: Enclosure, guided temperatures, and PLA (kid-safe, low-odor).
- Content & curriculum: Libraries, weekly project updates, and age-appropriate lessons.
- Room to grow: Can it scale from charm trinkets to mechanical parts and class projects?
The X-MAKER JOY and X-MAKER check these boxes with an app layer that starts playful and grows more technical with the child.
Gift bundles that land perfectly
If you choose a 3D printer, round it out with:
- Filament starter colors: Let kids match their ideas (neon wheels, metallic badges, pastel charms).
- Finishing kit: Fine-grit sandpaper, acrylic paints/markers, clear water-based sealant.
- Project prompts: A “30-day maker challenge” list on card stock; each card = one print idea.
- Maker journal: Sketch ideas, log print settings, note what worked (and what didn’t).
- Photo corner: A mini lightbox and phone holder so they can document and share their work.
Other thoughtful STEM gift categories (that pair well with a printer)
Even if the 3D printer is your centerpiece, a few complementary gifts multiply its impact:
- Electronics starters: Snap-together LEDs and switches; print a case to turn it into a lantern.
- Math manipulatives: Print custom fraction bars, tessellation tiles, or geometry solids.
- Outdoor science: Pair with a pocket microscope; print labeled sample trays and specimen tags.
- Board-game design kit: Blank boards and dice; print custom tokens and terrain.
- Mini robotics pack: Simple motors and wheels; print brackets, arms, and sensor mounts.
How to present the gift so it “clicks” on day one
Wrap the printer with three printed “tickets”:
- Print Me First: a small, fast-success model (name tag, charm).
- Remix Me: an accessory that invites variation (badge, bookmark, gear coaster).
- Invent Me: a prompt card—“Design a marble that rolls straighter than yesterday’s,” or “Make a rover wheel with more grip.”
That first afternoon becomes a memory, not an instruction slog.
Quick tips for parents and educators
- Celebrate prototypes, not perfection. Ask, “What will you try next?”
- Model curiosity. Print something that you want to fix or improve around the house.
- Mix art and science. Let kids paint, label, and stage their prints for a mini “exhibit.”
- Keep it screen-light. Use the app to design, then step away while the printer hums and hands-on begins.
Frequently Asked Questions
What’s the best way to choose stem gifts for 7–12?
Start with your child’s creative mode. Builders love modular systems; artists love customizable canvases; testers love experiments; coders love motion and logic. If you want one gift that covers all four, a kid-safe 3D printer is a strong choice because it flexes to any project a child imagines.
Why give a 3D printer instead of another building kit?
Kits are wonderful, but they’re finite. A 3D printer is open-ended—it becomes the tool for every idea. Kids design their own parts, fix what breaks, and keep exploring for months (and years) without waiting for a new kit to arrive.
Is a 3D printer really appropriate for ages 7–12?
With the right model, yes. The AOSEED X-MAKER JOY is designed for younger creators with one-click wireless printing and a kid-friendly app (icons, AI Word/Image Design, voice interaction). Older kids who want bigger, more technical builds can step up to the AOSEED X-MAKER.
Do kids need CAD or coding experience to use these printers?
No. AOSEED’s ecosystem removes the intimidation factor. Kids can speak, type, or sketch an idea and turn it into a model with AI assistance. As they grow, they can explore more advanced design modules at their own pace.
Is 3D printing “screen-free”?
Mostly. Kids use a tablet or laptop briefly to design and start the job, then the experience shifts to hands-on: removing supports, sanding, painting, testing, and iterating. The output (a real object) replaces screen time with maker time.
What materials are safe for kids?
Look for PLA filament—it’s low-odor and made from renewable resources. AOSEED’s printers are built around child-safe PLA and enclosed, quiet operation, so they’re comfortable for living rooms, classrooms, and makerspaces.
How long does a typical print take?
Small accessories can finish in under an hour; larger designs may take a few hours. Choose a first project that’s quick and successful (a name tag or charm) to hook attention, then graduate to bigger builds like vehicles, gliders, or desk organizers.
Can a 3D printer fit into school projects?
Absolutely. The X-MAKER includes modules that map to common STEM standards and supports multi-user setups. Students can model geometric solids, design simple machines, prototype inventions for fairs, or create artifacts for history/science presentations.
What if a print fails?
Great! Failure is data. Kids learn to adjust wall thickness, infill, scale, or geometry and try again—the heart of the scientific method. A quick tweak often turns a failed print into a celebrated success on the next try.
Are there ongoing costs or complicated upkeep?
Beyond filament and occasional nozzles or build surfaces, maintenance is light—especially with printers designed for kids. AOSEED’s ecosystem focuses on reliability and one-click workflows, so adults aren’t constantly troubleshooting.
What are good accessories to gift with a printer?
A finishing kit (fine sandpaper, paint pens), extra PLA colors, a maker journal, and a mini lightbox for photos. If your child loves robotics, add small motors and wheels—print brackets and frames to bring ideas to life.
What if my child prefers drawing or storytelling over “engineering”?
Perfect—3D printing marries art and engineering. They can create characters from stories, print jewelry or props for stop-motion films, or design custom game pieces. The X-MAKER JOY is especially friendly for the art-first pathway.
How can I keep motivation high after the holidays?
Schedule a weekly maker hour with rotating prompts: “Make something that floats better,” “Design a desk tool we’ll use this week,” or “Improve last week’s rover wheel.” AOSEED’s app provides new models and challenges to keep momentum rolling.
Bottom line
For gifts for kids who love to invent, aim for tools, not just toys. Combine creativity, safety, and room to grow—and you’ll give a child more than entertainment. You’ll give them a launchpad.
STEM 3D Printer vs Building Kits: Which Sparks More Creativity?
For decades, building kits for kids—from LEGO sets to robotic assembly boxes—have introduced children to the fundamentals of engineering. They offer structure, safety, and the instant satisfaction of putting something together. But a new kind of STEM learning toy is changing the game: 3D printers designed for kids.
So, what’s the real difference between STEM toys vs building kits? Let’s explore how these two paths to learning compare, and which one might fit your child’s imagination best.
The Core Difference: Fixed Results vs Infinite Possibilities

STEM building kits are designed around pre-defined outcomes. You follow instructions, use provided parts, and end up with a finished product—say, a motorized robot or bridge model. They’re guided and reassuring for first-time learners.
STEM 3D printers, on the other hand, remove the ceiling on creativity. Instead of just assembling someone else’s design, children design and manufacture their own—a fundamental leap from user to creator.
In short:
- Building kits teach how things fit together.
- 3D printers teach how things come to be.
Both are valuable, but their educational outcomes are different.
How Building Kits Support Early STEM Learning
Building kits remain excellent introductory STEM toys. They provide a clear framework and help kids visualize mechanical relationships. Young builders develop:
- Fine motor coordination (through small part assembly)
- Sequential logic (following instructions step by step)
- Pattern recognition (understanding how components relate)
However, once the project is complete, the learning journey often ends. Kits are finite experiences—great for early exposure but limited for sustained exploration.
Many educators note that after 5–10 builds, children start craving freedom: “Can I make my own version?” That’s exactly where STEM 3D printers for kids come in.
Why 3D Printing Is the Next Evolution in STEM Play

Unlike a building kit, a 3D printer is not the project itself—it’s the tool for infinite projects. With a printer, every idea can become a new hands-on experiment.
The AOSEED X-MAKER JOY (ages 4–12) and AOSEED X-MAKER (ages 9–16) demonstrate this shift beautifully. These aren’t intimidating technical machines—they’re safe, guided “mini toy factories” built for creativity.
Kids can draw, type, or speak an idea—and print it in minutes. Through AI Word Design (“turn the word ‘Rocket’ into a rocket toy”) and AI Image Design (transform a photo into a 3D model), imagination instantly becomes reality.
That difference—between building what’s given and building what you imagine—is the heart of modern STEM education.
The Hands-On Learning Connection
Both building kits and STEM 3D printers engage tactile learning, but at different depths.
- Building Kits → Learn how to assemble known parts.
- 3D Printers → Learn why each part exists, and how to design your own.
For instance, in AOSEED’s creative app, children modify shapes, adjust structures, and observe what happens when they change thickness or scale—developing true engineering intuition.
They don’t just follow steps; they test hypotheses, fix errors, and iterate—mirroring the scientific method. That’s powerful STEM learning disguised as play.
Key Comparison Table
|
Feature |
STEM Building Kits |
STEM 3D Printers (e.g. AOSEED X-MAKER Series) |
|
Learning Style |
Guided, step-by-step |
Open-ended, design-driven |
|
Creativity Level |
Moderate—limited to kit design |
Infinite—kids design from scratch |
|
Duration of Engagement |
Short-term (one project) |
Long-term (unlimited projects) |
|
Skills Developed |
Assembly, logic, patterning |
Design thinking, problem-solving, innovation |
|
STEM Depth |
Mechanical understanding |
Full STEM integration (science, tech, engineering, math) |
|
Reusability |
Fixed pieces |
Reprint, remix, reuse |
|
Customization |
Minimal |
Fully customizable |
|
Eco Impact |
Plastic parts, often discarded |
Uses recyclable PLA filament |
|
Age Range |
5–12 (varies) |
4–16 (varies by model) |
From Toy Builder to Young Engineer

When children use STEM building kits, they get a snapshot of engineering—constructing within boundaries. But when they move to 3D printing, they start thinking like engineers and designers.
AOSEED’s Toy Customizer and Creative Curriculum extend beyond assembly: kids design, test, and iterate their own toy inventions. Each month, they can join new design challenges and courses that nurture independence, problem-solving, and aesthetic sensibility.
This shift—from consumer to creator—builds confidence and prepares kids for the future of innovation.
Classroom Impact: Structure Meets Imagination
Many educators now use both: structured kits for early familiarity and 3D printing for open-ended mastery.
The AOSEED X-MAKER is particularly suited for classrooms. It integrates with STEM curriculum standards, supports multi-user management, and runs safely with ultra-quiet operation (below 50 dB).
Students can work in small teams, printing everything from gears and models of DNA strands to architectural miniatures. Teachers can track progress and map projects directly to math, physics, or art outcomes.
Real-World Skills That Go Beyond Play
3D printing introduces concepts no building kit can fully teach:
- Material science (understanding PLA vs ABS and print temperature)
- Digital design (modeling, scaling, and precision)
- Iterative testing (trial and error in real time)
- Spatial reasoning and geometry (3D space visualization)
- Sustainability awareness (reusing and recycling filament)
These are career-relevant skills for future engineers, designers, and innovators. By using tools like AOSEED’s printers early, children learn the language of creation that industries already use today.
Parental Ease and Safety
One reason some families hesitate to move from kits to 3D printers is fear of complexity. AOSEED’s printers resolve that concern.
Both models are ready to use out of the box, with one-click printing, automatic leveling, and child-safe enclosures. There are no exposed hot surfaces, no complicated calibration steps, and the materials are non-toxic and odorless.
The result: even five-year-olds can print safely under light supervision.
For parents, the app simplifies everything—designs, wireless printing, and time-lapse video recordings to share creative progress.
Frequently Asked Questions
What are STEM learning toys?
STEM toys are educational tools that introduce concepts in Science, Technology, Engineering, and Math through play. They encourage critical thinking, logic, and creativity while keeping children engaged hands-on rather than passively watching screens.
Are building kits considered STEM toys?
Yes. Building kits for kids—like robotics sets, construction kits, or mechanical puzzles—fall under STEM toys because they teach structure, motion, and logic. However, they usually provide fixed outcomes, meaning kids follow instructions instead of creating original designs.
How is a STEM 3D printer different from a building kit?
A STEM 3D printer is an open platform. Instead of assembling pre-made parts, children design and print their own components. Building kits focus on replication; 3D printers focus on innovation. One teaches “how to follow,” the other teaches “how to invent.”
What ages are best for STEM 3D printers?
AOSEED offers two levels:
- X-MAKER JOY for ages 4–12 – playful, guided design with AI help.
-
X-MAKER for ages 9–16 – advanced, curriculum-ready projects.
Both provide progressive learning experiences suited for each developmental stage.
Can 3D printers replace building kits completely?
Not necessarily. Building kits remain a wonderful starting point for young learners who need clear guidance. However, 3D printers extend the journey, allowing continuous exploration and creation once basic mechanical understanding is achieved.
Are 3D printers safe for kids to use at home?
Yes, when purpose-built for children. AOSEED printers use enclosed chambers, low-heat nozzles, and child-safe PLA materials. There are no toxic fumes or exposed parts, and everything is guided through an intuitive app interface.
How do 3D printers encourage STEM learning?
Through hands-on experimentation. Kids learn geometry while scaling models, physics while testing weight balance, and technology while adjusting print settings. Each print is a mini science project in motion—testing cause and effect in real time.
Do STEM 3D printers require coding knowledge?
No. AOSEED’s ecosystem is AI-assisted and visual. Kids can draw, speak, or type their ideas—no coding needed. As they grow, they can explore more advanced design tools integrated within the same ecosystem.
What can kids create with AOSEED 3D printers?
Thousands of options: cars, jewelry, animals, science models, game pieces, name tags, learning manipulatives, and more. The AOSEED app library includes 2,000+ customizable models and monthly toy design challenges to keep creativity flowing.
What materials do STEM 3D printers use?
AOSEED uses eco-friendly PLA filament, made from renewable cornstarch. It’s odorless, recyclable, and safe for home or classroom use. The X-MAKER also supports ABS filament for more advanced, heat-resistant projects.
Do 3D printers help reduce screen time?
Yes. Ironically, 3D printing is a screen-free STEM experience once printing begins. Kids design digitally, then interact physically—removing attention from screens and engaging real-world focus through assembly, painting, or creative display.
How long does a typical 3D print take?
Small models can print in under 20 minutes. Larger designs might take a few hours. Both AOSEED printers feature high-speed performance (up to 300 mm/s) with detailed accuracy, allowing quick results for young attention spans.
Can teachers use 3D printers in classrooms?
Absolutely. The AOSEED X-MAKER is classroom-ready, with multi-user management, curriculum-aligned modules, and quiet operation. It’s designed for project-based learning in STEM labs, makerspaces, and home-school environments.
How does 3D printing build problem-solving skills?
Each print teaches kids to predict, test, and refine. If a design fails, they adjust parameters and try again. This process cultivates perseverance, analytical thinking, and self-directed learning—core STEM attributes for life.
Is 3D printing the future of STEM education?
Many educators believe so. As industries adopt additive manufacturing, early exposure gives students an advantage. 3D printing nurtures design literacy, technical fluency, and a mindset of inventing rather than consuming—key skills for tomorrow’s innovators.
The Verdict: Structured Kits or Limitless Creation?
There’s no wrong choice—both STEM building kits and STEM 3D printers play vital roles in developing curiosity.
- Choose building kits to introduce core mechanical logic.
- Choose 3D printers to unlock creative independence and deeper technical understanding.
Together, they form a complete pathway: Learn the rules first—then learn how to rewrite them.
And for families ready to take that next step, AOSEED’s X-MAKER JOY and X-MAKER series provide the perfect bridge between play and purpose—where imagination doesn’t stop at the last instruction step.
How to Turn Kids’ Drawings into Real Toys
Turning a child’s doodle into a toy they can hold is pure magic. With modern tools, you can turn a drawing into a toy in a weekend—whether that’s a plush character or a sturdy 3D-printed figure. This guide focuses on 3D print kids drawing workflows because they’re fast, repeatable, and perfect for STEM learning. You’ll also see where plushie conversions shine (inspired by our competitor example) and how both methods can co-exist in your creative toolbox.
Why Turn a Drawing into a Toy? (Creativity Meets STEM)
Creativity + Ownership
When kids see their sketch become a real object, creativity skyrockets. They learn that ideas can be designed, tested, and improved.
STEM Skills—Without the Intimidation
Modeling simple shapes builds spatial reasoning, problem solving, and design thinking. A 3D print for kids project also sneaks in lessons on measurement, tolerance, and iteration.
Two Main Paths: Plush vs. 3D Printed
You have two popular options to turn drawing into toy:
Plushie Conversion (Soft & Huggable)
A sewing-based workflow replicates the drawing’s silhouette with fabric and stuffing. It’s ideal for cuddly characters, textures, and oversized features. (For inspiration on soft-toy methods, see plushie tutorials like our listed competitor reference.)
3D Printing (Strong, Customizable, Repeatable)
A 3D print kids toys workflow brings structure, durability, and endless iteration. It’s perfect for accessories, vehicles, creatures, and modular parts you can reprint or remix.
Quick Take: Plush is best for soft characters. 3D printing excels at articulated models, accessories, detailed props, and anything you might want to print again (or fix fast).
The 3D Print Workflow: From Paper to Plastic

Step A: Capture the Drawing
Photograph the drawing in good light (or scan it). Aim for flat, high-contrast lines. Clean smudges and stray marks in any image editor.
Step B: Trace & Simplify
Use an easy design tool to trace the outline. Many kid-friendly apps let you sketch with shapes and lines. Keep details bold and simple—big features print better and are safer.
Step C: Build the 3D Shape
Turn your 2D outline into 3D by:
- Extruding a silhouette into a flat “cookie” figure, or
- Building with primitives (spheres, cylinders, cubes) to match the drawing’s parts.
Step D: Check Scale & Wall Thickness
Set a size that fits small hands. For durability, keep walls thick enough (e.g., ≥1.2–1.6 mm) and avoid needle-sharp points.
Step E: Slice & Print
Choose child-safe material like PLA. Use a balanced layer height (e.g., 0.2 mm), moderate speed, and strong infill for toys that will be handled often.
Choosing a Kid-Friendly 3D Printer: What Matters
Must-Have Benefits
- Simple presets & guided UI: So kids can participate.
- PLA-first safety: Low-odor, non-toxic filament.
- Consistent reliability: So a weekend project doesn’t stall.
- Content ecosystem: Models, tutorials, and mini-courses to keep ideas coming.
Nice-to-Have Specs
- Enclosed build or shielded hotend for safer reaching hands.
- Resume print & clog-resistant extruder for fewer hiccups.
- Direct link to a model library for instant 3d print ideas for kids.
Tip: If you’re new, explore AOSEED’s 3D printer for kids collection—built for creativity, safety, and beginner-friendly control.
Step-By-Step: Turn a Drawing into a 3D Toy (Beginner Path)
This path emphasizes simplicity. It’s perfect for ages ~6–12 with light adult guidance. Pick a bold, front-facing character. Thicker lines and fewer tiny details print better. Photograph or scan at high resolution.
Trace & Build with Shapes
- Outline the body using basic shapes (ovals, rectangles, spheres).
- Add features (eyes, nose, accessories) as separate parts.
- Merge parts or leave them separate if you want color swaps later.
Printing, Finishing, and Safety
- Material: PLA is the go-to for family spaces.
- Layer height: 0.20 mm balances speed and detail.
- Infill: 15–25% for light toys; 30–40% for “playground-proof.”
- Edges: Round off tips to remove sharp points.
- Small parts: Avoid swallowable pieces for younger kids.
- Sanding: Smooth edges with fine grit paper.
- Snaps & joints: Test fit gently; adjust tolerances if too tight.
- Painting: Acrylics work well on PLA—prime first for brighter colors.
- Sealing: A clear, child-safe varnish can protect paint.
Pros, Cons & Considerations (3D Printing vs. Plush)
Advantages of 3D Printing
- Repeatable: Reprint lost or broken parts on demand.
- Modular creativity: Swap accessories, add wheels, or remix designs.
- STEM learning: Teaches 3D thinking, measurement, and iteration.
- Durability: Great for vehicles, tools, and articulated creatures.
Disadvantages & How to Mitigate
- Hard material: Not huggable—use rounded edges.
- Layer lines: Light sanding and primer smooths surfaces.
- Fit tolerance: Simple, chunky parts reduce frustration.
- Time to learn: Start with preset-friendly tools and mini-projects.
Advanced Tips: Articulation, Hybrid Builds & Color
As skills grow, try these upgrades to elevate your 3D print kids toys.
Make It Move
- Pinned joints: Simple peg-in-hole elbows and knees.
- Separate shells: Print arms and legs separately for swivel movement.
- Flexible parts: Try thin living hinges in PLA for simple flaps/tails.
Hybrid & Color Tricks
- Hybrid plush-print: 3D-print hard accessories (glasses, crowns) for a plush body.
- Color swaps: Print eyes, badges, or hats separately to snap on in different colors.
- Name tags: Extrude the child’s signature onto a baseplate or backpack charm.
Fun 3D Print Ideas for Kids (Remix Their Drawings)

Use these prompts to spark creativity—and rank for your secondary keywords like 3d print ideas for kids and fun things to 3d print for kids.
Starter Projects (Quick Wins)
- Badge & keychain set: Extrude their name in chunky letters and add a tiny mascot from their sketch.
- Creature tokens: Turn doodled animals into desk pals with stands.
Weekend Builds (Bigger Smiles)
- Mini vehicles: Translate boxy car drawings into rolling toys with snap-fit wheels.
- Hero kit: Print a mask emblem, utility “tools,” and a display base that features their original drawing.
What a Good Kids’ 3D Printer “Spec Sheet” Looks Like (At a Glance)
- Material: PLA-ready, child-safe ecosystem
- Controls: Beginner presets; guided app or on-screen prompts
- Build Reliability: Consistent first layers; unclog-friendly extruder
- Safety: Enclosed paths or guarded hotend where possible
- Ecosystem: Rich kid-friendly model library + tutorials
- Maintenance: Easy nozzle/extruder access; spare parts available
- Support: Clear FAQ, quick-start lessons, and parent guides
If you’re shopping, AOSEED’s 3D printer for kids lineup checks these boxes with a strong learning-content ecosystem.
Frequently Asked Questions
Can we scan the drawing directly into 3D?
You’ll still do a small amount of tracing or shape-building, but many beginner tools make this fast and visual.
Are 3D-printed toys safe for toddlers?
Use PLA, avoid small detachable parts, and round edges. Printed toys are great for ages that won’t mouth or swallow pieces.
How long will it take?
Simple keychains: under an hour. Chunky figures: a few hours. Complex models or high quality: overnight.
What if something breaks?
Reprint the part or tweak thickness/infill. That’s the beauty of digital toys—you keep the “recipe.”
Can we color without painting?
Yes—print separate colored parts (eyes, hats, badges) and snap them on.
Final Thoughts: Let Their Ideas Take Shape
The best kid projects are the ones they can proudly hold and show. With a simple, guided toolchain, you can turn drawing into toy again and again—growing skills, memories, and confidence at the same time. Start small, keep shapes chunky, and celebrate every print as a step in their design journey.
When you’re ready to build your home “toy lab,” browse a family-friendly 3D printer for kids to kickstart creativity today.
Mini 3D Printers Creating Maximum Joy: Compact 5 Options Reviewed
Here’s a quick breakdown of 5 top options to help you choose:
-
AOSEED X-MAKER JOY ($259): Best for kids aged 4–9, with safety features like a magnetic acrylic door, passcode touchscreen lock, and 2000+ free models for fun, educational projects.
-
AOSEED X-MAKER ($399): Great for older kids and teens, offering advanced tools, USB connectivity, and free slicing software for more complex designs.
-
Toybox 3D Printer ($299): Compact and simple with a focus on ease of use, ideal for younger creators with a smaller build volume.
-
Bambu Lab A1 Mini ($299): Prioritizes speed and precision with a larger build volume and optional multicolor printing upgrade.
-
Prusa Mini+ ($369): A reliable option for beginners or experienced users, featuring advanced temperature controls and a DIY kit for hands-on assembly.
Quick Comparison
|
Feature
|
AOSEED X-MAKER JOY
|
AOSEED X-MAKER
|
Toybox 3D Printer
|
Bambu Lab A1 Mini
|
Prusa Mini+
|
|
Price
|
$259
|
$399
|
$299
|
$299
|
$369
|
|
Safety Features
|
Fully enclosed, touchscreen lock
|
Enclosed, filament sensor
|
Shielded extruder
|
Filament detection, camera cover
|
Thermistors, regulated temps
|
|
Build Volume
|
120×120×120 mm
|
150×150×150 mm
|
70×80×90 mm
|
180×180×180 mm
|
180×180×180 mm
|
|
Best For
|
Ages 4–9
|
Ages 10+
|
Younger kids
|
Speed & precision
|
DIY learning
|
These printers combine safety, ease of use, and educational tools, making STEM learning fun and engaging for young makers. Read on for detailed reviews of each option.
Joy vs. X-MAKER 3D Printer: Which is the Best 3D Printer for

1. AOSEED X-MAKER JOY

The AOSEED X-MAKER JOY, available for $259, is designed for young creators aged 4–9. This compact 3D printer combines safety-focused features with easy-to-use functionality, making it a great way to introduce kids to 3D printing.
Safety is a top priority. A magnetic acrylic door keeps kids away from hot or moving parts, while a magnetic build plate and hidden extruder prevent pinches. Parents can set a passcode to lock the touchscreen, ensuring children can't access printing controls without supervision. This thoughtful design encourages safe, hands-on STEM learning.
Despite its small size, the printer offers solid performance: a build volume of 120 × 120 × 120 mm (6 × 6 × 6 in), speeds 300 mm/s, and support for PLA, PETG, and ABS materials up to 265 °C.
The AOSEED desktop and mobile apps make creativity simple with toy-builder templates, 3D drawing tools, and one-touch printing. Kids can explore over 1,500 free, ad-free models, keeping their focus on creating. For more advanced projects, the printer also supports USB and G-code inputs.
2. AOSEED X‑MAKER
The $399 X‑MAKER is designed for older kids and teens, taking what the X‑MAKER JOY offers and stepping it up a notch. While the JOY focuses on teaching the basics of 3D printing, the X‑MAKER adds features that grow with your child's abilities. It’s fully enclosed for safety but flexible enough to handle more advanced projects.
Safety remains a priority with a passcode-protected touchscreen, and it includes a filament runout sensor to prevent print interruptions. The printer features a 150×150×150 mm build volume, supports PLA, PETG, and ABS up to 265 °F, connects via Wi‑Fi or USB, and weighs 24 lbs.
Its software suite is versatile and user-friendly, offering mobile and desktop options along with a one-click Windows app. Kids can start with pre-sliced templates via USB or experiment with advanced slicing tools - all without subscription fees. Denise Bertacchi from Tom's Hardware highlights this versatility:
This printer strikes a balance between encouraging STEM learning and maintaining user-friendly controls, making it a great choice for families.
3. Toybox 3D Printer
The Toybox 3D Printer, priced at $249, is a great entry-level option for young creators. With a compact build volume of 70×80×90 mm and a kid-friendly design, it focuses on safety and ease of use.
This printer comes fully assembled - just unbox it and start printing. Its simple three-button touchscreen makes it easy for kids to operate.
Safety features like a shielded extruder, active cooling, and a magnetic build plate make removing prints straightforward and tool-free.
Key Features:
-
Print speed: 60 mm/s
-
Build volume: 70×80×90 mm
-
Connectivity: Wireless
-
Auto-leveling: Yes
-
Included: Filament, holder, power cable, calibration keys
The Toybox platform offers a library of free models and a Creator Space for importing STL, OBJ, 3MF, or Gcode files. Kids can share designs and explore collaborative projects, aligning perfectly with STEM education goals. As their skills improve, they can move from pre-made templates to creating custom designs.
Print quality is reliable, delivering clean results ideal for toys and simple projects. While more complex builds can take extra time, maintaining adhesion is easy - just wipe the print bed before starting. The app and wireless connectivity make printing from a phone or PC straightforward.
4. Bambu Lab A1 Mini
The Bambu Lab A1 Mini shifts focus from Toybox's playful approach to a printer that emphasizes speed and precision. It combines performance with safety features, similar to AOSEED printers. Priced at $299, it offers a 180×180×180 mm build volume.
Performance and Quality
The A1 Mini stands out with its speed and print quality. It completes a standard Benchy in just 44 minutes and produces nearly flawless results on XYZ calibration cubes and vase-mode tests. Key details include:
-
Build volume: 180×180×180 mm
-
Setup time: 11 minutes
-
Price: $299 (or $459 with AMS Lite)
-
Max speed: 200 mm/s
Safety and Ease of Use
The printer is equipped with features to make printing safer and more user-friendly. It detects filament problems, prevents nozzle clogs, and checks the build-plate level before starting a print. For privacy, it includes a sliding camera cover. Its guided touchscreen interface scored an impressive 8.8/10 for ease of use ([3]).
Educational Value
The A1 Mini includes a mystery-box project that introduces users to MakerWorld, Bambu Lab's cloud-based library and slicer. Models can be sent directly from a PC or mobile device. For those interested in multicolor printing, the optional AMS Lite upgrade is available for $459.
5. Prusa Mini+
The Prusa Mini+ combines dependable performance with thoughtful safety features and educational tools. Available as a semi-assembled unit or a DIY kit, it caters to those seeking convenience or a hands-on building experience.
Safety and Build Quality
The Mini+ prioritizes safety with three thermistors and a reliable power supply. It strictly regulates temperatures - up to 536°F (280°C) at the nozzle and 212°F (100°C) on the heated bed - to ensure smooth and controlled printing.
"Every Mini+ unit undergoes in-house testing to ensure consistent safety and reliability."
User Experience and Setup
This printer is designed to accommodate both beginners and seasoned creators:
-
Automatic mesh bed leveling ensures flawless first layers.
-
One-click USB printing simplifies the process.
-
PrusaSlicer integration offers pre-configured profiles for optimal results.
-
A free online beginner course is included with the semi-assembled option.
While the Mini+ shines in ease of use and durability, the AOSEED X-MAKER series provides comparable safety features, including a child-lock touchscreen, at a lower price.
Educational Value

The semi-assembled Mini+ includes access to the free online course, "3D Printing and Modeling for Beginners," making it a great learning tool. The DIY kit version adds an extra layer of educational value by teaching users assembly skills and reinforcing STEM concepts.
Performance Metrics
The Mini+ stands out with its:
-
Print Quality: High-level detail and consistent output.
-
Hardware Durability: A sturdy metal bed and durable components.
-
Software Integration: Smooth compatibility with PrusaSlicer.
-
Documentation: Clear, detailed guides and robust support resources.
Thanks to its balance of safety, learning opportunities, and reliability, the Mini+ is an excellent choice for both home and classroom environments.
Up next, compare these compact printers side by side to find the ideal option for your budding maker.
Key Features Comparison

|
Feature
|
AOSEED X‑MAKER JOY
|
AOSEED X‑MAKER
|
Toybox 3D Printer
|
Bambu Lab A1 Mini
|
Prusa Mini+
|
|
Price
|
≈ $259
|
$299
|
|||
|
Safety Features
|
Fully enclosed print area; non‑toxic PLA
|
Shielded extruder; active cooling
|
Auto-leveling; filament detection; sliding camera cover
|
Three thermistors; regulated temperatures
|
|
|
Ease of Setup
|
Fully assembled; factory calibrated
|
Fully assembled
|
11-minute setup; guided interface
|
Semi-assembled or DIY kit options
|
|
|
Educational Tools
|
One‑click printing; advanced design tools; 2000+ pre‑designed model
|
Subscription‑based content
|
MakerWorld library; cloud-based slicer
|
Online beginner course; PrusaSlicer integration
|
AOSEED printers stand out with their all-in-one approach to safety, ease of use, and educational resources. With these comparisons laid out, let's move on to the final recommendations.
Final Recommendations
Here's a breakdown of our top picks based on age and use case:
-
For Young Children (Ages 4–9) The AOSEED X‑MAKER JOY (around $259) is a great option. It features a fully enclosed build area, one-click printing, and a curated toy library. Its easy setup and safety features make it ideal for supervised creative play.
-
For Older Kids & Teens (Ages 10+) The AOSEED X‑MAKER (around $399) offers a balance of simplicity and advanced tools. It comes with a graphical touchscreen, free design apps, a full-featured slicer, and USB connectivity, making it a versatile choice for this age group.
-
For Classroom & STEM Programs The AOSEED X‑MAKER stands out for educational settings. Its enclosed design ensures safe, filtered printing, while the 2500+ ready-to-print models and free educational software make it a cost-effective choice for group learning.
-
For Budget-Conscious Buyers Priced at $259, the X‑MAKER JOY is more affordable than the Toybox ($299) and includes unlimited, subscription-free printing along with a large model library.
-
For most families, we suggest the AOSEED X‑MAKER. Its enclosed build area, extensive safety features, and optional expandability make it a solid all-around choice.
3D Print Shop vs. Home Printer: Which is More Cost-Effective for Making Kids' Toys?
Want to save money while making creative toys for your kids? Here’s the answer: If you plan to print kids' toys frequently, investing in a cost-effective home printer like the AOSEED X‑MAKER ($399.99) is the smarter long-term choice. For occasional, complex, or one-off projects, a 3D print shop may be more suitable.
Key Takeaways: Which is more cost-effective?
-
Home 3D Printing: Higher upfront cost ($259.99–$399.99), but lower per-toy costs over time. Ideal for frequent toy-making and hands-on STEM learning.
-
3D Print Shops: No initial investment, but each toy costs $5–$20. Best for infrequent or intricate designs where flexibility and customization are limited.
Quick Comparison:
|
Feature
|
AOSEED X‑MAKER Home Printer
|
Print Shop Services
|
|
Initial Cost
|
$259.99–$399.99
|
None
|
|
Per-Toy Cost
|
$1–$3 (PLA filament)
|
$5–$20 per toy
|
|
Learning Value
|
Hands-on STEM experience
|
Limited
|
|
Design Flexibility
|
Real-time tweaks possible
|
Requires finalized files
|
|
Best For
|
Frequent toy-making
|
Occasional prints
|
For regular toy-making and STEM education, the AOSEED X‑MAKER is a cost-effective and engaging option. Choose print shops for rare, complex, or larger projects.
Revealing the TRUE Costs of 3D Printing!![]()

Discover the Toy Library: 2000+ Models Included
One of the biggest advantages of choosing an AOSEED home printer is free access to the exclusive AOSEED Toy Library, which features over 2000 ready-to-print 3D models. From dinosaurs and animals to logic puzzles, mini vehicles, and educational STEAM projects, there’s something for every age group and interest.
Unlike 3D print shops where custom files often come with extra charges or licensing limitations, AOSEED Toy Library is included with every printer purchase. This means you can start printing immediately—without hunting for STL files or paying additional design fees.
Whether you're building a collection of action figures or exploring wind-up mechanical toys, the Toy Library offers a rich, ever-expanding playground for creativity and learning.
Growing C![]() ommunity, Lifetime Updates
ommunity, Lifetime Updates
![]()
![]()
![]()
AOSEED isn’t just a printer it’s a full ecosystem. When you invest in a home 3D printer like ![]() the X-MAKER or X-MAKER JOY, you’re joining a vibrant, family-friendly maker community.
the X-MAKER or X-MAKER JOY, you’re joining a vibrant, family-friendly maker community.
The AOSEED team regularly pushes firmware and software updates, expanding features and toy categories over time. You’ll also have access to a support community where parents and educators share print ideas, tips, and new designs.
In contrast, print shops offer no community, limited engagement, and static one-time services. With AOSEED, the printer grows with your child—offering lasting value beyond the initial purchase.
Cost Breakdown: 6-Month Toy-Making Showdown
Let’s break down the real costs of making one toy per week over 6 months.
|
Scenario
|
Initial Cost
|
24 Toys (Avg $ per toy)
|
Total Cost
|
|
AOSEED X-MAKER
|
$399.99
|
~$48 (filament)
|
$447.99
|
|
Print Shop
|
$0
|
~$288 ($12 avg per toy)
|
$288
|
Cost Analysis
Let's break down the costs of AOSEED home printers versus print shops for creating kids' toys.
Home Printer Costs
The AOSEED X‑MAKER costs $399.99, while the more affordable X‑MAKER JOY is priced at $259.99. Beyond the initial purchase, you'll need to account for ongoing expenses like:
-
PLA filament: $20–$40 per kilogram
-
Replacement parts (e.g., hotend): Around $30
This setup requires an upfront investment, but the per-print cost drops significantly over time, especially when producing multiple items.
Print Shop Costs
Print shops charge per item based on size, material, and complexity. Here's a typical breakdown for desktop models:
-
Small toys (2–3″): $5–$8
-
Medium toys (4–6″): $10–$15
-
Large toys (7″+): $15–$20
Additional expenses can include custom design work, post-processing, packaging, and shipping. While print shops eliminate the need for an upfront investment, the per-item fees can add up quickly. For example, printing 10 medium-sized toys at $12 each will cost $120, not including design or shipping fees.
If you're planning to produce multiple items, home printing can quickly become the more economical choice.
Next, we'll explore design options and accessibility.
Design Options and Access
When it comes to creating custom toys, design flexibility plays a huge role in fostering creativity and learning. Home 3D printers and print shops offer different experiences: home printers allow for real-time design tweaks and hands-on experimentation, while print shops require pre-finalized files and often involve waiting times. Let’s break down the features of each option.
Home Printer Features
![]()
The AOSEED X-MAKER is packed with tools to make toy creation easy and fun. It offers 14 different toy-building apps, including options for creating dolls, flexible models, vehicles, wind-up toys, and even 3D drawings. It also features:
-
One-touch printing for quick projects
-
A mobile app slicer for intermediate users
-
Advanced Cura-based slicing software for full control over print settings
-
Access to a library of 2000+ free models to jumpstart your creativity
This setup allows users to experiment and refine designs right away, making it ideal for learning and reducing material waste.
Print Shop Limitations
Print shops, on the other hand, operate differently. They require finalized STL files for printing. If changes are needed, you’ll have to resubmit the file and go through the queue again, which can take several days. Unlike home printers, print shops don’t offer interactive design tools. This makes it harder to test and improve designs on the fly, which can lead to wasted time and materials.
With a home printer, you get the freedom to tweak and test designs instantly, offering a more hands-on and efficient way to learn and create.
Return on Investment
Priced at $399.99, the AOSEED X‑MAKER offers an upfront cost balanced by long-term savings and a hands-on approach to STEM learning.
Learning at Home
Home printing with the AOSEED X‑MAKER is designed for safe and enclosed use, offering a learning path that grows with the user. It transitions smoothly from beginner-friendly features to more advanced controls:
-
Beginner: Simple one-click printing introduces basic concepts.
-
Intermediate: Kid-friendly apps encourage creativity and spatial thinking.
-
Advanced: Full slicer control helps develop technical problem-solving skills.
Print Shop Benefits
Print shops can be a great alternative when home printers fall short:
-
Complex Projects: Ideal for intricate designs or larger toys that go beyond the X‑MAKER 150 × 150 × 150 mm build capacity.
-
One-Off Prints: Perfect for occasional projects without the need for ongoing maintenance.
-
High-Detail Items: Best for models requiring industrial-level precision or specialized materials.
For families who prioritize frequent toy creation and STEM education, the AOSEED X‑MAKER stands out with its safety features, user-friendly design, and potential for skill development. Up next, we'll break down these options side by side to help you decide what works best for your family.
Side-by-Side Comparison
Here’s a breakdown of how the AOSEED X‑MAKER home printer stacks up against typical print shop services:
|
Feature
|
AOSEED X‑MAKER Home Printing
|
Print Shop Services
|
|
Initial Investment
|
$399.99 for the printer, toolkit, and starter PLA roll
|
No upfront equipment cost
|
|
Ongoing Costs
|
PLA filament ($20–$40/kg), tool-head replacement ($30)
|
Costs vary per print
|
|
Build Volume
|
150 × 150 × 150 mm
|
Usually supports larger volumes
|
|
Materials
|
Works with PLA, PETG, ABS
|
Offers a wider range of industrial-grade materials
|
|
Design Options
|
- Access to 2000+ models - Toy-building apps - Full slicer support via USB
|
Dependent on shop software and equipment
|
|
Learning Value
|
- Hands-on STEM experience - Three difficulty levels in X‑Print slicer
|
Limited skill-building opportunities
|
Making the Choice

When Home Printing Makes Sense
The AOSEED X-MAKER, priced at $399.99, is a smart choice for families who plan to print toys regularly. Here’s why:
-
Frequent STEM Projects: With access to a library of over 2000 models, three slicer difficulty levels, and an easy one-touch setup, it’s perfect for weekly toy-making without added expenses.
-
Growing With Your Child: Features like a USB port and full slicer support mean the X-MAKER can keep up as your child’s skills improve over time.
When to Use Print Shops
Print shops are better suited for specific scenarios:
-
Occasional Prints: Ideal for families who only need a toy or model every now and then, with pay-per-item pricing.
-
Specialized Models: Great for accessing industrial-grade materials or handling more complex designs.
-
Infrequent Use: Perfect for those who don’t print often and prefer per-project costs.
For hands-on STEM learning and frequent use, home printing with the AOSEED X-MAKER is a cost-effective option. On the other hand, print shops are better for one-time, intricate, or larger-scale projects.
Conclusion
At $399.99, the AOSEED X‑MAKER offers a cost-effective way to combine toy-making with hands-on STEM learning for kids. It can save money on per-item print-shop fees if you're producing toys regularly. The printer features beginner-to-advanced print modes, over 2000 pre-designed models, 14 design apps, a 150×150×150 mm build volume with a print speed of 300 mm/s, and supports PLA, PETG, and ABS materials - all within a fully enclosed, child-safe design.
While print shops are great for occasional or highly complex projects, the X-MAKER is ideal for families who want a safer, more educational, and versatile option for frequent toy-making and STEM activities. Interested in unlocking your child’s creativity while keeping costs down? Visit AOSEED to learn more about the X‑MAKER and its extensive model library.
Trusted by Educators and Parents Worldwide:
IME3D education products:
Used by over a million students in over 5,000 schools and training institutions!
AOSEED X-MAKER series:
Bestselling smart 3D printers for kids in over 30 countries, empowering them to design and print their own creations.
We focus on quality and safety:
Our products are internationally certified (CE, ROHS, FCC)
Award-winning! We've received prestigious honors like the German iF Product Design Award.


